
Introduction
Weep paths are channels at the bottom of stucco details that drain moisture away.
Keeping them clear helps prevent water from backing up into the wall. This article shows a plain‑language, DIY approach to inspecting and cleaning them without tearing the finish.
Start by locating the bottom terminations and looking for dirt, debris, or packed soil.
Gently flush or sweep the path with a soft brush, and check that the weep openings remain unobstructed. If you see stubborn buildup, refer to the product label or manufacturer instructions for safe cleaning methods and avoid damaging the stucco.
Key takeaways
- Inspect weep paths regularly to prevent dirt buildup and moisture damage.
- Clear clogged terminations with a soft brush, then flush from top.
- Document maintenance: note locations, condition, and dates when performing care.
- Wear eye protection and gloves; avoid forceful chiseling that can damage stucco.
- Use manufacturer guidelines for bottom terminations and compatible cleaning methods.
- Seal and reseat terminations properly after cleaning to prevent future clogs.
Table of Contents
- Introduction
- Key takeaways
- Why Stucco Weep Paths Matter
- Identifying Clogged Bottom Terminations
- Tools and Materials Checklist
- Step-by-Step Cleaning Process
- Repairing and Reinstalling Bottom Terminations
- Preventive Maintenance and Long-Term Care
- Troubleshooting and When to Call a Professional
- Conclusion
- FAQ
Why Stucco Weep Paths Matter
Weep paths and bottom terminations are the built-in drainage routes at the base of a stucco wall. They carry moisture out of the wall cavity and help keep the interior dry. When these openings clog, trapped water presses against the stucco and framing, which accelerates rot, mold, and failure of the coating.
A clear drainage plane relies on unobstructed terminations. Blocked paths undermine venting and can force moisture inward, increasing the chance of staining, softening of edges, and costly repairs. Keeping terminations open is a simple, practical safeguard for the wall system.
How weep paths function within the wall assembly
The main job of a stucco weep path is to let water escape from your walls. Here’s how it works:
Water gets trapped in your walls all the time, especially during rain or when snow melts. The drainage plane – that’s the layer behind your stucco – guides this water downwards.
At the bottom of your wall, there are small openings called weep holes. These holes lead to the weep path, a narrow gap between the stucco and the wall itself. Water flows through these weep holes into the weep path, then out through the bottom terminations – those are the little slots you see at the base of your walls.
Common clogging sources and failure modes
Weep paths can get clogged with all sorts of stuff. Here are some common culprits:
Settled soil: When you first install your weep path, the soil around it might look nice and neat. But over time, it settles and can block those important bottom terminations.
Mulch: If you’ve got landscaping near your walls, mulch can easily find its way into the weep path and cause clogs. The same goes for leaves, grass clippings, and other yard debris.
Paint or finish buildup, insect nests, and improper landscaping – like planting shrubs too close to the wall – can also lead to clogged terminations. Keep an eye out for these issues to prevent water from getting trapped in your walls.
Identifying Clogged Bottom Terminations
Begin with a visual check for signs of moisture in the lower wall, staining, or loose stucco near the base. Look for compacted dirt buildup around the terminations rather than a uniform surface dirt layer.
Use a safe inspection routine: stand on solid ground or a stable ladder, work in dry conditions, and avoid leaning directly into openings. If you see reduced drainage, damp trips, or recurring wet patches, there may be a blockage below the surface that needs a closer look.
Visual and tactile inspection checklist
Before you start poking around, give your weep path a quick once-over. This helps spot obvious issues without disassembling anything.
- Visible debris: Check for dirt, leaves, or other visible blockages.
- Staining: Look for dark streaks or stains, which could indicate trapped moisture.
- Clogged ends: Inspect the very end of each termination to ensure they’re open and clear.
- Gentle probing: Gently poke the terminations with a thin tool (like a wire or skewer) to feel for blockages. If it doesn’t move freely, there might be a clog.
- Termination condition: Check if any terminations are broken, cracked, or missing.
- Water flow: Pour water into the weep path and watch for signs of blockages (like slow drainage or no drainage at all).
- Mold or mildew: Look for any greenish-black spots, which could indicate trapped moisture.
- Paint condition: Check if the paint is peeling or blistering near the weep path, which might suggest trapped moisture.
Quick rule: If you spot any of these issues, it’s time to dig deeper and clear those clogs.
Moisture indicators and secondary damage signs
Clogged terminations can cause moisture buildup, leading to various problems. Here’s what to look for:
Efflorescence: This is a white, powdery substance that appears on the surface of masonry when moisture evaporates, leaving behind salt deposits.
Soft sheathing: If your home has wood-based sheathing, trapped moisture can cause it to soften and rot. Tap it gently; if it feels spongy or gives way, there’s a problem.
Paint blistering: Trapped moisture under paint causes it to bubble up and peel off. If you see this near your weep path, it’s a sign of trouble.
Musty odors: A damp, musty smell is another clear indicator that moisture is getting trapped somewhere in your wall assembly.
Tools and Materials Checklist
Prepare a basic set of hand tools for cleaning and minor repair: brushes, a low-pressure nozzle or spray bottle, a bucket, gloves, and eye protection. A small flexible pick or plastic scraper helps dislodge debris without damaging the finish.
Optional items include a portable flashlight, a light air blower, and a short extension pole for dusting high areas. Always inspect tools for wear and replace damaged items. Wear appropriate PPE and follow manufacturer guidelines for any cleaners you use.
Essential hand tools and safety gear
Before you start, ensure you have the right tools to keep your maintenance work safe and effective.
- Stiff brushes: To scrub dirt from terminations. A stiff-bristled brush is crucial for dislodging packed dirt.
- Hand trowel or scraper: For minor repairs, a hand trowel or scraper helps remove loose material and apply new mortar.
- Shop vacuum with crevice tool: To suck up loosened dirt. A crevice tool helps reach tight spaces around terminations.
- Gloves: Protect your hands from debris and harsh chemicals in sealants.
- Eye protection: Safety glasses or goggles shield your eyes from flying debris and drips.
- Stable ladder or platform: For accessing high terminations. A sturdy, non-slip ladder ensures safe climbing.
Quick rule: Always prioritize safety gear to prevent injuries while working on your stucco weep paths.
Replacement parts and materials to have on hand
Having the right replacement parts and materials ensures you can fix any issues you find during maintenance.
- Spare termination trims: Matching your existing ones. Keep extras in case of damage or loss.
- Compatible sealant: Check manufacturer guidance to ensure it’s suitable for your stucco and weep path design.
- Flashing tape: For repairing damaged flashing or creating new barriers against water intrusion.
- Appropriate mortar or patch mix: Matching your existing stucco. Check local codes or manufacturer guidance for compatibility.
Quick rule: Always check manufacturer guidelines and local codes to ensure you’re using compatible materials for your specific stucco system.
Step-by-Step Cleaning Process
Start with a gentle rinse to avoid forcing water into the wall. Work from the top of the affected area down, using slow, sweeping motions to clear loose dirt from the surface and away from the terminations.
Access the bottom terminations carefully, remove lodged debris, and recheck drainage after each pass. Finish with a light rinse and a dry inspection to confirm the openings are clear and water is draining outward rather than into the wall.
Step-by-Step Cleaning Process
This step-by-step guide walks you through the process of cleaning your stucco weep paths and bottom terminations, ensuring water can flow freely without driving moisture into the wall.
- Prepare the area and ensure safety.
Reason: Protect finishes and work safely from ladders or scaffolding.
Sign it’s right: All electrical fixtures are isolated, plants are covered, and you’re ready to start. - Inspect weep paths and terminations.
Reason: Identify clogged areas and assess damage.
Quick check: Use your visual and tactile inspection checklist from earlier in the article. - Choose appropriate cleaning techniques.
Reason: Different methods suit different types of dirt and debris.
Sign it’s right: You’ve selected manual brushing, vacuuming with a crevice attachment, or low-pressure air. - Clean weep paths and terminations.
Reason: Remove dirt and debris gently to avoid forcing water into the wall.
Quick check: Monitor your progress and ensure you’re not causing damage. - Rinse, dry, and confirm flow.
Reason: Ensure all residue is removed and water can drain freely.
Sign it’s right: Water flows easily through terminations without backing up.
Preparation and Safety Precautions
Before you start cleaning, take these steps to protect your home’s finishes and ensure safe work conditions.
Protect finishes: Cover windows, doors, and landscaping with drop cloths or plastic sheeting to prevent damage from water or debris.
Isolate electrical fixtures: Turn off power to any nearby outlets or switches. Use tape or covers to protect them from moisture.
Work safely: If you’re using ladders or scaffolding, ensure they’re stable and secure before climbing. Always maintain three points of contact while working at heights.
Cleaning Techniques
Use these gentle cleaning methods to remove dirt and debris from your weep paths and terminations without forcing water into the wall.
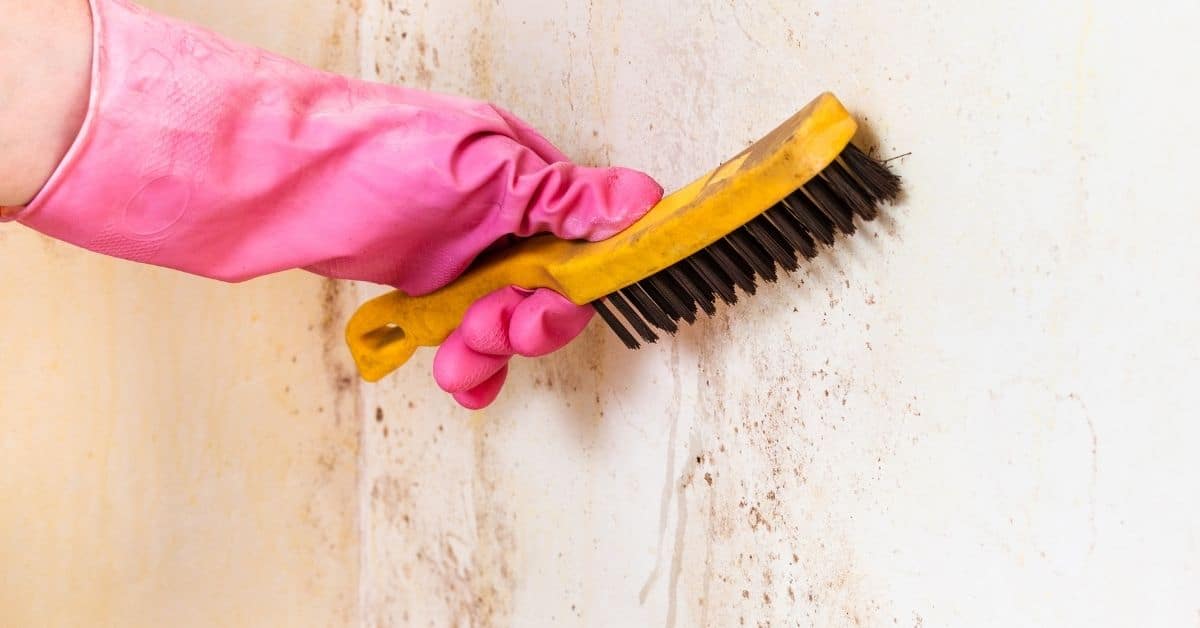
Manual brushing: Use a soft-bristled brush or broom to gently dislodge dirt. Work carefully, applying minimal pressure to avoid damaging the stucco.
Vacuuming with crevice attachment: Use a vacuum with a crevice tool to suck up debris. Be gentle and avoid pushing the nozzle too hard against the surface.
Low-pressure air: Use an air compressor with a nozzle designed for gentle cleaning. Hold it at least 6 inches away from the surface and use short bursts of air to dislodge dirt.
Rinsing, Drying, and Confirming Flow
After removing most of the debris, rinse and dry your weep paths to ensure they’re functioning properly.
Use a low-pressure water source or a damp cloth to gently rinse away any remaining residue. Be careful not to force water into the wall.
Allow the area to dry completely. This may take several hours or even overnight, depending on weather conditions.
Confirm flow: Once dry, pour water into the weep paths and terminations. Watch for any signs of backing up or slow drainage. If water flows freely, your cleaning job is complete. If not, you may need to repeat the process or consult a professional if the issue persists.
Repairing and Reinstalling Bottom Terminations
Assess whether the terminations are intact or damaged. If they are damaged or missing, plan to replace them and reseal with appropriate flashing and sealant per local guidance and product instructions.
Temporary fixes can address immediate drainage, but plan for a full replacement if the part shows excessive wear, cracking, or continuing blockage. Always veri