
Introduction
This guide explains the nine materials you’ll encounter during a roof replacement and what each one does. It keeps things practical for DIY homeowners, focusing on common causes for wear, simple tests you can do, and straight‑shoot fixes. It sticks to plain language and hands‑on steps you can actually follow on a jobsite.
You’ll learn how to spot signs of trouble, what to check on product labels or manufacturer instructions, and when to bring in a pro. We’ll keep the language practical and the steps doable, with safe options for tackling common roof issues. If you’re unsure about a spec, verify it on the product label and check local rules before proceeding.
Key takeaways
- Confirm shingle type or membrane is compatible with existing roof structure.
- Verify underlayment and ice-and-water barrier coverage meets project scope and climate.
- Check flashing integrity, replace damaged step flashing to prevent leaks.
- Inspect roof deck for soft spots or rot; plan structural repairs.
- Ensure proper ventilation components are installed; wear fall protection when accessing roof.
- Secure drip edge and valley metal, seal joints to prevent water intrusion.
Table of Contents
- Introduction
- Key takeaways
- Overview: Why Understanding Included Materials Matters
- Shingles or Roofing Membrane
- Underlayment and Ice-and-Water Barrier
- Flashing and Step Flashing
- Roof Deck (Sheathing) and Structural Repairs
- Ventilation Components (Ridge Vents, Box Vents, Soffit Vents)
- Flashing-Related Accessories: Drip Edge, Valley Metal, Sealants
- Fasteners, Underlayment Fasteners, and Adhesive
- Conclusion
- FAQ
Overview: Why Understanding Included Materials Matters
This article helps homeowners facing a roof replacement understand what is included in the project. It outlines how material choices affect cost, warranty, and long term performance. Knowing these details helps you compare bids and make informed decisions.
By the end, you will know what to verify in your contract and what questions to ask your contractor. Use this guide to spot surprises and to protect your investment over time. It also clarifies how included materials influence maintenance needs and future repairs.
Scope of “included” materials
The materials included in your roof replacement can make or break the final result. Let’s define what typically comes with a standard job and what might cost extra.
- Underlayment: Protects your roof from moisture. Look for synthetic underlayment rated at least 30 lbs/100 sq ft. Avoid cheap felt paper that can degrade quickly.
- Flashing: Seals around chimneys, vents, and skylights to prevent leaks. Ensure it’s made of durable materials like galvanized steel or copper. Poor flashing is a common cause of water damage.
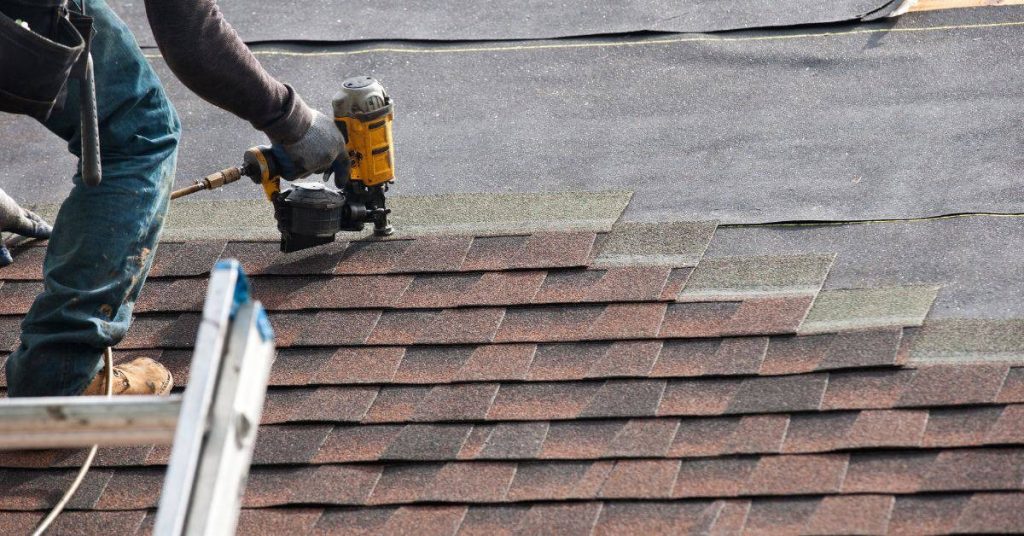
- Shingles: The visible part of your roof. Consider architectural shingles for better durability and appearance. Low-quality shingles can crack, curl, or stain over time.
- Fasteners: Secure the shingles to your roof. Galvanized nails are standard but consider stainless steel for coastal areas to prevent corrosion. Inadequate fasteners can lead to shingle blow-offs.
- Vents: Essential for proper attic ventilation. Look for balanced systems with both intake and exhaust vents. Improper venting can cause moisture buildup, leading to mold or ice dams.
- Drip edge: Prevents water from getting behind your roof’s edge. It should be included in the scope of work. Missing drip edge can result in water damage to your fascia and soffits.
- Sealants: Used around penetrations, nail heads, and other openings. Silicone or polyurethane caulk is typically used. Insufficient sealing can cause leaks.
- Insulation: Not always included but crucial for energy efficiency. Look for R-values suitable for your climate. Poor insulation can lead to high heating/cooling costs.
- Decking repairs: Fixing damaged or rotted plywood before installing new materials. This is often an extra cost but vital for a solid roof structure.
How to use this guide during estimates and inspections
Before signing any contracts, follow these steps to ensure you’re getting the best value for your money.
- Compare bids: Check each contractor’s list of included materials. Make sure they’re using similar quality products.
- Ask about exclusions: Some contractors may leave out certain items, like insulation or decking repairs. Inquire about these potential extra costs.
- Check warranties: Ensure the warranty covers both labor and materials. Ask about any prorated clauses or limitations.
- Inspect existing roof: Walk your contractor through your current roof to point out any problem areas that may need extra attention.
- Ask for references: Contact past clients to inquire about the quality of work and materials used.
- Check licenses and insurance: Ensure they’re licensed to work in your area and have adequate liability insurance.
- Verify subcontractors: Ask who will be doing the actual work. Some companies use subcontractors; make sure they’re reputable.
- Ask about clean-up: Some contractors include debris removal, others don’t. Make sure you know what to expect.
- Check for certifications: Some manufacturers offer certifications for installers who meet their standards. This can indicate quality workmanship and materials.
- Ask about future maintenance: Find out if they offer any maintenance plans or services to keep your roof in good condition.
Quick rule: If a bid seems too good to be true, it probably is. Don’t sacrifice quality for a lower price.
Shingles or Roofing Membrane
Contractors may include different shingle types or a membrane system depending on your roof. Common options include asphalt shingles and other membrane alternatives. Each option has its own strengths and potential failure points.
Ask for the exact type, grade, and warranty in the contract. Verify how tape, sealants, or overlaps are used and request documentation from the manufacturer or product label. Have the installer confirm compatibility with your roof design and climate expectations.
Common causes of shingle failure
Shingles can fail due to several reasons. Understanding these causes helps you spot trouble early.
Age: The number one culprit is simply time. Shingles degrade over years, losing their protective granules and becoming brittle.
Storms: High winds, heavy rain, or hail can damage shingles instantly. Look for cracked, dented, or missing shingles after severe weather.
Poor installation: Inadequate nailing, incorrect overlap, or using wrong nails can lead to early failure. Check nail patterns and overlaps during inspections.
Improper ventilation: Without proper airflow, heat and moisture build-up under the roof can cause shingles to curl and warp.
Manufacturing defects: Some shingles may have issues right from the start. Check manufacturer warranties and consider third-party inspections for new roofs.
Tests and inspection checks for shingles
Regularly inspect your roof to catch issues early. Here’s a simple checklist:
- Granule loss: Check gutters and valleys for missing granules, indicating worn-out shingles.
- Cracking or curling: Inspect edges and corners for signs of cracking or curling, which can lead to leaks.
- Nail pattern: Ensure nails are properly spaced and driven in. Missing or raised nails need immediate attention.
- Moss or algae growth: Excessive growth can hold moisture, causing shingles to decay faster.
- Leaks: Inspect your attic for water stains or mold after rain.
- Warranty checks: Ensure you have valid warranties from the manufacturer and installer. Consider third-party inspections if issues arise under warranty.
- Roof age: Know when your roof was installed. Most shingles last 20-30 years; after that, regular inspections are crucial.
- Gutter condition: Clogged or damaged gutters can cause water to back up under shingles, leading to damage.
Quick rule: Inspect your roof twice a year – in spring and fall. After severe weather, check again.
Fixes and acceptable replacements
Repairing or replacing shingles depends on the extent of damage.
Spot replacement: For minor damage, replace individual shingles. Ensure you match the existing type and color exactly to maintain your roof’s appearance.
Re-nailing: If nails are missing or raised, re-nail them properly. Use the correct size and type of nail specified by the manufacturer.
Full replacement: For extensive damage, consider a full roof replacement. It’s often more cost-effective than repeated repairs and ensures your entire roof is in good condition.
Acceptable upgrades: When replacing shingles, consider upgrading to a better quality or style. This can improve your home’s appearance and increase its value.
Matching materials: Always ensure you’re using the same type, color, and style of shingle as your existing roof. Mixing different types can lead to uneven aging and potential leaks.
Underlayment and Ice-and-Water Barrier
Underlayment and ice barriers are key layers for leak protection. They come in various materials and thicknesses that affect performance. The right choices depend on your roof shape and exposure to wind-driven rain or ice dam conditions.
Request clear specification of the underlayment type and whether an ice barrier is included at eaves and problem areas. Understand the installation notes, overlap methods, and venting considerations. Check the product label or manufacturer instructions for limits and suitability.
Causes of Underlayment Failure
Underlayment, your roof’s first line of defense against leaks, can fail due to several reasons. Here are the most common:
Installation Errors: Improper installation, like overlapping too little or too much, can lead to water intrusion.
Age Degradation: Over time, underlayment degrades, losing its effectiveness against moisture. It’s typically good for about 10-20 years.
UV Exposure: Prolonged exposure to sunlight can break down the underlayment’s material, making it more susceptible to leaks.
Mechanical Damage: Hail, falling branches, or even foot traffic can cause physical damage that leads to leaks.
Simple Tests and Checks
To check your underlayment’s condition, you’ll need access to the roof deck. Here’s what to look for:
Bubbling or Tears: These indicate water has gotten underneath, likely due to damage or improper installation.
Exposed Laps: If underlayment is peeling back or lifting at laps, it’s not protecting your roof like it should.
If you have access to a moisture meter or infrared scanner, use them to detect any hidden moisture. It’s the best way to find leaks before they cause major damage.
Fixes and Specification to Demand
If you find issues with your underlayment, here’s how to address them:
Spot Replacement: For minor damage or tears, spot replacement is usually sufficient. Just make sure to overlap the new piece properly.
Full Re-sheeting: If more than 30% of your underlayment needs replacing, it’s best to re-sheet the entire roof. This ensures consistent protection and prevents future leaks.
When specifying or verifying underlayment, ensure it meets these standards:
– Thickness: At least 36# felt or equivalent synthetic material.
– Temperature Rating: Ensure it’s rated for temperatures in your area to prevent curling and cracking.
Flashing and Step Flashing
Flashing components protect joints around chimneys, valleys, vents, and along edges. Step flashing is commonly used where roof planes meet walls, and valley flashing helps control runoff. Poor flashing installation is a frequent source of leaks.
Ask for a detailed list of included flashing elements and their locations. Request notes on installation methods and any maintenance expectations. Verify that the plan aligns with manufacturer guidance and local best practices.
Causes of Flashing Leaks
Flashing is your roof’s first line of defense against water intrusion. But improper installation or material choice can lead to leaks. Here are the common culprits:
Improper laps: Lapping flashing incorrectly can create gaps, allowing water to seep in.
Wrong material: Using the wrong type of flashing for your roofing material can cause compatibility issues and lead to leaks. For instance, using aluminum flashing with asphalt shingles can cause staining due to galvanic corrosion.
Nail holes: Nails driven through flashing create entry points for water. Always use clipping or special fasteners designed for flashing.
Inspection Methods and Tests
Regularly inspect your flashings to catch any issues early. Here’s a quick checklist:
- Visual inspection: Look for gaps, missing pieces, or sealant failure.
- Water stains: Check for water stains around the flashing, indicating a leak.
- Chimney flashings: Ensure they’re securely attached and there are no cracks.
- Step flashings: Check lap joints for proper alignment and secure attachment.
- Valley flashings: Inspect for any damage or wear, especially at the nail holes.
- Vent flashings: Ensure they’re properly sealed around the vent pipe.
- Water hose test: Use a garden hose to simulate heavy rain. Start at the top and work your way down to localize any leaks.
- Night inspection: After a rain, inspect with a flashlight at night to see if there are any active leaks.
Quick rule: Always inspect after heavy rain or snow melt. Better safe than sorry!
Repair Methods and Material Recommendations
The right materials and repair method can make all the difference in preventing future leaks.
- Reseating: If flashing is loose, reseat it using new sealant. Ensure you use a compatible type, like silicone for metal flashings or butyl for rubber.
- Replacement: Replace damaged flashing with the correct gauge. For instance, use 26-gauge for asphalt shingles and 24-gauge for tile roofs.
- Counterflashing: Add counterflashing to protect the top of step flashings from water intrusion.
- Sealant: Use a high-quality, flexible sealant to fill any gaps or cracks. Avoid using caulk designed for general use.
- Avoid: Never use roofing cement as a flashing repair material. It’s not designed to handle the stress of flashing and will crack over time.
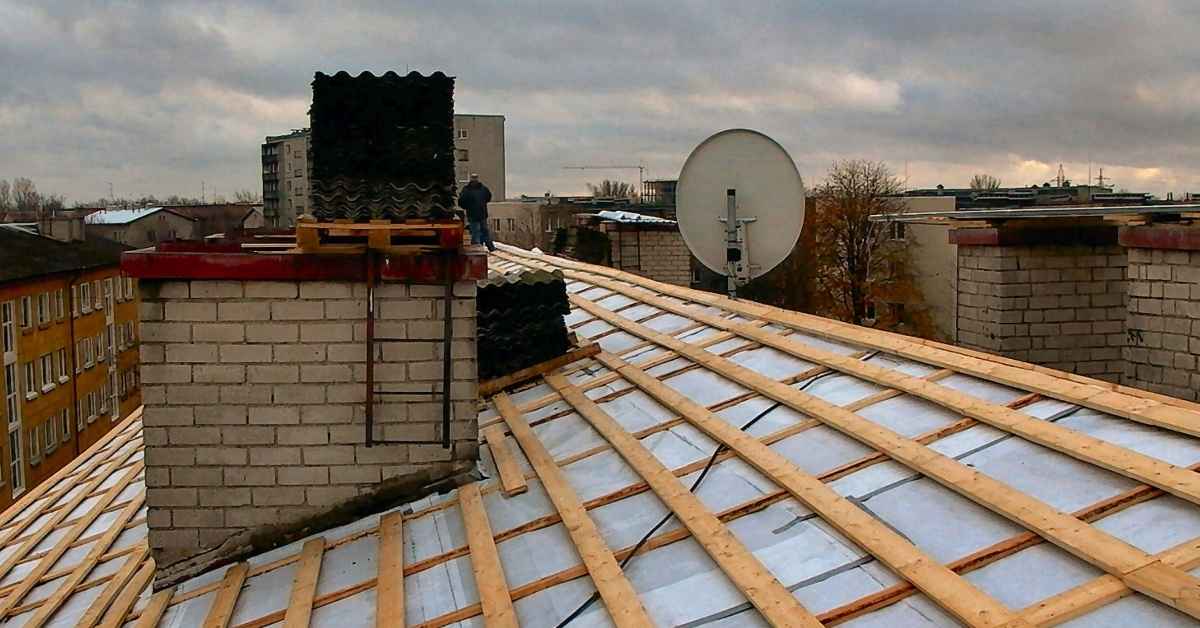
Roof Deck (Sheathing) and Structural Repairs
Deck work may be included when the existing boards show rot or compromise. The contractor should assess boards for soundness and replacement needs. Structural integrity directly impacts roof performance and span support.
Look for clear criteria on when deck replacement is included and how repairs are staged. Obtain documentation of rot checks, joist condition, and any load-bearing considerations. If unsure, verify the approach with manufacturer or local building guidance.
Causes of deck damage
Water’s the biggest enemy to your roof deck. It finds every crack and crevice, soaks in, and starts rotting from the inside out.
Prolonged leaks are a sure sign of trouble. Check your shingles, flashing, and caulking. If water’s getting in, fix it quick.
Lack of ventilation lets heat build up under your roof, cooking your deck from below. Make sure you’ve got enough ventilation – check manufacturer specs or local building codes.
Pests like termites and carpenter ants love wood. If you spot damage from pests, treat the infestation first, then repair the damage. Don’t just patch it up; they’ll keep chewing away.
Tests and inspection steps
Before you start any repairs, use this checklist to inspect your roof deck. It’s crucial to identify all issues before proceeding.
- Check for Sagging: Probe the deck with a flat bar or screwdriver. If it goes in more than 1/8″, there may be rot.
- Inspect for Stains: Look for water stains, mold, or mildew on the underside of the decking. These could indicate leaks.
- Moisture Check: Use a moisture meter to test for excess moisture in the decking. Anything above 15% is cause for concern.
- Check Fasteners: Ensure all nails and screws are secure. If any are loose or missing, replace them.
- Inspect Joists/Girders: Check the structural members below the decking for signs of rot, cracks, or movement.
- Check Roof-to-Wall Connection: Ensure the roof is properly connected to the walls. Any gaps could lead to water intrusion.
- Inspect Flashing: Check all flashing around vents, chimneys, and skylights for damage or gaps.
- Check Insulation: Ensure there’s proper insulation in your attic. This can help prevent ice dams and moisture buildup.
Quick rule: Always check the entire roof deck, not just problem areas. Skipping this step could lead to expensive rework down the line.
Repair options and scope clarifications
When it comes to roof deck repairs, you’ve got two main options: sistering or full replacement. Here’s how to decide:
Sistering – This is like adding a stud next to an existing one that’s weak. You add new plywood/OSB sheets alongside the damaged ones. It’s cheaper but only works if less than 20% of your deck needs repair.
For full replacement, check local building codes and manufacturer recommendations for suitable thickness. Typical ranges are 7/16″ to 1/2″ for plywood, or 7/16″ to 3/4″ for OSB. Get clear line-item pricing by asking contractors for a detailed estimate, or use online calculators as a starting point.
Ventilation Components (Ridge Vents, Box Vents, Soffit Vents)
Proper ventilation includes ridge, box, and soffit elements designed to balance intake and exhaust. Ventilation helps manage moisture and temperature in the attic space. Inadequate ventilation can lead to condensation and heat-related issues.
Ask which ventilation parts are included and how they fit your roof layout. Confirm that the system matches the attic size and climate, and check manufacturer recommendations for spacing and placement. Reference product data sheets or installation instructions when in doubt.
Symptoms and causes of poor ventilation
Ever felt your attic like an oven? That’s a sign of poor ventilation. Ice dams on your roof in winter? That’s another one. Shingles wearing out faster than they should? Mold growing in your attic?
These are all symptoms of inadequate or improperly installed ventilation. Here’s what goes wrong:
Inadequate intake: Not enough fresh air coming into the attic. This can happen if your soffit vents are blocked, or you don’t have any at all.
Improper exhaust: Hot air not escaping through ridge vents or box vents. This could be due to improper installation or blockages.
Tests and verification steps
Before you start tinkering, let’s confirm the problem. Here are some simple tests:
Attic temperature/humidity check: On a hot day, grab a thermometer and hygrometer. If your attic’s over 120°F or humidity’s above 50%, you’ve got a ventilation issue.
Visual airflow checks: Look at your soffit vents. See any dust or cobwebs? That means air ain’t flowin’. Check your ridge vents too, make sure they’re clear.
For a more thorough check, call in the pros for a blower door test or smoke test. They’ll find those hard-to-spot leaks and blockages.
Fixes and upgrade options
Alright, now that you know the problem, let’s fix it. Here are your options:
Add ridge vents or box vents: If you’re lacking exhaust, these can help hot air escape. Make sure they’re properly installed, clear of obstructions.
Install baffles in your attic: These keep airflow moving from the intake to the exhaust. They’re cheap and easy to install.
Balance intake/exhaust: For every square foot of ridge vent or box vent, you need about 1 square foot of soffit vent. That’s a 1:1 ratio. Ask your pro for this when they’re installing.
And remember, Solar Reflectance Index (SRI) matters too. Dark shingles absorb heat, light ones reflect it. Keep that in mind when you’re re-roofing.
Flashing-Related Accessories: Drip Edge, Valley Metal, Sealants
Small accessories like drip edges, valley metal, and sealants play critical roles in directing water away from edges and seams. These pieces prevent water intrusion that could bypass larger roofing components. They are easy to overlook if not explicitly listed.
Request a full checklist of these items and where they will be installed. Understand their material, coating, and compatibility with your shingles or membrane. Verify installation methods and whether the sealants meet local requirements and manufacturer guidance.
Visual checkpoints and common installation errors
Before you start any work, use this checklist to ensure your drip edge, valley metal, and sealants are in good condition. Here’s what to look for:
- Eaves: Check for proper overlap of drip edge flashing. Inadequate overlap can lead to water intrusion.
- Rake edges: Ensure drip edge is securely attached and not exposed to the elements, which could cause it to rust or bend.
- Valleys: Inspect valley metal for proper installation. Improper overlap can result in leaks.
- Exposed nails: Check for any nails that may have been driven through flashing during installation. These should be sealed with a suitable sealant to prevent leaks.
- Missing drip edge: Ensure drip edge is present at all edges of the roof, including eaves and rake edges. Missing drip edge can cause water to run down the sides of your home, potentially damaging siding or causing other issues.
- Rust or corrosion: Inspect for any signs of rust or corrosion on metal components. This could indicate previous leaks or improper installation.
- Cracked or damaged sealants: Check caulking and sealants around flashing for cracks, gaps, or other damage that may need repair.
- Improperly installed valley metal: Ensure valley metal is installed with the correct number of nails and proper overlap to prevent leaks.
Quick rule: Always inspect these areas visually before proceeding with any repairs or replacements. A thorough visual inspection can save you time and money in the long run.
Tests and simple on-site checks
Once you’ve completed your visual inspection, it’s time to perform some simple tests to ensure everything is watertight. Start by checking the attachment of your drip edge and valley metal.
Edge attachment: Gently tug on the edges of your drip edge and valley metal to ensure they are securely attached. If they feel loose or wobbly, they may need to be reattached with additional nails or screws.
Next, inspect the seams of your valley metal for any gaps or cracks that could allow water to enter. Use a flashlight to get a closer look if necessary.
Caulking condition: Check the condition of any caulking or sealants used around flashing. Look for signs of cracking, peeling, or other damage that may need repair. If you find any issues, it’s best to replace the affected sealant entirely to ensure a proper seal.
Finally, perform a simple water test to check for leaks. On a dry day, spray water along your roof valleys and eaves with a garden hose. Watch carefully for any signs of water intrusion, such as drips or streams running down your walls. If you notice any leaks, mark the location so you can address it later.
Fixes and best-practice materials
The right materials make all the difference when it comes to flashing-related accessories. Here’s what to look for in your contract:
- Drip edge metal gauge: Specify a 26- or 28-gauge drip edge metal for durability and longevity. Thinner gauges may bend or rust more easily.
- Valley metal overlap: Ensure valley metal is installed with at least 12 inches of overlap to prevent leaks. Some contractors may try to cut corners by using less overlap, but this can lead to problems down the line.
- Sealant type: Specify a high-quality, flexible sealant that can withstand temperature changes and won’t crack or peel over time. Silicone-based caulks are often a good choice for roofing applications.
- Nail size and spacing: Ensure drip edge and valley metal are attached with the correct size and spacing of nails to prevent leaks and ensure proper attachment. Typically, this means using 10d or 12d nails spaced no more than 6 inches apart.
- Drip edge installation: Specify that drip edge is installed with a slight bend at the bottom to help direct water away from your home’s exterior.
- Valley metal type: Choose between open and closed valley metal based on your roofing material. Open valleys are typically used with asphalt shingles, while closed valleys are better suited for tile or metal roofs.
- Sealant application: Ensure sealant is applied in a continuous bead along all edges of flashing to prevent water intrusion. Some contractors may skip this step, leading to leaks over time.
Fasteners, Underlayment Fasteners, and Adhesive
Fastener choices affect wind resistance, hold-down strength, and roof integrity. This includes nails, staples, and any adhesive used in the underlayment or membrane layers. The wrong fastener can lead to leaks or deck movement over time.
Ask for the specific type, length, and corrosion resistance of fasteners. Confirm what adhesives are included and their compatibility with your roofing material. If in doubt, check product labels or manufacturer installation instructions for acceptable use.
Causes of Fastening Failures
Using the wrong length, gauge, or type of fasteners can lead to serious issues with your roof. Here are some common causes:
Wrong Length: Fasteners that are too short won’t secure the shingles properly, leaving them vulnerable to wind uplift. Too long, and they could penetrate through the sheathing, damaging it.
Over/Under-Driving: Driving fasteners in too loosely or too tightly can cause leaks or damage the roof deck.
Corrosion: Rusty nails can corrode over time, weakening their hold and potentially causing leaks. Inappropriate adhesive use can also lead to failures if not compatible with materials used.
Inspection and Testing
Regularly inspect your roof’s fasteners to ensure they’re in good condition. Use this checklist:
- Nail Patterns: Check if nails are evenly spaced and follow the manufacturer’s recommendations.
- Penetration Depth: Ensure nails are driven deep enough but not too much, which could damage the roof deck.
- Corrosion: Look for rust on nails or staples. If found, replace immediately to prevent further damage.
- Adhesive Use: Check if adhesive is applied correctly and evenly.
- Underlayment Fasteners: Ensure they’re used where required and properly secured.
- Gutter Nails: Check if they’re secure and not pulling out.
- Drip Edge Nails: Ensure they’re driven in straight and secure.
- Contractor Specs: Ask your contractor for the specific fasteners used to ensure you’re using the right ones for repairs.
Quick rule: Always inspect after heavy winds or storms.
Repair and Replacement Guidance
If you find damaged fasteners, here’s how to fix them:
Re-Nailing: Remove the old nail, fill the hole with roofing cement, let it dry, then drive a new nail in the same spot.
Replace Corroded Fasteners: Remove rusty nails carefully. Apply a coat of primer to prevent further corrosion before installing a new one.
When replacing fasteners, use ones with the following features:
Galvanized or Stainless Steel: These resist corrosion and last longer.
Correct Length and Gauge: Use what’s recommended by the manufacturer to avoid common mistakes.
Conclusion
Takeaway: doing this right protects safety, durability, and curb appeal, so keep the focus on proper installation and good connections between every material layer. In practice, follow a simple flow from the top down, verify each connection, and test small areas before moving on.
First, check the roof in a steady sequence: shingles or membrane, underlayment and ice-and-water barrier, flashing and step flashing, the deck or sheathing condition, and the ventilation setup, then confirm that drip edges, valley metal, sealants, fasteners, underlayment fasteners, and adhesive are all appropriate for the job and match each other. Do this in a logical order and document any concerns before you commit to a repair or replacement.
Common mistakes to avoid are cutting corners on flashing or sealants, using the wrong fastener type or length, and skipping small but critical tests in a dry run first; always work from a dry, safe area, shut off power and secure fall protection, and never work alone when you’re on the roof or near edges. If you uncover structural rot or extensive flashing issues at valleys or chimneys, call a professional rather than guessing, and don’t push work when the roof is wet, windy, or icy.
If uncertainties arise about flashing details, deck repairs, or the correct combination of underlayment and adhesive, bring in a pro—safety and long-term performance demand it. Stay deliberate, stay safe, and you’ll keep this roof strong for years to come.
FAQ
How do I know the roof replacement includes the right underlayment and ice-and-water barrier for my climate?
Check the product labels or datasheets on the underlayment. Look for continuous coverage in vulnerable areas like eaves and valleys. If in doubt, read the manufacturer instructions or ask the contractor what they plan to use and where it goes.
What should I verify about flashing and step flashing material during a replacement?
Make sure metal flashing pieces are included and installed where they belong—around walls, chimneys, and transitions. Ask how they’ll seal joints and what sealants will be used, and confirm compatibility with the roofing material. If you see gaps or unfinished seams, raise a red flag.
How can I be sure the roof deck and any structural repairs are covered in the job?
Confirm that damaged decking will be replaced or repaired and that rotten or warped boards are addressed. Ask what fasteners will be used and how gaps between sheets will be handled. If there’s any uncertainty, get it in writing and point to the days you’ll inspect the deck.
How do I tell if ventilation components are included and balanced?
Ask what vents are being installed (ridge, soffit, box) and how they’ll create a proper airflow path. Ensure there are no blocking soffits or baffles in the plan. If you notice limited venting during a walkaround, ask for a quick calculation or guidance from the installer.