

Introduction
The transition from shingle to metal roofing is a significant project that requires careful planning and execution. Understanding the timeline of this process is crucial for homeowners to manage their expectations, allocate resources, and ensure a successful outcome.
This guide will walk you through the step-by-step timeline of a shingle-to-metal roof transition, helping you understand how long each phase takes and what to expect at every stage.
The Shingle to Metal Roof Transition Timeline
The timeline for a shingle-to-metal roof transition can vary depending on several factors such as the size of your roof, the complexity of the project, and weather conditions. However, here’s a detailed breakdown of the process to give you a clear idea of what to expect:
- Preparation (1-2 weeks): This phase involves assessing your current roof, obtaining necessary permits, selecting materials, and scheduling inspections.
- Removal of Existing Shingles (1-3 days): The old shingles are removed, and the roof deck is inspected for any damages.
- Installation of Underlayment and Drip Edge (1 day): A waterproof barrier is installed to protect your home from moisture, followed by the installation of drip edge flashing.
- Metal Roof Installation (3-5 days): The metal roofing panels are installed, starting from the eaves and working up to the ridge. This includes proper flashing at valleys, rakes, and other critical areas.
- Final Inspection and Cleanup (1 day): Once the installation is complete, a final inspection is conducted to ensure everything meets local building codes and manufacturer specifications. The work area is then cleaned up.
The total timeline for a shingle-to-metal roof transition typically ranges from 7 to 14 days, depending on the factors mentioned earlier. It’s essential to communicate with your contractor throughout the process to ensure everyone is on the same page regarding timelines and expectations.
Key takeaways
Proper preparation before starting the project can significantly impact the overall timeline. Ensuring you have all necessary materials, obtaining required permits, and scheduling inspections in advance can help streamline the process and prevent delays.
- Inspect roofing edge transitions for water penetration and signs of corrosion regularly.
- Validate flashing integrity; loose or damaged seals require immediate temporary caution.
- Use roof-safe ladders and fall protection when accessing metal roof sections.
- Difference between temporary fixes and permanent solutions should be clearly documented.
- Material compatibility matters; verify underlayment and fasteners suit metal roofing.
- Plan for proper sealing at ridges and penetrations to prevent leaks.
Table of Contents
- Introduction
- Key takeaways
- Overview of Shingle-to-Metal Roof Transitions
- Common Causes of Transition Problems
- Visual Inspection Checklist and Visual Checkpoints
- Diagnostic Tests and Measurements
- Repair Strategies: Temporary Fixes Vs. Permanent Solutions
- Materials, Tools and Specification Guidelines
- Best Practices for Installation to Prevent Future Issues
- Cost Considerations, Warranty and Code Compliance
- Conclusion
- FAQ
Overview of Shingle-to-Metal Roof Transitions
A shingle-to-metal transition is a junction where traditional asphalt shingles meet or are replaced by metal roofing. Homeowners and contractors encounter it during roof replacements, additions, or retrofit projects. This section summarizes the typical advantages and risks involved with changing materials at this point of the roof line.
Expect variations in durability, protection, and maintenance needs when crossing from shingles to metal. Understanding these dynamics helps plan for proper flashing, sealing, and drainage. The goal is to balance performance with long-term value and ease of repair if issues arise.
Typical locations and scenarios for transitions
Transitions from shingle to metal roofing typically occur at specific points on your home. These include:
Dormers: If you’re adding or repairing a dormer, it’s common to use metal roofing here due to its durability and aesthetic appeal.
Additions: When extending your home, using metal roofing on the new section can help maintain a uniform look with the existing shingle roof.
Eaves: Transitions at eaves often happen when repairing or upgrading this area. Metal roofing can provide better protection against ice dams and snow buildup.
Valleys: Valleys are critical transition points where two different roof planes meet. Using metal here can help direct water flow more effectively.
Key differences between shingles and metal roofing
Shingle and metal roofs have distinct characteristics that affect how they’re installed and perform. Here are the key differences:
Expansion/Contraction: Metal roofing expands and contracts with temperature changes, so proper spacing is crucial during installation. Shingles don’t require this consideration.
Fastening Methods: Metal roofs use hidden or exposed fasteners, while shingles are typically nailed on. This affects how each material handles wind uplift.
Underlayment Needs: Both materials need underlayment for waterproofing, but metal roofing often requires a specific type to prevent moisture buildup between panels.
Water-Shedding vs. Water-Barrier Approach: Shingle roofs rely on overlapping layers to create a water barrier. Metal roofs, however, shed water more efficiently due to their large panel size and interlocking seams.
Common Causes of Transition Problems
Leaks at the transition often stem from improper flashing, misaligned joints, or inadequate sealant. Corrosion can begin where metal edges are exposed to moisture and debris. Failures may also happen from movement due to settling or thermal expansion and contraction.
Real-world failures typically show up as staining, dampness, or rust at edges and seams. Poor integration with existing shingles can trap moisture behind flashing. Insufficient detailing during installation is a frequent root cause to look for.
Improper flashing design or installation
The wrong flashing profiles can trap water, leading to leaks. Inadequate laps and sealant choices accelerate deterioration.
Use proper flashing profiles, like step flashing for shingle-to-metal transitions. Ensure laps are tight and use quality sealants.
Improper installation, such as nail holes not being sealed or incorrect nailing patterns, can also cause leaks.
Thermal movement and differential expansion
Metal expands more than shingles with heat. This creates gaps at the transition, allowing water intrusion.
Use expansion joints to accommodate thermal movement. Install fasteners in staggered patterns to reduce stress.
Nail pops occur when fasteners can’t handle expansion and contraction. Ensure proper nailing patterns and use appropriate fasteners.
Incompatible underlayment or substrate conditions
Old, incompatible underlayments can trap moisture, leading to rot. Ice dams can also cause damage at transitions.
Use compatible underlayments for both materials. Ensure sheathing is flat and even to prevent water pooling.
Rotten sheathing or rafters can’t support the transition properly. Inspect and repair substrate issues before installing the transition.
Visual Inspection Checklist and Visual Checkpoints
Start with a systematic walkaround to identify obvious gaps, lifted shingles, or exposed fasteners. Check flashing corners, sealant beads, and transitions for cracks or voids. Look for staining or rust that signals moisture issues at the junction.
Inspect roof edge terminations, drip edges, and valley connections for gaps. Note any misaligned lines or warped metal panels. Pay attention to debris buildup that can hold moisture near the transition.
Exterior signs to look for on shingles and metal
Use this checklist when inspecting your roof from the ground or a safe ladder position.
- Rust streaks: Check metal panels. Rust indicates moisture trapped under paint, which can lead to panel failure.
- Missing sealant: Inspect around nails and at panel edges. Missing sealant lets water in, causing leaks.
- Lifted shingles: Check for shingles curling up or lifting. This exposes the underlayment to water intrusion.
- Warped metal panels: Look for wavy or buckled panels. Warping can cause leaks and panel failure.
- Staining patterns: Check for dark stains on shingles or underlayment. Stains indicate water intrusion, which can lead to rot.
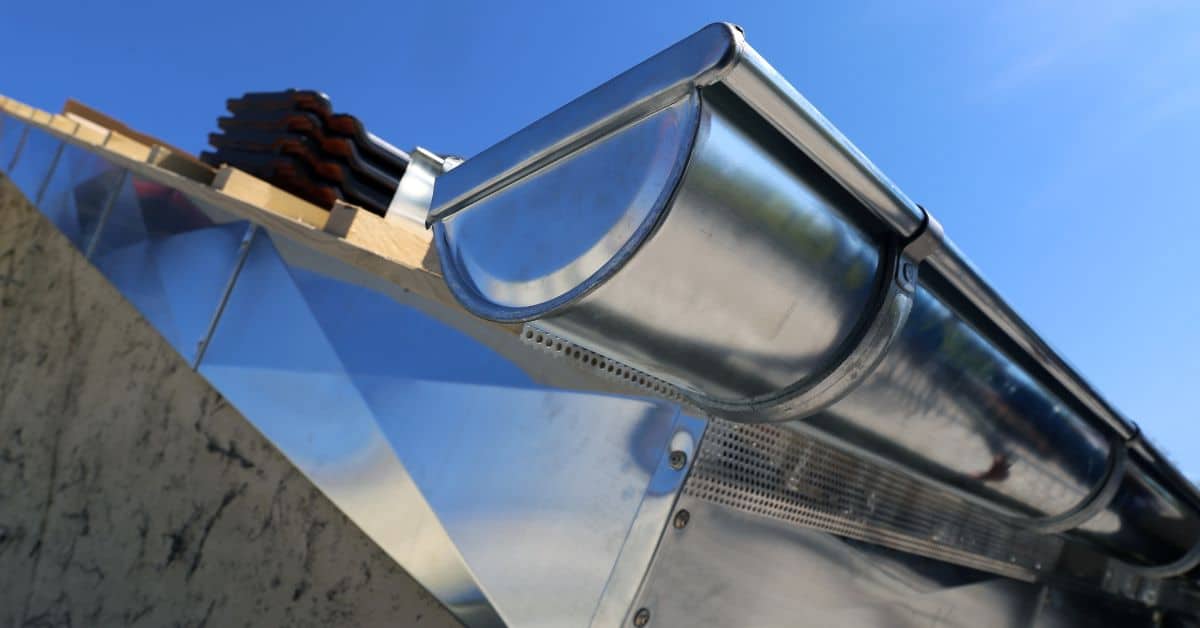
- Gutter performance: Ensure gutters are securely attached and draining properly. Clogged or damaged gutters can cause water to back up and leak into the roof.
- Flashing condition: Inspect around chimneys, vents, and skylights. Damaged or missing flashing can lead to leaks.
- Nail pops: Check for nails popping out of shingles or metal panels. Nail pops allow water intrusion and can cause further damage if not addressed.
Quick rule: If you spot any of these issues, don’t wait. Address them promptly to prevent minor problems from becoming major repairs.
Interior signs and attic inspection cues
Use this checklist when inspecting your roof from the inside, typically in the attic or crawl space.
- Staining: Look for water stains on the underside of the roof deck. Stains indicate leaks above.
- Mold: Check for mold growth on insulation, wood, or other surfaces. Mold indicates moisture and potential rot.
- Daylight at seams: Inspect around plumbing vents, chimneys, and other penetrations. Daylight indicates gaps that can let water in.
- Wet insulation: Feel insulation for dampness. Wet insulation loses its R-value and can indicate leaks above.
- Drip patterns: Look for drip patterns on the underside of the roof deck or on ceiling drywall. Drips pinpoint entry points from above.
- Musty odor: Smell for a musty, earthy scent. This can indicate mold growth and moisture problems.
- Wet spots on drywall: Check ceiling drywall for wet spots or discoloration. Wet spots indicate leaks above.
Quick rule: If you find any of these signs, trace the path of water intrusion back to its source and repair the leak promptly.
Diagnostic Tests and Measurements
Use basic tools to assess moisture and integrity, such as a moisture meter and a simple tactile check of seams. Measure the flatness and alignment of the metal surface at the transition. Confirm that fasteners are properly seated and not backing out.
Check for adhesion strength of sealants by inspecting cure, cracking, or peeling. Compare flashing height and coverage to manufacturer guidance or local requirements. When in doubt, verify with product data sheets or instructions from the manufacturer.
Water testing (controlled hose tests)
Before you start, make sure your water source is turned off and any existing leaks are temporarily fixed. This test helps reproduce leaks safely to pinpoint problems.
What you’ll need: A garden hose with a controlled nozzle, waterproof lights or cameras for inspection, and safety gear (gloves, goggles).
Start by checking base compaction. Poor compaction can lead to leaks. Use a soil probe to ensure your foundation is solid.
Next, gradually increase water pressure from the hose, starting at the lowest setting. Start at one end of the structure and work your way around, watching for any signs of leakage. Use lights or cameras to inspect hard-to-reach areas. If you find leaks, mark them clearly.
Fastener and substrate checks (pull tests, probe tests)
Before you start tearing into your walls or floors, you need to check the integrity of your fasteners and substrates. This helps prevent damage and ensures your repairs are solid.
Pull Tests: Check your fasteners by giving them a good tug. If they move more than 1/8″, they’re too loose or might be damaged. Tighten or replace as needed. Always check the manufacturer’s recommendations for proper installation and torque settings.
Probe Tests: Use a flathead screwdriver to probe your substrates. Gently poke around, looking for soft spots or crumbly material. If you hit something that feels wrong, dig a small hole to inspect further. Be careful not to create unnecessary damage – only remove what’s necessary to confirm the issue.
Remember, it’s better to find problems early and fix them right than to cover up issues with new materials. Take your time, check carefully, and don’t be afraid to dig a little if you have to. Your wallet (and your walls) will thank you in the long run.
Thermal movement and gap monitoring
Thermal expansion happens in every concrete job. It’s like when you see the train tracks bend on a hot day. You gotta account for it, or your concrete will crack.
Simple ways to monitor: Use temporary markers – just some paint or tape on the surface. Mark where you think cracks might happen. Check ’em every few days when the temp changes.
Data loggers are fancy, but they ain’t necessary for most DIY jobs. If you’re feeling tech-savvy, check out the options. Just remember to calibrate and place them right, or your data’s no good.
When to monitor? When it’s hot, when it’s cold, and especially during quick temp changes. That’s when concrete moves the most.
Repair Strategies: Temporary Fixes Vs. Permanent Solutions
Temporary fixes focus on stopping leaks quickly and protecting interior spaces. They are time-limited and aimed at reducing damage while plans for a durable repair are made. Temporary methods should not replace proper flashing or code-compliant detailing.
Permanent solutions involve proper flashing, compatible materials, and correct installation. Ensure repairs follow current standards and local rules, and verify details with the appropriate instructions or data sheets. Use durable sealants and flashing materials specified for metal transitions.
Emergency repairs and temporary sealing
When you’re facing a leaky roof transition, your first step is to stop the water damage. Here are some quick fixes:
Patching: For small holes or cracks, use roofing cement and a piece of flashing or shingle to create a temporary patch.
Tape alternatives: Use wide, flexible tape designed for roofs. Avoid using painter’s tape as it won’t stick in wet conditions.
Temporary flashing: If your flashing is damaged, use a piece of metal flashing or even a sheet of plastic to redirect water until you can make permanent repairs.
Permanent flashing redesign and replacement
To fix your roof transition permanently, you’ll need to replace or redesign the flashing. Here’s how:
Materials: Use metal flashing that matches your metal roofing. For shingles, use step flashing with a drip edge.
Design: Ensure the flashing is long enough to overlap both roof types and extends into the valleys where water flows.
Fastening: Use screws designed for roofs, not nails. Seal the heads with a dab of roofing cement to prevent leaks.
Transition re-roofing and substrate replacement
Sometimes, the damage is too extensive for simple repairs. Here’s when you might need to re-roof or replace the substrate:
Extensive damage: If there are multiple leaks, rotted sheathing, or widespread water stains, it may be best to start fresh.
Steps: Remove the old roof and flashing. Inspect the sheathing; if it’s damaged, replace it. Install new underlayment and flashing before re-roofing.
Considerations: Consult local building codes and consider hiring a professional if you’re unsure about any aspect of the job.
Materials, Tools and Specification Guidelines
Prepare a DIY-friendly list of materials that match the transition needs, including flashing, sealant, and fasteners appropriate for metal. Include safety gear and basic hand tools for cutting, bending, and fastening. Check labels and data sheets for compatibility with existing shingles and metal components.
Reference standards for metal gauge, flashing metals, and sealant types to ensure a proper match. When unsure, verify with the manufacturer instructions or local building guidelines. Do not rely on guesses; confirm material specs before buying or cutting parts.
Recommended flashing metals and coatings
When transitioning from shingle to metal roofing, it’s crucial to choose the right flashing materials. Galvanized steel is a common choice due to its durability and affordability. However, if you’re in a coastal area with high salt content, consider stainless steel or aluminum for better corrosion resistance.
For coatings, use a primer designed for metal roofs before applying paint. This helps prevent rust and ensures the paint adheres well. Avoid using coatings that could react with your existing shingles or fasteners.
Tip: Always check compatibility between metals to avoid galvanic corrosion.
Sealants, tapes and underlayments—what to use where
For exterior roofing joints, use a high-quality, UV-resistant sealant. Silicone-based or butyl rubber sealants work well for metal roofs. Avoid using acrylic latex caulks as they can degrade quickly when exposed to weather elements.
For tape, use a high-temperature, waterproof tape designed for roofing applications. This helps prevent leaks at joints and transitions.
As for underlayments, use a synthetic, water-resistant option like felt or tyvek. These provide a barrier against moisture and help protect your substrate during the transition process.
Best Practices for Installation to Prevent Future Issues
Plan the transition with a clear sequence that preserves roof drainage and ensures continuous protection. Align fastener patterns and flashing laps to minimize water entry paths. Ensure proper ventilation and debris-free surfaces before installation.
Detail the edge and corner connections to resist movement and weather exposure. Use compatible sealants and flashing materials that are rated for metal-to-shingle transitions. Always consult product guidance and local requirements for compliance.
Sequencing work and ensuring proper overlaps
Start by laying down a quality underlayment. This is your first line of defense against water intrusion.
Next, install the shingles. Make sure to stagger them for better protection. The bottom edge of each shingle should overlap the top edge of the one below it by at least 1/2 inch.
When installing metal flashings, they should lap over the shingles and underlayment, not the other way around. This ensures water is directed off the roof properly.
Fastening patterns and allowances for movement
For metal panels, use fasteners spaced no more than 12 inches apart. This provides a secure hold while allowing for some flexibility.
Consider using slotted or clipped fasteners. They let the panel move with temperature changes without breaking the seal.
Leave a small gap between each panel to allow for thermal expansion and contraction. About 1/8 inch should do it.
Cost Considerations, Warranty and Code Compliance
Think about project scope, material quality, and labor when evaluating costs for the transition. Some fixes may require more extensive flashing or added insulation, which affects overall price. Compare options with regard to long-term performance and maintenance needs.
Check warranty language related to installed transition components and workmanship. Review applicable building codes and permit requirements that govern metal installations and transitions. If in doubt, verify with the code compliance documents or the local building department.
Estimating repair vs. replacement costs
When transitioning from shingle to metal roof, cost is a major factor. Here’s how to estimate repairs versus full replacement.
Labor: Replacement takes longer than repairs. Expect labor costs to be higher for full replacement.
Materials: Metal roofing and underlayment are more expensive than shingles. But, you only need to buy what’s required for the transition area.
Substrate damage: If substrate is damaged, it needs replacing. This adds cost but ensures a solid base for your new metal roof.
Warranties, manufacturer requirements and local codes
Understanding warranties and code compliance is crucial before starting work.
Warranty: Check your shingle roof’s warranty. Some cover transition costs if done within a certain timeframe. Metal roof warranties need verification too – they often require specific installation methods for validity.
Manufacturer requirements: Follow manufacturer guidelines for metal roof installation. This includes underlayment, flashing, and fastener types.
Local codes/permits: Check local building codes before starting. You may need permits for roof replacement or transition. Always follow code to avoid fines and ensure safety.
Conclusion
Fixing a shingle-to-metal transition is about staying safe, avoiding water intrusion, and keeping the look clean. Move methodically, test ideas in small areas, and don’t rush the final seal or flashing. The right approach protects the roof, the interior, and your wallet over time.
Check in this order: verify the existing flashing and underlayment for wear, confirm metal panels and fasteners match the roof layout, test any temporary fixes in a dry spot, measure any gaps or deflections, and then plan the permanent fix with the proper flashing, sealant, and setting technique. Work cleanly, document what you find, and only move to the next step after a successful test in a controlled area.
Common mistakes to avoid are over-tightening screws that crush the shingle edge, using the wrong sealant or fastener type, and skipping a thorough dry fit before sealing. Safety rules are simple: wear eye protection, use a sturdy ladder and harness if needed, and never work on a wet or icy surface. Test repairs in a small, inconspicuous spot first and leave irreversible changes until you’re sure the method will hold for years.
If the problem repeats after a measured repair, or you see widespread decking or flashing damage, call a pro. Complex transitions, code-compliant flashing, and warranty considerations often require hands-on expertise. Stay disciplined, follow the checks you’ve learned, and you’ll finish with a durable, good-looking roof. You can do this.
FAQ
What are the first red flags that tell you a shingle-to-metal transition is failing?
Look for ongoing leaks, stained ceilings, or soft spots in the ceiling. Buckling or curling shingles near the metal edge and visible rust on fasteners are common signs. If you see excessive wind lift or gaps at flashing, inspect closely and plan a fix.
How should you test for water intrusion without tearing into the roof right away?
Run a light rain test with a hose along suspected joints while someone watches from inside. Check for drips at the transition edge and around flashing during the test. If you see water entry, stop and assess the flashing and sealant details before proceeding.
What’s the difference between a temporary fix and a permanent repair for the transition?
A temporary fix stops leaks and buys time, using foam, sealant, or quick-cover materials that seal the edge. A permanent repair re-flashes the area, replaces failing sealants, and updates fasteners and underlayment to factory specs. Always aim for a solution that lasts beyond the next season.
What should you ask or check when buying materials for a metal transition project?
Check manufacturer guidelines for flashing, underlayment, and fastener types compatible with your roof metal. Read labels for weather resistance and warranty coverage. If unsure, ask the supplier or installer for product datasheets and confirm with local rules or recommendations.