
Introduction
Roof coating for shingles is a protective layer you apply over a worn roof surface to help seal minor leaks and extend life. This guide will walk you through practical steps you can take, from surface prep to choosing a coating, in plain language. Do not rely on it as a substitute for major repairs or professional advice.
Before you start, check the coating label for surface prep requirements and any curing times to expect. Plan for weather, clean the shingles well, and test small areas before full application. If you see damaged shingles or water intrusion, address those issues first and verify local rules.
Key takeaways
- Inspect coating suitability before applying; verify shingle compatibility and manufacturer guidelines.
- Clean surface thoroughly and repair damaged shingles or flashing prior to coating.
- Perform water shedding tests and adhesion checks as per product label instructions.
- Apply in thin, even coats; avoid ponding and follow cure-time guidance from manufacturer.
- Wear fall protection and PPE; roof work requires caution and safe access practices.
- Check surrounding components—vents, chimneys, gutters—for compatibility and sealant compatibility.
- Understand warranties, codes, and local rules; coatings may affect roof warranties.
Table of Contents
- Introduction
- Key takeaways
- What Is Shingle Roof Coating and When It’s Used
- Causes of Coating Failure and Shingle Damage
- How to Inspect and Test a Shingled Roof for Coating Suitability
- Preparing Shingles for Coating: Surface Prep and Repairs
- Application Best Practices and Testing During Application
- Fixes and Remediation for Common Coating Problems
- Compatibility, Warranties, and Code or Warranty Considerations
- Cost, Roi, and Environmental Considerations
- Conclusion
- FAQ
What Is Shingle Roof Coating and When It’s Used
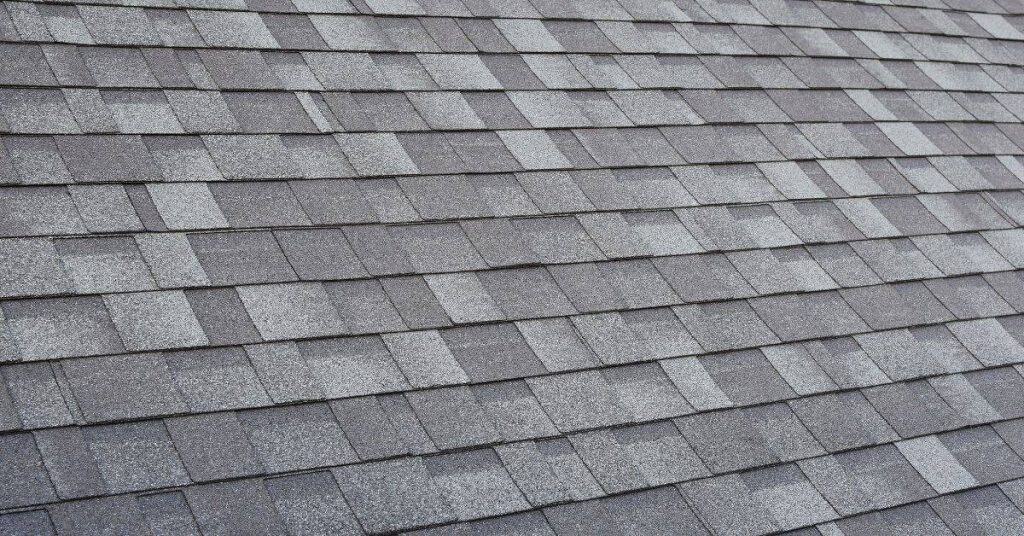
Shingle roof coatings are thin layers applied over existing shingles to alter or enhance performance. They come in several formulations, including acrylic, silicone, elastomeric, and bituminous types. Each aims to weatherproof the surface, improve reflectivity, or extend the roof’s life.
Use of coating is typically considered when the underlying shingles are in fair condition and the goal is to seal minor leaks, reduce heat gain, or refresh a tired appearance. When the roof shows widespread damage or advanced wear, re-roofing may be the better long-term choice, so verify guidance from product labels and manufacturer instructions before proceeding.
Types of coatings and how they differ
Roof coatings for shingles come in several types, each with its own properties. Let’s briefly look at the main ones:
Acrylic: These are water-based, affordable, and reflect UV rays to keep your roof cool. They’re great for extending life but may not be as durable as others.
Silicone: Silicone coatings are pricey but offer excellent durability and flexibility. They don’t crack or peel easily and can last up to 10 years. However, they might not reflect UV rays as well as acrylics.
Elastomeric: These are thick, rubber-like coatings that provide superior waterproofing. They’re great for preventing leaks but may not be as reflective or durable as other types.
Bituminous: Made from asphalt and oils, these are cheap and easy to apply. However, they can become brittle over time and lose their flexibility in cold weather.
When coating is NOT recommended
While roof coatings can extend the life of your shingles, there are times when they’re not suitable. Here’s when to skip the coating:
Severe damage: If your roof has significant damage like missing or broken shingles, coating won’t fix that. It’s better to replace those sections.
Curling or buckling shingles: Coatings can’t fix structural issues caused by age or improper installation. If your shingles are curling or buckling, it’s time for a new roof.
Multiple layers: Too many layers of shingles can make your roof too heavy and unstable. Coating won’t solve this problem; you need to remove some layers.
Warranty issues: Some warranties don’t cover roofs that have been coated. Check your warranty before proceeding, or consult a roofer to be sure.
Causes of Coating Failure and Shingle Damage
Root causes often stem from poor adhesion, moisture, or substrate problems. Improper prep, such as inadequate cleaning or failed primer steps, can lead to premature coating failure. Granule loss and surface contaminants also contribute to uneven performance.
Incompatible coating selections or applying into unsuitable conditions can accelerate wear and staining. Always check label directions, substrate compatibility, and local requirements to identify the most likely failure modes for your roof.
Common environmental and installation factors
Extreme weather conditions can wreak havoc on your roof coating. UV rays, for instance, can break down the coating’s chemicals over time, leading to poor adhesion and accelerated wear.
Ponding water, or water that sits on the roof for extended periods, can also cause damage. It weakens the coating, promoting blistering and peeling.
Temperature swings, especially in areas with harsh winters and hot summers, can cause the shingles to expand and contract. This movement can lead to cracking of the coating and granule loss.
Incorrect application conditions, like applying coatings when it’s too cold or humid, can also result in poor adhesion and failure.
Hidden substrate problems (deck, underlayment, ventilation)
The health of your roof’s underlying structure is crucial for a coating’s longevity. Rotten decking can’t provide the solid base needed for proper adhesion and may cause the coating to bubble or peel.
Wet underlayment, often due to poor attic ventilation, can also undermine your coating. Moisture trapped beneath the shingles can cause delamination, leading to premature failure of the coating.
Inadequate attic ventilation is a common culprit for moisture issues. It traps heat and humidity in the attic, which can then condense on the underside of the roof, wetting the underlayment.
To check for these hidden problems, inspect your attic’s ventilation, look for signs of water damage or rot, and ensure your underlayment is dry before applying any coating.
How to Inspect and Test a Shingled Roof for Coating Suitability
Start with a visual survey of all shingles for curling, cracking, or significant granule loss. Look for visible stains, blisters, or lifted edges that hint at moisture issues. Note any signs of previous repairs and coating patches.
Perform simple on-roof tests such as a gentle adhesion check if safe to do so, and inspect the substrate for dampness or mold. When in doubt, consult product instructions and local building guidance to confirm what tests are appropriate for your site.
Step-by-Step Process
This step-by-step guide walks you through inspecting and testing your shingled roof for coating suitability, ensuring a thorough and safe process.
- Preparation: Ensure the roof is dry and free of debris. Set up safety equipment like harnesses and secure ladders.
- Safety check: Inspect your ladder’s condition and ensure it extends at least 3 feet above the roofline. Check weather conditions for any potential hazards.
- Inspection start: Begin from the bottom of the roof, working your way up to avoid damaging shingles or walking on areas you’ve already checked.
- Visual check: Look for signs of damage like granule loss, cracks, and discoloration. Check for proper nail placement and securement.
- Perform tests: Conduct adhesion and water-penetration tests as outlined in the following sections. Document your findings for future reference.
- Cleanup: Remove any debris or test materials from the roof. Inspect your safety equipment before storing it away.
Visual checkpoints and what to look for
Use this visual checklist during your inspection to identify potential issues with your shingles and roof coating.
- Granule loss: Check for missing granules, especially around the edges of shingles. Excessive granule loss may indicate underlying damage or improper installation.
- Cracks: Inspect shingles for hairline cracks, which can allow water penetration and further damage over time.
- Discoloration: Look for yellowing, greening, or dark spots, which may indicate algae growth, mold, or moisture intrusion.
- Blistering: Check for raised areas on shingles, which can indicate trapped moisture or improper installation.
- Prior coatings: Inspect the roof for signs of previous coatings, as these may affect your ability to apply a new coating.
- Nail placement: Ensure nails are properly placed and secure. Nails too close to the edge can cause shingles to curl or lift.
- Shingle condition: Check for warping, curling, or lifting of shingles, which can indicate damage or improper installation.
- Flashing: Inspect metal flashing around chimneys, vents, and other openings for signs of rust, corrosion, or damage.
Quick rule: If you find more than 30% damaged shingles, it may be time to consider a full replacement rather than coating.
Adhesion and water-penetration tests
These simple on-roof tests help assess your shingles’ adhesion and resistance to water penetration, ensuring a successful coating application.
Tape pull test: Clean a small area of the roof. Apply painter’s tape firmly across the surface, then pull it off quickly. If granules come off with the tape, adhesion may be compromised.
Small patch test: Apply a small amount of coating to an inconspicuous area. Allow it to dry according to manufacturer instructions. Scratch at the edge of the dried coating with a coin or nail. If the coating peels off easily, adhesion may be poor.
Water spray/dry time observation: Lightly mist a small area of the roof with water using a spray bottle. Observe how quickly the water is absorbed and how long it takes for the surface to dry. Excessively slow absorption or drying times may indicate underlying issues with the substrate.
Preparing Shingles for Coating: Surface Prep and Repairs
Clean the roof surface to remove dirt, debris, and organic growth. Use a suitable cleaner and rinse thoroughly, ensuring the surface dries before coating. Address any algae or moss spots to prevent future staining.
Stabilize loose granules and replace visibly damaged shingles or flashing components. Ensure you have a dry, sound substrate and follow product label instructions for cleaning and pre-coating preparation.
Cleaning methods and products (safe for shingles)
Before you start, understand that aggressive cleaning can damage your shingles. Here’s how to clean safely:
Pressure washing: Keep the pressure low – around 1200 PSI or less. Hold the wand at a 45-degree angle and maintain a consistent distance from the roof.
Soft washing: For algae, moss, or lichen, use a soft wash solution with bleach (3:1 water to bleach ratio) or a specialized cleaner. Apply it gently using a pump sprayer, let it soak for 15-20 minutes, then rinse thoroughly.
Always rinse from top to bottom to avoid streaking and ensure no residue is left behind.
Repair and replacement steps before coating
Inspect your roof thoroughly for damage. Here’s what you need to do:
Replace damaged shingles: If a shingle is cracked, broken, or curling, replace it. Remove the nails with a pry bar, lift out the old shingle, and slide in the new one. Nail it down securely.
Reset loose shingles: If a shingle is just loose, reset its nail tabs by lifting it slightly and hammering the nail back into place. Ensure it’s secure but don’t over-tighten.
Seal nail pops: Nail pops can let water in. Use roofing cement to seal them, then cover with a new shingle tab or flashing.
Check and repair flashing: Ensure all flashings around chimneys, vents, and skylights are watertight. Re-caulk if necessary.
Application Best Practices and Testing During Application
Follow manufacturer guidance on temperature and humidity windows and apply with the recommended tools and techniques. Use the specified coverage rate and apply in thin, uniform coats as directed. Allow proper curing time between coats if multiple applications are required.
On-roof adhesion checks and visual cues during cure help verify success. If conditions or results don’t meet the label’s criteria, pause and recheck the product data sheet or manufacturer instructions before continuing.
Tools and materials checklist
Before you start, make sure you’ve got everything you need. This list helps ensure a smooth application process.
- Brushes: For edges and details. Get 1.5-2″ angled sash brush.
- Rollers: For main surfaces. Use 9″ roller covers with 3/8″ or 1/2″ nap for better coverage.
- Sprayer (optional): For large areas. Get a handheld, airless sprayer.
- Primer: To improve adhesion and seal the surface. You’ll need about 0.5 gallons per square.
- Coating material: Follow manufacturer’s guidelines for quantity. Typically, it’s around 1 gallon per 100 sq ft.
- Personal protective equipment (PPE): Safety glasses, gloves, long sleeves, and a hat to protect from drips.
- Tape measure: To ensure you’ve got enough material for the job.
- Ladder: A sturdy one to safely access your roof.
Quick rule: Check everything before you start. Missing a tool can halt progress and waste time.
Common application mistakes and how to avoid them
Knowing these common pitfalls helps ensure your coating job lasts. Here’s what to watch out for:
- Over-thinning: Thinning too much weakens the coating. Solution: Follow manufacturer’s thinning guidelines.
- Applying on wet or hot shingles: This can cause poor adhesion and bubbling. Solution: Apply when temps are between 40-85°F, and shingles are dry.
- Insufficient flashings prep: Not cleaning and priming flashings leads to leaks. Solution: Clean, prime, and coat all flashings.
- Not testing adhesion: Skipping tests can lead to coating failure. Solution: See ‘Testing During Application’ below.
These are the main mistakes. Avoid them for a successful application.
Fixes and Remediation for Common Coating Problems
For peeling or blistering, identify the underlying cause and remove the affected area before reapplying. If staining or discoloration appears, determine whether it’s cosmetic or a sign of bond failure. Replace severely compromised sections as needed.
If adhesion has failed across a large area, stripping may be necessary and reapplication considered, or you might revert to replacing the roof. Always confirm recommended remediation steps via product instructions and warranty terms before proceeding.
Localized repair vs full recoating decisions
First, figure out what’s causing the issue. Refer back to our earlier section on common causes.
If it’s minor – like a few peeling spots due to poor initial application – you might get away with localized repairs. Just clean those areas, prep them, and reapply coating.
But, if the problem is widespread or caused by hidden substrate issues, full recoating or even replacement might be needed. Extensive discoloration, streaking, or blistering are red flags.
Here’s a simple rule: if the bad spots cover more than 30% of your roof, it’s time for a full recoat or replacement. Safety first – don’t DIY if you’re unsure.
Long-term monitoring and maintenance plan
Once you’ve fixed your coating problems, it’s crucial to keep an eye on things. Set a reminder to inspect your roof annually – spring is usually best.
Here’s what to do during each inspection:
– Check for any new peeling, blistering, or discoloration.
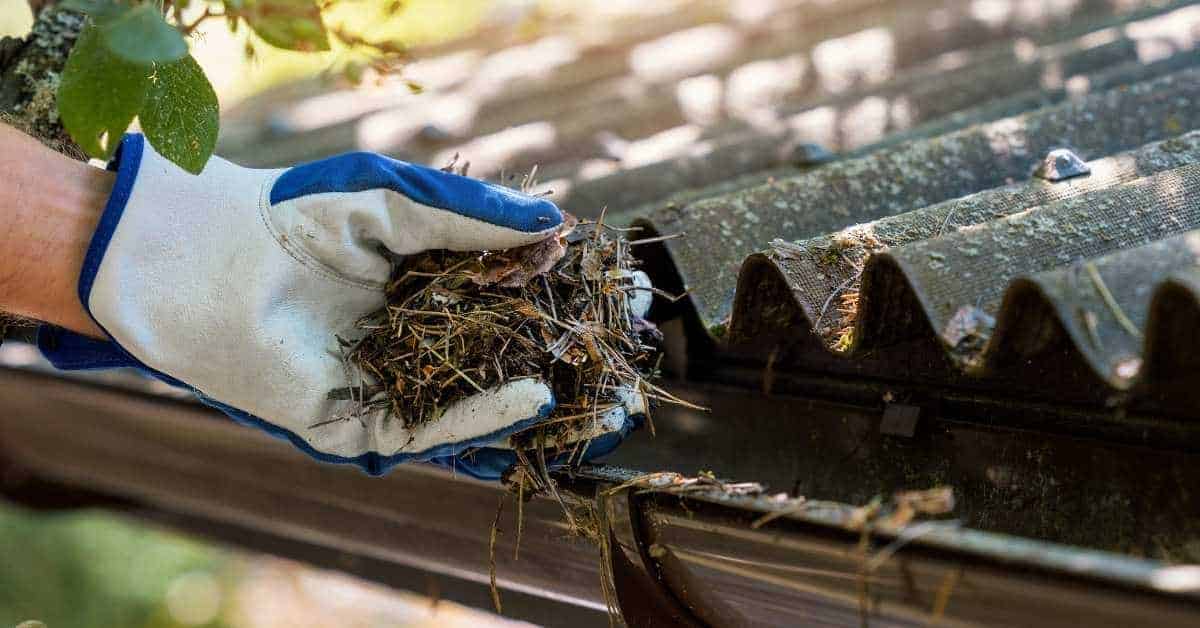
– Ensure all vents and valleys are clear of debris.
– Inspect gutters and downspouts for proper water flow.
– Trim back any tree limbs that might scrape against shingles.
Every 3-5 years, give your roof a thorough cleaning. Use a safe cleaner, like one with oxygen bleach or sodium percarbonate. Rinse well afterwards. This helps prevent algae and moss growth, which can damage coating over time.
Compatibility, Warranties, and Code or Warranty Considerations
Coatings interact with shingle warranties and building codes, so check compatibility before proceeding. Some manufacturer warranties may restrict coating use or require specific products. Certification or approval notices can influence eligibility.
Read the product data sheet and warranty language carefully, and confirm any local code requirements or endorsements. When in doubt, reach out to the shingle maker or the coating supplier for clarification.
How to verify product compatibility and approvals
Before you start, check the technical data sheet of your chosen roof coating. Look for these:
Adhesion tests: Make sure they’ve tested on similar shingle types to yours.
Primer requirements: Some coatings need a primer. Ensure it’s compatible with your shingles and available.
Temperature limits: Check if the coating can handle your local climate extremes.
What to ask contractors or manufacturers
When hiring a pro, ask these questions to ensure they’re the right fit:
Experience: How many similar jobs have they done?
Insurance: Ask for proof of liability and workers’ comp insurance.
Warranty transferability: Can the warranty be transferred to you if you sell your home?
Expected longevity: How long should the coating last on your specific roof?
Cost, Roi, and Environmental Considerations
Consider the upfront material and labor costs along with potential lifespan extension when evaluating coating options. Reflective coatings may reduce cooling loads, depending on climate and roof design. Weigh these factors against the cost of replacement or re-roofing.
Environmental impacts include material sustainability and disposal considerations. Compare coating versus replacement in terms of waste, energy use, and long-term performance by consulting product labels and local guidance.
Estimating costs and expected lifespan gains
The cost of roof coating varies, but expect to pay between $0.50 to $2 per square foot. That’s about half the price of a full replacement.
Lifespan extension? Realistic estimates range from 5 to 15 years. It depends on your climate and the condition of your shingles before coating.
Tip: Get local quotes for accurate pricing. Check with manufacturers or contractors about expected lifespan gains in your area.
Reflective coatings and energy savings
Reflective coatings can lower roof temperatures by up to 30°F. That means less heat transfer into your home, reducing cooling costs.
Expect to save around 7-15% on your cooling expenses. But remember, older shingles might not hold the coating as well, limiting savings.
Note: Energy savings depend on your climate and roof orientation. Expect less savings in cooler regions or with north-facing roofs.
Conclusion
The right roof coating plan protects your shingles, keeps water out, and preserves curb appeal, but it only works if you respect the surface, follow the tests, and work safely.
Check in this order: verify compatibility with your shingles and existing coatings, inspect for damage and repair needs, clean and dry the surface, perform a small-area test, apply per manufacturer guidance, and test cure and adhesion before full coverage. Move from a small patch to full coverage only after the test area looks solid and the coating behaves as expected, and always prioritize safety and proper ventilation.
Common mistakes to avoid include skipping the surface prep, ignoring shingle damage that needs repair, and rushing the application or testing steps. Always work in good light, use fall protection on pitched roofs, and keep a clear path for ladders and tools. If the coating is incompatible with your shingles, or you see widespread damage, stop and reassess—consult the warranty terms and don’t push on.
If you’re unsure about compatibility, warranty implications, or local code requirements, call a professional before moving forward. With careful prep, measured testing, and disciplined application, you can extend shingle life and maintain a solid, leak-free roof. Stay steady, follow the plan, and you’ll finish confident you did this right.
FAQ
Can I apply roof coating over algae, moss, or debris on the shingles?
Don’t. Clean or remove growth and debris first. If the surface isn’t clean, the coating won’t stick properly and will fail sooner.
What signs show that a roof coating is failing or not sticking anymore?
Look for peeling, cracking, blistering, or random patches that look different than the rest. If the coating seems soft to the touch or can be easily scraped off, plan on remediation rather than recoat.
How should I test adhesion and suitability before a full coating?
Follow the manufacturer’s instructions on adhesion tests. In general, test a small, inconspicuous area and observe how it bonds after the specified cure time. If it doesn’t pass the test, don’t proceed with a full coat.
What safety and prep checks should I do before applying a roof coating?
Inspect for damaged or warped shingles and address repairs as needed. Check product labels for surface prep, weather limits, and recoat windows, and ensure you have proper ventilation and personal protective gear. If you’re unsure of any instruction, verify with the label or manufacturer and local rules before proceeding.