
Introduction
Measuring a roof for shingles means calculating the roof’s surface area to know how much material you need. You’ll do this by taking rough measurements from the outside and noting any irregularities. Start with a simple shape and adjust for hips, valleys, and overhangs as you go.
Common issues like irregular roof shapes or damaged sections can affect how much material you need. Run quick checks by measuring at several points and compare to what the shingle package instructs, then review manufacturer guidelines for allowances. If you see gaps, sag, or weather damage, note them and plan for repairs before buying materials.
Key takeaways
- Verify roof measurements from ground and eaves using two independent methods for accuracy.
- Mark reference points consistently and document them before any measurement work begins.
- Double-check pitch and plane changes to avoid underestimation on complex roofs.
- Use a chalk line and carpenter’s level to verify straight edges.
- Safety first: tether ladder, wear non-slip boots, and wear eye protection.
- After measurement, compare against manufacturer guidelines and local code requirements.
Table of Contents
- Introduction
- Key takeaways
- Overview: Why Accurate Roof Measurements Matter
- Tools and Materials Checklist
- Preparing the Site and Establishing Reference Points
- Step-by-Step Method for Measuring a Simple Gable Roof
- Measuring Complex Roof Shapes (Hips, Valleys, Dormers, Multiple Planes)
- Common Causes of Measurement Errors and How to Test for Them
- Material Estimation: Shingles, Underlayment, Flashing, and Accessories
- Fixes and Best Practices After Measurement Errors
- Conclusion
- FAQ
Overview: Why Accurate Roof Measurements Matter
Roofing area + shingles estimator
Accurate measurements are the foundation of a smooth roofing project. They guide how much material to order and help you stay on budget. When measurements are off, you can end up with waste, delays, or unsafe conditions on the job.
Common problems include underordering, overordering, and gaps or overlaps that affect the fit. Take the time to measure carefully and cross-check figures before you buy. Use reliable references like product labels or manufacturer instructions to verify what you plan to purchase.
Common measurement mistakes and their consequences
Before you grab your tape measure, understand these common pitfalls to avoid costly errors.
- Ignoring roof slope: This can lead to underordering shingles and improper installation. Result: Water leaks and reduced lifespan of the roof.
- Not accounting for valleys/overhangs: Overlooking these areas can result in overordering or poor fit, wasting materials and time.
- Neglecting to measure twice: A single mistake here can cause you to order too many or too few shingles. Result: Waste or extra trips to the store.
- Relying on square footage alone: Roofs aren’t flat, so square footage doesn’t tell the whole story. You’ll end up with wrong quantities and poor coverage.
Take your time, measure carefully, and double-check your calculations to avoid these common mistakes.
Terms and units to know
Familiarize yourself with these terms and measurement units before you start. They’ll help you calculate the right amount of shingles for your roof.
Pitch: The slope of your roof, usually expressed as a ratio (e.g., 6/12).
Rise: The vertical increase in inches over a 12-inch horizontal span. Run: The horizontal distance over which the rise occurs.
Square (roofing square): A unit of measurement equal to 100 square feet of roof area. Rake: The sloping edge of a roof. Eave: The lower edge of a roof that overhangs the walls. Ridge: The highest point on a roof where two slopes meet.
Measurements are typically taken in feet and inches, then converted to squares for ordering shingles.
Tools and Materials Checklist
Start with a sturdy tape measure and a reliable ladder for safe access. A basic roofing calculator or app helps organize areas and counts. Add a level and chalk line to keep lines straight and square during setup.
For materials, have shingles, underlayment, and a starter strip on hand. Include safety gear like gloves, eye protection, and a harness if needed. Use manufacturer guidance to confirm compatible underlayment and fasteners with your chosen shingles.
Recommended safety gear and ladder setup
Before you start measuring, ensure your safety. Follow this checklist to protect yourself from falls and other hazards.
- Hard hat: Protects against falling debris.
- Safety harness: Secures you to the roof in case of a fall.
- Ladder angle: Place at 75° to the wall for stability. Check with 4-foot rise for every 1 foot horizontal reach.
- Ladder height: Extend 3 feet above the roofline to safely access it.
- Non-slip shoes: Prevents slips on wet or steep surfaces.
- Gloves: Protects hands from sharp edges and hot materials.
- Ear protection: Shields against loud power tools used nearby.
- Eye protection: Guards against debris and harmful UV rays.
Quick rule: Always prioritize safety over speed. Take your time to set up properly.
Digital tools and apps
While manual measuring is accurate, digital tools can save you time and effort. Here’s when to use them:
- Roofing calculators: Estimate materials needed based on roof dimensions. Use for quick, rough estimates.
- Aerial measurement services: Provide precise measurements from high-resolution images. Ideal for complex or hard-to-reach roofs.
- Drone/photo apps: Capture detailed images and videos of your roof. Helpful for inspecting inaccessible areas or checking work progress.
Quick rule: Use digital tools to supplement, not replace, manual measuring. Always verify results with a physical check.
Preparing the Site and Establishing Reference Points
Clear the work area of obstacles that could trip you up during measurements. Set a stable baseline from eave to ridge to anchor your measurements consistently. Mark corners and key reference points so you can reproduce measurements from different angles.
Double-check that the baseline stays true as you move across the roof edge. Use visible markers or chalk lines to keep lines aligned. If in doubt, verify reference points against manufacturer guidance or local building guidelines.
Visual checkpoints to confirm roof shape
Before you start measuring, take a visual walkaround of your roof. This helps confirm its shape and identifies potential obstacles.
- Hip roofs: Check where the slopes meet at 90-degree angles. These are hips.
- Valley roofs: Look for V-shaped intersections where two slopes meet. These are valleys.
- Gable roofs: Identify ends of the roof that come to a triangular peak. These are gables.
- Dormer roofs: Check for small, separate roofs on dormers protruding from the main roof.
- Chimney locations: Note where chimneys sit and if they’re centered or offset.
Quick rule: Mapping these features first ensures accurate measurements and helps plan material needs.
Measuring around obstructions
Roofs with chimneys, skylights, or vent stacks require careful measuring. Here’s how to account for these obstacles:
Chimneys: Measure from the eave to the base of the chimney, then from the top of the chimney to the ridge. Add these together and divide by 2 for the average length. Account for flashing with extra material.
Skylights/vent stacks: Treat these like small valleys. Measure from eave to skylight base, then from skylight top to ridge. Average and add for flashing.
Always measure twice – once around the obstruction and once over it – to ensure accuracy.
Step-by-Step Method for Measuring a Simple Gable Roof
Begin by measuring the length and width of the roof section from eave to eave and side to side. Record these numbers and multiply to estimate basic area. Adjust for pitch by using a simple factor or rule from the official guidance you are following.
Convert the adjusted area into roofing squares or another accepted unit per local practice, then add a reasonable waste allowance. Keep notes organized so you can audit measurements during ordering. Always check the latest instructions from your shingle manufacturer or local building codes.
Step-by-Step Process
Follow these practical steps to accurately measure your simple gable roof, ensuring you get the right amount of shingles for the job.
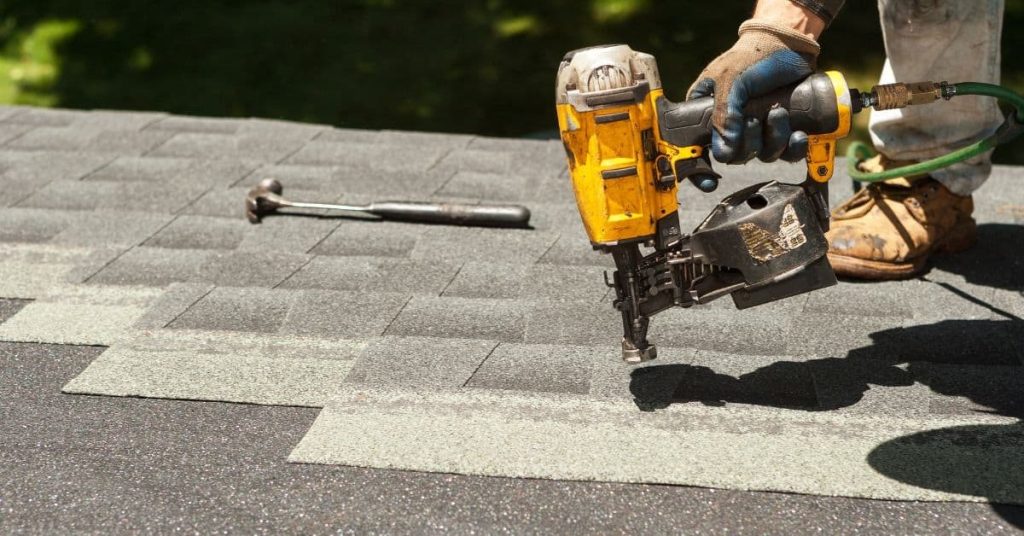
- Safety first: Inspect your ladder and wear appropriate safety gear before climbing onto the roof. Establish reference points on the ground for accurate measurements.
- Measure the length of the roof ridge using a tape measure or laser measurer, from one peak to the other. Note this down as ‘L’.
- At the eave (bottom edge), measure the width of the roof perpendicular to the ridge. This is your ‘W’.
- Calculate the area of the roof: A = L x W. This gives you the square footage.
- Measure the roof’s pitch using one of the methods mentioned earlier. Then, adjust your calculated area by the pitch factor (found in roofing manuals or online calculators) to get the effective roof area.
- Convert the effective roof area to roofing squares: 1 square = 100 sq ft. Divide your effective area by 100 to find out how many squares you need.
- Add a waste percentage (usually 10-15%) for cut-offs, breakage, and mistakes. Multiply your squares by this factor to determine the total number of bundles needed.
- Clean up any debris from the roof and double-check your calculations before ordering materials.
Calculating Roof Pitch and Its Impact on Material Needs
Measuring your roof’s pitch is crucial for choosing the right shingles that can withstand the angle and weather conditions.
- Rise/Run Method: Measure 12 inches along the roof, then mark where it rises. Divide rise by run to get the pitch (e.g., 6″ rise / 12″ run = 0.5 or a 5:12 pitch).
- Inclinometer: Use this tool to measure the angle directly, giving you the pitch in degrees.
- 12-inch Rise Method: Measure 12 inches along the roof, then see how high it rises. Divide rise by 12 to get the pitch (e.g., 6″ rise / 12″ = 0.5 or a 5:12 pitch).
- Pitch Impact: Higher pitches require shingles with better adhesion and wind resistance. Incorrect material can lead to cracking, staining, or weak bonding.
Example Calculation and Conversion to Shingles
Let’s say your roof is 40 feet long (L) and 20 feet wide (W). The pitch is 6:12. Here’s how you’d calculate the shingle needs:
First, find the area: A = L x W = 40 ft x 20 ft = 800 sq ft.
Next, adjust for pitch using a pitch factor (let’s say it’s 1.15 for this pitch): Effective Area = A x Pitch Factor = 800 sq ft x 1.15 = 920 sq ft.
Now, convert to roofing squares: Squares Needed = Effective Area / 100 = 920 sq ft / 100 = 9.2 squares.
Finally, add waste (let’s use 15%): Total Bundles Needed = Squares Needed x Waste Factor = 9.2 squares x 1.15 = 10.6 bundles. Round up to the nearest whole number: You need 11 bundles of shingles.
Check with your chosen manufacturer for their coverage per bundle (e.g., 33 sq ft/bundle) to ensure you’re ordering enough.
Measuring Complex Roof Shapes (Hips, Valleys, Dormers, Multiple Planes)
Break the roof into measurable rectangles and triangles where possible. Measure each plane separately and add the areas together for a total. For slopes and changes in direction, use small, repeatable methods to estimate the surface area.
Keep careful track of dormers and intersections, as these areas affect material counts. When in doubt, reference a trusted calculation method from manufacturer guidance or codes, and cross-check with a second measurement if feasible. Document any unusual transitions to avoid misreads later.
Handling valleys and hips
Valleys and hips are where your roof’s planes meet. They’re tricky because they change how you calculate linear materials like valley flashing and hip caps.
For valleys, measure the length of each side, then add them together. Divide by 12 to find out how many pieces of flashing you need. Add extra for waste at the ends.
For hips, measure around the hip, not up and over. You’ll get a longer measurement than the roof’s length. Calculate shingles needed like normal, but add extras for each hip. Underlayment needs to be extended up the hips too.
Dormers and intersecting roofs
Dormers stick out from your main roof, creating extra planes. Measure each plane like you would a simple gable. Add these areas together.
At the intersections, you’ll need more flashing and waste shingles. Measure around the dormer’s base to find this length. Divide by 12 for flashing pieces, add extras for waste at corners.
Don’t forget to account for increased underlayment needed where the planes meet. It should extend up and over each intersection.
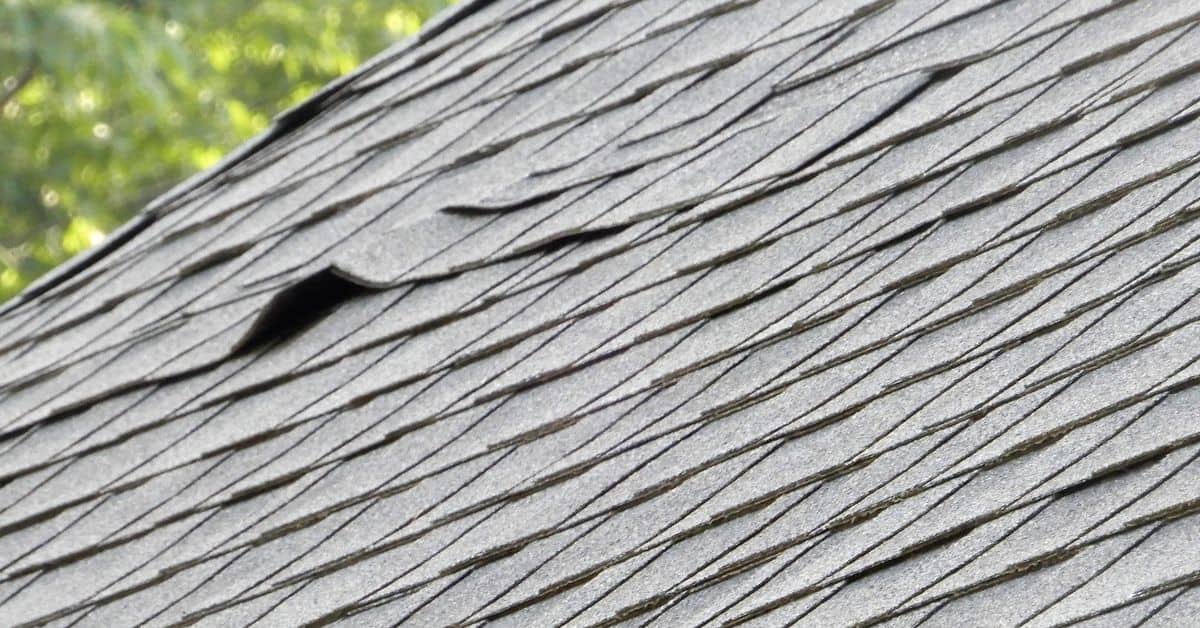
Common Causes of Measurement Errors and How to Test for Them
Inaccurate pitch and misread tape are frequent culprits. Overlooking roof overhangs or irregular edges can also throw off the math. Be prepared to recheck tricky sections as you go.
Run practical tests like re-measuring critical spans and comparing results with alternate methods. Have a second pair of eyes verify complex areas. When results don’t align, pause and consult the product label, manufacturer instructions, or local rules before proceeding.
On-roof verification checklist
Before you start laying shingles, it’s crucial to double-check your measurements on-site. This helps catch any errors before they cost you time and materials.
- Re-check baseline: Ensure your reference points are still accurate from the ground.
- Confirm pitch at multiple points: Measure pitch at ridge, eaves, and midway. Inconsistencies may indicate an error or structural issue.
- Validate perimeter lengths: Re-measure roof edges to ensure they match your initial measurements.
- Check for obstructions: Ensure no new obstacles have appeared since your initial measurement.
- Verify ridge length: Measure the ridge line again to confirm it’s correct.
- Check gable ends: Re-measure the height and width of each gable end.
- Inspect valleys: Ensure valley lengths match your measurements. Any discrepancies could lead to shingle waste or improper installation.
- Confirm overhangs: Double-check that overhang lengths are correct, as incorrect measurements can cause water damage.
Quick rule: Always re-measure before starting any work. It’s better to spend extra time checking than rushing into a mistake.
When to use professional measurement or aerial reports
While DIY measuring is usually sufficient, there are times when it’s best to leave the job to the pros.
Steep roofs: If your roof has a pitch above 7/12, it can be dangerous and difficult to measure accurately on your own. Consider hiring a professional or using an aerial measurement service.
Complex geometry: Roofs with multiple planes, intersecting dormers, or complex hip and valley systems can be challenging to measure accurately. A professional measurement report can provide the precise details you need.
Insurance/permit needs: If your project requires an inspection for insurance purposes or a permit, it’s often best to have a professional measurement report on hand. This ensures that all measurements are accurate and meet any relevant codes or regulations.
When hiring a professional, make sure they provide a detailed report including roof area, perimeter lengths, pitch, and any other relevant information. This will help you ensure you have the correct materials for your project.
Material Estimation: Shingles, Underlayment, Flashing, and Accessories
Translate your measured area into shingle quantities using the agreed unit (squares or bundles) and add a waste buffer. Plan underlayment in rolls and match the length to each roof plane. Include starter strips and field fasteners in your count.
Don’t forget flashing, drip edge, and edging accessories, plus nails or clips required by the system. Compare estimates against the specific shingle style and category you’ve chosen, consulting the product data sheet or installer guide for guidance. Verify all specs with the manufacturer or local code requirements before ordering.
Material specs and standards explained
The right materials make all the difference. They’ll give you a solid, long-lasting roof.
- Shingles: Look for 3-tab or architectural shingles with a wind rating of at least 110 mph. Avoid cheap ones; they crack and stain easily.
- Underlayment: Go for synthetic, 90-min rated underlayment. It’s stronger than felt and lasts longer in hot weather.
- Flashing: Use galvanized steel or aluminum flashing. Avoid plastic; it cracks over time.
- Drip edge: Get metal drip edge to protect your roof’s edges from water damage.
- Nails: Use corrosion-resistant nails, like stainless steel or hot-dipped galvanized. They won’t rust and pop off.
Ordering and contingency planning
Always order extra materials for waste and unexpected cuts. Aim for around 10-15% more than your calculations.
For shingles, consider the type – some have more coverage per bundle than others. Check with your supplier to be sure.
Store materials properly on-site to keep them dry and clean. Cover underlayment rolls at night or when not in use. Keep nails organized and protected from moisture.
Fixes and Best Practices After Measurement Errors
If measurements prove off, consider ordering add-ons to cover variations or arrange staged deliveries to prevent storage issues. Adapt the installation plan to match the corrected quantities and shapes. Keep a clear trail of updated measurements for accountability.
Look for ways to save cost without compromising safety or quality, such as adjusting waste factors within reasonable bounds or coordinating deliveries to reduce handling. Always confirm any changes with the product instructions or local regulations before proceeding.
On-site adjustments and patch strategies
When you realize measurement errors after starting installation, don’t panic. Here are some quick fixes:
Seam Alignment: If you’re short on shingles, adjust seam alignment to make them last. Stagger seams by half a shingle width to hide the gap.
Starter Strip Adjustments: If you’ve got too many starter strips, use them as regular courses higher up the roof. This blends them in and saves material.
Blending Partial Bundles: If you’re short by a few shingles, blend partial bundles into the course above or below to hide the gap. But remember, this is a temporary fix. Reorder if possible.
Preventative best practices for future projects
To avoid repeated mistakes, follow these preventative measures:
Standardize Measurement Process: Create a standard measurement process that includes checking measurements twice and having someone else verify them.
Document Photos and Calculations: Take photos of your calculations and measurements. This helps track errors and learn from past projects.
Keep a Measurement Log: Maintain a log for each roof, noting down all measurements, calculations, and any issues faced. This serves as a reference for future projects.
Conclusion
Getting the measurements right is the difference between a durable roof and costly callbacks. Do the checks carefully, stay within safe limits, and you’ll protect your home’s appearance and its long life.
Double-check that you have all required tools and materials, confirm reference points and level lines, measure each plane in the rough order you’ll work from the ground, verify each measurement twice, and then run the math for shingles, underlayment, and flashing before you buy. Keep the process simple, test small areas first, and document the results as you go so you don’t lose track.
Common mistakes to avoid are guessing dimensions, using damaged or misaligned reference points, and skipping tests for sag or misalignment after you mark. Safety rules to follow are to climb with a buddy when possible, use a sturdy ladder and fall protection as needed, and never rush the measuring or cutting steps. If a roof has complex shapes or you’re unsure about nailing patterns, flashing, or how to translate measurements into material orders, call a professional—you’ll save time and prevent costly errors in the long run. Stay methodical, check twice, and you’ll finish confident and ready to install.
FAQ
How do I verify that my roof measurements match the actual ridge and eaves after the first pass?
Double-check key reference points from the ground with a tape and plumb line. Re-measure the eaves and ridge separately and compare the sums to your initial numbers. If they don’t line up, re-check corners, offsets, and any overhang assumptions before ordering materials.
What should I do if I notice odd gaps or creases when laying out the shingles?
Revisit the edge alignments and make sure your reference lines are straight. If the gaps persist, re-measure the affected area and confirm you followed the roof plan exactly for that section. Do not stretch or fudge measurements to fit a bad layout.
How can I estimate waste without giving sloppy overage to the job?
Plan a reasonable waste factor based on the roof shape and layout. Use conservative estimates for odd cuts and corners. Always check the shingle manufacturer’s guidance on waste and adjust for your specific roof plan.
What checks should I perform before buying shingles and underlayment?
Read the product label and seller instructions for coverage and waste allowances. Confirm your measurements match the manufacturer’s recommended layout. If in doubt, compare notes with the material specs and local rules or instructions.