
Introduction
Shingle-to-metal roof transitions require careful detailing to prevent leaks and extend the life of the roof.
You’ll learn common problems and their causes, plus practical testing approaches and straightforward fixes you can assess in your own project.
The guide walks through real-world tips, rules of thumb, and decision points to help you plan repairs with confidence.
Key takeaways
- Inspect transition for rust, gaps, and improper slope before tearing off shingles.
- Use compatible flashing materials rated for metal roofing and underlayment.
- Sealant choice matters; choose UV-stable, non-bituminous sealant with proper warranty.
- Fastener spacing and corrosion-resistant screws prevent leaks at transitions.
- Test for leaks with controlled water exposure and infrared or dye test if available.
- Plan repairs by cost-benefit: retrofit flashing first; full replacement if roof age exceeded.
Table of Contents
- Introduction
- Key takeaways
- Why Shingle-to-Metal Transitions Fail
- Materials, Compatibility, and Corrosion Risks
- Flashing and Fastener Issues at Transitions
- Diagnostics and Testing Methods
- Repair and Retrofit Solutions
- Tools, Materials Checklist, and Safety Precautions
- Cost Factors and Decision Guide: Repair vs Replace
- Preventive Maintenance and Long-Term Best Practices
- Conclusion
- FAQ
Why Shingle-to-Metal Transitions Fail
The shingle-to-metal interface is a high-stress area where different materials behave differently. Expect movement from expansion and contraction and note that fasteners and sealants often don’t play well across both substrates. This zone is prone to failure when components aren’t fully compatible.
Common failure modes include flashing that can’t keep up with movement, leaks at ridges and valleys, wind uplift affecting shingles near metal edges, and corrosion of fasteners. Water flow changes and snow buildup can worsen these issues and reveal drainage problems. Material differences in flexibility and waterproofing drive maintenance needs and lifespan expectations.
Common failure types (leaks, oil-canning, corrosion, aesthetic issues)
The most common failures at shingle-to-metal transitions are:
Leaks: Water finds its way through improperly sealed or damaged transition areas. Flashing failure is a major culprit.
Oil-canning: Metal panels can dent and buckle due to uneven support or excessive expansion/contraction, leading to leaks and aesthetic issues.
Corrosion: Fasteners and sealants at the transition may corrode over time, causing leaks and structural weakness. This is often due to improper material selection or inadequate protection from elements.
Aesthetic issues: Shingles near metal edges can lift or curl up due to wind uplift, creating an unsightly appearance and potential entry points for water.
How climate and roof geometry worsen transition issues
Climate and roof design play significant roles in stressing transition details:
Wind-driven rain: High winds can force water into tiny gaps at transitions, causing leaks. This is exacerbated by improperly sloped roofs or clogged drip edges.
Temperature swings: Extreme heat and cold cause materials to expand and contract differently, stressing sealants and fasteners at transitions.
Roof geometry also impacts transition performance:
Valleys: Water collects in valleys, increasing the risk of leaks if transitions aren’t properly sealed. Improper valley flashing is a common cause of leaks here.
Pitch changes: Where roof pitch changes, like at dormers or hips, transition details must be carefully designed and installed to prevent leaks due to water flow changes.

Materials, Compatibility, and Corrosion Risks
List all transition materials you see: asphalt shingles at the edge, metal flashing in aluminum, galvanized steel, or copper, fasteners, sealants, and any underlayment. Each material has its own typical rate of degradation and service life to consider. Note how these parts interact at the interface.
Galvanic corrosion happens when two dissimilar metals contact an electrolyte like rain or dew, especially if coatings are damaged. Poor compatibility can lead to rust stains, loose fasteners, or cracked sealants. Sealant choice and underlayment also influence how moisture migrates and where corrosion starts.
Dissimilar metals and galvanic corrosion
Galvanic corrosion happens when two different metals are in contact with each other, especially in the presence of moisture. This can cause accelerated rusting or deterioration of one metal, typically the less noble one.
Example: If you have Galvalume (a zinc-aluminum alloy) and copper touching, rainwater acts as an electrolyte, driving corrosion on the Galvalume side.
To prevent this, keep metals separated using insulating barriers like rubber gaskets or plastic washers. Use protective coatings and avoid direct metal-to-metal contact at transitions.
Sealants, membranes, and underlayment compatibility
Choose sealants that are compatible with both your shingles and metal roofing. Asphalt-based adhesives can degrade aluminum, while silicone or polyurethane sealants work well with most materials.
For underlayments, use products designed for both shingle and metal roofs. Some asphalt-saturated felts can trap moisture, promoting corrosion. Instead, opt for synthetic underlayments that allow moisture to escape.
Warning: Avoid using incompatible sealants or underlayments. Look out for signs of cracking, peeling, or discoloration, which indicate incompatibility and potential leaks.
Flashing and Fastener Issues at Transitions
Understand each flashing type used at the transition, including step, counter, throat, and valley profiles. Improper detailing such as misaligned planes or gaps creates water pathways and potential uplift. Proper interaction with metal panels is essential for continuous waterproofing.
Fasteners near transitions can be mislocated, under- or over-driven, or made from corrosion-prone material. Look for signs of leaks or wind uplift linked to these fasteners. A good detailing plan keeps sealant priorities clear and ensures backing materials support the flashing.
Flashing Failure Modes and Proper Detailing
Improperly installed or detailed flashing is a common culprit behind leaks at shingle-to-metal transitions. Here are typical mistakes to avoid:
Misaligned planes, missing bends, or gaps in flashing create pathways for water intrusion. Counterflashing should overlap step flashing and be properly terminated into the wall or roof surface.
Proper detailing involves ensuring each piece of flashing is correctly lapped, bent, and secured to maintain a continuous waterproof barrier.
Fastener Selection and Common Installation Errors
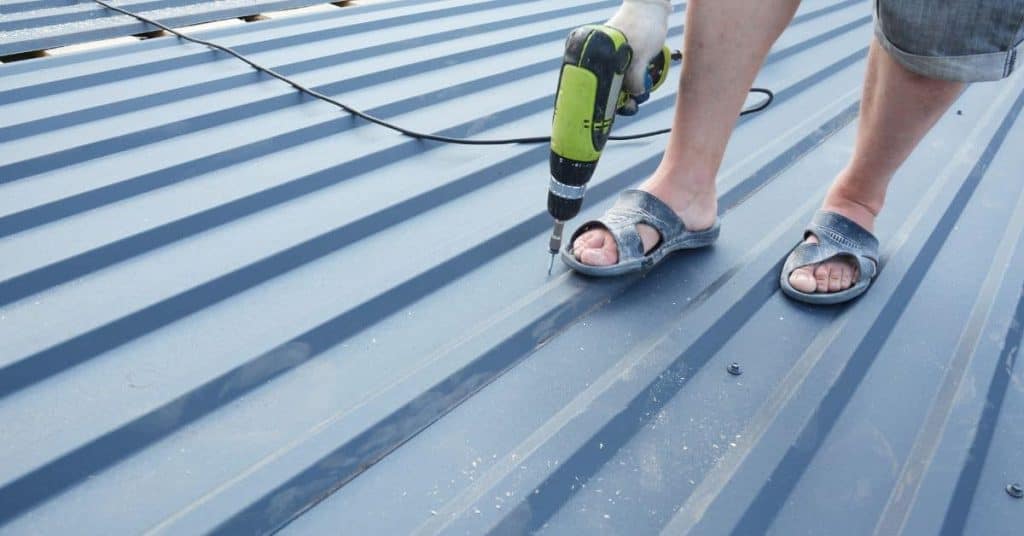
Using the wrong fasteners or installing them incorrectly can lead to leaks or panel slipping at transitions. Here are mistakes to avoid:
- Wrong material: Avoid using nails with metal heads on metal roofs due to corrosion risks.
- Incorrect spacing: Follow manufacturer’s guidelines for proper screw spacing to prevent uplift.
- Under- or over-driven: Incorrect torquing can cause leaks or panel damage. Use a torque driver set to the recommended setting.
- Missing washers: Omitting washers can lead to leaks and corrosion.
Regularly inspect fasteners, especially after severe weather, and tighten or replace as needed.
Diagnostics and Testing Methods
Plan a methodical inspection around the transition area, checking flashing integrity, seals, and fasteners. In the attic, look for staining patterns and daylight indicating path leaks. Don’t forget to inspect gutters and downspouts for drainage issues that can masquerade as panel leaks.
Use a sequence of tests: start with visual checks, then moisture observations, followed by infrared scanning if available. Controlled water tests can help confirm suspected joints, and moisture meters can verify decking conditions. Always confirm findings before committing to fixes.
Controlled water (hose) tests and how to perform them safely
A controlled hose test is the best way to pinpoint active leaks. Here’s how:
Safety first: Use a sturdy ladder, secure it properly. Wear non-slip shoes, safety glasses. Never test in wet or icy conditions.
Start at suspected areas. Spray water from top down, mimicking rain. Have someone inside to check for leaks. Document findings with photos and notes.
Non-invasive diagnostics: attic checks and IR/moisture meters
Attics reveal much about roof leaks. Look for stains, daylight, or mold. Map potential leak paths back to the deck.
Infrared cameras show thermal anomalies, indicating moisture. Use them in low light, after a few hours of no rain. Moisture meters confirm wet spots.
Remember, no power tools in attics with insulation. Wear protective clothing and a headlamp.

Repair and Retrofit Solutions
Targeted flashing repairs use compatible materials and correct overlaps, terminations, and inspection points. Consider best-practice sealants and metal flashings that suit the adjacent shingles and panels. Ensure the repair details prevent further seepage and uplift.
Retrofit options include overlay repairs, step-down flashing, and upgrades to backing or moisture barriers. Match underlayment to the existing roof assembly and be mindful of substrate compatibility. When in doubt, plan for a thorough evaluation of the whole transition to avoid patchwork failures.
Band-aid vs. permanent repairs: when to do each
Sometimes you need a quick fix, other times it’s best to tackle the problem head-on. Here’s how to decide:
Temporary fixes (band-aids): These are great for small leaks or minor issues. They buy time until you can do a proper repair.
Permanent repairs: Go for these when the damage is significant, materials are degraded, or you’re dealing with recurring problems. It’s more work but it lasts longer and prevents future headaches.
Rule of thumb: If the problem is small and localized, a band-aid might do. But if it’s widespread, persistent, or causing secondary damage, dig in and do it right.
Step-by-step reflash and overlap repair approach
This sequence restores a watertight shingle-to-metal transition by removing failed materials and installing correct ones.
- Remove failed flashings, fasteners, and underlayment. Be careful not to damage surrounding materials.
- Install compatible underlayment or moisture barrier. Follow manufacturer’s instructions for proper overlap and termination.
- Install new metal flashing. Ensure it’s wide enough to overlap shingles and extend up the metal roof at least 2 inches.
- Secure flashing with appropriate fasteners. Use stainless steel or hot-dipped galvanized nails or screws. Avoid mixing metals to prevent galvanic corrosion.
- Seal all nail/screw heads and overlaps with a high-quality sealant. Use a caulk gun for precision application.
- Check your work. Inspect for any missed spots, proper overlap, and secure attachment.
- Test the repair. Lightly spray the transition area with water to ensure it’s watertight.
Tools, Materials Checklist, and Safety Precautions
Gather core tools for inspection and repair, such as measuring devices, ladders, pry bars, utility knives, caulk guns, and drill drivers. Bring sealants, butyl tape, corrosion-resistant screws, metal fl