
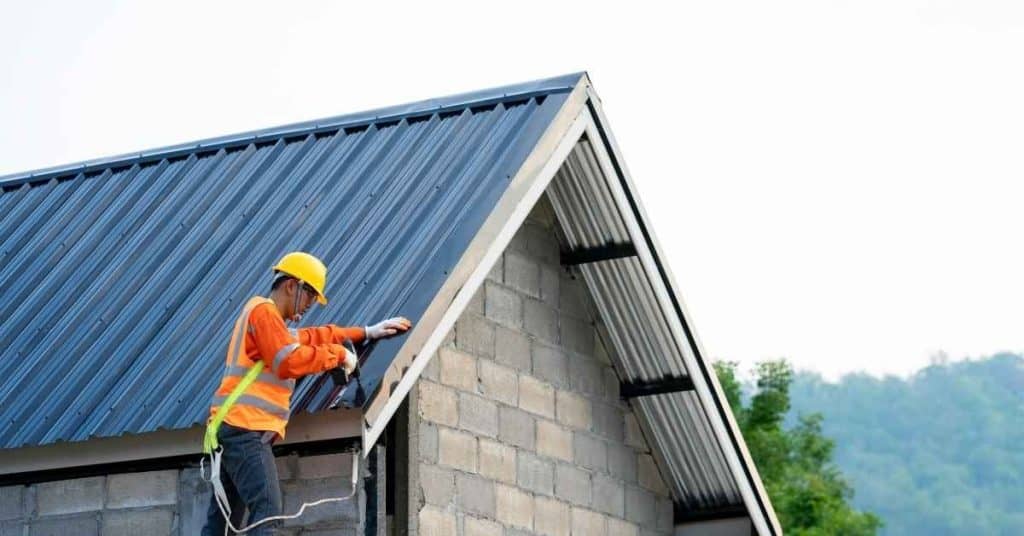
Introduction
Metal roofing directly on felt means installing metal panels over a roof underlayment without a solid wood deck. This setup can work in some situations, but it requires careful attention to the underlayment condition and fastener plan. Before you start, inspect the felt for tears, lifting, or bunching, and decide if you need to address these with patches or replacement.
Test the setup by walking the panels gently and checking for gaps or movement after temporary fasteners, and listen for any creaks. If you see loose edges or moisture behind the felt, stop and reassess, because a small issue can become a leak. Fixes depend on what you find, but plans usually involve securing a solid fastening pathway and ensuring a proper seal at overlaps; always follow manufacturer instructions and local rules.
Key takeaways
- Inspect underlying felt for delamination, damp spots, or exposed edges before installing metal.
- Routinely check for corrosion under panels and rust streaks from compromised felt.
- Perform on-roof tests for panel movement, wind uplift, and foam or sealant failures.
- Always wear fall protection and harness when inspecting exposed roofs.
- Permanent fixes require replacing felt or underlayment and resealing all panel joints.
Table of Contents
- Introduction
- Key takeaways
- Why Installing Metal Roofing Directly over Felt Happens
- Risks and Failure Mechanisms of Metal over Felt
- Visual and Physical Signs That Metal over Felt Is Problematic
- On-Roof Tests and Diagnostics
- Short-Term Repairs and Temporary Fixes
- Permanent Fixes: When to Replace Felt, Underlayment, or Panels
- Material Specs, Compatibility, and Standards
- Cost Estimates, Lifespan Expectations, and Roi
- Conclusion
- FAQ
Why Installing Metal Roofing Directly over Felt Happens
Homes and renovations often push for speed and lower upfront costs. In many cases, metal is put over existing felt to save on tear-off time and disposal hassles. Some projects are accidental, while others are deliberate choices driven by contractor recommendations or availability of materials.
Look for situations where a quick cover is chosen for a renovation, or when an older roof is left in place to avoid a full replacement. Always verify what the plan was with the installer and what the manufacturer allows for underlayment and metal mating surfaces.
Historical and regional practices
In some regions, it’s common practice to install metal roofing directly over existing felt. This is often due to historical building traditions or local codes that allow for this method.
For instance, in areas with a long history of using metal roofs, like the American Midwest, installing metal over felt might be seen as a quick and cost-effective way to replace an old roof.
However, it’s crucial to understand that while this practice may have been acceptable in the past, modern building codes often require proper ventilation and barrier layers under new roofs.
Contractor mistakes and homeowner DIY choices
Both contractors and homeowners can make errors that lead to metal roofing being installed over old or inappropriate felt. Here are some common mistakes to avoid:
- Inadequate inspection: Not checking the condition of the existing felt before installing new metal roofing.
- Ignoring felt age: Assuming that old felt is still serviceable and not replacing it when necessary.
- DIY shortcuts: Homeowners may try to save money by skipping steps, like removing damaged felt or installing a new underlayment.
- Following outdated practices: Some contractors might still follow old methods that don’t meet current building codes.
To prevent these issues, always ensure your contractor inspects the existing roof thoroughly and follows modern installation practices. If you’re doing it yourself, take the time to learn proper techniques and don’t cut corners.
Risks and Failure Mechanisms of Metal over Felt
Felt beneath metal can trap moisture and hinder drainage, which invites problems over time. Corrosion concerns arise when moisture sits against metal fasteners and panels. The combination can lead to accelerated wear and potential leaks as conditions change.
Fastener issues are common with hidden underlayment, including loosening and seal failure. Long-term durability depends on how well water can escape and how compatible the materials are with each other. Check with a professional if you’re unsure about the set-up.
Moisture trapping and rot
Felt paper is designed to absorb water, which is great for protecting your roof from leaks. But when you install metal roofing directly over it, that moisture gets trapped. Here’s why that’s a problem:
The moisture can’t escape, so it sits there, slowly rotting the underlying structure of your roof. Mold and mildew love this environment too, setting up shop and causing even more damage.
Over time, this trapped moisture weakens your roof’s structure. It’s like a slow-motion disaster waiting to happen.
Corrosion and chemical incompatibilities
The asphalt in felt paper can react with the metal in your roofing panels. This reaction can cause corrosion, which eats away at the metal over time.
Some felts have additives to make them fire-resistant. These chemicals can also react with the metal or coatings on your roofing panels, accelerating corrosion and damaging the finish.
Even if you don’t see any rust right away, these chemical reactions are still happening. It’s a silent enemy that could cause big problems down the road.
Visual and Physical Signs That Metal over Felt Is Problematic
Staining or discoloration on metal near edges can indicate trapped moisture. Look for blistering or bubbling where panels meet the roof plane. Buckling or warping of sheets may signal underlying moisture or substrate problems.
Fasteners that appear to be leaking or weathered, along with loose or backing-out screws, require attention. If you notice damp insulation or a musty smell, treat these signs as urgent and inspect further with a pro.
Exterior visual checkpoints
Before grabbing your ladder, use this checklist to spot potential issues from ground level or a safe vantage point.
- Rust streaks: Look for vertical red or brown lines. They signal moisture and corrosion.
- Panel separation: Check for gaps between metal panels. Wide spaces mean water can get in.
- Loose seams: Inspect where panels meet. If they’re lifting, water’s getting through.
- Visible fastener problems: Look for popped or missing nails/screws. They let water in.
- Buckling: Panels should lie flat. If they’re warped, there’s an underlying issue.
- Water stains: Check for dark spots on siding or walls. They hint at leaks.
- Gutter issues: Clogged or damaged gutters can cause water to back up and leak under the roof.
- Missing drip edge: This prevents water from getting behind the fascia. If it’s gone, water can seep in.
Quick rule: If you spot any of these, don’t wait – get up there and investigate further.
Interior inspection clues
Before climbing into your attic, use this checklist to find signs of a failing roof assembly from inside your home.
- Damp insulation: Feel around for wet or damp areas. It’s a sign of water intrusion.
- Rust stains: Look for orange or red spots on ceilings or walls. They indicate leaks and corrosion.
- Light penetration: Check for sunlight coming through the roof. It means your barrier is compromised.
- Water spots on joists/rafters: Dark spots or streaks signal water damage.
- Mold/mildew: Smell or see any? It’s a sign of moisture and potential rot.
- Warped or sagging ceilings: These are signs of serious water damage that needs immediate attention.
- Wet spots on the floor: Check for damp areas, especially around vents or skylights.
- Missing or damaged shingles (if visible): From inside your attic, look for gaps in your roof’s protective layer.
Quick rule: If you find any of these signs, don’t ignore them. Get up into your attic safely and investigate further.
On-Roof Tests and Diagnostics
Contractors perform non-destructive checks such as moisture meters and surface investigations to see if water has penetrated under felt. They may probe seams and fasteners to test for looseness or corrosion risk. Homeowners can request an assessment of underlayment condition and fastener integrity from a qualified roofer.
Ask for documentation of performed tests and what they indicate about drainage, ventilation, and moisture paths. If in doubt, verify that tests align with local building code guidance and manufacturer recommendations.
Fastener and seam inspection procedures
Before you start any roofing work, use this checklist to inspect your roof’s fasteners and seams. This will help you identify potential issues early and prevent costly rework.
- Check nail heads: Ensure all nail heads are flush with the shingle surface or slightly below. Any protruding nails can cause leaks and damage.
- Test nail tightness: Gently pull on a few nails at different locations to ensure they’re secure. If any wobble, they may need retightening.
- Inspect staples: For roofs with staple guns, check that all staples are fully seated and not backing out.
- Check seam integrity: Walk your roof’s ridges, hips, and valleys to ensure seams are intact. Look for any cracks, gaps, or lifted edges.
- Examine flashing: Inspect all flashings around vents, chimneys, and skylights. Ensure they’re securely fastened and show no signs of rust or damage.
- Check underlayment: If accessible, check the underlayment for any punctures, tears, or signs of water damage.
- Inspect drip edge: Ensure your roof’s drip edge is securely fastened and in good condition. This prevents water from getting behind your fascia.
- Check gutter attachment: Make sure gutters are securely attached to the fascia. Any loose or missing hangers can cause leaks and damage.
Quick rule: Always inspect your roof after severe weather events, such as heavy rain, snow, or windstorms. This helps catch any issues early before they become major problems.
Moisture mapping and infrared/thermal checks
Before you start any roof repair or replacement, you need to find out if there’s trapped moisture. This can cause rot, mold, and other big problems down the road.
When to check: If your roof is leaking, or it’s been a while since the last inspection. Also, before installing new insulation or covering up old materials.
Here’s what you need to do:
– Use a moisture meter to check for dampness in your roof’s structure. Press it against the surface and follow the manufacturer’s instructions. If it shows high moisture content, there might be a problem.
– For a more detailed look, use an infrared/thermal camera. This shows temperature differences, helping you spot hidden moisture. It’s like having X-ray vision for your roof. But remember, this tool is no substitute for good old-fashioned inspection and common sense.
– Always check the product labels and manufacturer instructions to ensure you’re using these tools right. And if you’re not sure about anything, don’t hesitate to call a pro. It’s better to be safe than sorry when it comes to your roof.
Short-Term Repairs and Temporary Fixes
Temporary fixes focus on reducing water ingress and protecting fasteners until a permanent plan is in place. Sealing exposed gaps with appropriate sealants can help, but avoid relying on them as a long-term solution. Improve ventilation where possible to help dry conditions under the metal.
Be mindful of safety and code constraints when applying any patch or seal. Always confirm with the product label, manufacturer instructions, or local code guidance before proceeding.
Patch and seal options for seams and fasteners
When you find leaks at seams or around fasteners, use these temporary fixes to stop the water intrusion until a permanent repair can be made.
For seams, apply a generous bead of roofing sealant along the entire length. Use a caulking gun and ensure the sealant is compatible with your metal roofing material. Squeeze out any excess to prevent it from washing away in rain.
If the seam is badly damaged, consider using underlayment patches. Cut the patch to size, apply roofing adhesive, and press firmly into place. Seal the edges with roofing sealant.
For fasteners, check if they’re loose or missing. Tighten any loose screws or nails. If a nail is missing, use a screw that’s long enough to penetrate through the felt and into the sheathing. Seal around the fastener with roofing sealant.
Improving ventilation and drying
Trapped moisture is a major issue when metal roofing is installed directly over felt. Improve ventilation to help dry out the trapped moisture and slow down deterioration.
Open up any attic vents you have. If your attic doesn’t have enough vents, consider installing more. The general rule is 1 square foot of vent for every 300 square feet of attic floor space.
If you have a powered attic fan, use it to draw out hot air and moisture. If not, consider installing one. They can be controlled by a thermostat or humidistat to run only when needed.
In the meantime, dehumidify your living space if necessary. This will help reduce the amount of moisture that could potentially migrate up into the attic and get trapped under the metal roofing.
Permanent Fixes: When to Replace Felt, Underlayment, or Panels
Replacement decisions consider the extent of damage, the age of the existing roof, and the expected lifespan of components. Sometimes a full reroof is the most durable option, but selective panel or underlayment replacement may suffice in limited areas.
Discuss costs and lifespan expectations with a pro, and ensure plans comply with building codes. Verify that the chosen approach aligns with manufacturer guidelines for metal and underlayment compatibility.
Best practices for complete re-roofing
The best way to ensure a long-lasting, problem-free metal roof is to follow these steps when doing a full replacement:
1. Remove the old felt: Start by stripping off all the existing felt. This might seem like extra work, but it’s crucial for preventing future moisture issues.
2. Inspect and repair the substrate: Once the felt is gone, inspect the roof decking underneath. If you find any rot or damage, repair it before installing new underlayment. This step ensures your new metal roof has a solid base to sit on.
3. Select and install underlayment: After the substrate is in good shape, choose an approved underlayment for your climate zone. Install it according to manufacturer’s instructions, ensuring there are no gaps or overlaps that could trap moisture.
4. Install metal panels correctly: Finally, install your new metal roofing panels following the manufacturer’s guidelines. Make sure fasteners are properly spaced and sealed to prevent water intrusion.
Partial replacement and retrofit options
In some cases, you might not need to replace your entire roof. Here’s when and how to do partial replacements or retrofits:
1. When to consider a retrofit: If only certain areas of your felt are damaged, or if your metal panels are still in good condition, overlaying with an approved underlayment can be an option.
2. Using furring strips: Another method is installing furring strips over the existing felt. This creates a new surface for your metal panels to sit on, preventing direct contact with the old felt. This method should only be used if the felt is still intact and not showing signs of significant damage or rot.
3. Safety first: Regardless of which retrofit option you choose, always prioritize safety. Make sure your roof can support your weight, wear appropriate fall protection gear, and work during dry conditions to prevent slips and falls.
Material Specs, Compatibility, and Standards
Understanding material compatibility helps homeowners avoid future problems. Consider metal type, coating, and thickness in relation to the underlayment and venting. Ask for explicit guidance on what underlayment is approved for use with the chosen metal.
Check standards and certifications with a professional, and have them point to the exact sections on labels or data sheets. When in doubt, reference manufacturer instructions and local building code requirements.
Metal panel materials and coatings explained
The metal you choose for your roofing panels and the coating applied can significantly impact their compatibility with asphalt felts. Here are some options:
- Steel: Common, affordable. Look for Galvalume or galvanized coating. Avoid bare steel; it rusts.
- Aluminum: Lightweight, durable. No coating needed; naturally resistant to corrosion.
- Zinc: High-end, long-lasting. Good chemical resistance but can be pricey.
- Coatings: Look for PVDF (polyvinylidene fluoride) or Kynar 500 for excellent durability and fade resistance.
- Avoid: Bare metals and low-quality coatings; they’ll crack, stain, or bond poorly with felts.
Recommended underlayment types and fastening systems
Using the right underlayment and fasteners can prevent common issues when installing metal roofing over felt. Here’s what to consider:
Underlayments: Synthetic, breathable options like Tyvek or Typar are ideal. They resist moisture better than felts and won’t degrade as quickly.
Separation layers: Consider using a separate layer between felt and metal to prevent bonding issues. Building paper works well.
Fastening systems: Use corrosion-resistant fasteners suitable for your chosen metal panel. Follow manufacturer’s guidelines for spacing and installation.
Cost Estimates, Lifespan Expectations, and Roi
Financial planning should weigh repair options against full replacement and the impact on home value. Lifespan expectations for components help set realistic budgets and timelines. Insurance considerations may shift based on whether the roof is repaired or replaced.
Identify factors that drive cost variation, such as material choices, roof size, and access limitations. Always verify with suppliers and contractors about what is included in estimates and what can affect long-term value.
Compare repair vs full replacement scenarios
When your metal roof has issues, you’ve got options: temporary repairs, partial retrofits, or a full re-roof. Let’s weigh the pros and cons.
Temporary Repairs: Cheapest upfront, but band-aids don’t last. Expect 1-3 years before redoing.
Partial Retrofit: More expensive than patches, but lasts longer – around 5 to 7 years. Keeps your home looking uniform too.
Full Re-roof: Most costly, but gives you the longest lifespan (20+ years) and best curb appeal. It’s a big job, but it might be worth it if your felt underlayment is shot.
Insurance, warranties, and code considerations
Metal-over-felt installations can affect your insurance claims and warranties. Here’s what you need to know.
Warranties: Many manufacturers won’t cover metal roofs installed over felt if the felt fails first. Keep those warranty docs handy.
Insurance Claims: If your roof leaks due to felt failure, insurance might not cover it if they find out you knew about the problem. Document any inspections and repairs.
Building Codes: Some areas require a solid deck under metal roofs now. Check local codes before starting work. It’s the law, after all.
Conclusion
Installing metal roofing directly over felt can seem fast, but the real payoff comes from protecting safety, durability, and curb appeal—so treat the next steps like a concrete repair plan, not a finish-off job.
First, inspect a small, representative roof area and perform the on-roof tests to confirm water tightness, then decide whether you can refresh with proper underlayment or must replace felts and install compatible panels; next, select the right underlayment and confirm it meets the manufacturer’s standards, then plan short-term fixes only as a bridge to a solid, permanent solution, and finally schedule the full fix with a clear sequence for removal, reapplication, and inspection.
Avoid common mistakes such as rushing to fasten metal without confirming underlayment compatibility, ignoring signs of moisture or rot, or skipping controlled tests; safety rules matter most—work with a partner, use fall protection, keep the work area dry, de-energize tools, and test a small area first before expanding.
If you see widespread moisture intrusion, sagging, or complex roof geometry, or you’re unsure about underlayment compatibility and standard compliance, call a professional rather than pushing ahead. Stay practical, stay safe, and you’ll finish with a roof that looks solid and lasts.
FAQ
What should I check on my underlayment before proceeding with metal roofing over felt?
Look for signs of wet spots, mold, or delamination. Check that the felt is intact and not peeling or damaged in high-risk areas. Follow the manufacturer’s instructions for any underlayment requirements.
Can I repair damaged felt or underlayment instead of replacing it?
Small, localized damage may be patchable, but widespread wear means replacement is the safer route. If you’re unsure, verify with the product label or instructions and consider a professional opinion.
What are safe, temporary fixes if I’m not ready to replace everything?
Temporary fixes should only buy you time and not mask core problems. Avoid relying on makeshift patches or sealing methods that trap moisture. Document the issue and plan a proper repair or replacement schedule.
How do I decide between replacing felt, underlayment, or entire panels?
Consider the extent of damage, moisture history, and the age of the roof parts. If the underlayment shows widespread deterioration or repeated leaks, replacement is usually wiser. Check the product instructions and local guidelines for guidance.