

Introduction
Two layers of shingles indicate an overlaid roof that needs careful inspection and possible repairs.
This guide shows how to spot warning signs, perform basic checks, and decide when to seek professional help.
Key takeaways
- Check local codes to confirm maximum allowed roof shingle layers.
- Overlay can save labor, but often costs more long-term repairs.
- Two-layer roofs may void warranties and complicate insurance claims.
- Expect higher attic heat, reduced ventilation, and accelerated shingle wear.
- Hire an experienced contractor for evaluation, permits, and proper tear-off.
- Budget for full tear-off, disposal, and possible roof deck repairs.
Table of Contents
- Introduction
- Key takeaways
- Visual signs that suggest two shingle layers
- Simple on-roof tests a homeowner or contractor can perform
- Building codes, permits, and local limits on layers
- Insurance and shingle manufacturer warranty implications
- Risks and long-term durability of two-layer roofs
- Cost comparison: overlay vs full tear-off and realistic budgeting
- Permits, inspections, and hiring the right contractor
- What to do if you find two layers: options and decision framework
- Conclusion
- FAQ
Visual signs that suggest two shingle layers
From ground level or a safe ladder stance, you can spot telltale roofline changes, ridge profiles that look unusually thick, and edges of shingles stacked or offset in a way that doesn’t fit a single layer. These clues don’t require stepping on the roof, just steady observation of the top edge and along transitions. Use binoculars or a drone if available, and document any doubled lines with photos from multiple angles.
Look for signs of added weight or sagging that might show up as soft spots, deflection along valleys, or midspan bowing. Distinguish layering from normal wear by noting color differences, ghosted lines, or texture changes caused by granule loss, moss, or debris. Note where clues are most visible, such as hips, ridges, eaves, and areas with shading that can exaggerate depth, and plan to verify with a pro if you suspect more than one layer. Stay off wet or steep sections and keep observation distances safe while you gather information for a quick consult with a roofer or inspector.
Edge and Rake Inspection Tips
Use these tips when checking eaves, rakes, and gable edges where overlapping layers are most visible.
- Check for offset lines: Look at the edge of shingles. If they’re staggered neatly but seem thicker than usual or have a double line, you might have two layers.
- Inspect rake edges: At the ends of your roof, check if shingles are doubled up or offset.
- Examine gable edges: Where the roof meets the wall, look for any signs of double-layered shingles.
Quick rule: If you spot offset lines or doubled-up shingles at these edges, it’s a strong sign of two layers.
Common Camouflage and Misleading Appearances
Sometimes, layers can be hidden by certain factors. Here’s how to avoid false positives:
New shingles applied neatly: If your roof looks freshly re-shingled but you suspect it might have two layers underneath, look for any signs of offset or thickness at the edges.
Heavy granule loss: This can make shingles appear thinner and hide underlying layers. Check for any other signs like sagging or unusual ridge lines.
Coatings: Some homeowners apply coatings to their roofs, which can disguise layering. If you suspect this, try to find an uncoated area or look at the edges where coatings might not have been applied evenly.
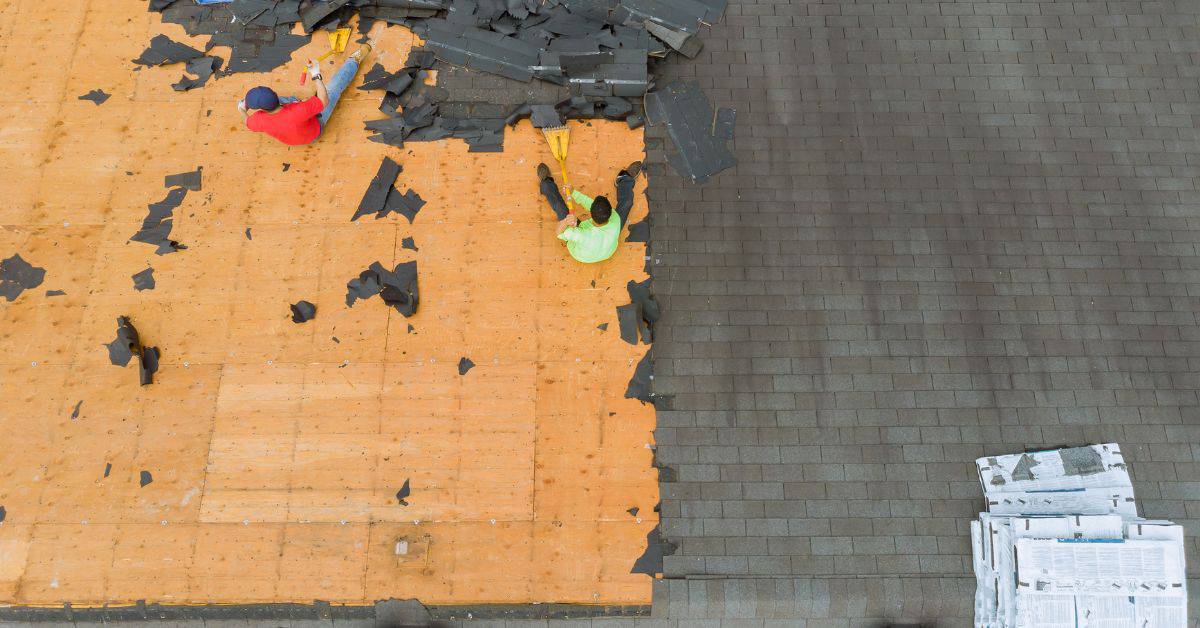
Simple on-roof tests a homeowner or contractor can perform
Safety always comes first, so set up a solid ladder, use fall protection, and wear proper PPE before any on-roof check. If conditions feel unsafe, stop and reassess; do not push beyond your comfort zone. Keep testing to controlled, light-touch actions that minimize damage while you learn what the roof can tolerate.
Perform a gentle pry on a loose shingle to assess substrate stability without tearing up the edge. Check attic or ceiling nail patterns and fastener spacing for misalignment or unusual clusters that might signal an overlay issue. Tap shingles along the edge to listen for differences in sound that could indicate additional layers or voids, and document what you find with photos from multiple angles for a contractor’s review.
Attic Inspection for Nail Pattern and Light Penetration
Inspecting your attic can reveal a lot about your roof’s layers. Here’s what to look for.
- Dual nail rows: Check for two parallel lines of nails. This could indicate an overlay.
- Elongated nail holes: Long, stretched-out nail holes suggest that shingles have been nailed through once before.
- Daylight through seams: If light is shining through your roof’s seams, it’s a sign of overlays or damaged underlayment.
Quick rule: If you find any of these signs, consider getting a professional opinion before proceeding with repairs.
Prying and Lift Tests — Method and Risks
Gently lifting a shingle corner can help you feel for additional layers. Here’s how to do it safely.
Tools needed: A flathead screwdriver or a pry bar with a thin edge.
Start at the bottom of your roof, near the eaves. Insert your tool under a loose shingle corner and gently lift. Be careful not to damage the shingles or cause them to curl up.
Risks: If you’re not careful, you could damage your shingles or create voids that will compromise your roof’s integrity. This could also potentially void warranties if they exist. Always be gentle and stop if you feel resistance.
Building codes, permits, and local limits on layers
In many jurisdictions, an overlay is restricted by code, especially when more than one existing layer is present or when weight and ventilation concerns come into play. The rationale often centers on load, ventilation, nail penetration, and warranty implications, so expect varying interpretations across regions. Check your local adopteds and amendments to see where overlays stand in your area.
Verify permit and inspection requirements early, since some places require a tear-off or special plans for any overlay. Be prepared to document existing layers safely and to provide contractor drawings or installation details if a permit is needed. Understand that exceptions exist, particularly for specific roof pitches, materials, historical districts, or seismic zones, and ask questions about how those rules apply to your project.
How to check your local code quickly
Finding out about your local building codes is crucial before you start any roof work. Here’s how:
1. Visit your municipal website or contact the permit office. They should have information on adopted building codes and amendments.
2. Ask for specific sections related to roofing, overlays, and shingle layers. Keywords to look for include ‘roof coverings’, ‘overlay’, ‘shingle layer limit’, and ‘re-roofing’.
3. If you’re unsure, don’t hesitate to contact the local building department or a roofing professional for clarification.
When overlays are explicitly prohibited
There are certain situations where adding another layer of shingles is not allowed. Here’s why:
1. Steep Slopes: Overlays on steep roofs can increase the risk of shingles sliding off, especially in high winds. Some jurisdictions prohibit overlays on pitches above 6/12 or 45 degrees.
2. Certain Roof Types: Flat and low-pitched roofs may not allow overlays due to drainage issues and the risk of water ponding. Metal, tile, or slate roofs might also have specific overlay restrictions.
3. Structural Issues & Fire Zones: If your roof has structural damage or is in a fire-prone area, overlays may be prohibited to ensure safety and prevent further issues.
Insurance and shingle manufacturer warranty implications
Disclosures and coverage vary by insurer, and adding a second layer can affect how a claim is evaluated or priced. Some policies may have exclusions or require notice, while others might adjust premiums based on the perceived risk of a layered roof. Always inform your insurer about any overlays or re-roof plans to avoid surprises during a claim.
Manufacturer warranties often specify proper installation and existing condition requirements, and overlays can trigger eligibility questions or voids if the roof was not installed according to the warranty terms. Keep a clear record of condition before work, the number of layers, photos, and all communications with the insurer and shingle maker, plus permit and inspection documents for future reference.
What insurers commonly require or deny
Insurers often have specific requirements when it comes to roofing work, especially with overlays. Here’s what you need to know:
Confirm coverage before work begins. Contact your insurer beforehand to ensure they cover overlays and understand their conditions. Some may require a certain number of layers be removed or insist on complete replacement.
Insurers typically concerned about previous layers increasing the risk of leaks and faster deterioration. They might deny claims if they deem the overlay a nonstandard repair, leading to more damage.
To avoid surprises, get it in writing from your insurer before starting any work. This includes their requirements, exclusions, and any potential premium changes.
Manufacturer warranty limitations and voiding actions
Shingle manufacturers usually have specific terms regarding overlays in their warranties. Here’s what to look out for:
Check product literature. Review your shingles’ warranty information carefully. Some manufacturers allow overlays under certain conditions, while others strictly prohibit them.
Warranty eligibility often depends on proper installation and no existing warranty violations. Overlays can void coverage if not done correctly or if they cause further damage to the roof structure.
Some actions can also void your warranty, such as:
- Using incorrect nailing patterns
- Not removing all damaged or rotted wood before installing new shingles
- Installing overlays over more than two layers (check local codes too)

Risks and long-term durability of two-layer roofs
Two-layer roofs bring structural and load concerns that may exceed the design limits of some homes, with potential for premature wear if the framing or underlayment is stressed. Evaluate how the added weight interacts with attic ventilation and overall balance of the roof system, especially in climate zones with heavy precipitation or wind exposure. Use a practical checklist to gauge whether your house can tolerate an extra layer without compromising structure.
Layering can trap moisture, reduce ventilation, and accelerate shingle wear through uneven temperatures and granule loss. Hidden deck or sheathing damage may exist under the top layer, affecting insulation and energy efficiency, and resale value can be impacted by the perception of higher maintenance risk. Use a decision framework to weigh long-term durability against short-term savings, and consult a professional when in doubt about load or ventilation limits.
Structural and moisture-related concerns
Added Weight: Two layers of shingles add extra weight to your roof. This can stress the framing, especially on older homes or those with flat roofs.
The added weight increases the risk of roof sag, which can compromise the structure’s integrity and lead to costly repairs down the line.
Moisture Trapping: The second layer traps moisture, reducing attic ventilation. This can lead to rot in the decking and sheathing, shortening your roof’s lifespan and damaging your home’s structure.
Trapped moisture also increases the risk of mold growth, ice dams, and insulation damage, leading to energy inefficiency.
Performance and maintenance implications
Reduced Inspection Access: Two layers make it harder for professionals to inspect your roof thoroughly. This can lead to undetected damage and higher repair costs.
Harder Repairs: With two layers, repairs become more complex. Removing the top layer without damaging the underlying one requires skill and time, increasing labor costs.
Shingle Adhesion: The second layer may not adhere properly to the first, especially if it’s an older roof. This can lead to shingles lifting or peeling, compromising your roof’s weatherproofing and leading to leaks.
Expected Remaining Life: A two-layer roof typically has a shorter lifespan than a full replacement. While the exact life expectancy depends on factors like climate and maintenance, you can expect it to be around 10-15 years less than a new roof.
Cost comparison: overlay vs full tear-off and realistic budgeting
Break down the cost components for both options by listing materials, labor, disposal, permits, and equipment rental without assuming exact figures. Consider how an overlay might limit certain expenses while potentially impacting long-term repair needs or warranty coverage, and compare that against a full tear-off that clears old layers but carries higher upfront labor. Gather multiple quotes to capture regional differences and project scope limitations.
Discuss how long-term value, energy performance, and future maintenance factor into the math. Look at hidden or ongoing costs such as disposal charges, potential underlayment replacements, and any upgrades needed for ventilation. Use a simple budgeting approach to decide whether the perceived savings of an overlay justify the tradeoffs in durability and warranty considerations over time.
Short-term vs long-term financial tradeoffs
Overlays might seem cheaper upfront, but they’re not always the best deal. You save on labor and disposal costs, but you could pay more later.
With overlays, you’re just covering up existing issues. Those problems don’t go away. They might even get worse over time.
Full tear-offs cost more initially, but they let you fix any hidden damage. You’ll likely need fewer repairs in the long run. It’s like fixing a leaky roof now or waiting for water damage to spread.
Ask yourself: Do I want immediate savings or long-term reliability?
Typical additional costs to factor in
Besides materials and labor, there are other costs you shouldn’t overlook. These can add up quickly.
Permits: You’ll need permits for both overlays and tear-offs. Check your local fees.
Structural repairs: If your roof has hidden damage, you might need to fix it before re-shingling. This can add labor and material costs.
Upgrades: You might want to upgrade your underlayment or flashings while you’re at it. These improvements can boost your roof’s performance and lifespan.
Insurance upgrades: Some insurers require certain upgrades for re-roofing jobs. Check with yours before you start.
Permits, inspections, and hiring the right contractor
Permits and inspections vary by local rules, and some areas require them for overlays or reroofs while others may not. Find out what triggers permits in your jurisdiction and how exemptions or thresholds are determined, so you’re not surprised by a later request for documentation. Start with the local building department to confirm requirements for your project scope.
Inspectors verify layer counts and installation quality, so understand what documentation you’ll need and what milestones to expect during the job. Hiring a licensed contractor matters for insurance, liens, and warranty protection, so vet references, review past work, and ensure written scope and timeline are in place. Verify permits yourself by checking status online or with the contractor, and keep records for future inspections or resale.
Homeowner checklist before hiring a roofer
Before you pick up the phone to call a roofer, make sure you’ve got this checklist ready. It’ll save you from headaches later.
- License: Ask for their license number and verify it with your local building department. No license? They might not be insured or qualified.
- Insurance: Confirm they have liability and workers’ comp insurance. You don’t want to be held responsible if something goes wrong.
- Written estimate: Get it in writing, detailing materials, labor, and timeline. A verbal agreement can lead to misunderstandings.
- Permit handling: Ask who’ll pull the permit. If they won’t, you might end up with fines or redoing work.
- References: Check at least three recent references. Don’t be afraid to ask about any issues that came up.
- Past work: Ask for photos of similar jobs they’ve done. Seeing is believing when it comes to quality.
- Certifications: Look for certifications from manufacturers or organizations like GAF, CertainTeed, or the National Roofing Contractors Association.
- Scope of work: Ensure their estimate includes a detailed scope of work. This protects both you and them.
- Warranty details: Ask about warranties on materials and labor. Make sure they’re clear and cover what you expect.
Quick rule: Never hire a roofer without checking these basics. It’s your home, after all.
What to expect during a professional roof inspection
When you’ve hired a pro for your roofing job, here’s what they’ll do during the inspection. It’s their chance to assess the damage and plan the work.
- Roof access: They’ll check if it’s safe to walk on your roof. If not, they might use drones or binoculars.
- Layer count: Pros will count shingle layers. Too many can cause structural issues and void warranties.
- Decking condition: They’ll check the roof deck for damage, rot, or sagging. This affects how they approach the job.
- Ventilation: Pros will look at your vents to ensure they’re clear and functioning properly. Good ventilation prevents moisture buildup.
- Flashing: They’ll check around chimneys, skylights, and other openings for proper flashing. This keeps water out.
- Gutter condition: Gutters direct water away from your home. If they’re damaged or clogged, they won’t do their job.
- Drainage: Pros will look at how water drains off your roof. Poor drainage can cause leaks and damage.
- Recommended remedies: Based on their findings, they’ll suggest repairs or replacement, and explain why.
Quick rule: Trust the pro’s expertise during the inspection. They’re looking out for your home’s best interests.
What to do if you find two layers: options and decision framework
Start with a structural and decking check to determine if the roof can safely bear additional loads or if reinforcement is needed. Document any signs of damage and verify code and warranty constraints before making a choice. Use a clear framework to guide the decision between overlay and tear-off based on safety and long-term value.
Gather multiple bids with identical scopes so you can compare apples to apples, and confirm that permits and disposal considerations are included in the proposal. Prioritize safety, proper permits, and inspections, and plan the process around weather and access to the roof. Use the information you collect to decide whether an overlay is appropriate or a full tear-off is warranted for lasting performance.
When to choose full tear-off and replacement
If you’ve found two layers of shingles, it’s time to decide whether to overlay or tear off. Here are clear indicators for a full replacement:
Rotted decking: If the roof decking is rotted or damaged, it needs replacing. Overlaying won’t fix this.
Multiple prior overlays: Too many layers can cause structural issues and trap moisture. A tear-off might be best.
Structural sag: If your roof sags, it’s a sign of serious structural damage that requires a full replacement.
Warranty/insurance prohibitions: Some warranties or insurance policies won’t cover overlays. Always check these before deciding.
Temporary fixes and safe interim measures
While you’re planning your permanent solution, here are some safe temporary fixes:
Patching leaks: If there are minor leaks, patch them temporarily to prevent further damage. This buy time but isn’t a long-term fix.
Improve attic ventilation: Good airflow can help prevent moisture buildup and extend the life of your roof.
Avoid temporary overlays: While it might seem tempting, adding another layer temporarily is usually a bad idea. It can trap moisture and hide underlying problems.
Remember, these are just interim measures. A permanent solution will still be needed.

Conclusion
Two layers of shingles can look fine from the ground, but they change safety, durability, and how you budget the job. The bottom line: decide quickly, document what you find, and move forward with a plan that keeps your roof strong and your family safe.
Start with a simple check that sticks: confirm local rules on layers and permits, verify warranty language, inspect the roof for visible signs, do a small, cautious on-roof check if you can do it safely, compare overlay versus full tear-off costs, and, if required, line up a licensed contractor who can handle inspections, permits, and the work. Keep the process orderly, and don’t skip the permit or inspection step.
Common mistakes to avoid are pushing ahead without clear code and permit approvals, underestimating long‑term durability or cost, and ignoring safety. Always use fall protection and stable ladders, test only in a small, non‑critical area, and stop if you see sagging, soft spots, or loose nails. Don’t rip into the roof without knowing structure, warranty, or contractor requirements; and don’t assume you can safely DIY every aspect of the job.
If you’re unsure about codes, or the roof is steep, old, or near the edge of a warranty, call a qualified contractor. In these cases, professional help isn’t a failure—it’s a smart way to protect your investment, speed up the permit process, and avoid costly mistakes. You’ve got this—make the call, get the plans, and get it done right.
FAQ
How can I tell if there are two layers of shingles on my roof?
Look for a roof with uneven lines, extra nail lines, or a ridge that looks thicker than usual. Lift a shingle at the edge and see if there is another layer underneath. You’ll often see the under layer peeking out where another row overlaps.
What simple tests can confirm there are two layers?
Check the edge of the roof where shingles meet against the gutter. If you see a second set of nails or a thicker stack near the edge, that’s a sign. You can also pry up a loose shingle slightly to check for an additional layer beneath.
Why should I remove a second layer instead of leaving it?
Two layers mean more weight, higher risk of ice damming, and faster wear. It can lead to leaks and more costly repairs later. It’s better to fix it now than pay for big problems later.
What steps should I take to fix two layers of shingles?
Hire a licensed roof pro if you’re not sure about safety. They’ll remove the top layer, inspect the deck, and install new shingles properly. Don’t mix shingle types or leave nails exposed; follow manufacturer and local code rules.