
Introduction
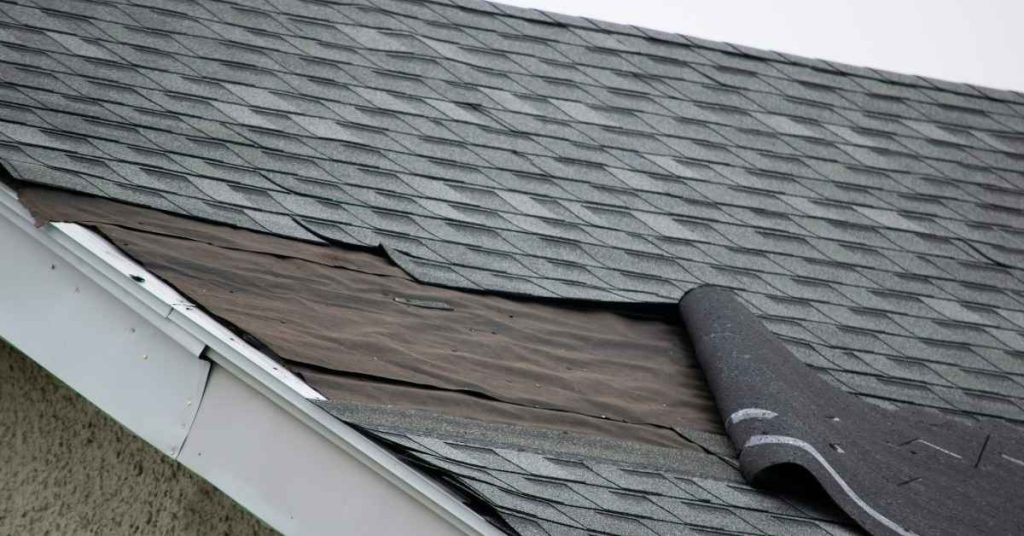
Roof underlayment is the protective layer installed under the shingles to keep the roof deck dry when the surface isn’t exposed.
Felt, synthetic, and peel-and-stick each have a place, but the right choice depends on weather, roof type, and ease of install. Check the product label and local rules to confirm what to use on your project and how to install it correctly.
Felt is a simple, traditional option that’s easy to work with for steady conditions.
Synthetic underlayments offer tear resistance and lighter weight, but follow the manufacturer for perforations and laps.
Peel-and-stick provides a continuous seal in high moisture areas, but requires clean, dry surfaces and careful application per instructions.
Key takeaways
- Felt underlayment offers classic, affordable protection for simple roof setups.
- Synthetic underlayment provides lighter weight, better tear resistance, and quick installation.
- Peel-and-stick gives durable, self-adhering weatherproofing with proper membrane overlap and sealant.
- Verify compatibility with roof deck, shingles, and local code before selecting.
- Ensure proper laps, seams, and installation sequence to prevent water intrusion.
- Safety: wear gloves and eye protection when handling rough underlayment materials.
Table of Contents
- Introduction
- Key takeaways
- Overview of Roof Underlayment and Why It Matters
- Felt Underlayment (Asphalt-Saturated)
- Synthetic Underlayment
- Peel-and-Stick Underlayment (Self-Adhering)
- Comparing Performance: Durability, Water Resistance, and Standards
- Installation Considerations and Common Mistakes
- Cost, Availability, and Environmental Impact
- Choosing the Right Underlayment: Decision Guide and Quick Flow
- Conclusion
- FAQ
Overview of Roof Underlayment and Why It Matters
Underlayment acts as a secondary weather barrier and provides temporary protection during re-roofing. It also plays a role in the overall roof system performance, codes, and warranties. The choice you make can influence water management, installation workflow, and inspection outcomes.
Think of underlayment as the first line of defense against leaks and a scaffold for the rest of the roof system. It affects how shingles are laid, how fast you can work, and what inspectors look for during and after installation. Check your project’s requirements and local rules when selecting sheet types or roll products.
Function and benefits
Roof underlayment’s primary job is to protect your roof from moisture. It acts as a secondary weather barrier, catching any water that gets past your shingles or tiles.
Moisture control: Underlayment helps prevent water damage by keeping it out of your roof system and home.
Leak protection: It provides an extra layer of defense against leaks, giving you added peace of mind during heavy rain or storms.
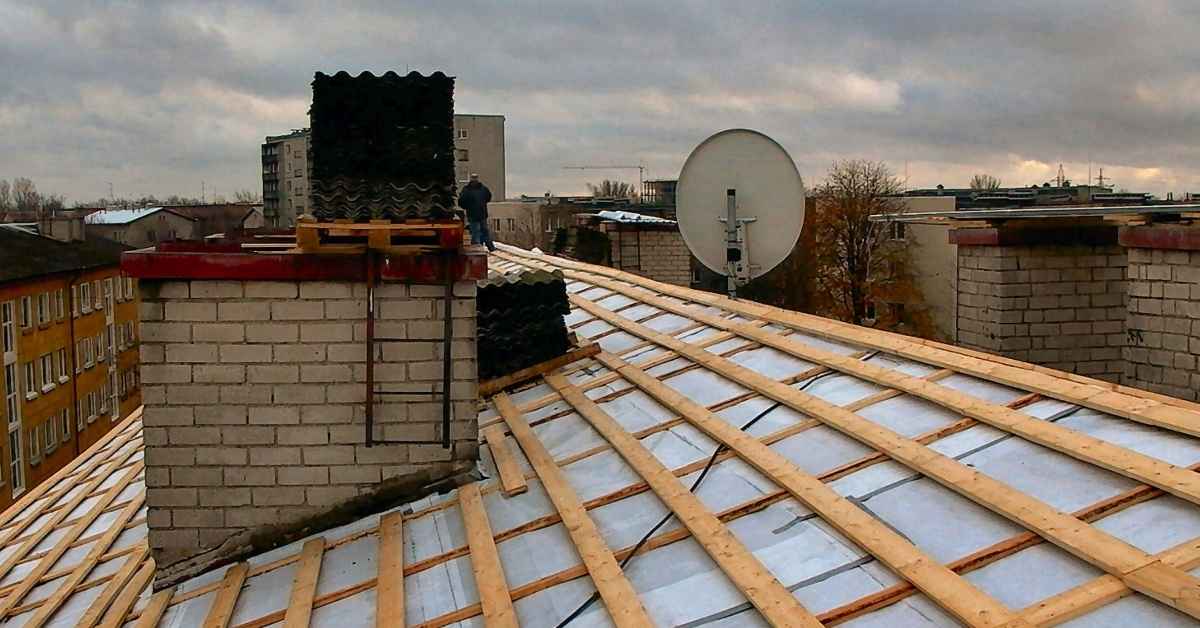
Installation protection: During re-roofing, underlayment protects the roof substrate from damage caused by exposure to the elements and construction activities.
Material categories and basic composition
Choosing the right underlayment material is crucial for a successful roof installation. Here are the three main categories:
- Asphalt-saturated felt: Inexpensive, traditional option. Look for 15 or 30 lb. felt. Avoid in high heat areas due to potential cracking.
- Synthetic polymer sheets: More durable and tear-resistant than felt. Specs range from 60 to 200 gsm. Great for steep slopes but can be slippery during installation.
- Self-adhering rubberized membranes: Premium option with strong adhesion, excellent moisture protection, and easy installation. Ideal for low-slope roofs but pricier than other options.
Felt Underlayment (Asphalt-Saturated)
Felt is a saturated mat product that comes in various weights and blends. It is still used in some traditional or lower-slope applications where code or contractor practice supports it. Variability in weight and quality means you should verify the label, product data sheet, or local code before use.
Pros include familiarity and straightforward handling, while cons often center on moisture absorption and slower installation compared to modern synthetic options. It’s important to assess where felt fits in your roof plan and whether it meets current code expectations for your area. Always cross-check manufacturer instructions and local requirements before installation.
Advantages and disadvantages
Felt underlayment has its pros and cons. Let’s break them down.
Pros
- Cost-effective: Felt is one of the most affordable roofing underlayments.
- Widely available: You can find it at any home improvement store.
- Easy to install: Its familiar texture makes it simple to walk on and secure.
- Provides a solid base: It offers good protection against minor punctures from nails or staples.
Cons
- Susceptible to tearing: Felt can tear easily, especially when exposed to moisture or foot traffic.
- Moisture retention: It absorbs water, which can lead to mold and mildew growth if not dried quickly.
- UV degradation: Prolonged exposure to sunlight degrades felt’s effectiveness.
- Limited lifespan: Once exposed, felt has a shorter lifespan compared to synthetic alternatives.
Felt makes sense when you’re on a tight budget or working with historical restorations where authenticity is key. But for long-term performance, consider other options.
Best use cases and roof types
Felt underlayment isn’t one-size-fits-all. Here’s where it works best:
Budget-sensitive jobs: If cost is a major factor, felt might be your best bet.
Historical restorations: In some cases, felt can help maintain the historical integrity of a roof.
However, avoid using felt in areas with high winds or heavy snow loads. It’s also not recommended for long-term exposure to sunlight due to its UV limitations.
Synthetic Underlayment
Synthetic underlayment uses polymer-based material designed to resist tearing and UV exposure, with different slip textures and weight classes. It tends to dry quicker and can be lighter than felt, depending on the product. Because performance varies widely, you should compare data sheets and product labels before choosing.
Key differences often show up in traction, puncture resistance, and weather tolerance. Review the manufacturer technical data and installation instructions to ensure compatibility with your deck and shingles. Verify that the product meets local code or standard certifications for your region.
Advantages and disadvantages
Synthetic underlayment offers a range of benefits, but it also has its drawbacks.
Pros
- Lighter weight for easier handling
- Increased tear resistance for better durability
- Longer exposure tolerance to weather elements
- Better slip resistance for safer installation on steep slopes
Cons
- Variable quality among brands, so check manufacturer data
- Higher upfront cost compared with basic felt underlayment
- Some types may not be suitable for long-term exposure without roofing material
- Potential issues with UV degradation if not properly installed or protected
Synthetic underlayment makes sense when you need better durability, easier handling, and longer exposure tolerance.
Best use cases and roof types
Synthetic underlayment shines in certain scenarios. It’s ideal for steep-slope roofs due to its slip-resistant texture.
Long exposure periods between the roof deck and finish material also benefit from synthetic underlayment’s longer exposure tolerance.
If you need improved handling, durability, or want a consistent performance across your entire roof, consider synthetic underlayment. It’s particularly useful when installing complex or large roofs where consistency is key.
Peel-and-Stick Underlayment (Self-Adhering)
Peel-and-stick underlayment uses rubberized asphalt or modified membranes with an adhesive backing for a watertight seal. It can provide strong protection where roof edges, penetrations, and flashings are critical. Installation is sensitive to surface prep and ambient temperature, so follow the specifics on the label.
Expect higher material costs and consider how well the product bonds to your roof deck and interacts with the chosen finish. Confirm compatibility with your roof system, and consult manufacturer guidance for deck prep and flashing details. Always verify with product instructions and local code requirements.
Advantages and disadvantages
The primary benefit of peel-and-stick underlayment is its superior adhesion and seam sealing, making it ideal for critical areas.
Pros
- Excellent adhesion to roof deck and itself.
- Seals seams tightly to prevent water intrusion.
- Provides a consistent barrier even in low-slope areas.
- Reduces the risk of blow-offs during high winds.
- Can be applied in cold temperatures, making it suitable for early or late season installations.
Cons
- Sensitivity to installation conditions – must be applied at optimal temperature and on a clean surface.
- Higher material cost compared to felt or synthetic underlayments.
- Not suitable for all roof types, especially those with high heat exposure.
- Requires careful handling to avoid damaging the adhesive backing before application.
Peel-and-stick makes sense when you need a durable, reliable seal in vulnerable areas or where other underlayments may fail.
Best use cases and roof types
Peel-and-stick is recommended for vulnerable areas like valleys, eaves, and low-slope transitions where water intrusion is a risk.
Valleys: The self-adhesive nature makes it ideal for sealing valley flashing and preventing leaks at the most susceptible point on your roof.
Eaves: It’s perfect for eaves, as it sticks well to the facia boards and prevents water from getting underneath the roofing material.
For low-slope transitions, peel-and-stick provides a consistent barrier that won’t wrinkle or buckle like other underlayments might. It’s also suitable for areas prone to ice dams or wind-driven rain due to its exceptional adhesion and seam sealing properties.
Comparing Performance: Durability, Water Resistance, and Standards
Felt, synthetic, and peel-and-stick each address water intrusion and tear resistance in different ways, with varying UV exposure tolerance. Synthetic options often offer better tear resistance and lighter handling than felt. Peel-and-stick emphasizes sealing around edges and penetrations, but depends on proper surface prep.
Standards and certifications from manufacturers or industry bodies can guide you, but products differ by region. Look for test data and certifications on the manufacturer data sheet or label to compare options. Always align choices with local code expectations and project specifications.
Longevity and maintenance
Each underlayment type has its own lifespan, influenced by factors like weather exposure and installation quality. Regular inspections can help extend performance.
Felt: Typically lasts 12-30 years. Check for delamination, curling edges, or tears. Avoid heavy foot traffic to prevent damage.
Synthetic: Lasts 15-30+ years. Inspect for punctures and wear around penetrations. Keep debris off to prevent accelerated aging.
Peel-and-Stick: Has a shorter lifespan, around 5-10 years. Look for adhesive failure, bubbling, or curling. Keep it clean during installation to avoid contamination.
Weather and climate considerations
Climate plays a significant role in underlayment selection and performance. Here’s how each type handles different weather conditions:
Heat & Sun:
- Felt: Degrades faster in heat, becomes brittle.
- Synthetic: More sun-resistant but can still degrade over time.
- Peel-and-Stick: Adhesive can soften and lose tackiness.
Cold & Ice:
- Felt: Can become brittle in cold, leading to cracks.
- Synthetic: More flexible but can still crack if too cold.
- Peel-and-Stick: Adhesive can harden and lose stickiness.
Wind: All types can be lifted by high winds. Ensure proper installation and use wind-rated products in high-wind areas.
Material specs and standards explained
Matching underlayment specifications to local codes and shingle requirements is crucial for a durable, safe roof. Here are key specs to consider:
- Fire Rating: Look for Class A rating (most stringent). Avoid products with lower ratings.
- Slip Resistance: Ensure it meets ASTM D6381 standards for safety during installation and maintenance.
- Wind Uplift Resistance: Check for compliance with ASTM D6380. Use higher wind-rated products in hurricane zones.
- Permeability: Choose breathable underlayments to prevent moisture buildup (except in ice-dam prone areas).
- Thickness & Weight: Thicker, heavier underlayments provide better protection but can be more expensive and harder to install.
Installation Considerations and Common Mistakes
Plan deck prep, overlaps, and fastening according to the chosen product’s instructions. Pay attention to the direction of overlaps and how flashing interfaces with the underlayment. Proper exposure limits and edge sealing can make or break performance.
Common mistakes include skipping surface prep, improper fasteners, and failing to follow flashing details. Read and follow manufacturer instructions and local building codes closely. Double-check that materials are compatible with your roof system before starting.
DIY vs professional installation
Before you grab your toolbelt and start laying underlayment, consider this: DIY can save you money, but it’s not always the best choice. Here’s when to do it yourself and when to call a pro.
DIY is right for: Small projects, simple designs, and if you’ve got some experience under your belt. Check your local building codes first, though. Some areas require permits or inspections even for DIY work.
Pros are better for: Large jobs, complex designs, or when safety’s a concern. Roofing can be dangerous, and pros have the right gear and know-how to keep you safe. Plus, many manufacturers won’t honor warranties unless a licensed pro does the work.
Tools and materials checklist
Before you start your concrete project, use this checklist to ensure you have everything you need. Verify each item on-site to avoid costly mistakes.
- Concrete mix: Check the bag for the correct mix design (e.g., M30, M40) and follow manufacturer’s instructions for water-cement ratio.
- Formwork: Ensure it’s sturdy, level, and properly braced. Check that it’s slightly oversized to account for concrete shrinkage.
- Reinforcement (rebar): Verify the size (e.g., 10mm, 12mm) and spacing (e.g., 200mm centers) match your project requirements. Check that it’s properly tied and supported.
- Concrete pump or mixer: If renting, ensure you’ve reserved the right equipment for your project size and have a backup plan in case of breakdowns.
- Trowel (finishing): Check that it’s the correct size (e.g., 12″, 18″) for your project. Ensure it’s clean, straight, and free of defects.
- Concrete sealer: Verify it’s suitable for your concrete type and application method (e.g., spray, roll). Check the manufacturer’s instructions for curing time before sealing.
- Safety gear: Ensure you have hard hats, safety glasses, gloves, steel-toed boots, and high-visibility vests. Check that all equipment is in good working condition.
- Protective clothing: Verify you have long-sleeved shirts, long pants, and knee pads to protect against concrete splatter and rough surfaces.
Quick rule: Always double-check your measurements and calculations. Incorrect dimensions or quantities can lead to costly rework or project delays.
Cost, Availability, and Environmental Impact
Material costs, labor requirements, and regional availability drive the overall price picture. Availability can vary by region and by whether a contractor stock option or special order is needed. Environmental considerations include recyclability and embodied impacts of the chosen product.
Think about lifecycle value rather than upfront cost alone. Evaluate durability, ease of installation, and potential waste or disposal considerations in your area. Always corroborate with supplier labels and local environmental guidelines when selecting products.
Cost drivers and lifecycle value
The cost of roof underlayment varies by type, but it’s not just about the upfront price. Here’s what drives material and labor costs:
- Product quality: Higher quality materials like synthetic underlayments come at a premium but offer better performance and longevity.
- Roof complexity: Steep pitches, multiple valleys, or complex roof designs increase installation time and thus labor costs.
- Replacement frequency: While felt is cheaper, it degrades faster. So, you might end up replacing it more often than a synthetic underlayment, costing you more in the long run.
Remember, a higher initial investment can sometimes reduce long-term repair risks and costs. It’s like buying quality boots; they might be pricier but last longer and perform better.
Sustainability and disposal
When it comes to the environment, not all underlayments are created equal. Here’s what you should consider:
- Recyclability: Some underlayments can be recycled at the end of their life. Ask your supplier about this.
- Landfill considerations: Non-recycled underlayments will end up in landfills, contributing to waste. Reducing this is a key part of sustainability.
- Recycled content and end-of-life handling: Some manufacturers use recycled materials in their products. Also, ask about how they handle disposal or recycling at the end of the product’s life.
Every bit helps when it comes to reducing our environmental impact. So, consider these factors when choosing your underlayment.
Choosing the Right Underlayment: Decision Guide and Quick Flow
Start with roof slope, climate, and roof type to narrow down the options. If budget is tight and code allows, felt might be acceptable in some cases; for higher durability or rough conditions, synthetic or peel-and-stick may be preferred. Consider warranty requirements as part of your decision.
Next, compare manufacturer installation instructions and local inspector expectations. If in doubt, reach out to the manufacturer and your local building department for final verification before purchasing. Use this framework to guide a final choice that fits your project’s constraints and goals.
Quick decision flow (text-based)
Start by identifying critical areas on your roof. These are spots where water can easily penetrate, like valleys and eaves.
Check climate risks: Consider your local weather patterns. If you live in a high-wind or heavy-rain area, opt for synthetic or peel-and-stick underlayment.
Verify roof covering and warranty needs: Some warranties require specific underlayment types. Always check with the manufacturer of your chosen roofing material.
Visual checkpoints and inspection tips
Use this checklist once the underlayment is installed but before shingles go on. It’s your last chance to ensure everything is right.
- Laps: Check if they’re clean and flat. Wrinkles or gaps can trap water.
- Fastener placement: Ensure nails are evenly spaced, not too close to the edges, and not overdriven (which can cause leaks).
- Terminations: Seals at eaves, rakes, and valleys should be intact. Missing or damaged seals let water in.
- Edges: Underlayment should extend up the roof slope from the eave to prevent water intrusion.
- Overlaps: Ensure they’re correct (felt: shingle up; synthetic/peel-and-stick: shingle down).
- Exposed nails: None should be visible. If so, they can rust and cause leaks.
- Dents or tears: These compromise the underlayment’s integrity. Ensure they’re minimal and properly patched.
- Proper alignment: Underlayment should align with roof slope, not run horizontally.
Quick rule: If anything looks off, don’t hesitate to request correction from your installer.
Conclusion
Paragraph 1: Underlayment choice matters for safety, durability, and the look of a roof, and picking the right type at the right time prevents leaks and costly fixes later. Do the work with solid steps, and you’ll end up with a roof that lasts through the seasons.
Paragraph 2: Start by checking the weather window and roof condition, choose the underlayment that matches your roof and sheathing, then lay out and tape or seam as the product guides direct, inspect all edges and penetrations, and finish with a careful fasten and seal around vents, flashings, and corners; always follow manufacturer instructions and keep the work area clean and dry to prevent damage or slips.
Paragraph 3: Common mistakes are rushing the installation, skipping seams or proper overlaps, and ignoring flashing details; never work on a wet or windy roof, and wear slip-resistant boots and harness if needed; test a small area first and stop if material buckles, curls, or adhesion fails.
Paragraph 4: If the roof has complex flashings, high wind areas, or uncertain weather windows, call a professional instead of forcing the project, and stay focused on safety and careful workmanship—a solid underlayment job today saves you from leaks and stress tomorrow.
FAQ
When should I choose felt underlayment versus synthetic underlayment?
Choose felt if you want a low-cost, simple option and you’re on a straightforward roof with good ventilation. Choose synthetic if you want better tear resistance, lighter weight, and faster installation. Check the product label for recommended applications and your local climate considerations.
Is peel-and-stick underlayment necessary for certain areas, or can I skip it altogether?
Peel-and-stick helps seal around vents, chimneys, and rakes where nails can leak. Use it in problem spots and high wind areas, but don’t rely on it for every seam. See manufacturer instructions for where peel-and-stick is required or preferred.
Can I mix underlayment types on the same roof?
Usually best to pick one system for the whole roof or follow the manufacturer’s zone guidance. Mixing types can create compatibility and fastening issues. If you’re unsure, stick to one type or consult the product instructions.
How do I know if the underlayment is installed correctly?
Look for smooth, wrinkle-free sheets with proper overlaps and no gaps at edges. Ensure fasteners are set per the label and sealant/peel-and-stick areas are properly adhered. If in doubt, re-check the manufacturer instructions and your own installation checks.