

Introduction
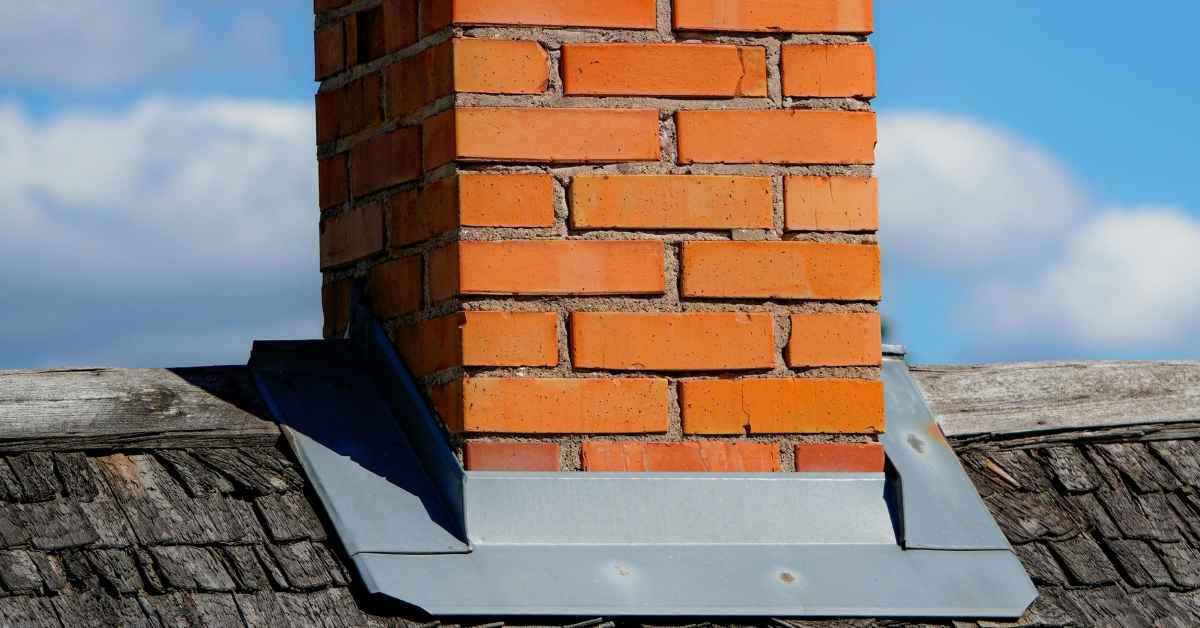
Chimney flashing is the waterproof barrier where the chimney meets the roof that keeps out rain. In practice, leaks usually show up where the flashing overlaps shingles or around fasteners.
Common leak points include the junction of the chimney, roof deck, and flashing, plus gaps at joints and corners. When you redo or repair flashing, check the manufacturer’s instructions and local rules, and use the right flashing and sealant to match your roof type.
Key takeaways
- Inspect flashing joints, step flashing, and chimney chase counterflashing for deterioration.
- Identify typical leak points: apron, sidewall gaps, brick spalling and mortar gaps.
- Visual checkpoints: roof line, sealant aging, corrosion at metal flashing edges.
- Better flashing details: ensure integrated counterflashing, proper drainage, and pitched water runoff.
- Materials and tools: verify compatibility with roof substrate, weathering, and code guidance.
- Safety first: work from stable surfaces, avoid ladders on wet surfaces, wear PPE.
Table of Contents
- Introduction
- Key takeaways
- Why Chimney Flashing Fails — Root Causes
- Typical Leak Points Around Chimneys
- Visual Checkpoints for Effective Inspection (DIY-Focused)
- Better Flashing Details and Design Principles
- Materials, Tools, and Material Specs Explained
- Step-by-Step Repair and Upgrade Options (DIY and Pro Scopes)
- Preventive Maintenance and Best Practices
- Troubleshooting, Common Mistakes, and Hiring Guidance
- Conclusion
- FAQ
Why Chimney Flashing Fails — Root Causes
Flashing leaks usually start with material aging and breakdown. Weathering, UV, and freeze-thaw cycles take a toll over time. Poor detailing lets water find a path behind the metal or membrane.
Movement from the roof and chimney, or shifting from framing, creates gaps and split seals. When components aren’t lapped or terminated correctly, water can follow the path of least resistance. Observed staining or rust often points to these root causes, not just a single bad seam.
Material degradation and corrosion
The lifespan of your chimney flashing heavily depends on the material used. Cheap, low-quality materials won’t hold up against weathering and heat.
- Corrosion: Rust weakens metal flashings. Look for red or orange stains. Use stainless steel or copper for better corrosion resistance.
- UV exposure: Sunlight degrades rubber and plastic flashings over time. Opt for materials rated for UV resistance.
- Freeze-thaw cycles: Extreme temperature changes can cause cracking in improperly selected materials. Choose freeze-thaw resistant materials, like aluminum or copper.
- Weathering: Prolonged exposure to rain and snow can degrade flashings. Regular inspections help catch issues early.
- Incompatible materials: Mixing incompatible materials (e.g., metal with rubber) can cause weak bonds, leading to leaks. Ensure all materials are compatible.
Poor detailing and installation errors
Proper installation is crucial for flashing performance. Avoid these common mistakes:
- Improper laps: Overlapping flashings incorrectly can create gaps, allowing water entry. Ensure laps are staggered and tight.
- Wrong sequencing: Installing flashings out of order can lead to leaks. Follow the recommended sequence for your specific flashing system.
- Omitted secondary barriers: Skipping step flashing or counterflashing can leave gaps where water can enter. Always install all required components.
- Inadequate sealing: Not properly sealing around nails, screws, and joints allows water to seep in. Use appropriate sealants and apply them correctly.
Regularly inspect your flashing for signs of these mistakes and address any issues promptly.
Structural movement and masonry issues
Chimneys are subject to movement due to settling, temperature changes, or wind. This movement can compromise flashing interfaces, leading to leaks.
Cracked mortar: Inspect your chimney’s mortar joints for cracks. Repointing may be necessary to prevent water entry.
Settling: If your chimney has settled, it may no longer be plumb or level, causing flashing to leak. Have the structure evaluated and repaired if needed.
Shifting stacks: A shifting chimney stack can cause flashing to bend, warp, or separate, leading to leaks. Ensure your chimney is properly secured and aligned.
Typical Leak Points Around Chimneys
Start at the step flashing where it meets the roof plane; misalignment or gaps here invite seepage. Counterflashing terminations at the chimney sides are a common failure if not tucked under proper flashing.
Also check saddles or crickets that shed water poorly, and the chase-top transitions where the chase collar meets flashing. Each junction has its own failure mode, so inspect them as a group and note any loose or cracked parts.
Step Flashing and Shingle Laps
The step flashing around your chimney should overlap with the roof’s shingles to keep water out. Here’s how to check it:
- Inspect each step flash. It should go up the chimney, then under a shingle.
- Check if the shingle laps over the top of the step flash, covering at least 2 inches.
- Ensure there are no gaps or missing pieces in the flashing.
- Look for rust or corrosion on the flashing, which could cause leaks.
- If you find any issues, replace the damaged flashing and re-lay the shingles properly. If it’s beyond your DIY skills, call a pro.
Counterflashing Terminations and Mortar Joints
The end of the counterflash should be tucked under the shingles to prevent water from getting behind it. Here’s what to look for:
Check if the counterflash is properly tucked under the shingles at its termination.
Mortar joints around the chimney can crack and let water in. Inspect these joints, especially where they meet metal flashing.
If you see cracks or gaps, repoint the mortar using a tuckpointing technique. If the damage is severe, consider replacing the entire section of flashing.
Crickets/Saddles and Backwater Zones
Crickets or saddles are metal pieces that go over the chimney to direct water away. They’re crucial for preventing leaks:
Check if your cricket is present and in good condition. It should slope downwards, away from the chimney.
Backwater zones behind the chimney can trap water. Ensure these areas are properly sloped to drain water away.
If you find any issues with your crickets or backwater zones, repair them immediately to prevent chronic leaks. If you’re unsure, consult a professional.
Visual Checkpoints for Effective Inspection (DIY-Focused)
Look for loose or lifted flashing, corrosion, or broken sealant along chimney edges. Check for dark stains, spalling masonry, or efflorescence on nearby brick or stone surfaces.
Inside, watch for staining on ceilings or attic rafter bays, and any musty smells that hint at hidden leaks. Work safely from ground level or with appropriate fall protection, and avoid climbing on unstable roof sections.
Exterior roof and flashing signs
Before you grab your ladder, use this checklist to spot common issues from the ground.
- Corroded metal: Rust on flashings or counterflashings. It’s a sign of water exposure and needs attention.
- Loose flashings: Check for any waviness or gaps around chimney base. They might be pulling away from the brickwork.
- Missing counterflashing: Look for open spaces where counterflashings should be, especially at corners and edges.
- Debris buildup: Piles of leaves or dirt around the chimney base can trap water and cause leaks.
- Cracked mortar: Inspect mortar joints for cracks. They could let water seep in.
- Worn shingles: Check if shingles near the chimney are damaged or missing. They might be directing water towards the flashing.
- Rust stains: Look for rust-colored stains on the exterior wall below the chimney. They indicate past leaks.
- Warped siding: Check if siding near the chimney is warped or buckled. It could be due to water absorption from a leak.
Quick rule: If you spot any of these issues, don’t wait. Get them fixed before they cause bigger problems.
Interior indicators in the attic and ceilings
Head up to your attic or check your ceilings for these signs of chimney leaks.
- Water stains: Dark spots on the ceiling or attic floor. They’re a clear sign of water intrusion.
- Damp insulation: Check if insulation around the chimney is wet or damp to the touch. It could be absorbing water from a leak.
- Active drips: Look for actual drops of water falling from the ceiling. They indicate an active leak.
- Musty smell: A damp, musty odor around the chimney area might mean there’s a hidden leak.
- Bubbling paint: Check if paint on the ceiling is bubbling or peeling. It could be due to water absorption.
- Mold or mildew: Look for signs of mold or mildew growth, especially around the chimney area.
Quick rule: If you find any of these issues, trace the path back to the chimney-flashing interface. That’s where the leak is likely coming from.
Safety and photo-documentation tips
Before you start your inspection, make sure you’re doing it safely. And don’t forget to document what you find.
- Ladder safety: Use a sturdy ladder that’s long enough for the job. Keep it level and secure at the top.
- Roof safety: Wear non-slip shoes and move carefully on the roof. Watch out for slippery surfaces, especially in wet conditions.
- Photograph problems: Take pictures of any issues you find. They’ll help you explain to a contractor or plan your DIY repair.
- Note details: Jot down notes about what you’re seeing. Include things like the exact location, size, and severity of the problem.
- Avoid power lines: Keep your ladder and yourself away from power lines. If a storm is coming, wait until it’s passed before inspecting your roof.
Quick rule: Safety first! Always prioritize your personal safety when inspecting your roof or attic.
Better Flashing Details and Design Principles
Prioritize proper sequencing: install primary flashing first, then counterflashing, with overlaps that direct water away. Keep terminations tucked under adjacent flashing so water travels over, not behind, joints.
Use continuous bends and clean laps to reduce crevices. Favor durable materials and simple, continuous transitions over complicated stacks that invite failure. Focus on robust, repeatable details rather than brand specs.
Proper sequencing and layering techniques
Start with a solid base. Install underlayment first to protect against moisture from below.
Next, apply step flashing. Make sure each piece overlaps the one below it by at least 2 inches. This creates a staggered pattern that sheds water outward.
Now, install shingles. They should overlap the step flashing to maintain a continuous water-shedding path.
Lastly, add counterflashing. It should cover and be secured to the top of the step flashing, ensuring no gaps where water can seep in.
Secondary defenses: kickouts, crickets, and diverters
Kickouts are L-shaped metal pieces that divert water away from vulnerable junctions where the roof meets a wall. Install them at these intersections.
Crickets or saddles are used when one roof plane is higher than another. They sit on top of the lower roof, diverting water away from the chimney and preventing backups.
Diverters, like cricket-style diverters, can be used to direct water away from specific areas prone to leaks, such as where a dormer meets the main roof.
Use these secondary defenses in combination with proper sequencing and layering for maximum protection.
Termination methods and integration with masonry
For integrated counterflashing, the flashing is inserted into a vertical groove (reglet) cut into the chimney’s mortar joints. This method provides good protection but requires precise cutting.
Face-applied systems involve securing the flashing directly to the face of the chimney with nails or screws. They’re easier to install but may not provide as robust protection against water intrusion.
The best choice depends on your chimney’s construction and local climate. For example, integrated counterflashing might be better in areas with heavy rain, while face-applied systems could suffice in drier regions.
Regardless of the method chosen, ensure a tight fit and proper sealing to prevent leaks at termination points.
Materials, Tools, and Material Specs Explained
Flashing comes in several forms; pick options that resist corrosion and suit your roof type. Consider tools that help you form tight bends, cut clean edges, and seal without relying on risky field workmanship.
When you check specs, verify compatibility with adjacent materials, installation temperature ranges, and warranty language. Always compare manufacturer instructions and local code requirements to your project site.
Material options and tradeoffs
Choosing the right material for your chimney flashing is crucial to prevent leaks. Here are some common options:
- Galvanized Steel: Common, affordable. Look for 24- or 26-gauge. Avoid thin gauges as they rust quickly.
- Aluminum: Lightweight, corrosion-resistant. Check for anodized finish for better durability. Avoid in areas with high salt content.
- Copper: Premium, long-lasting. Expensive but won’t corrode like steel. Not suitable for all applications due to its softness.
- Lead: Traditional, malleable. Used for custom jobs. Toxic if not handled properly; avoid if possible.
- Membranes: Flexible, waterproof. Great for repairs and as secondary defense. Check UV resistance and temperature range.
Tools and consumables checklist
Before starting any chimney flashing job, ensure you have the right tools:
- Tape Measure: To get accurate measurements.
- Chalk Line: For marking straight lines on the roof.
- Claw Hammer or Nail Puller: To remove old nails and flashing.
- Utility Knife: For cutting new flashing to size.
- Safety Glasses: To protect your eyes from debris.
- Work Gloves: For handling materials and protecting hands.
- Roofing Nails or Screws: To secure the new flashing. Check they match your existing fasteners.
- Rubber Roofing Cement: For sealing seams and edges.
- Caulk Gun: To apply cement smoothly.
- Ladder: A sturdy one for safe access to the roof.
- Safety Harness: Essential for working at heights.
Quick rule: Always double-check your tools and materials before starting any job.
What specs and standards to check
Before purchasing materials, verify the following:
Corrosion Resistance: Check the material’s resistance to rust or corrosion. This is crucial in areas with harsh weather conditions.
Manufacturer Instructions: Always follow the manufacturer’s installation guidelines to ensure your flashing lasts as long as possible.
Local Building Codes: Check with your local building department to ensure your chosen materials comply with local codes and standards. Some areas may have specific requirements for chimney flashing.
Step-by-Step Repair and Upgrade Options (DIY and Pro Scopes)
For temporary fixes, seal obvious gaps and keep water from pooling while you plan a longer repair. Assess whether you can handle a full flashing replacement or if a licensed contractor is the safer route.
When planning a DIY permanent repair, outline a logical sequence: remove deteriorated sections, clean surfaces, install new flashing, and verify proper terminations. If in doubt, prepare to hire help and gather any project guidelines or permits required by local rules.
Step-by-Step Repair Process
This step-by-step guide walks you through repairing and upgrading your chimney flashing, from prep to finish.
- Inspect the area. Identify damaged sections and take photos for reference.
Reason: To understand the extent of repairs needed.
Quick check: Document findings for future comparison. - Safety first. Set up ladders securely, wear safety gear, and remove any obstacles.
Reason: Safety is paramount when working at heights.
Quick check: Ensure your workspace is clear and safe. - Remove damaged flashing. Carefully pry off old flashing using a flathead screwdriver or pry bar.
Reason: To prepare the surface for new flashing.
Quick check: Inspect the underlying structure for any damage. - Install new step flashing. Overlap joints properly, following the sequence explained earlier.
Reason: Proper overlap prevents water intrusion.
Quick check: Ensure each piece is correctly positioned and secured. - Install counterflashing. Fit it over the step flashing, ensuring a tight fit against the chimney.
Reason: Counterflashing protects the top of step flashing from water penetration.
Quick check: Inspect for proper fit and secure attachment. - Seal joints. Apply roofing cement or caulk to all seams and nail holes.
Reason: Sealing prevents water intrusion at vulnerable points.
Quick check: Ensure all joints are well-sealed. - Clean up. Remove debris, store tools properly, and inspect your work.
Reason: A clean workspace promotes safety and proper tool maintenance.
Quick check: Ensure the area is left in good condition. - Final inspection. Check for any leaks or signs of water intrusion from inside the home.
Reason: To ensure the repair was successful.
Quick check: Inspect attic and ceilings for any moisture.
Temporary Emergency Fixes
When a leak is active, these temporary fixes can buy you time until permanent repairs can be made. Remember, they are not long-term solutions.
Non-structural seals: Use roofing cement or caulk to temporarily seal leaks at the source. Apply liberally and allow to dry.
Limitation: Will degrade over time and in harsh weather conditions.
Temporary diverters: Install a makeshift diverter using plastic sheeting, tarps, or even large pieces of rubber to redirect water flow away from the leak.
Limitation: Can be unsightly, may not fully stop leaks, and can be dislodged by wind or weather.
While these fixes can help in a pinch, they should not replace permanent repairs. Always follow up with professional-grade flashing and proper installation techniques.
Replacing Step Flashing and Counterflashing (Overview)
This overview guides you through removing damaged flashing and installing new step flashing and counterflashing.
First, remove old flashing carefully to preserve the underlying structure. Then, install new step flashing, ensuring proper overlap with roofing materials.
Tip: Always start from the bottom and work your way up for correct overlapping.
Next, install counterflashing. Fit it over the step flashing, ensuring a tight fit against the chimney. Secure it in place using nails or screws.
Note: Counterflashing should be slightly shorter than the chimney’s width to allow for expansion and contraction.
Proper integration with roofing materials is crucial. Ensure all flashing is securely attached, properly overlapped, and sealed to prevent water intrusion.
Installing or Repairing a Cricket/Saddle
A cricket or saddle behind your chimney can improve drainage and prevent pooling. Here are decision points and general steps to consider.
Decision point: If water is pooling behind the chimney, causing leaks or damage, installing or repairing a cricket/saddle may be necessary.
General step: Build up the structure behind the chimney using roofing felt, plywood, or other suitable materials. Ensure it slopes away from the chimney to direct water flow.
Tip: The slope should be at least 1 inch per foot of length to effectively drain water.
Note: If your chimney is masonry, consult a professional before making any structural changes.
Once the cricket/saddle is installed or repaired, ensure it’s properly integrated with the roof and flashing system. Seal all joints and inspect regularly to maintain its effectiveness.
Preventive Maintenance and Best Practices
Schedule seasonal inspections and address debris that blocks drainage around the chimney. Clear the roof edge and chimney base to prevent water from pooling near flashing.
After extreme weather, recheck seals and look for new gaps or movement. Keep maintenance records with dates and findings to catch recurring issues before they escalate.
Routine inspection and minor upkeep
Regularly inspect your chimney’s flashing to catch wear early. Here’s a simple checklist for safe, DIY maintenance.
- Clear debris: Remove leaves, twigs, or other buildup from the flashing area every few months. Debris traps moisture, leading to rust and leaks.
- Check sealant condition: Inspect caulking and sealant around the base of the flashing. Cracked or missing sealant lets water in, damaging the structure.
- Monitor interior moisture: Keep an eye on your chimney’s interior for signs of dampness or mold. Excessive moisture can compromise the flashing’s integrity.
- Inspect counterflashing: Ensure the masonry around the flashing is sound and properly sealed. Cracks in the masonry can allow water to bypass the flashing.
- Check step flashing: Make sure each piece of step flashing overlaps its neighbor correctly. Improper overlap allows water intrusion.
- Inspect chimney cap: Ensure the cap is secure and undamaged. A missing or damaged cap lets rainwater into the flue.
- Check for animal nests: Remove any bird or squirrel nests from the chimney top. Nests can block proper ventilation, causing moisture buildup.
- Inspect chimney crown: Ensure the cement crown at the top of your chimney is intact and properly sloped to direct water away from the flue.
Quick rule: Inspect your chimney’s flashing annually, preferably in late spring or early fall. Regular checks help prevent costly repairs down the line.
Weather-related care and long-term preservation
Extreme weather conditions can degrade your chimney’s flashing over time. Here are some considerations to help preserve its longevity:
Freeze-thaw cycles: Water expands when it freezes, which can cause cracks in the caulking and sealant around your flashing. Ensure these areas are well-sealed before winter.
Prolonged wetting: Constant exposure to moisture can lead to rust on metal flashings. If possible, redirect water away from the flashing area using gutters or downspouts.
UV exposure: Prolonged sun exposure can degrade caulking and sealant, making them more susceptible to cracking. Apply a UV-resistant sealant for added protection.
Proper drainage and ventilation: Ensure your chimney has adequate ventilation to prevent moisture buildup. Install a chimney cap if you don’t have one, and consider installing a cricket or saddle to divert water away from the flashing.
Troubleshooting, Common Mistakes, and Hiring Guidance
When leaks are ambiguous, trace water paths from the interior to the exterior while noting any related roof features. Avoid overusing sealants as a long-term solution, which can trap water behind flashing.
Prepare to hire by collecting photos, measurements, and a summary of observed conditions. Ask contractors about their approach to flashing terminations, overlap, and sequencing, and request references or past project details showing similar work.
Diagnosing intermittent or hidden leaks
Chimney leaks can be tricky to pinpoint, especially when they only appear during certain weather conditions. Here’s a systematic approach to trace these elusive problems:
First, isolate the roof area. Look for leaks near the chimney, but also check other potential entry points like valleys and eaves. Use tarps or plastic sheeting to block off sections of the roof during rain.
Next, use targeted water testing. With a helper inside the house, apply water to specific areas around the chimney while they monitor for leaks from within. Alternatively, consider hiring a professional leak detection service for a thorough inspection.
Frequent DIY and pro mistakes to avoid
Even experienced contractors can make mistakes when it comes to chimney flashing. Here are some common pitfalls to steer clear of:
- Improper sequencing: Installing counterflashing before step flashing allows water to get trapped behind the counterflashing and cause leaks.
- Incompatible materials: Using incompatible materials, like aluminum flashing with a concrete chimney, can lead to rapid corrosion and failure.
- Cosmetic-only repairs: Focusing on aesthetics rather than functionality can result in leaks that reappear soon after the repair.
- Overuse of sealant: Relying too heavily on sealants can trap moisture, leading to further damage and eventual failure. Always ensure proper ventilation.
- Insufficient overlap: Inadequate flashing overlap allows water to seep in at the edges, causing leaks.
To avoid these mistakes, always prioritize functionality over appearance, use compatible materials, follow proper installation sequences, and ensure adequate overlap and ventilation.
How to vet contractors and compare quotes
When hiring a professional for your chimney flashing repair, it’s crucial to do your homework. Here are some key factors to consider when evaluating bids:
Verify credentials and warranties. Ensure the contractor is licensed and insured. Ask about manufacturer warranties on materials used and labor warranties offered by the contractor.
Compare proposed details. Make sure each quote includes a detailed description of the work to be done, including materials to be used and any necessary repairs or upgrades. Ensure these align with your long-term waterproofing goals.
Ask for references and examples of their work. A reputable contractor should be able to provide references from satisfied customers and photos or videos of similar projects they’ve completed.
Conclusion
Getting the flashing right isn’t optional. When done well, it stops leaks, protects the attic and framing, and keeps the look and value of the home solid for years. The core idea is simple: upgrade from sloppy details to proper flashing that sheds water and stays secure under weather, temperature swings, and movement.
Check in this order: inspect existing flashing for loose laps and corrosion, verify step and counter flashing are continuous and properly integrated with the chimney, assess sealant and joints for cracks or gaps, and confirm the transition to the roof cover is clean and secure. Then test the repaired area on a dry day with a cautious water run or hose to simulate rain, and recheck any areas you touched for leaks or movement.
Avoid common mistakes: don’t rely on thin sealants or single-layer patches for a multi-point leak, don’t skip the roof surface underneath the chimney, and never work on a wet or icy roof without fall protection. Safety rules matter: use fall protection on pitched roofs, clear the area below, and work only within your skill set. If something looks off, pause and reassess before moving forward.
If you encounter crown damage, extensive mortar gaps, or flashing that is embedded in brick or stone, it makes sense to call a professional rather than push on. Stay patient, follow solid steps, and you’ll get durable results that protect the home and save you from costly repairs later. You’ve got this—focus on solid details, careful workmanship, and safe testing, and you’ll finish with a leak-free chimney and confidence.
FAQ
What signs tell me flashing needs repair or replacement?
Look for rust spots, lifted edges, or gaps where roof and chimney meet. Loose or aversioned flashing usually shows up as damp spots on the ceiling or warped shingle edges near the chimney. If you see peeling sealant or water streaks, inspect the flashing area first.
Can I fix chimney flashing myself, and what’s the safest approach?
You can do a basic repair if you’re comfortable on the roof, but don’t skip safety. Start by cleaning the area, resealing with compatible sealant, and re-fastening loose pieces. If the flashing is badly corroded, bent, or there are active leaks behind the wall, call a pro.
What materials should I use for DIY flashing upgrades?
Use flashing material that matches your existing setup and is rated for roof exposure. Check labels or manufacturer instructions for compatibility with your chimney and roof type. If in doubt, bring the packaging or instructions to the local hardware store and ask for guidance.
How do I tell whether this is a simple DIY fix or a job for a pro?
If you can safely access the roof, see clear signs of damage, and have the right tools, a moderate repair is doable. If you find widespread rust, multiple leaks, or water behind the flashing in the walls, stop and hire a professional. Local rules or building advice can also guide your decision.