
Introduction
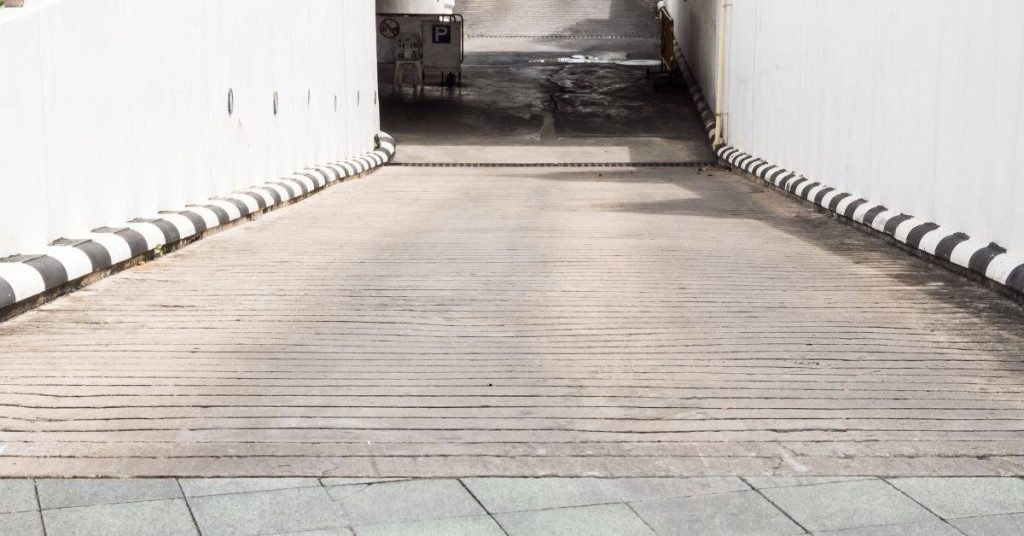
Salt finish concrete is a textured surface created by applying rock salt to the surface while the concrete is still plastic, then washing away the salt to reveal a speckled, dimpled look. It’s a hands‑on method that reveals a rougher, more industrial texture than a smooth finish. It works best when you want grip and a casual, non-slip feel underfoot.
To do it, pour and screed the concrete, then spread the salt evenly over the surface while it’s workable and let it set briefly before washing and brooming as needed. The finish offers benefits like better traction and a distinctive appearance, but it can be uneven and may require extra care with sealing and maintenance. Always check product labels, manufacturer instructions, and local rules to confirm suitability and steps for your project.
Key takeaways
- Salt finish creates textured, slip-resistant surface by exposing aggregate through controlled etching.
- Prepare surface by cleaning, curing, and masking edges before applying the salt mix.
- Using consistent spray or broadcast technique helps even texture and color variation.
- Salt finish pros: durability, low maintenance, aesthetic appeal in patios and walkways.
- Disadvantages include potential pore exposure and surface roughness if over-etched.
- Always consult manufacturer instructions and local codes before proceeding to ensure safety.
Table of Contents
- Introduction
- Key takeaways
- What Is a Salt Finish Concrete?
- Tools and Materials Checklist
- Planning and Preparation
- Step-by-Step Application Process
- Safety Precautions and Environmental Concerns
- Advantages, Disadvantages, and Common Mistakes to Avoid
- Best Use Cases and Design Ideas — Where Salt Finish Makes Sense
- Costs, Maintenance, and Troubleshooting
- Conclusion
- FAQ
What Is a Salt Finish Concrete?
A salt finish is a decorative technique that introduces granular texture into the surface by broadcast salt onto the still-plastic concrete. The salt temporarily disrupts the cement paste as finishing begins, creating micro-texture as it dissolves. The result is a tactile, slightly irregular surface that highlights the aggregate.
Visually, you’ll see granular, mica-like specks that catch the light and give the surface a subtle sparkle. The feel is rougher than a standard flat finish and can affect slip performance, especially when wet. Follow a clear workflow that keeps texture consistent while preserving strength and integrity.
Definition and basic principle
The salt finish technique is simple. We add salt to the concrete surface during finishing. The salt crystals delay the setting of the cement paste, giving us time to create texture.
Here’s how it works: when we apply salt, it temporarily disrupts the cement paste. This allows us to expose aggregates or create a textured paste surface.
The salt eventually dissolves and washes away during curing, leaving behind a unique, textured finish.
Typical appearance and texture variations
A salt finish can range from lightly textured to coarse exposed-aggregate looks. It depends on the size of your aggregates and the type of salt you use.
For a lightly textured look, use fine aggregates and rock salt. The result will be subtle mica-like specks across the surface.
If you want a coarse exposed-aggregate finish, go for larger aggregates and salt crystals. This will give your concrete a rougher, more rustic appearance.
Tools and Materials Checklist
Start with the basics: trowels, floats, edging irons, jointers, forms, and a moisture/texture plan for the salt finish. Add optional tools like a power trowel or mechanical broom for additional texture as needed. Keep storage and maintenance in mind so tools stay clean and ready.
Think through mix components and specs: cement type, aggregate size, water-to-cement ratio, and admixtures that affect workability and set. Note how slump, air and bleed influence salt distribution and texture. Consider salt options and application methods that suit your texture goals and timing.
Salt types and how to choose
Before you start, understand the salt options. Each has its own look and feel.
- Rock Salt: Cheap, coarse grain. Gives a rustic, textured finish. May cause corrosion if used indoors or on metal surfaces.
- Coarse Marine Salt: More refined than rock salt. Offers a cleaner look. Still, check for impurities that could affect the final appearance.
- Pelletized Salt: Uniform size and shape. Provides consistent texture. More expensive but worth it for high-end projects.
- Salt Grain Size: Smaller grains give a finer, more uniform texture. Larger grains create a rougher, more rugged look.
- Purity: Higher purity means fewer impurities that could affect the finish or cause discoloration over time.
Quick rule: Choose your salt based on the look you want and where it’s going. Indoors, opt for purer salts to avoid corrosion and discoloration.
Concrete mix and admixtures to consider
Your concrete mix and admixtures can make or break your salt finish.
- Aggregate Size: Smaller aggregates give a smoother, more refined finish. Larger aggregates create a rougher texture that shows through the salt.
- Finishability of the Mix: A well-finished mix means better salt adhesion and a more uniform appearance.
- Plasticizers: These make your concrete easier to work with. Too much can cause the salt to float instead of sticking.
- Retarders: Slow down set time, giving you more working time. But too much can affect the final strength of the concrete.
- Air Entrainment: Adds tiny air bubbles that help with freeze-thaw durability. Too much can cause the salt to pop out over time.
Quick rule: Follow manufacturer guidance for admixtures. Too much or too little can ruin your finish.
Tools and consumables
Having the right tools makes the job easier and ensures a better finish.
- Screed: Levels your concrete. A 2×4 works fine for small jobs, but consider a power screed for larger ones.
- Bull Float: Smooths out the surface. Use it before applying salt to ensure an even finish.
- Trowels: Finishing trowel for final smoothing, edging trowel for edges and corners.
- Power Floats: For larger surfaces, they save time and energy. But be careful not to overwork the concrete.
- Salt Spreader: Ensures even salt distribution. A shaker or sieve works too.
- Wash Equipment: Clean up any excess salt with water before it sets.
- PPE: Safety glasses, gloves, and a dust mask for protection.
- Temporary Protection Materials: Tarps or plastic sheets to protect the area from rain or debris.
Quick rule: Keep your tools clean and in good condition. A well-maintained tool is a safe, efficient tool.
Planning and Preparation
Site prep should focus on flatness, cleanliness, and moisture management. Check drainage and edge conditions before any formwork or pour to avoid texture inconsistencies. Establish a basic curing plan and contingency for weather delays.
Formwork must be square, plumb, and braced so movement doesn’t alter the surface. Verify compatibility with existing concrete or subfloors and plan moisture barriers if needed. Map out aggregate texture timing to align with finishing steps.
Substrate, Reinforcement, and Formwork Checks
Start by preparing your compacted base. It should be flat, clean, and free of any debris or contaminants that could compromise your concrete’s integrity.
Rebar/mesh placement is crucial for structural strength. Ensure it’s properly placed according to your engineer’s specifications, with adequate coverage and spacing.
Check slope/drainage. Your slab should slope slightly towards the center or edges to facilitate water runoff. This prevents ponding, which can lead to future failures like cracking or delamination.
Timing, Weather, and Scheduling
Concrete workability is heavily influenced by ambient temperature. Pour when temperatures are between 50°F-90°F (10°C-32°C) for optimal results. Consult your concrete mix’s datasheet for specific guidelines.
Humidity also plays a role. High humidity can cause excessive bleeding, leading to surface imperfections. Plan your pour on a day with moderate humidity.
Wind can dry out and cool the concrete too quickly, affecting its strength development. Schedule your pour on a calm day or when wind speeds are low. Always consult local codes for specific regulations regarding weather conditions during pouring.
Step-by-Step Application Process
Set up a workflow with weather and surface conditions checked, and keep tools within reach. Establish PPE and a safety checklist for slip hazards and chemical exposure. Prepare a clear sequence from placement to initial finish before salt application.
Place and screed, then bull float to bring up defects. Do a high points pass and decide on a final texture with a trowel or satin finish if desired. Monitor set times to avoid over-smoothing and edge inconsistencies.
Step-by-Step Process
Follow these practical steps to achieve a salt finish concrete surface from start to finish, ensuring safety and quality at every stage.
- Prepare your work area: Check weather conditions (air & slab temp, wind, humidity) and ensure surfaces are clean. Gather all tools and materials within reach.
- Ensure safety: Establish PPE requirements and review a clear safety checklist for slip hazards and chemical exposure.
- Place concrete: Follow your timeline to pour and spread the concrete evenly across the slab.
- Finish the surface: Use a bull float, then trowel or satin finish as needed before salt application. Keep an eye on set time to avoid oversmoothing or uneven edges.
- Broadcast salt: Apply salt evenly at the correct rate once the surface begins to stiffen but before final set. Allow it to dwell for optimal etching and aggregate exposure.
- Wash and rinse: Thoroughly remove salt residues after dwell, using a scrubbing technique and appropriate water pressure. Ensure even rinsing and proper drying.
- Seal (optional): Apply a compatible sealer after washing and curing, following manufacturer’s guidelines for long-term protection and maintenance.
Place, screed, and initial finish
Proper concrete placement and finishing sets the stage for a successful salt finish. Follow these steps to achieve an even, well-finished slab.
Start by placing concrete according to your timeline, ensuring consistent coverage across the entire surface.
Use a screed to level and achieve the desired grade, working from one side of the formwork to the other in smooth, steady strokes. Be sure to check for any low spots or high points as you go, making adjustments as needed.
Once the concrete is leveled, use a bull float to remove excess water and bring aggregate to the surface. Follow up with trowel or satin finish passes to achieve your desired final texture before applying salt.
Broadcasting salt and dwell period
The salt application process requires careful timing and even distribution for optimal results. Follow these guidelines to achieve the perfect salt finish.
Begin broadcasting salt as soon as the surface starts to stiffen but before final set, typically around 2-4 hours after placement. Use a fine salt with appropriate grain size, applying it evenly at a rate of about 1/8 to 1/4 pound per square foot.
Adjust your application rate based on slab porosity: more porous slabs may require additional salt. Be mindful of form lines and control joints, ensuring even coverage across the entire surface. Over- or under-applying salt can lead to inconsistent results, so take care to apply it evenly.
The dwell period allows the salt to etch and expose aggregate, creating texture and depth. Factors affecting dwell time include temperature and humidity; generally, expect a dwell period of 12-36 hours. Monitor your slab closely for signs that the finish has reached optimal salt depth without over-etching.
Rinse/reveal and optional sealing
Thoroughly rinsing or pressure-washing your slab removes salt residues, revealing the textured surface. Additionally, applying a sealer protects and enhances the appearance of your salt finish concrete.
Use a scrubbing technique with appropriate water pressure to remove all salt residues after the dwell period. Be sure to avoid under-washing or uneven rinsing, as these can compromise both appearance and longevity.
Allow the slab to dry completely before applying a compatible sealer, following manufacturer’s guidelines for ideal application timing and cure considerations. Optimal sealing enhances durability, protects against stains, and maintains the aesthetic appeal of your salt finish concrete over time.
Safety Precautions and Environmental Concerns
Define PPE needs, including gloves, eye protection, respirators for dusty conditions, and slip-resistant footwear. Maintain fall protection when working near edges or fresh pours. Keep the area organized to reduce exposure risk.
Handle and store salts and accelerants with care, reviewing labels and safety data sheets. Set up containment to prevent runoff and runoff salts from entering drains or gardens. Plan for proper cleanup and disposal of wash water and residues.
Personal protective equipment and safe handling
The right gear keeps you safe while salt-finishing. Here’s what to wear and how to handle salts.
- Gloves: Protect your hands from chemicals. Choose durable, water-resistant gloves like nitrile or neoprene – around $10-$20 a pair.
- Eye protection: Goggles or safety glasses shield eyes from splashes and dust. Expect to pay $5-$15.
- Respirator (optional): If you’re mixing dry salt, use a respirator with P100 filters to protect against dust – around $30-$60.
- Footwear: Wear sturdy boots with good grip to prevent slips on wet surfaces. Expect to pay $50-$150.
- Fall protection (if working at height): Use harnesses and lanyards when working above 6 feet – around $100-$300 for a kit.
Environmental runoff and corrosion mitigation
Contain wash water to protect the environment. Salt-laden water can harm vegetation, increase soil salinity, and enter waterways.
Use containment barriers around work areas – available for rent or purchase at $20-$50 each. Collect washout water in sealed containers for proper disposal.
Mitigate corrosion risks by choosing the right salt. Sodium chloride is generally safe for concrete, but avoid calcium chloride if rebar is exposed as it can cause pitting. Apply protective coatings to vulnerable metals before exposure to saltwater.
Regularly clean and maintain equipment to prevent salt buildup that could cause corrosion or surface staining. Follow local regulations for disposal of washout water.
Advantages, Disadvantages, and Common Mistakes to Avoid
Salt finishes offer improved slip resistance and decorative texture for outdoor settings where grip matters. They can enhance curb appeal and provide a unique tactile surface. Consider maintenance needs in outdoor environments when weighing options.
Disadvantages include a longer workflow with additional curing and sealing steps, and potential corrosion risks in susceptible conditions. Expect ongoing upkeep and the possibility of texture changes over time with wear.
Pros and cons summary
Salt finish concrete offers both benefits and drawbacks. Here’s a quick rundown to help you decide if it’s right for your project.
Pros
- Improved slip resistance: Salt crystals create a textured surface that provides better grip, especially in wet conditions.
- Decorative texture and unique visual interest: The random pattern of salt crystals adds aesthetic appeal to outdoor surfaces.
- Durability and low maintenance: Once sealed, salt finish concrete requires minimal upkeep and can last for years.
- Ideal for certain decorative outdoor surfaces: It’s perfect for patios, walkways, and low-traffic areas where grip is important.
Cons
- Labor-intensive process: Salt finish concrete requires more time and effort than traditional smooth finishes.
- Longer workflow with curing and finishing steps: The process involves multiple stages, including broadcasting salt, dwelling, rinsing, and sealing.
- Potential for surface issues or rebar corrosion: In susceptible conditions, improperly applied salt can lead to problems. Proper protection is crucial.
- Ongoing maintenance or sealing needs: While low-maintenance, salt finish concrete does require periodic resealing to keep it looking its best.
Salt finish makes sense for decorative outdoor surfaces where grip and aesthetics are important. However, it may not be suitable for high-traffic interiors or surfaces exposed to aggressive deicing salts without proper protection.
Common mistakes and how to avoid them
Even with careful planning, mistakes can happen. Here are some common pitfalls and ways to prevent them:
- Incorrect salt type or improper application timing: Always use manufacturer-approved products and follow their guidelines for application timing.
- Uneven distribution or insufficient pressing of crystals: Ensure consistent surface moisture and temperature before broadcasting salt. Use a broom to press the crystals into the concrete.
- Failing to clean residues: Thoroughly rinse and remove all salt residue after the dwell period to avoid compromising the finish.
- Skipping or improper sealing: Apply compatible sealers as soon as possible after rinsing. Regular resealing maintains the texture and protects against moisture damage.
- Ignoring environmental conditions that affect curing and texture: Monitor weather conditions during the curing process. Avoid applying salt finish in extreme heat, cold, or high humidity.
By understanding these common mistakes and taking preventive measures, you can achieve a successful salt finish concrete project.
Best Use Cases and Design Ideas — Where Salt Finish Makes Sense
Ideal applications include outdoor patios, walkways, pool decks, and select interior spaces where texture and grip are desirable. Use scenarios that benefit from a non-slip, decorative surface and manageable maintenance. Align expectations with traffic and cleaning routines.
Design options cover texture levels, broomed versus troweled finishes, and color or seeding with aggregates. Pair with compatible sealers and stain ideas to achieve the desired look while preserving texture. Consider transitions to other materials for visual interest.
Best Functional Applications
Salt finish concrete excels where texture and slip resistance are crucial. Here’s why it’s ideal for certain areas:
Patios, Walkways, Pool Decks: These high-traffic zones benefit from salt finish’s non-slip surface. The texture helps prevent falls on wet or icy surfaces.
Interior Floors (Garages, Basements): Salt finish is durable and easy to maintain, making it perfect for these hardworking spaces. It hides dirt well and requires minimal upkeep.
Aesthetic Pairings and Design Tips
Salt finish concrete offers versatility in design. Here’s how to make it work for you:
Stains and Aggregates: Combine salt finish with stains or exposed aggregates for a unique look. For instance, use a warm stain with coarse salt for a rustic feel.
Borders and Accents: Use salt finish as a border around stamped or stained concrete, or mix it with pavers or tile accents in patios and pool areas. Inside, pair it with baseboards, tiling transitions, or lighting fixtures to create visual interest.
Costs, Maintenance, and Troubleshooting
Budget around labor, materials, equipment, and sealing as part of the project scope; vary costs by site conditions and finish goals. Plan for regional differences and potential hidden tasks that affect total time. Use a realistic contingency to cover weather or curing delays.
Establish a maintenance routine that includes cleaning, sealing timing, and slip-resistance checks. Keep a simple troubleshooting guide for issues like uneven color or salt haze and know when a pro should be consulted. Align sealing choices with expected wear and appearance goals.
Cost factors and budgeting guidance
The cost of a salt finish concrete project depends on several factors. First, consider the labor time. DIY will save you money but takes more time. Hiring a pro is faster but costs more.
Material costs vary regionally. Expect to pay around $100-$200 per cubic yard for cement and aggregate. Salt additives are extra, usually $50-$100 per 50 lb bag. You’ll also need equipment like forms, screeds, and a bull float.
Sealers are crucial but add to the cost. Penetrating sealers are cheaper ($30-$60 per gallon) than film-forming ones ($50-$100). Don’t forget site cleanup and surface prep costs, which can be hidden fees.
Tip: Get quotes from local pros and check regional material prices. Consider buying materials in bulk for savings.
Maintenance schedule and repair options
Salt finish concrete needs regular cleaning to maintain its appearance. Use a mild detergent and soft-bristle broom every 6-12 months. Reseal every 2-5 years, depending on traffic and weather.
Slip resistance can decrease over time. Reapplying salt or using a non-slip sealer can help. Regular maintenance extends longevity and keeps the aesthetic.
For repairs, patch low spots with a concrete repair mix. For small areas, use a trowel to re-texture and broadcast new salt. Always test cleaners and sealers on a small area first.
Quick rule: Regular maintenance keeps your salt finish looking good and performing well.
Visual checkpoints and troubleshooting during the job
Use this checklist at each stage to ensure a successful pour. Check it after broadcasting salt, washing off, and before final sealing.
- Uniform salt coverage: Ensure salt is evenly distributed. Inconsistencies lead to blotching or uneven color.
- Wash-off results: After rinsing, check for proper reveal. Too much salt can cause surface dusting/salt haze; too little may not provide desired effect.
- Efflorescence: White powder on the surface indicates excess salts. It’s normal but should disappear after a few weeks or with a light acid wash.
- Cracks: Small cracks can appear during curing. Fill and seal immediately to prevent water intrusion.
- Chipping: Check for any chipped areas. Repair promptly to maintain the finish’s integrity.
- Color consistency: Ensure the color is even throughout. Uneven color indicates inconsistent salt distribution or improper washing.
- Surface texture: The surface should have a consistent, slightly rough texture. Too smooth may lack slip resistance; too rough might be uncomfortable to walk on.
- Edges and corners: Check these areas for proper finishing. They’re often overlooked but crucial for the final look.
Quick rule: Regular visual checks help catch issues early, saving time and money.
Conclusion
Salt finish concrete rewards careful prep and controlled application with lasting texture and color, but it only pays off if you protect people and the surface from damage during the process. Stay focused on safety, follow the steps, and you’ll end up with a durable, good-looking floor that you can be proud of.
First, verify the project scope and substrate, then gather the tools and materials, test a small area, and plan your sequence from prep to cure. Prep the surface, apply in the correct order, monitor for crowding or trapping moisture, rinse and neutralize as needed, seal after the cure, and perform a final inspection before opening the space. Work steadily, follow the manufacturer or product recommendations, and document any adjustments for future projects.
Common mistakes to avoid are skipping proper surface preparation, rushing the application or cure, and using the wrong salt size or placement pattern. Always wear appropriate PPE, work in a well-ventilated area, and keep the work area clean to prevent slips or contamination. If you’re unsure about moisture in the slab, or if the area is large or complex, pause and reassess—a dry, stable substrate is non-negotiable.
If the project is bigger than a small patio patch, or you see signs of moisture, cracks, or uneven results during prep, consider calling a professional rather than forcing it. Stay deliberate, finish with care, and you’ll have a salt finish that blends durability with the look you planned.
FAQ
What is salt finish concrete and how does it differ from other decorative finishes?
Salt finish is a textured surface created by applying or exposing salt granules on the top of the hardening concrete. The salt leaves a slightly rough, slip-resistant surface as it breaks away pinholes and creates texture. It’s different from smooth troweled or stamp-pattern finishes because the texture comes from the salt, not from forms or additives.
How do you apply salt finish concrete?
Apply or embed the salt while the concrete is workable, then allow it to set enough to resist scuffing. Rinse or scrub away the salt to reveal the textured surface, then cure or seal as recommended by the product instructions. Follow local guidelines and manufacturer labels for timing and method.
What are the advantages and limitations of salt finish?
Advantages include a natural grip and a low-gloss, rustic look that hides minor imperfections. It’s usually simple to repair by reapplying salt in worn spots. Limitations are uneven texture on large areas and the need for proper sealing to resist weather and wear; check product specs for wear life and use cases.
How should I maintain salt finish to maximize longevity?
Keep it clean with regular dry brushing or light washing to remove grit. Re-seal according to the sealer’s instructions when the surface starts to look faded or dull. For any doubt on products or timing, read the label and consult manufacturer guidance or local rules before proceeding.