
Introduction
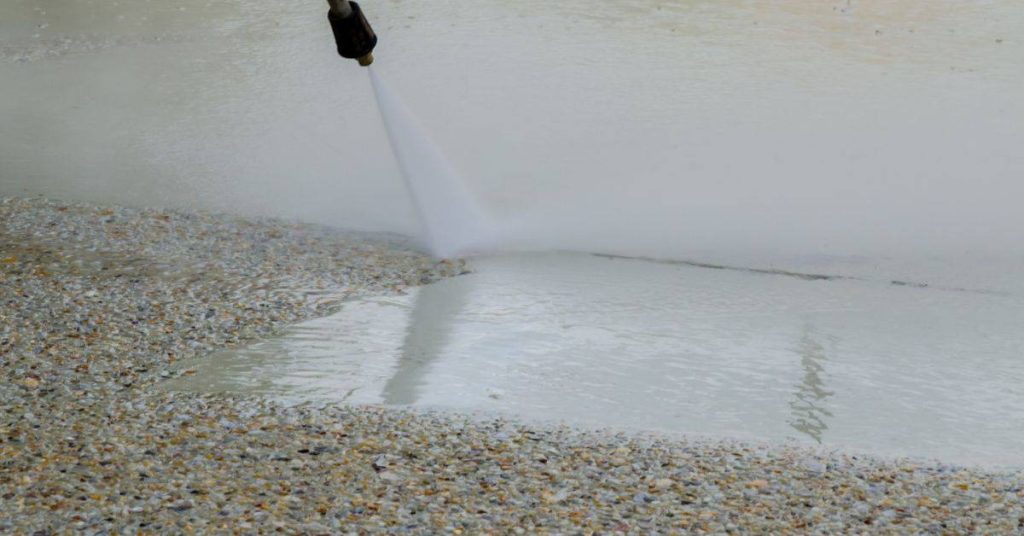
Exposed aggregate finish is when you reveal the decorative rocks in fresh concrete by washing away the surface grout at the right time. Plan the pour with your exposure goal in mind, and monitor the surface as it firms so you can decide when to start washing. Have a clear sequence for washing, exposing the aggregate, and letting the surface set before sealing.
Washing is done with care after the surface has stiffened enough to resist marring, using a gentle, low-pressure method to rinse away the top layer. After exposing the aggregate, allow the surface to dry and cure as recommended before applying a sealer, choosing a sealer type that suits your location and traffic. Always check product labels and local rules for curing and sealing times, and test a small area first to confirm your approach.
Key takeaways
- Plan exposure timing with weather, slab hardness, and surface condition before washing.
- Use light, even washing after pour to reveal aggregate without eroding cement paste.
- Rinse and stop washing when aggregate shows clean, consistent exposure across area.
- Inspect surface for fines, dips, or loose stones before sealing.
- Wear PPE and follow manufacturer guidelines when selecting and applying sealer.
- Allow proper drying and curing after sealing, follow manufacturer guidelines and safety.
Table of Contents
- Introduction
- Key takeaways
- What an Exposed Aggregate Finish Is and Why It Matters
- Timing: When to Expose Aggregate for Best Results
- Washing Procedures to Reveal the Aggregate
- Surface Preparation Before Sealing
- Sealing Techniques and Choosing the Right Sealer
- Maintenance, Inspection, and Long-Term Durability Strategies
- Tools, Materials, Safety, Environmental and Cost Considerations
- Conclusion
- FAQ
What an Exposed Aggregate Finish Is and Why It Matters
Exposed aggregate means the concrete matrix is visible with the aggregate grains exposed on the surface. It differs from standard broomed or troweled finishes by revealing the stone, glass, or sand pieces that are embedded in the mix. This distinction influences texture, color, and overall durability considerations.
Common applications include driveways, patios, and walkways where appearance and slip resistance matter. The timing of washing and sealing affects how evenly the aggregate presents and how long the surface endures. Properly managed exposure supports wear resistance and long-term beauty, while mis-timed finishing can lead to dullness or uneven exposure.
What “exposed aggregate” means in practice
Exposed aggregate concrete isn’t your everyday smooth finish. It’s a process that reveals the stones and pebbles mixed into the concrete.
We achieve this by using methods like washout, retarders, or grinding. Washout involves washing away the cement paste to expose the aggregate. Retarders slow down the curing process, allowing more time for washing. Grinding is used sparingly, as it can dull the mix.
Each method has its outcome: washout gives a natural look, retarders allow for more control, and grinding provides a consistent exposure but may affect the concrete’s appearance.
Benefits for durability and slip resistance
Exposed aggregate finishes boost your concrete’s lifespan. The visible stones provide better wear resistance, lasting longer than smooth surfaces.
For slip resistance, exposed aggregate is a winner. Those little stones give traction, making it safer in wet conditions compared to broom-finish or troweled concrete.
Plus, it looks great: the varied textures and colors add visual appeal, giving your project a unique touch.
Typical applications and suitability
Exposed aggregate is perfect for driveways. The extra traction helps when driving in wet weather, and the durability stands up to vehicle traffic.
Patios and walkways also benefit from this finish. It’s slip-resistant, durable, and adds a nice aesthetic touch to outdoor living spaces.
Commercial areas: exposed aggregate works well here too, especially in high-traffic zones like sidewalks or loading docks. Just remember, it’s not ideal for indoor floors due to the uneven surface.
Timing: When to Expose Aggregate for Best Results
The critical timing window ties to concrete maturity, moisture condition, and form removal schedule. Exposing too early can compromise bond; too late may reduce depth and uniformity. Plan exposure within the window suggested by manufacturer guidelines and local practices.
Consider curing duration, ambient conditions, and weather when deciding readiness. Visual cues and, if available, test panels help confirm depth before full exposure. Document results to guide future projects and sealing compatibility.
Key factors that affect curing and exposure timing
The timing of aggregate exposure is critical for a durable, consistent finish. Here are key factors to consider:
Temperature: Warmer temps speed up concrete maturity. Ideal exposure temp is 50-90°F (10-32°C). Too cold can delay set and weaken bond.
Humidity & Wind: High humidity keeps the slab moist, aiding curing. Low humidity or strong winds can dry out the surface too quickly, leading to inconsistent exposure depth and weakened bond.
Mix Design & Admixtures: Slower-setting mixes give more time for proper curing before exposing. Some admixtures may accelerate set; check manufacturer guidelines. Thicker slabs take longer to cure through.
Visual checkpoints and simple on-site tests
Before exposing aggregate, use these visual cues and quick tests to confirm readiness:
- Surface Sheen: A matte surface indicates proper curing; a glossy sheen means it’s too early.
- Laitance Removal: Gently scrub the surface with a broom. If laitance (grayish film) comes off easily, it’s not ready.
- Aggregate Visibility: You should see aggregate particles clearly through the cement paste.
- Moisture Meter: Use one to check moisture content at the surface and 1-2 inches deep. Aim for 4-6% and 8-10%, respectively.
- Reinforcement Coverage: Ensure all reinforcement is adequately covered with concrete before exposing.
- Form Removal: If forms are still in place, check if they can be removed without damaging the surface.
- Test Panels: If pre-placed, expose and wash them to confirm depth and appearance match your target.
- Cement Set: Gently scratch the surface with a coin. If it’s hard and doesn’t crumble, it’s likely set.
Quick rule: Don’t rush exposure based on calendar days alone; rely on these checks to confirm readiness.
Seasonal and weather scheduling considerations
Weather plays a significant role in aggregate exposure timing. Plan around these conditions:
Hot & Dry Conditions: High temps speed up curing but can also dry out the surface too quickly, leading to inconsistent exposure depth. Keep the slab moist during exposure.
Cold Conditions: Below 50°F (10°C), concrete sets slowly and may not develop proper strength before freezing. Avoid exposing in cold weather unless protected from freezing.
Humid & Rainy Conditions: High humidity keeps the slab moist, aiding curing. However, heavy rain can wash away cement paste, leading to inconsistent exposure depth. Protect the surface during and after rainfall.
Washing Procedures to Reveal the Aggregate
Begin with a surface assessment to check for loose material and brightness of the aggregate. Protect nearby substrates and confirm cure stage and weather are suitable before washing. This reduces the risk of damage during wet surface work.
Choose soft-bristle brushes or nylon pads and a mild cleaner. Use low-pressure washing and controlled motions to reveal the aggregate without eroding the cement paste. Stop when the desired brightness is achieved and uniform exposure is evident.
Initial wash and chemical retarder removal
Start gentle. Your first pass should be light, just to remove loose dust.
If you used a surface retarder, now’s the time to remove it. A soft-bristle brush or nylon pad with some mild detergent will do the trick. Be conservative – you can always wash more later.
Why go slow? Over-washing on the first pass can damage the aggregate and leave you with a rough, uneven surface.
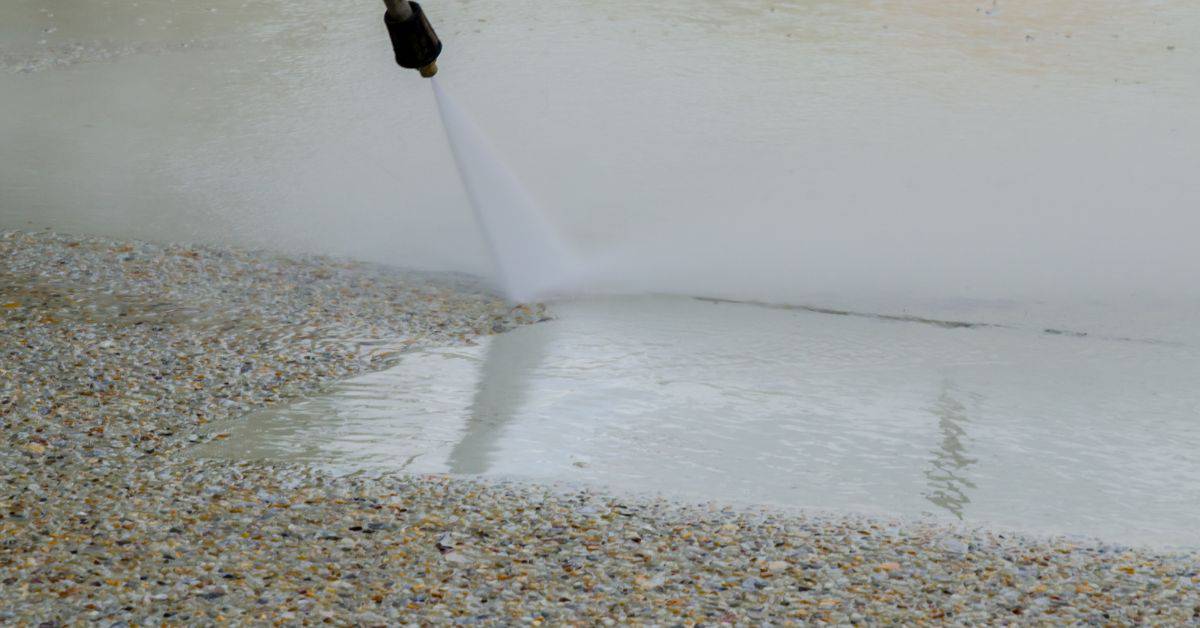
Pressure-washing best practices and equipment guidance
Start low, increase gradually. You don’t want to gouge the surface.
- Adjustable pressure washer: Essential for fine-tuning your cleaning power. Rentals are around $50-$100 per day.
- Low-pressure setting (600-1200 PSI): Ideal for aggregate exposure. Too high, and you’ll damage the surface.
- Nozzles: Use a 25° or 40° nozzle for even coverage. Avoid 0° or 15° nozzles – they’re too focused and can cause damage.
- Testing area: Before you start, test on a small, hidden spot to ensure you’re not causing any harm.
- Distance matters: Keep the nozzle about 6-12 inches from the surface. Too close, and you’ll create divots or gouges.
Common washing problems and corrective actions
Uneven exposure is a common issue. It happens when you wash some areas more than others, leaving them too bright or eroded.
Solution: Re-wash lightly in stages, focusing on the over-washed spots first. This helps even out the aggregate reveal.
Slurry residue can be a problem if not rinsed properly. It can dry and leave a hazy film.
Fix: If you find this happening, rinse again thoroughly with clean water. If it’s still an issue, light grinding or spot repairs might be needed.
Surface Preparation Before Sealing
Thorough cleaning is essential to remove dirt, oil, and any old sealers. Use appropriate cleaners and methods, and ensure the surface is free of contaminants before sealing. Include any necessary etching or degreasing steps per local guidance.
Test moisture levels with simple checks or meters and document results. Repair cracks or spalls and ensure repairs are dry and cured. Verify surface profiling and porosity to anticipate sealer performance and adhesion.
Cleaning, stain removal, and degreasing
Start by removing any loose material with a stiff brush. Then, tackle tough stains:
- Oil and grease: Use a degreaser like TSP (trisodium phosphate) or a commercial cleaner. Test in a small area first.
- Rust: Apply a rust remover, following the manufacturer’s instructions.
- Biological growth: Use a solution of bleach and water (1:3 ratio), then rinse thoroughly.
- Efflorescence: Remove with a muriatic acid solution (1 part acid to 5 parts water). Always wear protective gear when handling chemicals.
Rinse the surface well after cleaning. Let it dry before proceeding.
Repairs, patching and ensuring a sound substrate
Fill cracks, spalls, and pitting with an appropriate repair material. Use a concrete patch for small repairs or a polymer-modified cement for larger ones.
Note: Always follow the manufacturer’s instructions for mixing and application.
Allow patches to cure according to the product’s guidelines. Once cured, profile the repaired areas with a broom finish or lightly etch them to match the surrounding surface.
Moisture testing and substrate acceptance
Before sealing, test for moisture:
- Plastic sheet test: Place a plastic sheet on the concrete, secure the edges, and check after 24 hours. If condensation is present, the surface may be too moist.
- Calcium chloride test: Apply calcium chloride to the surface. If it turns pink or red within 60 minutes, moisture levels are too high for sealing.
- Moisture meter: Use a non-invasive meter following the manufacturer’s instructions. Most sealers require moisture levels below 4 lbs/1000 sq ft/24 hours at 73°F (22°C) and 50% RH.
Always follow the sealer manufacturer’s guidelines for acceptable moisture levels before application.
Sealing Techniques and Choosing the Right Sealer
Compare sealer types and how they influence color, texture, and long-term durability. Understand whether penetrating or film-forming products best suit the exposure and maintenance needs. This choice shapes appearance and performance over time.
Follow application prerequisites and best practices, including surface prep and environmental controls. Perform test patches and observe cure times and recoat windows to ensure a reliable seal. Plan for routine maintenance and resealing as part of the lifecycle.
Penetrating vs film-forming sealers: pros and cons
The choice between penetrating and film-forming sealers for your exposed aggregate surface depends on the look you want and how well it’ll hold up. Let’s break down each type.
Pros of Penetrating Sealers
- Keeps natural texture and color of aggregates.
- Allows moisture to escape (breathable).
- Won’t peel or flake off like some film-forming sealers.
- Easy to apply, often with a single coat.
Cons of Penetrating Sealers
- Less durable than film-forming sealers. Expect to reseal more frequently.
- Won’t enhance color or gloss level like film-forming sealers.
- May not provide sufficient protection against stains, chemicals, or heavy foot/vehicular traffic.
- Not suitable for areas with high UV exposure without additional protection.
Penetrating sealers are ideal when you want to maintain the natural look of your aggregates and don’t mind occasional resealing. They’re great for indoor use and low-traffic outdoor areas.
Application methods, coat strategy and coverage considerations
Applying sealer correctly is key to getting a durable finish. Here’s how:
Tools: Use a roller for large areas, a low-pressure sprayer for even application, or a brush for edges and hard-to-reach spots.
Coat Strategy: Follow the manufacturer’s guidelines for wet film thickness. Typically, you’ll apply 2-3 coats with proper drying time in between. Recoat too soon, and you risk poor adhesion; wait too long, and you might not get even coverage.
Coverage Considerations: Always check the manufacturer’s coverage rates. A common mistake is applying too little sealer, leading to inadequate protection. Better to have a bit extra than run out mid-job.
Material specs and standards to check
Choosing the right sealer means checking its material specs. Here’s what to look for:
- VOC Content: Lower VOCs mean less harmful emissions, important if you’re sealing indoors or in poorly ventilated areas.
- UV Stability: For outdoor use, ensure the sealer has good UV resistance to prevent fading and cracking. Look for a spec of at least 3 years’ durability.
- Salt and Chemical Resistance: Essential if your surface is near a pool, spa, or in an area prone to chemical spills. Check the manufacturer’s data sheets for specific resistance ratings.
- Slip Rating: For high-traffic areas, ensure the sealer has a suitable slip rating to prevent accidents.
- Maintenance Intervals: Check how often you’ll need to reseal. This varies based on traffic, weather exposure, and the sealer type.
Using the wrong material can lead to cracking, staining, weak bond, or even premature failure of your sealer. Always check specs and follow manufacturer guidelines for best results.
Maintenance, Inspection, and Long-Term Durability Strategies
Set up a practical inspection schedule to catch wear and color changes early. Use photos and notes to track condition over seasons and weather cycles. Document any observed issues for timely action.
Develop cleaning and upkeep routines that avoid damaging the finish. Use approved cleaners and gentle brushing when needed and protect the surface during heavy use or nearby work. Resealing cues and timing keep the aggregate looking its best longer.
Routine inspection and cleaning schedule
Regularly inspecting and cleaning your exposed aggregate finish helps maintain its durability and appearance. Here’s a simple checklist to follow.
- Visual Inspection: Check for signs of wear, fading, or etching after extreme weather or heavy use.
- Joint Weed Growth: Inspect joints for weed growth every quarter.
- Stain Check: Look for stains and discoloration. Address promptly to prevent buildup.
- Pressure Wash (Annually): Use a soft brush and low pressure to clean the surface gently.
- Avoid High Pressure: High pressure can damage the aggregate finish.
- Remove Stains Promptly: Clean oil, rust, or efflorescence stains as soon as possible to prevent dulling.
- Document Findings: Take photos and note findings for future reference.
- Clean Adjacent Areas: Protect plants, seals, and coatings during cleaning.
Quick rule: Inspect visually after extreme weather or heavy use, clean annually with a soft brush and low pressure, and remove stains promptly to maintain your finish’s longevity.
When to re-seal and how to test sealer performance
Knowing when to reseal is crucial for maintaining your exposed aggregate’s durability. Here are signs and tests to help you determine if it’s time.
- Loss of Water Beading: If water no longer beads up, the sealer may be worn out.
- Increased Surface Slickness: A noticeably slick surface indicates a need for resealing.
- Visible Traffic Wear: Check for wear patterns from foot or vehicle traffic.
- Water Drop Test (WDT): Place a few drops of water on the surface. If they don’t bead up, it’s time to reseal.
- Scratch Test (ST): Gently scratch the surface with a coin or key. If the aggregate is exposed, resealing is needed.
- UV Exposure Check: Look for discoloration or fading due to UV exposure.
- Chemical Resistance Check: Apply a small amount of mild cleaner to check if it affects the sealer.
Quick rule: Reseal when water no longer beads, surfaces become slick, and traffic wear is visible. Use WDT, ST, UV exposure, and chemical resistance checks to confirm.
Addressing damage and restoring performance
Occasional damage can occur on your exposed aggregate finish. Here’s how to handle it.
- Localized Wear: Lightly sand, clean, and reseal affected areas.
- Spalling or Deep Stains: Repair using a compatible patching compound, then reseal.
- Professional Restoration: Consult a professional if damage is extensive or beyond DIY repair.
- Prompt Spill Cleanup: Quickly clean spills to prevent staining and damage.
- Avoid Harsh Chemicals: Harsh chemicals can damage the sealer and aggregate.
- Temporary Protection: Protect surfaces during nearby construction work.
- Minimize Heavy Traffic Damage: Limit heavy foot or vehicle traffic where possible.
Quick rule: Address localized wear by sanding, cleaning, and resealing. For spalling or deep stains, repair with a compatible compound, then reseal. Consult a professional for extensive damage.
Tools, Materials, Safety, Environmental and Cost Considerations
List essential tools and optional add-ons needed for mixing, finishing, and sealing. Keep a compact shopping list to avoid last‑minute runs. Plan for task-specific tools to improve job speed and quality.
Compile a complete materials checklist and note PPE and safety controls. Include environmental practices and waste management steps to stay compliant. Outline budgeting and whether to DIY or hire a pro, with guidance on contractor questions and insurance considerations.
Tools and materials checklist
Before you start, make sure you have all the necessary tools and materials. This checklist will help you stay organized and avoid last-minute runs.
- Adjustable pressure washer: Essential for cleaning and preparing the surface. Ensure it’s compatible with your chosen products.
- Scrub brushes: Stiff-bristled brushes are needed to remove dirt, stains, and efflorescence. Choose ones that won’t damage the surface.
- Surface retarders: These slow down the curing process, allowing more time for aggregate exposure. Check compatibility with your mix design.
- Sealer applicators: Roller covers, sprayers, or brushes – choose based on your sealer type and surface area.
- Moisture meter: Essential to test the substrate before sealing. It helps prevent blisters and delamination.
- Tape and masking supplies: Protect adjacent areas from sealant with painter’s tape and drop cloths.
- Cleaners: Degreasers, acid cleaners, or other specialized cleaners – choose based on your surface type and contaminants.
- Polymer-modified cement: If repairs are needed, use a compatible patching material to ensure long-term durability.
Quick rule: Always verify tool and product compatibility before starting any job.
Safety, PPE and environmental controls
Your safety and the environment’s well-being are paramount. Here’s what you need to know:
Wear appropriate PPE: Gloves, eye protection, and a respirator for solvent-based products. Proper footwear is also crucial.
Contain runoff: Use tarps or other barriers to prevent sealant or cleaning agents from entering drains or waterways. Dispose of materials responsibly according to local regulations.
Follow safety protocols: Use ladders and step-stools safely, ensure fall protection if working at heights, and follow lockout/tagout procedures for equipment.
Cost planning and hiring professionals
Budgeting is key to a successful project. Here’s how to estimate costs:
Calculate material needs: Use manufacturer coverage rates to determine how much sealant, cleaners, and other materials you’ll need. Don’t forget to account for waste.
Factor equipment rental and labor: If hiring pros, factor in their hourly rate or flat fee. Consider equipment rental costs if you don’t own the necessary tools.
Get multiple quotes: Before committing, obtain quotes from several reputable contractors. This helps ensure you’re getting a fair price and quality service.
Conclusion
Done right, an exposed aggregate finish stays durable and looks sharp for years, but it hinges on safe work and solid timing—from exposing the aggregate to sealing it. Stay deliberate about weather, surface prep, and choosing the right sealer, and you protect the job from costly mistakes.
First, check your timing and conditions, test a small area before full exposure, wash in stages to reveal the aggregate without underscoring or overexposing, prepare the surface thoroughly, select a sealer that matches your substrate and climate, follow the product’s cure and application guidelines, and schedule maintenance inspections so you catch wear before it spreads.
Common mistakes to avoid include rushing exposure in unsuitable weather or soil conditions, washing too hard or too soon and damaging the surface, skipping proper surface prep or choosing the wrong sealer for your climate, and failing to test a small area or follow cure times and ventilation requirements—always wear appropriate protection and work in a well-ventilated area.
If you’re unsure about the timing, sealer choice, or how to handle concrete patches, it makes sense to bring in a professional rather than risk uneven color, structural damage, or costly remediation. Stay deliberate, document what you do, and you’ll finish with a durable, attractive surface you can trust for years to come.
FAQ
When is the right time to expose the aggregate after pouring?
Look for guidance on the concrete label or datasheet for your mix. If unsure, wait until the surface has firmed up and the puddling is gone, then test a small area first. Don’t rush it with wash or grind techniques until you’re sure the surface isn’t still curing hard.
What washing techniques work best after pouring to reveal the aggregate?
Use a gentle approach first—low-pressure spray and a soft scrub to lift the top cement without digging into the concrete. Avoid aggressive blasting that can gouge or roughen the surface. If in doubt, follow the manufacturer’s or contractor’s instructions and test on a small area.
What sealing method should I choose for durability?
Penetrating sealers soak in and protect the concrete without forming a film. They’re good for color and texture but may require reapplication over time. Film-forming sealers sit on top and can enhance color and gloss but may trap moisture if not applied correctly. Check product labels for suitability to your substrate and climate.
How long does it take for a sealer to dry or cure after application?
Drying and cure times vary by product and weather. Read the label for the expected time before traffic or use. In hot or humid conditions, expect longer curing times; in cool conditions, shorter times can be misleading—verify with the manufacturer instructions and local conditions.
What maintenance practices help long-term durability?
Inspect the surface regularly for wear or cracks. Re-seal as recommended by the product maker or when the water beads no longer on the surface. Clean spills promptly and avoid harsh cleaners that can degrade the sealer or aggregate.