
Introduction
Troubleshooting stamped concrete walkways is figuring out and fixing issues that affect texture, color, and durability.
Start with solid prep: clean forms, set forms correctly, and prepare the slab surface according to the product instructions. If you see staining, preexisting cracks, or stamping trouble, check labels and local guidelines before making changes.
Stamping problems often come from timing, pressure, and pattern alignment during the work. Discuss curing steps, shielding from sun or wind, and re-stamping or touch-ups if allowed by the product. Seal and maintain after curing to protect color and wear, and plan regular resealing as recommended by the manufacturer.
Key takeaways
- Assess site drainage and surface slope before stamping or repairing stamped concrete.
- Verify recommended curing methods and timing to prevent cracks during removal or pour.
- Plan stamping patterns in layout to match existing pathways and reveals.
- Sealants must be compatible with finishes; apply as directed after curing.
- Wear eye protection and masks; follow safety data when mixing repair mortars.
- Document overall condition, cost options, and decide between repair or replacement.
Table of Contents
- Introduction
- Key takeaways
- Common Problems and How to Identify Them
- Proper Surface Preparation Before Repair or Installation
- Color and Pattern Issues: Causes and Fixes
- Cracks, Settlement, and Structural Repairs
- Surface Defects: Efflorescence, Spalling, and Surface Wear
- Sealers, Maintenance, and Long-Term Care
- Tools, Materials, and Safety Precautions
- Cost Considerations and Decision Guide: Repair Vs Replace
- Conclusion
- FAQ
Common Problems and How to Identify Them
This section helps you spot the six most common issues on stamped concrete walkways: fading color, pattern bleeding, surface cracks, efflorescence, spalling, and settling. You’ll learn simple visual and tactile checks you can do without tools to tell if a problem is cosmetic or more serious. Recognize how each issue looks and feels so you can decide what to do next.
Knowing what to look for helps you decide whether it’s cosmetic or requires action. You’ll get practical steps for cleaning, sealing, crack filling, and when to reach out for professional help. Photograph symptoms, track timing, and set up a simple maintenance plan so the walkway stays durable and nicer longer.
Visual inspection checklist
Before starting any concrete work, use this checklist to identify potential issues. It’s best done after the concrete has cured for at least 28 days.
- Color loss: Check for areas where the concrete is lighter or discolored. This could indicate water damage or inadequate curing.
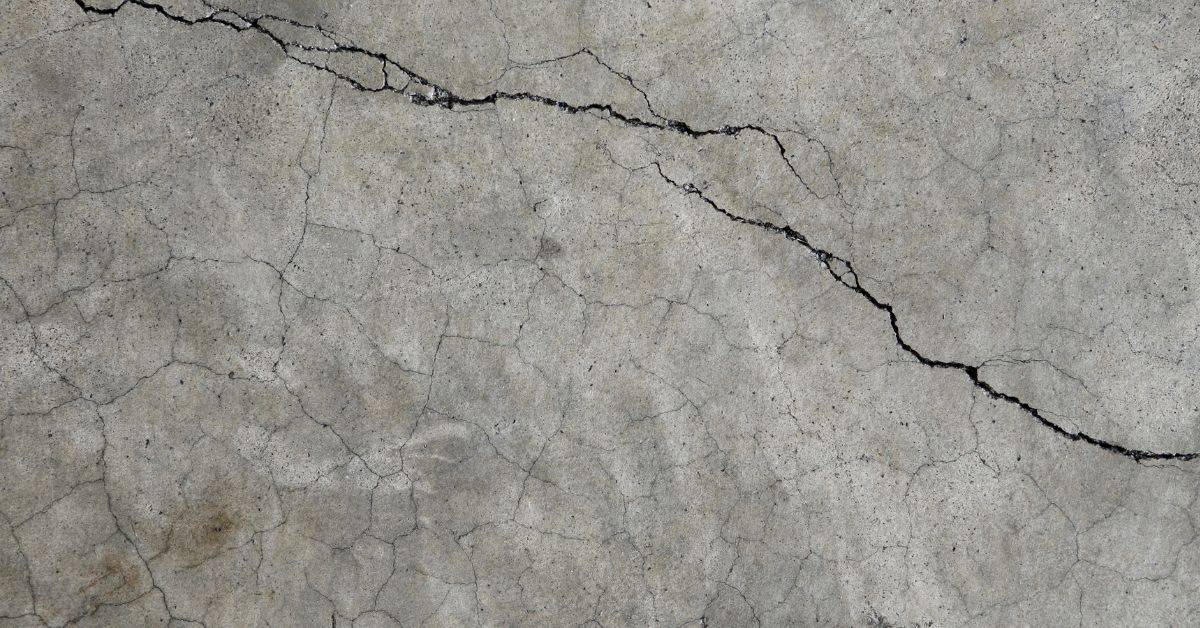
– How to confirm: Compare with adjacent areas, and check if the discoloration has affected the surface texture. - Hairline cracks (less than 1/8″): Look for thin, spiderweb-like cracks. These are usually harmless but can worsen over time.
– How to confirm: Use a ruler or tape measure to check the crack width. - Structural cracks (greater than 1/8″): Check for wider, deeper cracks that could indicate structural issues.
– How to confirm: Measure crack width and depth. If unsure, consult a structural engineer. - Surface texture changes: Look for areas where the surface is smoother or rougher than others.
– How to confirm: Compare with adjacent areas using your hands or a straight edge. - Popouts (small, raised areas): These can indicate air pockets or aggregate issues during mixing.
– How to confirm: Press gently on the popout. If it feels hollow or gives way, it needs repair. - Delamination (flaking or peeling surface): Check for areas where the concrete seems to be lifting off the surface.
– How to confirm: Gently tap with a hammer. Delaminated areas will sound hollow. - Uneven surfaces: Look for areas that are higher or lower than adjacent ones.
– How to confirm: Use a level or straight edge to check surface flatness. - Cracking around openings (doors, windows): Check for cracks near edges and corners.
– How to confirm: Measure crack width. If greater than 1/8″, consider rebar reinforcement or expansion joints.
Quick rule: Always address structural cracks, delamination, and uneven surfaces immediately to prevent further damage and costly repairs.
When to call a pro vs DIY
You’ve done your visual inspection, now you need to decide if it’s a job for you or time to call in the pros. Here’s what to consider:
Severity and Extent: Small cracks are usually okay to fix yourself. But if they’re wide (more than 1/4 inch) or long, it might be more than a DIY job.
Structural Risk: If you see signs of structural damage – like sloping floors, bulging walls, or cracks around door frames – these are red flags. These could indicate serious issues like foundation problems, which need professional attention.
Proper Surface Preparation Before Repair or Installation
Proper surface prep starts with a thorough substrate check—look for cracks, moisture, and overall soundness to decide if the slab can be resurfaced or needs removal. Plan the base depth and ensure compaction so the surface won’t settle. Clean, profile, and patch cracks, and set joints to control cracking; then run a moisture check before you pour.
Skipping this prep leads to bond failures, staining, and long-term cracking that shows up after you install. Doing it right gives you a solid anchor, better adhesion, and fewer calls for repair. If you’re unsure about moisture tests, joint depth, or base compaction, check the label or manufacturer instructions.
Assessing and fixing the substrate/base
The first step in proper surface preparation is assessing your existing slab. Grab a shovel and check for:
- Cracks: Hairline cracks are okay, but wider ones need attention.
- Moisture: Too much moisture can cause long-term issues. If it’s damp, consider installing a vapor barrier.
- Soundness: Tap the slab with a hammer. A dull thud means it’s solid; a hollow sound indicates soft spots that need removal.
If your substrate is in good shape, you can resurface it. If not, remove and replace it with a proper base:
- Material: Use compacted crushed stone or sand for your base.
- Thickness: Aim for 4-6 inches thick, depending on traffic and load requirements.
- Compaction: Ensure it’s well-compacted to prevent settling. Rent a plate compactor if needed.
Cleaning and surface profiling for repairs
Before patching or resealing, you need a clean, profiled surface. Here’s how:
- Remove contaminants: Use pressure washing to remove dirt, oils, sealers, and coatings.
- Create a profile: You need a rough surface for good adhesion. Mechanical scarifying or chemical cleaners can help.
If you’re unsure about the best method, consult with a pro before starting. Remember, proper cleaning and profiling is crucial to prevent long-term failures.
Color and Pattern Issues: Causes and Fixes
Uneven color, pattern bleeding, and ghosting are usually caused by moisture, improper release agent application, and curing conditions, with mismatched patterns making problems obvious. Localized color restoration, reapplying the release agent for future pours, or using a compatible overlay are common fixes you can plan for. Start with deciding on patterns and colors upfront to minimize future issues.
Diagnostic steps matter: check substrate moisture, temperature, humidity, and sealer compatibility, and test color on a small patch or sample board. Knowing when to repair vs. redo comes from a clear plan, sample boards, and documenting the color sequence for future work. A smart preventive workflow—proper surface prep, consistent slab moisture, timely topcoats, and choosing a compatible pattern and color scheme—will save you headaches later.
Techniques for color correction
When it comes to fixing color issues, you’ve got a few options. The best one depends on the severity and type of problem.
Localized Color Restoration: For small areas with uneven color or light spots, use acrylic stain or integral color hardener. Apply it directly onto the affected area, then seal it in. This works great for touch-ups.
Overlay Techniques: If you’re dealing with large patches of discoloration or inconsistent patterns, consider using a stampable overlay. It’s like giving your walkway a fresh canvas to work on. Apply it over the existing slab, let it cure, then stamp and seal as usual.
Preventing pattern bleeding and ghosting
Bleeding and ghosting happen when the imprint from one pour bleeds into the next. Here’s how to prevent it:
Release Agent Application: Apply release agent generously but evenly before stamping. This helps prevent the concrete from sticking to the stamps, reducing the risk of bleeding. Don’t skimp on this step!
Timing is Key: Stamp your walkway as soon as possible after pouring. The longer you wait, the more likely it is that the imprint will bleed into the next pour.
Avoid Overworking or Imprint Slippage: Be gentle when stamping. Too much movement can cause the imprint to slip, leading to ghosting. Once you’ve made your impression, move on to the next area without disturbing the freshly stamped concrete.
Cracks, Settlement, and Structural Repairs
Cracks come in two kinds: cosmetic and structural. Look for patterns like hairline or wide, diagonal cracks, fresh vs aging, moisture intrusion, edge lift, or spalling to judge urgency. For repair, options include epoxy or polyurethane injections for active cracks, routing and sealing for non‑structural ones, and partial replacement when the concrete is severely distressed or delaminated; watch for signs of underlying settlement or subbase issues as you decide the path.
Use simple diagnostic checks to spot settlement: inspect base and subbase conditions, note moisture and drainage around the slab, observe grade correctness and any differential elevation, and see if cracks align with joints or load paths. This matters because addressing only the surface can miss a real problem that keeps moving or spreading, which complicates repairs and raises costs. If you’re DIY, plan steps carefully, isolate the area, clean and dry cracks, and select the adhesive or filler based on crack behavior and the expected load, while checking labels or manufacturer instructions for curing times and compatibility.
Repair methods by crack type
Cracks come in various shapes and sizes. Matching the right repair method to your crack’s width, depth, and pattern ensures a lasting fix.
Hairline cracks (less than 1/8 inch): These are usually cosmetic. Seal them with a concrete sealer or fill with a pencil epoxy. They won’t last forever but should buy you time until the next maintenance cycle.
Wider random cracks (up to 3/4 inch): Active, load-bearing cracks need more attention. Epoxy or polyurethane injections can stabilize them and extend their lifespan significantly. Routing and sealing may also work for non-structural cracks.
Full-depth failures: Severe distress or delamination requires partial replacement. Remove the damaged section, mill it back, and repour with proper reinforcement. This is a permanent fix but comes at a higher cost.
Addressing settling and drainage causes
Crack movement often points to underlying issues like undermining, poor drainage, or tree roots. Tackle these root causes to prevent recurring problems.
Undermining: If cracks align with load paths or joints, your subbase may be failing. Probe the base and subgrade for soft spots, and consider soil stabilization if necessary. Regrading might also help redistribute loads evenly.
Poor drainage: Standing water indicates inadequate drainage. Install surface drains or French drains to redirect water away from your walkway. Ensure proper grading to facilitate runoff as well.
Tree roots: Roots can lift and displace concrete. If you suspect this is the case, consider removing or pruning the tree. You might also need to replace affected sections of your walkway.
Surface Defects: Efflorescence, Spalling, and Surface Wear
Efflorescence, spalling, and abrasive wear show up on stamped concrete when moisture and salt move through the slab, when freeze–thaw or weak bond causes surface pieces to crack, and when traffic or cleaning wears down the surface. A practical path is to clean, remove loose material, patch or repoint as needed, and replace damaged areas if the defects are too deep or wide. Preventive steps like proper sealing, moisture control, and careful cleaning help reduce recurrence over time.
This matters because small defects can trap moisture, worsen patterns, and ruin the look you spent time stamping. Understanding when to patch, when to reseal, and when resurfacing is warranted helps you plan costs and timing, and keeps your stamped finish durable. Check product labels and manufacturer instructions for patching mortars, sealers, and color-matching options, and follow local guidance on moisture management and joint maintenance.
Treating efflorescence safely
Efflorescence appears as a white, powdery residue on your stamped concrete. To confirm it’s not just dirt, try this test: dampen the area with water. If the residue remains, it’s likely efflorescence.
Never use harsh chemicals like muriatic acid to clean efflorescence. It can damage the sealer and discolor your concrete. Instead, use a solution of 1 part vinegar to 4 parts water. Apply with a soft-bristle brush, let it soak for 15 minutes, then scrub gently.
If the efflorescence is extensive or you’re unsure about treating it yourself, consult a professional. They can assess the damage and protect your color and sealer during cleaning.
Repairing spalling and thin spots
Spalling occurs when small pieces of concrete break off, often due to freeze-thaw cycles or poor bonding. First, remove loose material with a chisel and brush out the area.
For small repairs, use a patching mortar that matches your concrete’s texture and color. Apply it according to the manufacturer’s instructions, using a trowel or putty knife to ensure an even surface. Let it cure for at least 24 hours before sealing.
If more than 10% of your walkway is damaged, consider resurfacing or overlaying. It’s often more cost-effective and can extend the life of your concrete. However, if the substrate is severely damaged, replacement might be necessary.
Sealers, Maintenance, and Long-Term Care
Choosing the right sealer is the big lever for long life. We compare solvent-based and water-based formulas by what they do to UV protection, odor, cure time, vapor emissions, slip resistance, and how they play with stamped concrete dyes or acrylic stains. Expect different rough lifespans based on traffic and climate, and always check the label for guidance rather than guessing.
Gloss level matters for how much depth your color shows and how texture and micro-cracks appear, plus how slippery the surface gets when wet. Plan your timing and prep around a sensible curing window and surface cleaning, with moisture checks and appropriate ambient conditions in mind, and decide on single versus multiple coats based on traffic and look. A regular sealing cadence keeps issues like fading, efflorescence, and surface wear at bay, and proper winter and summer care protects from salt, sun, and thermal movement, while avoiding sealing during extreme heat or humidity. Always use the product instructions and local conditions as your guide, and don’t skip the basics like moisture balance and runoff checks.
Sealer selection and application tips
Choosing the right sealer is crucial for your stamped concrete walkway’s longevity. Here are some key factors to consider:
Traffic, exposure, and climate – High-traffic areas need tougher sealers. For sunny climates, opt for UV-resistant formulas.
Prep the surface by cleaning thoroughly (as mentioned in earlier sections) and checking moisture content. Apply sealers when temps are between 50-90°F (10-32°C), avoiding dew points above 45°F (7°C).
Apply sealers in thin, even coats – usually one or two is enough. Follow the manufacturer’s guidelines for cure time before allowing foot traffic.
Routine maintenance schedule and tips
A regular maintenance routine keeps your walkway looking sharp and performing well. Here’s a simple seasonal checklist:
Spring: Clean the surface using a mild detergent and soft-bristle brush. Rinse thoroughly and let dry completely.
Summer: Inspect for signs of wear, stains, or fading. Reseal every 2-3 years, depending on traffic and sun exposure. Address any spot repairs promptly.
Fall: Before winter sets in, clean the surface again to remove any dirt or debris that could trap moisture. Apply a fresh seal coat if necessary.
Winter: Use sand instead of salt for de-icing. If you must use salt, rinse it off promptly to prevent damage from freeze-thaw cycles.
Tools, Materials, and Safety Precautions
This section covers the essential tools, materials, and safety steps you’ll need for troubleshooting and repair on a concrete job. You’ll want cleaners, patch and repair mixes, sealers, stamping tools, release agents, trowels, mixers, buckets, rollers, and the right PPE. Also, plan for proper ventilation when handling chemicals and follow weather and working-condition considerations to protect your crew and the surface.
The point is to keep the project moving without creating new damage. Knowing which materials work with your finish and substrate helps you pick compatible cleaners, patch products, and sealers, and to follow surface prep and curing practices. Clear safety routines—ventilation, SDS references, spill response, proper storage and disposal—along with traffic control and non-slip walkways, keep a DIY repair from turning into a bigger headache or disrupting neighbors and occupants.
Tools and materials checklist
Before you start any repair or maintenance work on your stamped concrete walkway, consult this checklist to ensure you have the right tools and materials.
- Cleaners: Degreaser for removing stains, mild detergent for general cleaning. Without proper cleaning, sealers won’t adhere well.
- Patch mixes: Quick-setting or standard concrete patch for filling cracks and holes. Skipping this can lead to further damage and tripping hazards.
- Sealers: Acrylic, epoxy, or polyurethane sealers compatible with your existing finish. Using incompatible sealers can cause discoloration or peeling.
- Stamping tools: Rent or buy new stamps to match your original pattern for touch-ups. Worn-out stamps may not produce the desired texture.
- Release agents: To prevent concrete from sticking to stamps during installation or repair. Without release agent, stamps can stick and ruin the pattern.
- Trowels: For spreading patch mixes and sealers. Using wrong trowel size can result in uneven surfaces.
- Mixers: Electric mixer for patch mixes to ensure even consistency. Hand mixing may not provide adequate blending.
- Buckets: For mixing and carrying materials. Using the wrong size bucket can waste material or cause spills.
- Rollers: For applying sealers evenly. Improper application can lead to streaks or missed spots.
- PPE: Gloves, eye/face protection, boots for safety during work. Without PPE, you risk injuries from chemicals and falling objects.
Quick rule: Always check your walkway’s finish and substrate compatibility before using any new materials or tools.
Site safety and curing precautions
Safety should always be your top priority when working on your stamped concrete walkway. Here are some crucial safety measures to keep in mind.
Curing: Keep the walkway moist during curing to prevent cracking. Use plastic sheets or misting systems, especially in hot, dry weather. Inadequate curing can lead to weak, brittle concrete.
Barricading: Use temporary barriers and signage to keep pedestrians off the walkway while it’s wet or being repaired. This prevents slips, falls, and damage to the surface.
Temperature precautions: Avoid working in extreme temperatures (below freezing or above 90°F). Concrete sets best between 50-80°F. Extreme temperatures can affect concrete’s strength and durability.
Cost Considerations and Decision Guide: Repair Vs Replace
Repair vs replace depends on condition, aesthetics, and budget. Expect costs to scale from simple cleaning/sealing to patching, overlay, partial or full replacement; factors like concrete condition, site prep, removal, finishes, slabs vs structural issues push costs up or down. Use a simple decision framework to weigh lifespan, use, and budget.
Stamped designs add cost and downtime because matching pattern, color compounds, and sealants may be needed. Get multiple bids and ask about materials, workmanship, warranties, timeline, and permits; look for red flags like vague scopes or pressure to skip steps. Prorate expected lifespan by age and climate, and know when to patch/overlay vs replace; this keeps you from over- or under-scoping.
Typical repair cost components
When you’re comparing quotes for your stamped concrete walkway repairs, understanding the cost breakdown is crucial. Here’s what to expect:
Labor: This varies based on the job’s complexity and duration. Simple cleaning or sealing jobs will have lower labor costs than extensive patching or overlay work.
Materials: The cost of materials like concrete mix, sealants, and repair compounds can add up. Ask for a detailed breakdown to compare estimates accurately.
Permits & Prep: Some repairs may require permits, and site preparation (like removing old concrete or adjusting drainage) can increase costs. Make sure these are included in the quote.
When replacement is the better option
While repairs can extend your walkway’s life, there are times when replacement is a wiser long-term investment. Consider these scenarios:
Extensive structural failure: If your walkway has multiple cracks, severe settlement, or slabs that are lifting or separating, it might be more cost-effective to replace the entire thing.
Repeated repairs: If you’ve been making frequent repairs over the years, it could be a sign that replacement is needed. The old saying ‘a stitch in time saves nine’ applies here – addressing the problem now can prevent bigger issues down the line.
Major drainage problems: If water isn’t draining properly from your walkway, it can lead to further damage and costly repairs. Replacing the walkway with proper grading and drainage systems can save you money in the long run.
Conclusion
Safety, durability, and a good look depend on strong preparation and careful steps. Protect people and the project by testing in a small area first, following proper surface prep, and using the right materials for the job.
Do this next: inspect the existing work for cracks, spalling, or efflorescence and note moisture or settlement signs; verify the substrate is clean, dry, and properly primed before repair or installation; match color and pattern plans, then apply repair or overlay in manageable sections with consistent technique; test adhesion and cure in a hidden spot, then seal and maintain according to a realistic schedule that you can sustain.
Common mistakes to avoid include skipping surface prep or moisture testing, choosing the wrong sealer or color product, and rushing repairs without curing time or safety gear. Always wear eye protection and gloves, work in good lighting, and keep kids and pets away from fresh work. Don’t improvise fixes that bypass the recommended steps; if in doubt about substrate condition, drainage, or load-bearing issues, pause and reassess before proceeding.
If the crack is deep, the slab shows ongoing movement, or you’re unsure about the underside or structural impact, call a professional instead of pushing on. When in doubt, prioritize safety and durability, and remember that deliberate, staged work now prevents costly rework later. You’ve got this—step by step, you’ll get a strong, long-lasting walkway.
FAQ
What preparation steps are essential before stamping a walkway?
Clean the surface and remove loose debris. Remove oil spots and dust so the release agent and pattern sit cleanly. Set forms, control joints, and edges to prevent movement during stamping.
How should I choose stamping patterns and designs?
Pick patterns that suit the walkway length and traffic. Smaller patterns hide imperfections better; larger designs read as a single feature. Check sample boards and make sure the pattern transitions smoothly at transitions and doorways.
What are proper curing techniques to avoid issues?
Follow the manufacturer’s recommendations for curing or sealing timing. Keep the surface from rapid drying and protect it from sun and wind as it cures. Don’t rush the cure or expose fresh concrete to heavy traffic too soon.
What safety precautions should I follow during stamping and sealing?
Wear eye and hand protection, and use tools as designed. Keep others off the work area and control foot traffic with barriers. Read label instructions for sealers and release agents, and follow local weather considerations to prevent slips or damage.