
Introduction
Rain on fresh mortar can range from a minor nuisance to a ruinous washout depending on how soft the joint was and how long it was exposed, so act fast to protect and assess it. Cover undisturbed mortar with a breathable tarp or plastic supported off the joint until it firms, and check product labels or manufacturer instructions for specific cure times. If you see surface erosion, loss of bond, or exposed aggregate once dry, plan for repair or removal rather than assuming it’s sound.
Start with simple protection and inspection: keep the area shaded and covered, gently probe joints when they feel firmer, and sweep away loosened material before deciding. If defects are deep, continuous, or across a critical structural joint, check local rules and consider redoing the joint or calling a pro.
Key takeaways
- Immediately cover exposed mortar with waterproof sheeting and secure edges to shed water.
- Do not try finishing joints until surface is dry to avoid trapping.
- Inspect for powdery glaze, cracks, or spalling after drying before reuse.
- Use matching mortar and repointing when damage is confined to joints, not entire wall.
- If in doubt, pause repairs and consult manufacturer instructions or local code requirements.
- Safety: wear eye protection, gloves, and monitor working surface for slips when wet.
Table of Contents
- Introduction
- Key takeaways
- Immediate Protection Steps the Moment Rain Starts
- Why Rain Harms Fresh Mortar — Mechanics and Common Failure Modes
- Visual and Hands-on Checks to Assess Damage After Drying
- Decision Framework — Repair in Place Vs Full Redoing of Joints
- Step-by-Step Salvage and Repair Methods for Rain-Damaged Mortar
- Tools, Materials Checklist, and Material Specs to Match Existing Masonry
- Preventive Planning to Avoid Rain-Related Failures on Future Jobs
- When to Call a Professional and What to Expect from Remediation
- Conclusion
- FAQ
Immediate Protection Steps the Moment Rain Starts
Stop work and take quick, safe actions you can do alone to keep water off the fresh mortar. Focus on covering the joint, diverting runoff, and preventing tools or people from disturbing the wet surface.
Use everyday items on hand—tarps, plastic sheeting, a broom, or a folding ladder—to shield the mortar until you can set up a better barrier. If a product’s use matters, check the label or manufacturer instructions for suitability before relying on it.
Quick covers and tarping techniques
Grab a tarp, plastic sheeting, or temporary awning to shield your fresh mortar joints from the rain. The goal is to keep water off without causing new problems.
Anchor covers securely: Use weights, stakes, or tie-downs to prevent wind from blowing them away. Avoid using bricks as weights; they can dislodge and damage the joint.
Ensure covers slope downwards to direct water runoff away from your work area. Ponding or runoff over the mortar can wash it out or cause it to crack when it dries.
Short-term drying and shelter strategies
Once you’ve covered your work, focus on helping the mortar dry. Saturated mortar takes longer to cure and can lead to weak joints.
Avoid direct heat: Don’t use heat guns or space heaters to speed up drying. Direct heat can cause rapid evaporation from the surface, leading to cracks as the inner layers continue to dry.
Create a windbreak using cardboard, foam boards, or additional tarps to protect your work from wind and rain. This helps maintain a consistent temperature and humidity around the mortar, promoting even curing.
Protecting adjacent work and scaffolding
Rain protection for your fresh mortar joints shouldn’t cause issues elsewhere. Here’s how to keep nearby work and equipment safe:
Shield brickwork and trim: Use drop cloths, cardboard, or plastic sheeting to protect installed bricks and trim from rain. This prevents water from seeping into joints and causing damage.
If you’re working on scaffolding, cover the platform with a tarp or plastic sheet to keep it dry. Wet platforms can be slippery and difficult to work on, increasing the risk of accidents.
Why Rain Harms Fresh Mortar — Mechanics and Common Failure Modes
Rain introduces excess water that dilutes the mix and disrupts the cement hydration process, reducing bond strength and altering set behavior. It can also wash out fine particles from the joint and change the joint profile while the mortar is still plastic.
Expect things like surface washing, weak bond at the interface, soft or crumbly mortar, and irregular joint finishes after exposure. For specifics about how a mortar formulation will react, consult the product data sheet or technical bulletin.
Washout and loss of cement paste
Rainwater can wash away the cement paste from your fresh mortar, leaving behind exposed aggregate. This happens because water dilutes the cement, reducing its ability to bind with the sand and other materials.
The surface will appear uneven, with some areas lacking the smooth finish you expect. You might also notice texture changes, like rough patches or holes where material has been carried away by the water.
This is a serious issue as it weakens the mortar’s bond and reduces its strength. In severe cases, you may need to remove and redo the affected joint.
Weak surface skin and delamination
Early rain exposure can leave your mortar with a soft, powdery surface. This happens when water interferes with the hydration process, preventing the cement from setting properly.
The surface may crumble or flake off easily, which is a sign of weak bond strength. You might also notice delamination – separation between layers of mortar – indicating that the materials haven’t bonded together as they should.
This can lead to further damage over time, so it’s important to address this issue promptly. You may need to remove and replace the affected material.
Dimensional and aesthetic changes
Rain can cause your mortar joints to shrink prematurely, leading to recessed joints that don’t align properly with the surrounding masonry. This can affect both the structural integrity and appearance of your work.
You might also notice color variation in the affected areas. Rainwater can leach out certain compounds in the cement, leaving behind a different shade than intended.
Efflorescence – a white, powdery deposit – may appear on the surface as water evaporates and leaves behind salts from the mortar. While this is mainly cosmetic, it’s still an unwanted result of rain exposure.
Visual and Hands-on Checks to Assess Damage After Drying
After the mortar has dried, perform a systematic inspection: look for color changes, surface powdering, cracks, and areas of poor adhesion. Use firm fingertip pressure and a small chisel to check for soft spots and soundness along the joint.
Document locations and severity so you can compare interventions later and decide if testing or manufacturer guidance is needed. If in doubt about strength or safety, follow up with product manufacturer instructions or a prospec for testing options.
Visual checkpoints and photo documentation
Before you start poking around, grab your camera. A visual record helps track changes over time.
- Washouts: Look for areas where the rainwater has washed away cement paste, leaving a patch of exposed aggregate.
- Cracks: Check for hairline cracks or larger ones. Even tiny cracks can indicate structural issues.
- Texture differences: Compare affected areas to unaffected ones. Rain-damaged mortar may look different.
- Discoloration: Note any color changes, which could signal chemical reactions.
- Efflorescence: Look for white, powdery deposits that might indicate salt leaching from the concrete.
- Delamination: Check for flaking or peeling of the surface layer.
- Warping or bulging: Any changes in shape could mean dimensional instability.
- Muddy patches: These might indicate areas where water has pooled and caused damage.
Quick rule: Always take photos from the same angle and lighting to ensure consistent comparison over time.
Simple tactile and probe tests
After your visual check, it’s time for some hands-on testing. Be gentle; you don’t want to cause more damage.
Hardness test: Gently scrape the surface with a coin or a blunt tool. If the mortar is too soft, it might crumble. This could indicate washout or incomplete curing.
Bond test: Apply firm but gentle pressure with your fingertips. If the mortar feels spongy or gives way easily, there might be delamination or weak bonding to the substrate.
Deep failure check: Gently probe deeper into the joint with a thin tool. If it goes in too easily, there could be structural issues deep within the joint.
When to use moisture meters or lab tests
Sometimes, visual and tactile checks aren’t enough. That’s when you might need some extra tools.
Moisture meters: These can help you measure the moisture content in the mortar. If it’s too high, it could indicate incomplete curing or ongoing damage. Use them when your visual checks suggest potential issues but you’re not sure.
Lab tests: For serious concerns, consider sending samples to a lab for testing. They can check for things like compressive strength, bond strength, and chemical changes that might not be visible to the naked eye. This is usually warranted when there’s significant damage or you’re unsure about the structural integrity.
Quick rule: Don’t rely on these tools alone. They should supplement your visual and tactile checks, not replace them.
Decision Framework — Repair in Place Vs Full Redoing of Joints
Decide by comparing the extent and depth of damage: superficial powdering or discoloration often calls for touch-up or repointing, while loss of bond or deep softening usually requires removal and redoing the joint. Base your choice on whether the mortar still provides structural support and weatherproofing.
When a specification or warranty matters, verify requirements in the project documents or product literature before proceeding. If the damage spans a large area or affects connected structural elements, consider full removal and replacement or professional evaluation.
Signs that only cosmetic repair is needed
If the damage seems mostly skin-deep, you might get away with a touch-up job. Look for:
Surface roughness: A little grittiness or unevenness can be sanded down and sealed.
Small recessed areas: Tiny hollows can often be filled with fresh mortar.
Slight color differences: Minor discoloration might just need a bit of matching grout to blend in.
Signs that require full removal and repointing
If the damage goes deeper than the surface, it’s time for a full joint replacement. Watch out for:
Continuous loss of bond: If mortar is falling out in chunks or large pieces, the whole joint needs to go.
Pervasive crumbling: Widespread fragility means the joint has lost its strength and must be redone.
Structural movement: Any signs of shifting or displacement indicate a serious problem that requires full removal and repointing.
Prioritizing safety and long-term performance
When deciding on repair scope, consider these factors for safety and longevity:
Structural load: If the joint bears significant weight or stress, a full redo might be necessary to maintain integrity.
Exposure to freeze-thaw cycles: In harsh climates, a thorough repointing can prevent further damage from freezing and thawing.
Warranty implications: If the work is under warranty, follow the manufacturer’s or installer’s guidelines for repairs to avoid voiding coverage.
Step-by-Step Salvage and Repair Methods for Rain-Damaged Mortar
Start with the least invasive repairs: brush out loose material, let the joint fully dry, then apply a compatible patch or thin repointing layer matching the existing profile. For deeper failures, cut back to sound mortar, clean dust and debris, dampen the joint to the proper condition, and place new mortar in layers to avoid voids.
Match texture and finishing tools to the surrounding joints and follow manufacturer mixing and curing guidance for best results. When product-specific procedures matter, check the product label or technical data sheet for recommended practices.
Step-by-Step Repair Process
This sequence guides you through salvaging and repairing rain-damaged mortar, from preparation to final checks.
- Inspect the damage. Mark out areas for repair.
- Wear safety gear: gloves, goggles, dust mask.
- Remove loose material using a stiff-bristle brush or chisel. Be gentle; don’t damage substrate.
- Rehydrate lightly if needed. Use a spray bottle with water. Don’t soak.
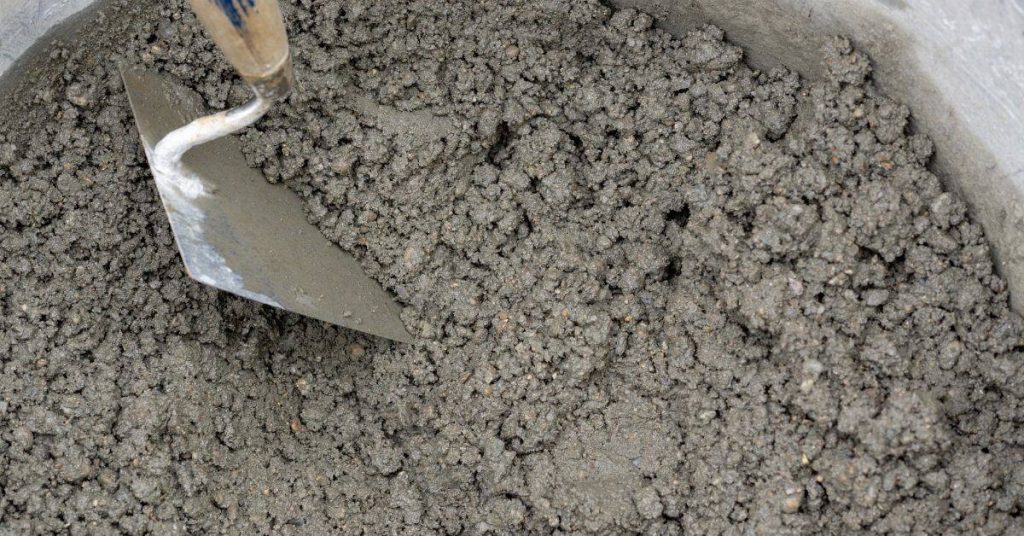
- Prepare fresh mortar matching the original. Follow mix ratios on cement bag.
- Pack mortar into joints using a pointing trowel or rubber float. Work in small sections.
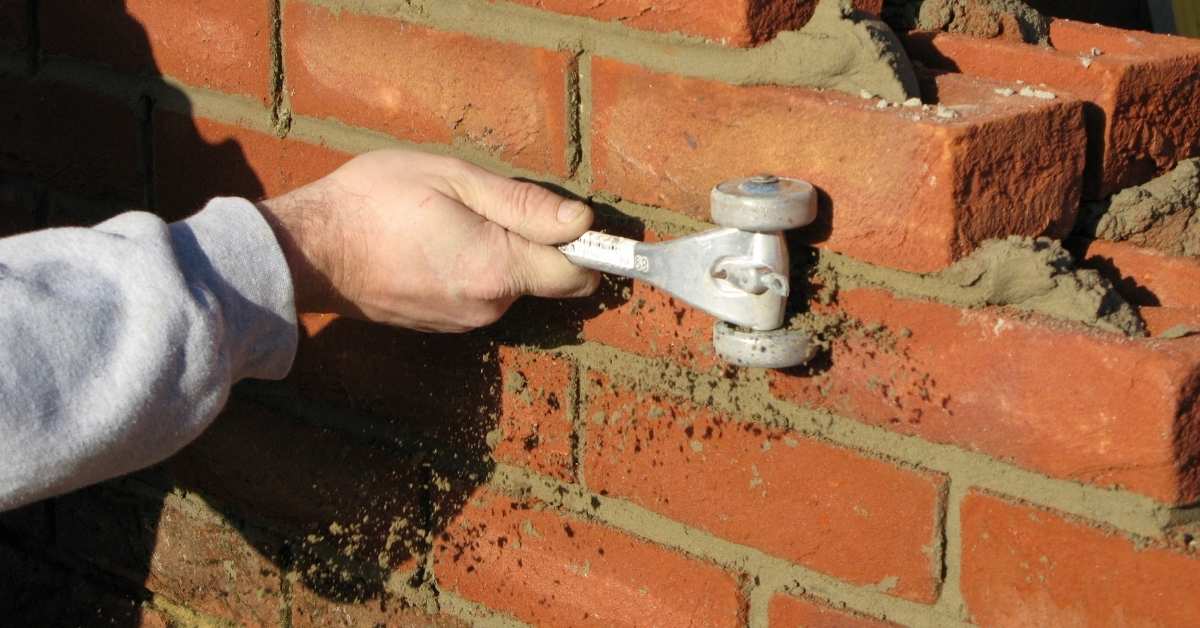
- Tool the joint to match existing profile. Use a jointer tool for straight lines, a round-nose trowel for curves.
- Let it set for 20-30 minutes, then strike off excess mortar with a pointing trowel.
- Clean up tools and area. Let the repair cure as directed on cement bag.
Surface consolidation and retooling for minor damage
Restore appearance by cleaning, rehydrating, and retooling joints with minor damage.
- Clean loose material: Use a stiff-bristle brush or wire brush. Rent a vacuum to remove dust ($20-$40/day).
- Rehydrate lightly: Spray water onto the joint using a garden sprayer ($15-$30). Don’t soak; just dampen.
- Retool the joint profile: Use a jointer tool for straight lines or a round-nose trowel for curves. Match existing profile.
- Optional: Apply a sealant: After curing, apply a masonry sealer to protect from future water damage ($20-$50 per quart).
Localized tuckpointing and patch repairs
Remove damaged mortar, prepare the cavity, and pack new mortar in stages for localized repairs.
Use a cold chisel to remove old mortar to sound depth. Be careful not to damage substrate.
Clean the cavity with a wire brush or compressed air. Ensure no debris remains.
Pack new mortar in stages using a pointing trowel or rubber float. Work from the bottom up, ensuring good bond with existing mortar.
Full repointing workflow
Safely remove old joints, clean substrate, place new mortar, cure, and finish for sections that need full repointing.
Use a grinder with a diamond blade to cut out old joints. Wear safety gear: goggles, gloves, hearing protection.
Clean the substrate using compressed air or a wire brush. Ensure no debris remains.
Place new mortar using a pointing trowel or rubber float. Work in small sections to ensure proper curing. Protect from rain and freezing during curing.
Tools, Materials Checklist, and Material Specs to Match Existing Masonry
Gather hand tools (pointing trowels, joint raker, wire brush), safety gear, mixing bucket, mortar, and coverings before beginning repairs. Include a range of aggregate sizes, pigments or pre-colored mortar, and a small grinder or chisel for removal work as needed.
Choose mortar type and color to match existing masonry and verify mixing consistency and strength requirements from the manufacturer or project specs. If you need exact proportions or performance values, check the product label or data sheet rather than guessing.
Tools and safety gear
Before you start, make sure you have the right tools to keep your job safe and efficient.
- Gloves: Protect your hands from cuts and chemicals.
- Safety glasses: Shield your eyes from debris and hazards.
- Dust mask or respirator: Guard against inhaling mortar dust.
- Hearing protection: Use when operating power tools like grinders.
- Trowel set (pointing trowel, margin trowel): Essential for applying and shaping new mortar.
- Cold chisel and hammer: For removing old, damaged mortar.
- Grinding/cutting tool (optional): For tough jobs or large areas; follow safety guidelines.
- Drop cloths or plastic sheets: Protect surfaces from mortar droppings.
Quick rule: Always prioritize safety. Wear appropriate gear and keep your workspace clean.
Mortar selection and matching basics
Matching the existing mortar is crucial for a seamless repair job.
- Strength: Match the existing mortar’s strength. Too weak, it crumbles; too strong, it cracks.
- Color: Get close matches using color charts or small test batches.
- Sand gradation: Match the size and distribution of sand particles in the old mortar.
- Type (e.g., N, M, S): Follow ASTM C270 standards for type selection.
- Lime content: Match the existing lime content for similar performance.
- Product datasheets: Consult these for specific product details and guidelines.
- Pro consultation: If unsure, consult a professional mason or architect.
Quick rule: Matching is key. Don’t rush this step; it saves you rework later.
Mixing and curing best practices
Proper mixing and curing ensure your new mortar sets well and lasts.
- Water: Add just enough water for a stiff, not soupy, consistency. Too much weakens the mix; too little makes it crumbly.
- Mixing time: Mix thoroughly to ensure even distribution of ingredients.
- Curing time: Keep the new mortar moist and covered for at least 72 hours to allow proper curing.
- Avoid freezing: Don’t let fresh mortar freeze; it weakens the set.
- Protect from rain: Shield cured mortar from heavy rain until fully set (around 28 days).
- Follow manufacturer guidelines: Always follow the specific mix ratios and instructions provided by the product manufacturer.
Quick rule: Patience pays off. Don’t rush mixing or curing; it’s crucial for a strong, lasting repair.
Preventive Planning to Avoid Rain-Related Failures on Future Jobs
Plan work around weather forecasts, stage mortar work in smaller sections, and set up temporary shelters or tarps before you mix mortar. Communicate timing and responsibilities with helpers so coverings can go up quickly if the weather turns.
Prepare contingency materials and confirm any product-specific curing windows or limitations with the manufacturer or technical literature. Implementing simple site controls—edge barriers, drip edges, and clear paths for runoff—reduces the risk of future rain damage.
Weather planning and scheduling tips
Check short-term forecasts daily. Rain can hit quick, so plan ahead.
Build in contingency days. Weather delays happen. Be ready to adapt.
Schedule work during stable weather windows. It’s worth the wait for dry conditions.
On-site setup and staging to control water
Grade site for runoff. Water should flow away from work area.
Install temporary gutters. Protect mortar from rain running down walls.
Stage materials under cover. Keep them dry, accessible, and ready for use.
Worker protocols and inspection checkpoints
Use this checklist after rain or before final cover application:
- Check for water ingress. Look for signs of water penetration in joints.
- Inspect mortar. Check for soft, damaged, or missing mortar.
- Verify cover depth. Ensure proper cover is applied to protect from rain.
- Document findings. Note conditions and actions taken for records.
Quick rule: Regular inspections keep minor issues from becoming major problems.
When to Call a Professional and What to Expect from Remediation
Hire a contractor or structural mason when damage affects structural integrity, spans large areas, or when you lack the tools or experience to safely remove and replace mortar. Professionals can assess hidden issues, perform controlled demolition, and ensure proper substrate preparation and bonding.
Ask the contractor about their remediation methods, warranties, and whether they follow specific product manufacturer instructions or local code requirements. If warranty or compliance is important, request documentation and check references before hiring.
Red flags that warrant a contractor visit
If your masonry work is showing signs of serious distress, it’s time to call in the pros. Here are some red flags:
Extensive bond loss: If more than 20% of your mortar joints have lost their bond, it’s a sign that the damage is extensive and beyond typical DIY repairs.
Wall movement: Cracks in walls or bulging sections could indicate structural issues. These need professional assessment to prevent further damage.
Recurring leaks: If you’ve patched up leaks before, but they keep coming back, it might be a sign of underlying problems that require professional attention.
Typical professional remediation steps and timelines
When you hire a pro, here’s what they might do:
Full repointing: They’ll remove all damaged mortar and replace it with new, matching mortar. This can take several days to a week, depending on the size of the job.
Structural tie repair/replacement: If there are issues with your wall ties, they may need to be replaced. This involves drilling into the walls and installing new ties, which can add time to the project.
After repairs, pros will usually apply a protective sealant and monitor the area for any signs of recurring damage.
Questions to ask contractors and documentation to request
Before you hire, make sure to ask these questions:
Materials: What materials will they use? Ensure they match your existing masonry.
Warranty: How long is their warranty? A good pro should stand behind their work for at least a year.
References: Can they provide references from past clients? Follow up on these to ensure quality work.
Cure/protection measures: What steps will they take to protect the area during and after repair?
Conclusion
If rain hits fresh mortar, protect the work fast, then check what got wet and how it looks after it dries. The goal is to keep strength, avoid cracks, and keep the face of the wall clean. Quick, deliberate actions save time, money, and headaches later.
Do this now: examine the joints for freshness and washout, seal or cover the area to keep it from drying unevenly, dry the surface if needed, decide whether you can repair in place or you must redo the joint, gather the right tools and material specs to match the masonry, and test a small area first before you commit to a full repair. Stay with the plan, keep it simple, and follow the order so you don’t miss a step. Use only what the guide suggests or what matches the existing brick and mortar in your area, and plan for future rain protection on the job site.
Common mistakes to avoid are waiting too long to protect the fresh work, mixing or applying materials with the wrong consistency or spec, and pushing on when the joint shows signs of weakness after rain. Don’t skim the safety checks, don’t over-wet joints, and don’t guess about repair depth or joint width. Always test a small area first, wear eye and skin protection, and keep a clear, dry surface during work.
If the damage after drying is questionable or if large sections show washout, if moisture has penetrated deeper than the surface, or if you’re unsure about matching material specs, it makes sense to call a professional. They can confirm the extent, perform remediation, and keep the project moving. Stay practical, stay safe, and you’ll protect your brick or blockwork without redoing more than needed.
FAQ
What should I check on the mortar after rain damage before deciding to redo the joint?
Look for softness, cracking, or powdery surface on the fresh mortar. If it has set but feels friable or shows efflorescence, assess if it can be salvaged or needs rework. Always verify with the product label and manufacturer instructions for weather exposure limits.
Can I salvage partially damaged joints, or do I need to redo the entire joint?
Salvage is possible if the joint is mostly solid and not deeply cracked or out of alignment. If damage extends below the surface or throughout the joint, plan for a full redo. Check local rules and follow the tool and material guidelines from the manufacturer for patching vs full replacement.
What immediate steps should I take if more rain is forecast?
Keep the area protected with a temporary cover and avoid additional water on the surface. If possible, allow a brief cure window before applying any patch or new mortar. Always consult product labels for cure times and weather restrictions.
How do I know whether to patch in place or remove and redo joints later?
Evaluate how the original mortar set up and whether the joint has lost integrity. If patching would create a noticeable trench or mismatched color, plan a redo. Use the manufacturer instructions and local guidelines to confirm acceptable repair methods.