
Introduction
Clear advantage tape is a transparent adhesive tape used to seal, protect, or mark surfaces where you don’t want masking or a visible edge. It’s handy for temporary fixes or when you need to see what’s underneath. In DIY work, you pick it for visibility, easy removal, and less glare.
Causes of tape failures include poor adhesion on dusty surfaces, movement, or heat. To test, try a small patch, press firmly, and check if it sticks after a gentle twist. If it fails, clean the area, let it dry, and reapply or choose a tape designed for your surface; always verify label guidance and any local rules.
Key takeaways
- Inspect tape label for cure time, substrate compatibility, and storage requirements before use.
- Clean surface thoroughly; dust, oil, or moisture sabotages adhesive bond and clarity.
- Perform a simple test: apply a strip, press, and inspect adhesion after a wait.
- When in doubt about transparency, check with manufacturer guidance or safer alternatives.
- Store rolls in original packaging away from heat and direct sun to preserve clarity.
- Use appropriate tools; avoid pulling tape at extreme angles to prevent tearing.
Table of Contents
- Introduction
- Key takeaways
- What “Clear Advantage” in Tape Means
- Root Causes of Tape Problems
- How to Diagnose Tape Problems Step-by-Step
- DIY Tests You Can Run at Home or on the Job
- Practical Fixes and Workarounds for Common Issues
- Choosing the Right Clear Tape for Your Project
- Tools and Materials Checklist
- Preventive Care and Best Practices for Long-Term Clarity
- Conclusion
- FAQ
What “Clear Advantage” in Tape Means
A clear advantage in tape translates to how transparent the tape is, how well it sticks, how long it lasts, and how easy it is to work with. These attributes affect whether the tape disappears on a finish, holds a seam, or bridges a gap without tearing. Different projects demand different balances of visibility, adhesion strength, and durability.
Quick distinctions can be drawn between cellophane, polypropylene, and acrylic adhesive systems. Each type has its own typical look, feel, and performance profile, so check the product label or data sheet to confirm what you’re getting. If in doubt, compare manufacturer guidance to your project needs and choose accordingly.
Key Performance Attributes Explained
The ‘clear advantage’ in tapes lies in several key performance attributes. Let’s break them down:
Transparency: This is obvious, but it matters for visibility and aesthetics. You want to see through the tape, right?
Tack: That’s the initial stickiness when you press the tape onto a surface. Good tack means it sticks immediately.
Shear Strength: This is how well the tape holds up under stress or weight. High shear strength keeps your packages intact, even if they’re heavy.
Aging Resistance: Over time, tapes can lose their stickiness or turn yellow. Good aging resistance means your tape stays effective and clear for longer.
Residue Behavior: When you remove the tape, you don’t want any sticky residue left behind. Easy removal is key here.
Common Use Cases and User Expectations
Clear tapes have many uses, from packaging to repairs. Here’s what users expect in each scenario:
Packaging: Users want the tape to seal boxes securely, keeping contents safe during transit. They also want it to be easy to tear by hand for quick opening.
Sealing: For sealing envelopes or bags, users expect the tape to stick well and create a strong, airtight seal to prevent leaks.
Repairs: When fixing tears or holes, users need a tape that adheres well to various surfaces and provides durable, long-lasting repairs.
Arts/Crafts: In creative projects, users want tapes that are easy to apply, don’t leave residue, and can stick to different materials without damaging them.
Root Causes of Tape Problems
Tape failures often come from defects in the material, a mismatch in adhesive chemistry, environmental stress, or mistakes during application. These factors can reduce clarity, cause adhesion loss, or create visible residue. Identifying which factor is at play helps you pick a safer fix.
When in doubt, verify specifications from the label, product data sheet, or manufacturer instructions. Cross-check environmental ratings and surface prep requirements to ensure they align with your job conditions. If something seems off, pause and confirm before proceeding.
Material and adhesive formulation issues
The type of backing, coating thickness, and adhesive chemistry greatly influence tape performance. Incorrect choices can lead to cloudiness, poor adhesion, or yellowing.
- Backing Type: Wrong backing can cause cracking or staining. Use appropriate backing for your surface (paper, cloth, etc.). Spec/Rating to look for: Backing compatibility with your substrate. Tip/Avoid: Don’t use vinyl tape on rough surfaces.
- Coating Thickness: Inadequate coating can result in weak bond. Use tapes with suitable coating thickness. Spec/Rating to look for: Coating weight (gsm). Tip/Avoid: Don’t use thin-coated tape on heavy-duty applications.
- Adhesive Chemistry: Poor adhesive can cause yellowing or weak bond. Use tapes with appropriate adhesive type. Spec/Rating to look for: Adhesive type (rubber, acrylic, etc.). Tip/Avoid: Don’t use water-based adhesive on wet surfaces.
Environmental and storage factors
Humidity, temperature, UV exposure, and contamination can degrade tape performance. Store and use tapes properly to maintain their effectiveness.
Humidity: High humidity can affect adhesive performance. Tip/Avoid: Keep tapes dry during storage and application.
Temperature: Extreme temperatures can damage backing or adhesive. Tip/Avoid: Store and use tapes within their recommended temperature range.
UV Exposure: Prolonged UV exposure can cause yellowing or weakening of tape. Tip/Avoid: Protect tapes from direct sunlight during storage and application.
Application and handling mistakes
Improper surface prep, wrong tape selection, and incorrect pressure/temperature can lead to poor results. Avoid these common mistakes:
- Surface Prep: Dirty or uneven surfaces cause weak bond. Why/Avoid: Clean and prepare surface before application.
- Wrong Tape Selection: Using inappropriate tape for the job leads to failure. Why/Avoid: Choose tape based on substrate, temperature, and environment.
- Incorrect Pressure/Temp: Too little or too much pressure, or wrong application temperature can cause poor adhesion. Why/Avoid: Apply correct pressure and within recommended temperature range.
Proper surface prep, tape selection, and application ensure a strong, lasting bond.
How to Diagnose Tape Problems Step-by-Step
Start with a simple check: is the tape failing at the surface, in the air, or during handling? Look for lack of adhesion, edge lift, or tearing. Note whether the issue is consistent across a project or limited to a single area.
Next, isolate the variables: test on a similar substrate, in a similar environment, using a known-good application technique. Document results and compare against label or data sheet guidance. If needed, try a different tape with the same job to confirm the root cause.
Step-by-Step Process
Follow this clear, numbered sequence to diagnose tape problems like a pro. It’s all about practical steps and jobsite habits.
- Preparation: Gather tools (gloves, knife, light, notepad), ensure safety (good lighting, no hazards).
- Inspect the affected area visually, as outlined in the next section.
- Main inspection: Use a sharp knife to gently lift tape edges. Check adhesion, look for residue or streaks.
- Perform simple tests (adhesion peel test, clarity check) to isolate causes, as detailed later.
- Clean up: Wipe off any residue, dispose of used tape properly. Recheck the area after 24 hours to ensure no new issues arise.
Visual Inspection Checklist
Use this checklist during your initial inspection to quickly identify potential tape problems.
- Bubbles: Indicate trapped air or moisture, poor application technique.
- Cloudiness: Suggests contamination on the substrate, improper storage, or material defects.
- Streaks: Could be residue from previous applications, dirt, or incompatibility with the surface.
- Residue: Shows incomplete removal of old tape, or adhesive failure.
- Wrinkles: Suggests improper application technique, or substrate issues.
- Edge lifting: Indicates poor adhesion, possibly due to contamination, humidity, or incorrect application.
- Discoloration: Might be a sign of UV degradation, heat exposure, or chemical reaction with the surface.
Quick rule: If you spot any of these issues, don’t ignore them. They’re signs that something’s not right and needs further investigation.
Simple Tests to Isolate Causes
The adhesion peel test is a quick way to check if the tape’s adhesive is working properly. Gently pull at the edge of the tape; it should lift cleanly without leaving residue.
A clarity comparison can help identify contamination issues. Apply a small piece of new tape on a known clean surface, then compare it to the problematic area. Cloudiness or streaks indicate substrate or storage problems.
Exposure tests can reveal environmental factors. Leave a small piece of tape in an area with high humidity or temperature extremes for 24 hours, then check for changes in adhesion or clarity.
When to Send Samples to a Lab
Lab testing is usually the last resort, but it’s crucial when you’ve exhausted other options. Here are some thresholds for lab testing:
Inconsistent batch behavior: If multiple rolls from the same batch show varying performance, send samples for analysis.
Safety-critical failures: If tape failure could lead to safety issues (e.g., in a high-risk area), send samples to ensure it’s not a widespread problem.
Include with your samples: a detailed description of the issue, any relevant test results, and a piece of the problematic tape. Also, provide information about storage conditions and application technique.
DIY Tests You Can Run at Home or on the Job
Perform a simple clarity check by laying a short strip on the intended surface and inspecting from normal viewing angles. Conduct a basic adhesion test by lightly peeling at a corner to see if seconds of pressure produced a firm hold. Do a quick residue wipe to see if any transfer occurs.
For aging or environmental exposure, place a tape sample in a representative climate for a short period and re-check clarity and adhesion. Keep notes and compare to the product instructions so you know what counts as acceptable wear.
Clarity/transparency comparison test
To check tape clarity, grab some printed charts or text with fine details. Place a piece of each tape sample over the print.
Look for distortion, blurriness, or discoloration. Make notes on what you see. A clear winner will let you read the print clearly through it.
Tip: Use a magnifying glass to inspect closely if needed.
Adhesion and peel strength quick tests
For a simple adhesion test, stick a piece of tape on a clean surface at a 90° angle. Press firmly for 15 seconds.
After 24 hours, pull the tape off at a 90° angle again. It should peel smoothly without leaving residue or tearing. If it’s too easy to remove, try again with more pressure.
For peel strength, use a known angle – like 180°. Stick, wait, then pull slowly and steadily. Time how long it takes to peel off completely.
Accelerated aging simulation
To speed up aging, use a heat source like an oven (set at 140°F/60°C) or a UV-A lamp. Place your tape samples inside or under the light.
Check on them every few hours. Look for changes in clarity, adhesion, and color. Stop when you see significant changes or after 24 hours max.
Safety first: Never leave heat sources or lamps unattended. Keep flammables away from heat.
Practical Fixes and Workarounds for Common Issues
For poor adhesion, try cleaning the surface with an appropriate cleaner and reapplying with firm, even pressure. If discoloration appears, consider a different clear tape with a more compatible adhesive system. Bubbling often signals trapped air during application; squeegee from center out and rework if needed.
Residue on removal can be addressed with a mild solvent recommended by the tape manufacturer or a gentle wipe with a compatible cleaner. If issues persist, verify surface compatibility and temperature guidelines on the product label or data sheet before choosing a different tape or application method.
Improving adhesion and surface prep
Start with a clean slate. Use soap, water, and a scrub brush to remove dirt and grease from the surface.
Sand lightly with fine-grit sandpaper to roughen up the area. This gives the tape more to grip onto.
Consider using a primer. It helps create a better bond between the surface and the adhesive. Follow the manufacturer’s instructions for application.
Apply pressure evenly with a roll or squeegee. This ensures good contact and drives out any air bubbles.
Removing discoloration and residue
For solvent-based cleaners, start with the mildest option. Test on a small, hidden area first to ensure it doesn’t damage your substrate.
Apply the cleaner using a soft cloth or cotton swab. Work in small sections, rubbing gently.
If residue persists, try mechanical removal. Use a plastic scraper or a putty knife, working from one edge to the other. Be careful not to scratch the surface.
For tough discoloration, you might need to lightly sand and repaint. Always wear safety gear when sanding.
Temporary versus permanent fixes
Temporary fixes are great for quick repairs or when you can’t remove the tape immediately. Use hot-melt patches or double-sided tape. Apply according to package instructions.
For permanent replacements, you’ll need to remove the old tape completely. Use a heat gun and a scraper, working in small sections.
Choose temporary fixes for minor issues or when you’re short on time. Permanent replacements are best for long-term solutions or major problems.
Always remember, safety first. Wear gloves, safety glasses, and protective clothing when handling chemicals or using power tools.
Choosing the Right Clear Tape for Your Project
Base your choice on the substrate type, anticipated environment, required lifespan, clarity needs, and budget. Consider how visible the tape will be and whether you need a temporary or long-term hold. Make sure the tape’s performance matches the job demands you face.
Examples of best-fit types depend on the project, so check the manufacturer instructions or data sheet for guidance. If you’re unsure, compare labels and pick the option that aligns with your primary requirements and constraints.
Matching tape types to applications
The right clear tape starts with choosing the correct adhesive and backing. Here’s how:
Polypropylene (PP) tapes: Great for general use, indoor projects, and short-term applications. They’re cheap, flexible, and easy to apply.
Polyester (PET) tapes: Ideal for high-heat environments and long-lasting outdoor jobs. They’re more expensive but offer superior UV resistance and durability.
Acrylic adhesives: Perfect for surfaces that need extra holding power, like metal or glass. They’re also good for low-temperature applications.
Silicone adhesives: Use these for high-heat, moisture-resistant needs. They’re pricey but perform well in harsh conditions.
Material specs and standards explained
Understanding material specs ensures you get the right tape for your job. Here’s what to look for:
- Tensile Strength: How much force a tape can withstand before tearing. Look for: 10-20 lbs/inch (for general use).
- Peel Adhesion: The bond strength between the tape and surface. Look for: 5-15 lbs/inch (depends on application).
- Service Temperature: The range within which a tape maintains its adhesive properties. Look for: -20°F to 180°F (for general use).
- UL Listed: Underwriters Laboratories listing ensures safety and quality. Check if needed, especially for electrical applications.
- ASTM D3078/D3654: These standards ensure tape performance meets industry benchmarks. Look for these specs to be met or exceeded.
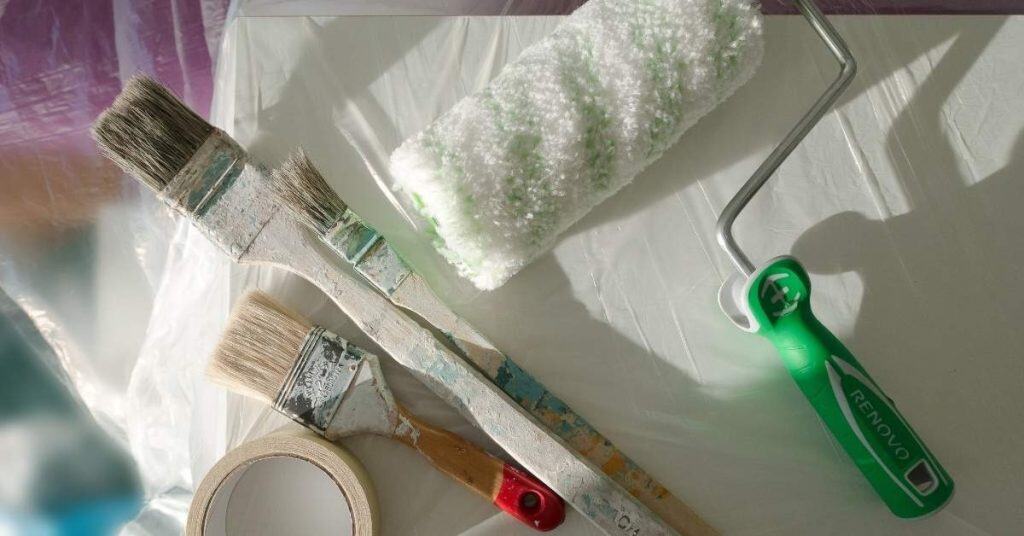
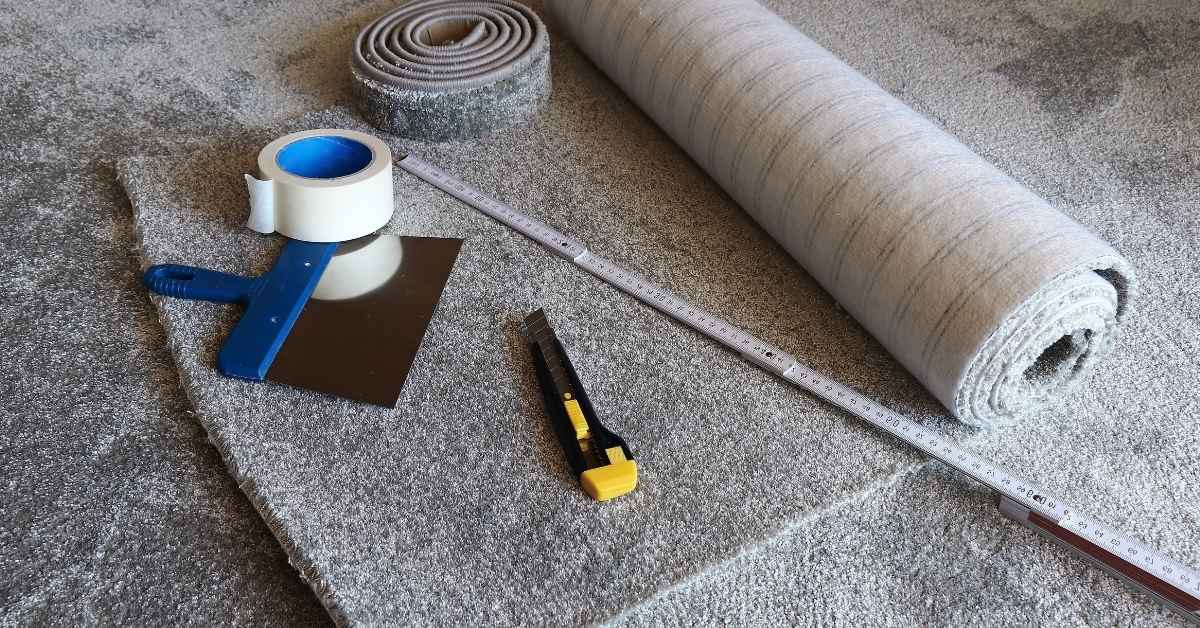
Tools and Materials Checklist
Have basic cutting tools like scissors or a craft knife, a smoothing card or squeegee, and clean rags for surface prep. Include a marker for labeling and a simple surface-cleaning solution suitable for the substrate. Keep gloves handy to avoid fingerprints on clear surfaces.
Stock a few tape samples in case you need to swap types, plus surface prep supplies and a small storage container to keep rolls from getting dusty. Always reference the product label or data sheet for any special storage or handling notes.
Basic household toolkit
Before you start, make sure you have these basic tools and materials to ensure your tape application goes smoothly.
- Cleaning solvents: To prep surfaces. Skip this, and you’ll end up with poor adhesion.
- Lint-free cloths: For wiping down surfaces. Regular rags can leave residue behind.
- Utility knife: For cutting tape to size. A dull blade can tear the tape.
- Roller or squeegee: To apply pressure and remove air bubbles. Without this, your tape won’t stick properly.
- Printed clarity chart: To compare tape clarity before application. No chart? You might end up with a cloudy finish.
Quick rule: Always use these basics to ensure a solid start.
Workshop and inspection tools
For more thorough testing and application, consider these workshop tools. They’re not always necessary but can make your job easier.
- Digital peel tester: To measure tape adhesion accurately. A must-have for quality control.
- UV lamp: To check for UV protection in clear tapes. Skip this, and you might miss out on crucial sun protection.
- Desiccant storage: To keep your tapes dry before use. Ignore this, and moisture can affect tape performance.
Quick rule: These tools are optional but can make a big difference in your results.
Preventive Care and Best Practices for Long-Term Clarity
Store tapes in a cool, dry place away from direct sunlight and heat sources. Keep rolls sealed to minimize dust pickup and prevent adhesive from collecting contaminants. Proper storage helps preserve clarity and performance over time.
Handle tapes with clean hands or gloves, apply with appropriate tension and pressure, and follow surface prep instructions. Periodically check stored assets and recheck critical tapes against the manufacturer guidance if conditions change or the project timeline extends.
Storage and Inventory Management
Proper storage is key to maintaining tape clarity and performance. Here’s how:
Temperature and Humidity: Store tapes in a cool, dry place. Ideal temperature range is 50-80°F (10-27°C), with humidity below 60%.
Shelf Life: Rotate stock regularly to use older rolls first. Most clear tapes have a shelf life of 12-18 months, but check the manufacturer’s guidelines.
Keep tapes away from direct sunlight and heat sources like radiators or water pipes.
Application Best Practices and Training Tips
Consistent, high-quality tape application starts with understanding these key steps:
Surface Preparation: Ensure surfaces are clean, dry, and free of contaminants. Lightly abrade if needed.
Tape Application: Apply tape in a single, smooth motion at a consistent speed. Press firmly along the entire length to ensure good adhesion.
Avoid Common Pitfalls: Don’t apply tape in extreme temperatures or humidity. Avoid applying over painted surfaces that may peel off with the tape. Train users to follow these steps consistently for best results.
Conclusion
Safety first and lasting clarity depend on disciplined testing, proper prep, and choosing the right tape for the job. When you follow the checks, trials and fixes discussed here, you’ll get a clean look that sticks and lasts without surprises.
Do this in order: inspect the tape and surface for compatibility, clean and dry the area, run a small test patch with the recommended dwell time, verify adhesion and edge seal, then apply with even tension and firm contact, and finally recheck after a short cure period. Use the right tape for the environment, keep a clear surface, and document any findings so you know what to repeat on similar jobs.
Common mistakes to avoid are skipping surface prep, using the wrong type or grade of clear tape for humidity or temperature, and over-tensioning or under-pressing during application. Don’t rush the test or ignore a cloudy patch, edge lift, or tack failure—these signs save you from bigger problems. Follow basic safety rules: work in a ventilated area if needed, protect hands and eyes, and test a small area before wide use.
If the job involves structural concerns, electrical insulation, or unknown chemical exposure, or if you see persistent adhesion failures after steps and tests, call a professional and stay focused on choosing the correct tape and method for the project. With these steps, you’ll finish confidently, protect the appearance, and avoid costly mistakes.
FAQ
Why does clear tape lose clarity after a while, and what can I do about it?
Clear tape can haze due to moisture, dust, or surface residue. Clean the surface thoroughly before reapplying and choose a tape type labeled for your surface and environment.
How can temperature and exposure affect adhesion and visibility on a job site?
Extreme temps can weaken adhesion and make the tape creep or lift. Check the tape label for recommended operating range and avoid applying in conditions outside that range.
What quick tests can I run to know if the tape still sticks well?
Press a small corner and try lifting a short edge to test adhesion. If it lifts easily or leaves residue, replace with fresh tape and re-clean the surface before re-taping.
How should I remove or re-tape without damaging the surface?
Pull slowly at a low angle to minimize lifting. If residue remains, use the product’s recommended cleaner or gently re-clean the area before applying new tape.