

Introduction
Paint projects around the house are quick touch-ups and small refinishing tasks you can tackle without professional help. We’ll cover quick fixes you can do in a weekend and the mistakes to avoid. Keep it simple, prep well, and check paint labels and surface type before you start.
This article speaks in plain language from the jobsite, not a classroom manual. If you spot a tricky spot, it’s ok to pause, test a small area, and verify with the product instructions or local rules. For safe ranges, stick to basic prep steps, ensure good adhesion, and follow brush and roller tips according to the label.
Key takeaways
- Inspect surfaces for cracks or dampness before choosing a quick paint project.
- Sand rough patches lightly, wipe dust, and prime glossy areas for adhesion.
- Use proper ventilation and avoid painting in extreme heat or cold.
- Test a small patch first and check color, sheen, and coverage.
- Protect floors and furniture with drop cloths; remove obstacles from pathways.
- Allow adequate dry time between coats according to manufacturer recommendations.
Table of Contents
- Introduction
- Key takeaways
- How to Choose the Right Quick Project
- Tools and Materials Checklist
- Prep and Patching for Fast, Long-Lasting Results
- Fast Painting Techniques That Still Look Professional
- Room-Specific Quick Fixes and Considerations
- Common Mistakes and How to Avoid Them
- Cleanup, Touch-Ups, and Visual Checkpoints
- Safety, Ventilation, and Environmental Considerations
- Conclusion
- FAQ
How to Choose the Right Quick Project
Choose small, high-impact paint tasks that match your available time and skill. Start with a clear outcome in mind. Use a simple checklist to prioritize fixes and spot scope creep.
This approach keeps projects doable and shows progress fast, so you stay motivated. It helps you avoid overdoing the job and wasting time, materials, or money.
Step-by-Step Process
The following steps guide you through choosing and completing a quick paint project, ensuring it’s done right the first time.
- Preparation: Gather necessary tools and materials. Check your list includes paint, brushes, rollers, tape, sandpaper, and safety gear like goggles and gloves.
- Safety Checks: Ensure the area is well-ventilated. If painting outdoors, check for weather changes. Always keep flammable materials away from heat sources.
- Surface Preparation: Clean the surface to remove dirt or grease. Lightly sand any rough spots and wipe off dust. Apply painter’s tape to protect edges.
- Painting: Start at the top of the surface, working your way down in ‘W’ or ‘M’ shaped strokes for walls, or side-to-side for trim. Maintain a consistent pressure on the brush or roller.
- Final Checks and Cleanup: Inspect your work for any missed spots. Allow paint to dry completely before removing tape. Clean tools thoroughly with water (or appropriate solvent) and store properly.
Assessing Surface Condition
Before you start painting, it’s crucial to inspect the surface for any issues that may affect your project’s outcome.
Look for common problems like chips, stains, or peeling paint. These can indicate underlying issues such as moisture damage or poor previous prep work.
If the damage is minor (e.g., a few small chips or scratches), a simple touch-up might suffice. However, if the surface shows extensive damage or peeling, it’s best to fully prepare the area before painting.
Remember: Proper prep work ensures better paint adhesion and longevity of your project.
Matching Paint and Finish
To achieve a professional-looking result, it’s essential to match the existing paint type and sheen as closely as possible.
First, identify the current paint type. Latex (water-based) paints are common in modern homes, while oil-based paints were more prevalent in older properties.
Next, determine the sheen level. Common sheens include flat/matte, eggshell/satin, semi-gloss, and high-gloss. Matching the sheen helps maintain a consistent look throughout your space.
Always: Test your chosen paint on a small, hidden area before committing to a full coat. This allows you to check for color match and observe how it dries.
Tools and Materials Checklist
This section covers the essential tools and paint types you’ll need for quick home projects, plus optional tools that speed things up. Keep a basic toolkit: brushes, rollers, trays, a putty knife, sandpaper, painter’s tape, drop cloths, a level, and a drill with driver bits. Know the paint types you might use, and check the label to confirm compatibility with the surface.
Optional tools like a sander, caulk gun, or corner applicator can speed bigger jobs. Having the right gear matters because the wrong tool slows you down and can damage edges or finishes. Always follow the product instructions and check local household hazardous waste rules for disposal.
Brushes, rollers, and applicators
Before you start applying any coating or sealant, use this checklist to ensure you have the right tools for the job. This will help you achieve a professional finish and avoid costly mistakes.
- Small areas: Use angled brushes (1-2 inches). Check they’re soft-bristled for smooth surfaces, or stiff-bristled for textured ones.
- Trim work: Use trim paintbrushes (1.5-3 inches) with a straight edge. Ensure the ferrule (metal part) is tightly secured to prevent bristles falling out.
- Textured surfaces: Choose nap rollers based on texture depth: 3/8″ for light textures, 1/2″ or 3/4″ for deeper textures. Check the roller’s cover material matches your surface (e.g., lambswool for smooth surfaces).
- Large areas: Use extension poles with rollers to reach high places without ladders.
- Sprayer worth it?:** Consider a sprayer if you’re covering 500 sq. ft. or more, or have complex shapes. Check your surface can handle slight overspray (e.g., not suitable for indoor use).
- Paint sprayer tips: Choose the right tip size based on paint viscosity: larger tips (e.g., 0.13) for thicker paints, smaller tips (e.g., 0.015) for thinner ones.
- Applicator condition:** Inspect all applicators for wear and tear before use. Replace any with damaged bristles or covers to avoid streaks and uneven coverage.
- Cleaning supplies: Have mineral spirits, soap, and water ready to clean brushes and rollers after use to maintain their condition.
Quick rule: Always match the applicator type and size to your surface texture and area size. Using the wrong tool can lead to poor coverage, streaks, and wasted product.
Paint, primer, and specialty products
Before you start painting, use this checklist to ensure you have the right products for a durable, long-lasting finish. Check each item before you begin work.
- Primer: Check label for “primer” or “sealer”. Ensure it’s suitable for your surface (interior/exterior, drywall/wood/etc.).
- Stain-blocking primer: If painting over stains or knots, use a stain-blocking primer to prevent bleed-through. Check label for “stain-blocking” claims.
- Mildew-resistant paint: For bathrooms or humid areas, use paint with mildew-resistant additives. Check product label for “mildew-resistant” or “mildew-fighting” claims.
- Paint color: Ensure you have the correct shade and enough quantity. Double-check your paint swatch before purchasing.
- Paint finish: Choose the right sheen for your project (flat, eggshell, satin, semi-gloss, high-gloss). Check manufacturer’s recommendations for each room/area.
- Paint quality: Opt for good-quality paint to avoid rework and ensure durability. Read reviews or ask store associates for advice.
- Paint application tools: Briefly check your brushes, rollers, and trays (see “Brushes, rollers, and applicators” section) to ensure they’re in good condition.
- Safety gear: Check you have safety glasses, gloves, and a respirator or dust mask for paint application.
Quick rule: Always use primer before painting. It improves adhesion, seals the surface, and helps achieve better color coverage.
Prep and Patching for Fast, Long-Lasting Results
Prep matters. Clean the surface, sand rough spots, and fill holes before patching. Proper prep prevents rework and gives your patch a long-lasting grip.
Doing the prep right saves time and money, and it shows in the final look. If you skip it, you’ll likely redo the patch sooner than you think. Always check the label/datasheet for any material-specific instructions.
Quick hole and crack repairs
Before you grab your paintbrush, tackle those small nail holes and hairline cracks. Here’s how:
For small holes, use a spackling compound. Apply with a putty knife, let it dry, then sand smooth.
For hairline cracks, use painter’s caulk. Squeeze a bead along the crack, smooth with your finger or a damp cloth, and let it dry.
Dealing with peeling or flaking paint
Peeling or flaking paint needs attention before you repaint. Here’s what to do:
If it’s small and stable, lightly sand, feather the edges, and prime. No need to strip.
For larger areas or loose paint, safety first: wear gloves, goggles, and a mask. Use a scraper or wire brush to remove loose paint, then sand smooth.
Never repaint over peeling paint – it’ll just peel again.
Fast Painting Techniques That Still Look Professional
You can speed up painting with smart techniques that still look sharp. Learn to cut in cleanly, use steady rolling patterns, and try simple spraying tips without sacrificing finish. These methods help you finish faster and keep edges neat.
Using these methods matters because they reduce touch-ups and keep a smooth, even finish. Always follow the product label and manufacturer instructions for tools and technique. For disposal and cleanup, check your local household hazardous waste rules.
Efficient cut-ins and edging
For clean edges without excessive taping, use a 2-inch angled brush. Dip it just shy of 1 inch up the bristles.
Start at the top, holding the brush at a 45-degree angle to the wall. Paint a 3-4 inch strip along the edge, then fill in the rest with your roller. This technique, called ‘cutting-in’, gives you a sharp line without needing much tape.
To protect adjacent surfaces quickly, use painter’s tape and a plastic drop cloth. Tape off the edges first, then lay down the cloth to catch any drips. No need to spend hours taping every inch – just focus on the edges and any areas you don’t want paint on.
Rolling and texture management
Choose a roller cover that matches your wall’s texture. For smooth walls, use a 1/2-inch or 3/4-inch nap. For textured surfaces, go for a 3/4-inch to 1-1/2-inch nap.
Start at the top of the wall and work your way down in ‘W’ or ‘M’ patterns. This helps distribute paint evenly and reduces lap marks. For ceilings, use a roller extension pole and start from one corner, working your way across and down.
Don’t overload your roller. Dip it into the paint tray, then roll off any excess on the ribbed section of the tray. You want a thin, even coat – not drips.
Room-Specific Quick Fixes and Considerations
This section covers quick, room-specific fixes you can do now. It highlights prep steps and product needs for kitchen, bathroom, bedroom, and trim.
Doing good prep and choosing the right products saves time and avoids future repairs. It explains why certain fixes matter more in some rooms and what pitfalls to avoid.
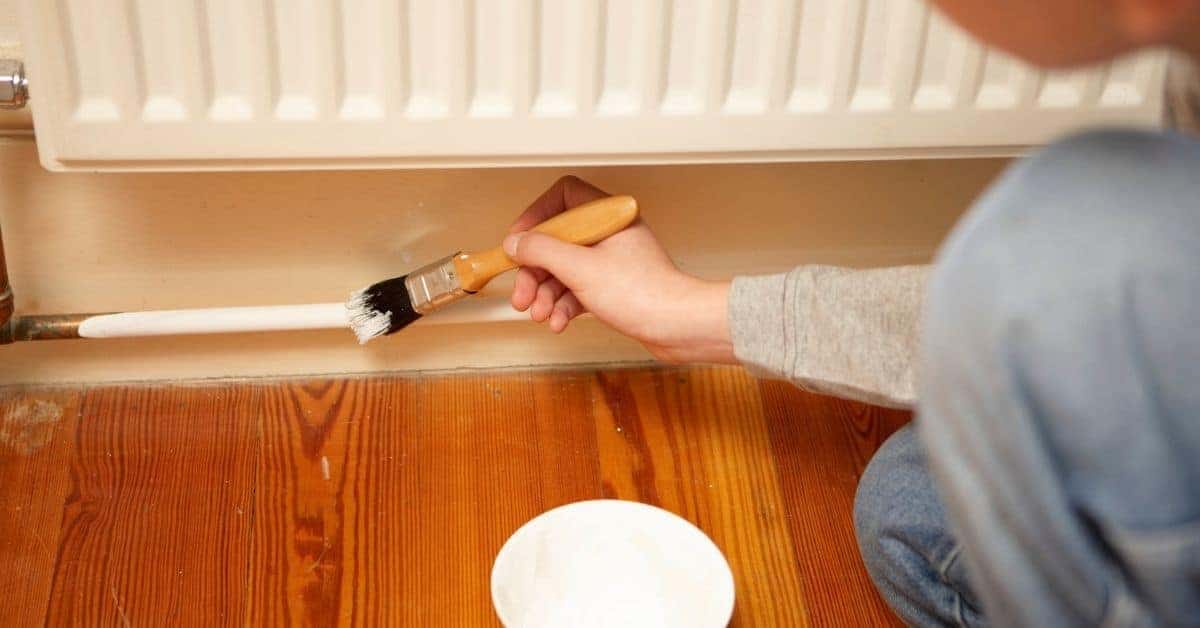
Kitchen and cabinet touch-ups
Degreasing is the first step when touching up kitchen cabinets. Use a degreaser to clean surfaces, especially around the stove and sink areas.
Adhesion can be an issue with cabinets. Ensure they’re clean, dry, and sanded lightly before painting. A primer designed for cabinets will help too.
For fast renewals, consider using a cabinet-specific paint or stain. These are formulated to adhere well and provide good coverage.
Bathrooms and moisture-prone areas
Before painting, check for mildew. If found, clean it off with a solution of bleach and water (1 part bleach to 3 parts water). Let it dry.
Use a moisture-resistant primer in these areas. It’ll help prevent mildew growth under your paint.
Ensure proper ventilation during painting and afterwards. Keep the bathroom door open or use a fan to circulate air.
Common Mistakes and How to Avoid Them
Common mistakes in DIY projects can ruin the finish and waste your time. Rushing, skipping prep, choosing the wrong paint, or letting coats dry too quickly causes trouble. We’ll cover those mistakes and give clear fixes you can act on.
Knowing the why helps you avoid redo work. Proper prep and using the right product make the job last and look right. If you notice problems, check the label or datasheet for guidance and follow local household hazardous waste rules for disposal.
Color and Sheen Missteps
Picking the right color and sheen is crucial. Don’t rely on small paint chips, they can deceive. Test your colors by painting large swatches in different areas of the room to see how light affects them throughout the day.
Consider the sheen too. High-gloss is great for high-traffic areas like kitchens and bathrooms as it’s easy to clean, but it shows every imperfection. Matte or eggshell might be better for walls with minor flaws.
Remember, you can always darken a room, but lightening requires repainting. So, if in doubt, go a shade lighter.
Overworking Paint and Visible Flaws
Brush marks, roller lines, and drips happen when you’re too eager to cover the surface. Less is more. Apply thin, even coats.
For brush marks, use a good quality brush and apply paint in ‘W’ or ‘M’ patterns. For roller lines, maintain a ‘wet edge’ by not letting previously painted areas dry before rolling over them.
Drips happen when you overload your applicator. Work from the top down, using gravity to your advantage. If drips do occur, let them dry, then lightly sand and repaint.
Cleanup, Touch-Ups, and Visual Checkpoints
Cleanup quickly after painting to save time and keep tools in good shape. Clean as you go, store leftover paint for quick touch-ups later, and perform a simple visual check to know when you’re done. A tidy jobsite also helps prevent drips and rework.
Good cleanup makes touch-ups easier and prevents rust on metal tools or dried paint on brushes. Visually check for smooth, even coverage and no missed spots to know the job is complete. For disposal, check local household hazardous waste rules and follow the product label directions for safe handling.
Smart touch-up strategies
Use this checklist to blend small repairs invisibly. It’s crucial for maintaining a professional look.
- Inspect the area: Check for any missed spots or new imperfections before starting.
- Match the paint: Ensure you’re using the same type and color as the existing paint. A slight mismatch can be noticeable.
- Prepare the surface: Lightly sand, then wipe clean to improve adhesion.
- Prime if needed: If repairing a bare spot, use a primer to seal it before painting.
- Test first: Apply paint to a small, hidden area to check for color match and drying time.
- Work in thin layers: Apply multiple light coats instead of one thick one. This reduces drips and improves coverage.
- Avoid overworking: Too many coats can lead to visible flaws like brush strokes or a shiny patch.
- Blend edges: Use a small, soft brush to feather out the repair’s edges into the surrounding paint.
- Let it dry: Allow each coat to dry completely before recoating. Rushing can cause issues like bubbles or peeling.
- Edges: Check all edges – walls, ceilings, trim – for any missed spots or drips. Use a step ladder if needed.
- Sheen consistency: Inspect the sheen across the entire surface to ensure it’s even. Check under different lighting conditions.
- Coverage: Make sure every spot is covered, including hard-to-reach areas and corners.
- Drips and runs: Look for any drips or runs, especially on vertical surfaces like walls.
- Texture consistency: Ensure the texture (if applicable) is consistent across the entire surface. Check from a distance to spot any variations.
- Color consistency: Inspect for any color variations, which could indicate missed spots or incompatible paints.
- Dry time: Allow paint to dry completely before inspecting. Checking too soon can lead to inaccurate results.
- Final walkthrough: Do a final walkthrough of the entire room to catch any issues you might have missed during initial inspection.
Quick rule: If in doubt, test first and work slowly for best results.
Visual checkpoints for quality control
Use this checklist to inspect your work before calling the job done. It helps ensure a high-quality finish.
Quick rule: Inspect your work thoroughly and under different lighting conditions for best results.
Safety, Ventilation, and Environmental Considerations
Safety comes first when painting. Make sure you have good ventilation and wear basic protective gear. Dispose of leftover paints and containers by checking local household hazardous waste rules.
Ventilation helps reduce fumes and headaches, and a poorly set up area can cause mistakes or accidents. Always follow the product label and manufacturer instructions, and store materials safely. If you’re unsure about disposal or cleanup, check the label or datasheet for guidance.
Personal Protective Measures
Safety first, mate. Before you start slapping paint around, gear up.
Grab a pair of gloves to keep your mitts clean and solvent-free. Never touch your face or eyes with gloved hands.
Protect your lungs too. Use a respirator if you’re dealing with oil-based paints or stains, or working in a poorly ventilated area. A dust mask will do for water-based paints.
Eye protection’s a must. Safety glasses or goggles will keep paint and solvents out of your peepers.
Minimizing Waste and Proper Disposal
Let’s not be wasteful, yeah? Here’s how to make the most of your paint.
First off, store leftovers properly. Seal those cans tight and keep ’em in a cool, dry place. They’ll last longer that way.
Can’t use it all? Check with local recycling centers or hardware stores. Some take leftover paint for reuse or proper disposal.
If it’s unusable, check your local waste management guidelines. Some areas have hazardous waste days where you can drop off solvents and paints. Never pour them down the drain!
Conclusion
Sticking to the plan keeps your paint project durable and looking clean. Safety and proper prep pay off with fast results that last, and that means you can move on with confidence instead of redoing work later.
Make the move by confirming you have the right quick project, the right tools, and a solid prep patch; then patch, prime if needed, and roll or brush in even, logical strokes, finishing room by room and checking up close as you go. Test a small area first, ventilate well, and clean as you go so you don’t trap dust or fumes under fresh paint.
Common mistakes to avoid include skipping patching, glopping on too much paint, and rushing dry times. Safety first: wear a mask where needed, protect floors and furniture, and never mix chemicals without reading labels. Test a small area before full coverage, and keep good ventilation to prevent fumes from building up. Take your time on edges and corners and keep a clean, tidy workspace so mistakes don’t compound.
If a room or surface is beyond quick fixes, or if you encounter stubborn patches, moisture, or heavy peeling, call a professional rather than forcing through. The right call today saves time, money, and headaches tomorrow—now go ahead and finish strong, with clean lines, solid coats, and a safe, durable result you can be proud of.
FAQ
How do I fix peeling or blistering paint on interior or exterior surfaces quickly and safely?
Start by scraping loose paint and cleaning the surface. Patch with compatible filler or putty, then prime before applying new paint. Always read the label to match the primer and finish type with the surface you’re painting.
What’s the right way to touch up scuffs or small nicks so it doesn’t stand out?
Clean the spot, feather the edges, and use a small brush for tight areas. Apply thin coats and match the finish; let each coat dry before judging the color blend. If you’re unsure, test on a discreet spot first.
How can I paint ceilings or walls faster without creating drips or roller marks?
Cut in along the edges with a brush, then roll in a W pattern to distribute paint. Keep the roller loaded with paint but not dripping, and work in manageable sections. Use proper lighting to spot missed spots as you go.
What are the common mistakes that ruin a DIY paint job and how do I avoid them?
Skipping prep, using the wrong primer or paint for the surface, and skimping on ventilation lead to poor results. Follow the product instructions, and don’t mix brands unless the label allows it. If in doubt, check the manufacturer’s directions and local rules for safe use.