
Introduction
Drywall corner bead is a trim piece that shapes and protects wall corners. It comes in metal or plastic and is embedded into joint compound to create a square, sharp edge. For DIY work, set it true, fasten with nails or screws, and cover with tape and mud.
Choosing the right bead depends on your wall style and environment, and you should check product labels and manufacturer instructions. If corners look bent, loose, or cracked, plan fixes like replacement beads or careful re-mudding, and verify local rules if applicable. Always follow safety and tool instructions and test a small area before full work.
Key takeaways
- Understand corner bead types and select based on wall material and seam needs.
- Inspect existing corners for damage before repairing or replacing bead.
- Measure accurately with a straight edge and level to plan bead placement.
- Follow installation steps in order: set, embed mud, and check alignment.
- Use proper finishing techniques to blend bead joints while avoiding ridges.
- Safety: wear eye protection and mask when sanding; keep dust down.
Table of Contents
- Introduction
- Key takeaways
- Understanding Corner Bead Types and When to Use Them
- Tools and Materials Checklist
- Preparing the Wall and Measuring
- Installation Methods Step-by-Step
- Finishing: Taping, Mudding, Sanding, and Painting
- Common Problems and Fixes for Bad Corners
- When to Repair Vs Replace and Quick Temporary Fixes
- Quality, Specs, and Buying Guidance
- Conclusion
- FAQ
Understanding Corner Bead Types and When to Use Them
Different corner bead materials and profiles serve different jobs. Common options include metal and vinyl beads, with variations for square, flexible, or curved corners. Consider the project needs to decide which type fits best.
Match bead type to conditions like new construction, repairs, or high-traffic areas. Each option has its own pros and cons, so verify manufacturer guidance and local rules before choosing. When in doubt, check label or data sheet for compatible uses and recommended substrates.
Metal corner bead
Metal corner beads come in two main types: galvanized and stainless steel. Both are durable, long-lasting options.
Galvanized is cheaper but can rust over time if not properly primed. It’s great for new construction where durability matters most.
Stainless costs more but won’t rust. It’s ideal for humid areas or when a long-lasting, low-maintenance finish is needed. Metal beads are rigid, so they’re best for square corners and high-traffic zones.
Vinyl and PVC corner bead
Vinyl and PVC beads offer moisture resistance, making them perfect for bathrooms, kitchens, or other damp areas. They’re also flexible, which helps prevent cracking under stress.
They won’t dent like metal but can be harder to finish smoothly due to their texture. Use these where a durable, moisture-resistant corner is needed, but aesthetics aren’t top priority.
PVC beads are typically white and can be painted. Vinyl beads often come in various colors for a quick, no-paint-required solution.
Paper-faced, bullnose, and flexible beads
Paper-faced beads have a paper backing that sticks to the drywall like tape. They’re easy to install but less durable than metal or vinyl.
Bullnose beads have a rounded edge for a smooth, finished look. They’re used when aesthetics are important and corners aren’t too sharp.
Flexible beads can curve around corners, making them ideal for rounded walls or arches. They’re also useful for repairing damaged corners as they can follow the existing shape.
Tools and Materials Checklist
Assemble the basics first: markers, a straight edge, a utility knife, and shears or tin snips for the bead. Include a drywall hammer or hybrid setter, tape, mud pan, and a mixing paddle. Have a tape measure handy to confirm overall dimensions as you work.
List the compounds, fasteners, and safety gear next. Include setting-type joint compound, plaster or fiberglass tape, and appropriate fasteners for the bead type. For DIY versus pros, note alternatives like adhesive systems or pre-finished edges, and always follow the product instructions and local safety guidelines.
Essential hand and power tools
Before you start, make sure you have these tools on hand. They’ll help you install corner bead like a pro.
- Snips or utility knife: To cut the corner bead to size.
- Hammer/tapper: To tap the bead into place and secure it with nails or screws.
- Screwdriver (if using screws): To drive in screws for a stronger hold.
- Corner trowel: To apply compound smoothly and evenly.
- Utility knife: To score and snap the bead, or to trim excess compound.
- Tape measure: To ensure your cuts are accurate and the bead is straight.
- Pencil: To mark where you’ll cut and nail/screw.
- Level or straight edge: To keep the bead level as you install it. Missing this can lead to crooked corners.
Quick rule: Don’t skimp on tools. The right ones make the job easier and faster.
Fasteners, adhesives, and compound choices
Choosing the right fasteners, adhesives, and compounds is crucial for a strong, long-lasting corner.
- Nails or screws: Use nails for quick installation, but screws provide better hold. Skip this step at your peril; corners can pop off later.
- Adhesive (optional): For extra strength, use an adhesive before nailing/screwing. It’s a pro trick that works great for DIYers too.
- Setting compound: This sets quickly and is ideal for filling gaps or reinforcing corners. Use it when you need to work fast.
- Drying compound: Slower setting, but provides a stronger bond over time. Great for final coats and wider taping jobs.
Quick rule: Match your choice of compound to the job at hand. Setting compounds are great for quick fixes, while drying compounds provide better long-term strength.
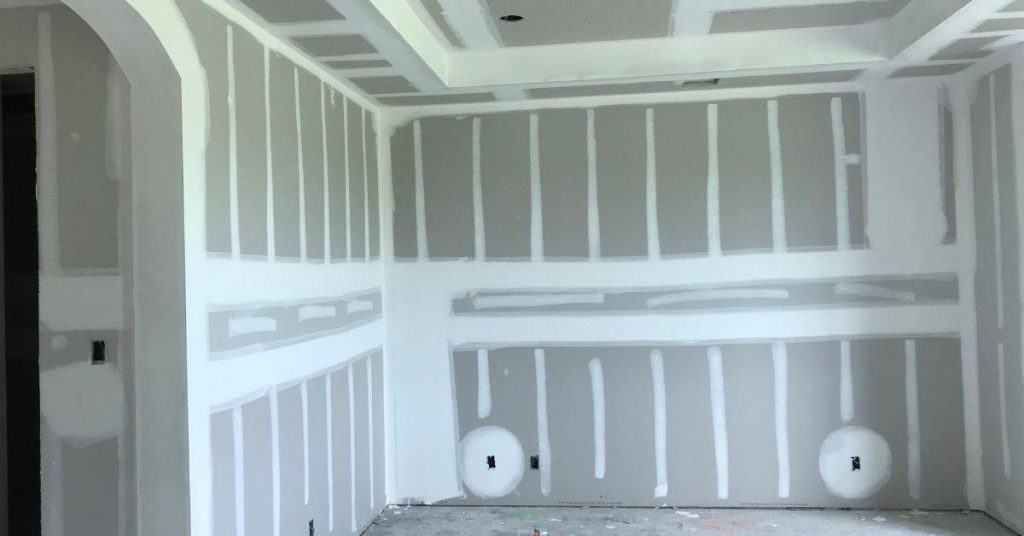
Preparing the Wall and Measuring
Start with a clean, dry surface and inspect for loose paper, cracks, or protrusions. Remove any old tape or finishing materials that could cause lumps. Fix obvious defects before you lay out new beads.
Measure corners carefully and check for true, square edges. Mark reference lines and use a straightedge to verify that corners sit true before fastening. If measurements don’t look right, recheck substrate and ensure flatness according to the product guidelines.
Surface prep and removing old bead
Before installing new corner beads, ensure your walls are clean and ready. Safety first: wear gloves and eye protection when handling damaged beads.
Remove any old, damaged beads carefully using a utility knife or nippers. Be cautious not to damage the drywall substrate.
Clean the area thoroughly. Remove rust from metal beads with steel wool and mild soap. Repair any substrate damage with joint compound before proceeding.
Accurate measuring and cutting techniques
Measure your corner length accurately using a tape measure. Mark the bead at each end of the wall, then connect the marks with a straight edge.
For metal beads, use tin snips to cut along your mark. For vinyl or PVC, score and snap. Ensure cuts are clean and square to avoid gaps or jagged edges.
Tip: Double-check your measurements before cutting. It’s easier to trim a bit more off than to try and extend a too-short bead.
Installation Methods Step-by-Step
First, choose mechanical fastening for most installations and align the bead along the corner. Secure with the recommended fasteners or nails at regular intervals. Ensure the bead sits flush with both surfaces before mudding.
Next, consider adhesive or tape systems for special cases or temporary setups. Follow the system instructions and press the bead firmly in place. For flexible or curved beads, use the appropriate technique to maintain a true corner while allowing movement where needed.
Step-by-Step Installation Process
This step-by-step guide walks you through installing drywall corner bead, from prep to finish.
- Prep the wall and measure for your bead. Accurate measuring prevents crooked corners.
- Cut the bead using a utility knife or tin snips. Be careful not to nick yourself.
- Apply construction adhesive along the corner if using an adhesive-set bead. This helps prevent movement during installation.
- Position and align the bead, then fasten it in place with nails or screws every 4-6 inches. Check for square before driving any fasteners.
- Apply joint compound over the bead, feathering out to the wall. Let it dry, then sand and apply a second coat if needed. Proper finishing prevents cracks down the road.
- Clean up your workspace and tools. A clean site is a safe site.
Mechanical fastening with nails/screws
Using nails or screws to fasten your corner bead? Here’s how to do it right.
Start by marking the centerline of your corner. This helps you keep your bead straight and centered.
Space your fasteners every 4-6 inches, driving them in just enough to seat the bead. Be careful not to overdrive, as this can deform the bead or cause it to pop off later.
Use a level or square to check for plumb and straight corners before driving any more fasteners. This helps ensure your corner is perfect.
Adhesive-set and taped paper-faced bead
Paper-faced beads are great for smooth finished corners. Here’s how to install them.
First, apply a thin bed of joint compound or construction adhesive along the corner. This helps hold the bead in place while it dries.
Position and align your bead, then press it firmly into the adhesive. Use a taping knife to smooth out any excess and ensure good contact.
Tape over the seam with drywall tape, then apply joint compound over the tape and bead. Let it dry before sanding and applying more coats if needed.
Installing flexible or rounded beads
Flexible and rounded beads are perfect for curves and unique corners. Here’s how to install them.
First, decide if you need an inside or outside curve. This affects how you’ll bend your bead.
Bend the bead gently using a corner tool or by hand. Be careful not to kink or crease it. Use a backer board for support if needed.
Position and align your bead, then fasten it in place with nails or screws every 4-6 inches. Apply joint compound over the bead, feathering out to the wall. Let it dry before sanding and applying more coats if needed. Proper finishing prevents cracks down the road.

Finishing: Taping, Mudding, Sanding, and Painting
Apply joint compound in stages, embedding tape along the seam as directed. Build a narrow first coat and let it set before applying subsequent layers. Avoid overfilling to keep the edge crisp.
Sand the joints with a light touch and blend the feather edges into the surrounding wall. Prime the repaired area if needed before painting. Use a compatible paint finish and follow manufacturer recommendations for curing times.
First coat and embedding tape or bead flange
The first coat is crucial for a strong, smooth corner. Start by applying compound to the corner using your taping knife.
Press the tape or bead firmly into the wet compound. Use your fingers or a flat tool to ensure no air pockets are trapped underneath. Be careful not to tear the paper face if you’re using a paper-faced bead.
Inspect your work before moving on. Make sure the tape or bead is fully embedded and there are no gaps or bubbles.
Feathering and sanding without damaging bead
When feathering, start from the center of the corner and work outwards. This helps create a smooth, even edge.
Be careful not to sand too aggressively. Use light, even strokes with your sandpaper. Start with a higher grit (120 or 150) to avoid gouging the bead.
Check your progress frequently. Sand only until you have a smooth edge, then stop. You can always go back and sand more if needed.
Priming and paint considerations
Use a primer before painting to seal the surface and improve paint adhesion. Apply it as soon as your corner is fully dry and sanded.
Paint adhesion varies with bead material. For paper-faced beads, use a primer designed for wallpaper. For metal or plastic beads, a general-purpose primer should work fine.
Avoid highlighting imperfections by using a paint with good coverage. Apply it evenly and let it dry according to the manufacturer’s instructions.
Common Problems and Fixes for Bad Corners
Dents and indentations can be filled with fresh compound and feathered out; match the surrounding texture as you go. Open seams require re-taping and re-mudding to seal the joint. For wavy edges, recheck corner alignment and reapply mud in thin, successive coats.
Hairline cracks often respond to a light skim coat and proper sanding. If corners crack again, inspect substrate movement and consider alternative corner bead or fastening methods. For most issues, verify product instructions and technique before rework.
Fixing dented or crushed metal beads
Dents in metal corner beads can often be hammered out, but only if the bead hasn’t been over-stretched. Use a soft-faced mallet and gently tap from the backside to pop the dent out.
For deeper dents, you might need to fill with setting compound. Scrape off any loose paint or rust first. Apply compound, let it set, then sand smooth before painting.
Important: If the bead is severely crushed or stretched too thin, replace it entirely. Hammering or filling won’t fix that.
Correcting gaps, bulges, and uneven edges
For gaps between the bead and wall, fill with setting compound. Apply a thin layer first, let it set, then build up as needed. Sand smooth once dry.
To fair out bulges, apply successive layers of joint compound, letting each one set before sanding lightly. Re-scribe the edge after each layer to maintain a straight line.
For uneven edges, re-scribe the bead’s edge with a utility knife or corner tool. This helps create a true line for taping and finishing.
Repairing crumbling or delaminated paper-faced corners
If the paper face is peeling off, stabilize it with a thin layer of setting compound. Let it set, then lightly sand to create a good surface for re-tape.
Remove any loose material with a utility knife or corner tool. Clean the area and apply joint adhesive before re-applying tape or installing a new bead.
Tip: To prevent future delamination, use high-quality tape and adhesive designed for paper-faced corners.
When to Repair Vs Replace and Quick Temporary Fixes
Use repair when the corner is still sound but has surface flaws or minor deformation. Choose replacement if the bead or substrate shows significant damage or movement. Make the decision based on visible integrity and long-term durability as advised by instructions or local codes.
Temporary fixes include pinning loose sections, taping over small gaps, or applying a quick skim coat to even out errors. These hold until you can perform a proper repair or replacement. Always document and follow safety guidelines during any interim fix.
Criteria to decide repair vs replacement
When deciding whether to repair or replace your drywall corner bead, consider these factors:
Extent of Damage: Small nicks and dents can usually be repaired. But if the damage is extensive, with large gaps or missing sections, it’s better to replace.
Moisture Issues: If there’s mold or water damage, you’ll need to address that first before replacing the bead. Otherwise, the new one will also get damaged.
Structural Substrate Problems: If the wall itself is bowed, cracked, or otherwise compromised, repair won’t help. You’ll need to replace the bead and possibly fix the wall too.
Aesthetics Required: If you’re aiming for a high-end finish with no visible repairs, replacement might be best. But if you don’t mind seeing the repaired area, a good repair job will do.
Temporary patches and fast cosmetic fixes
If you need a quick fix before guests arrive or while planning a full repair, try these temporary solutions:
Spot Mudding: Apply joint compound directly over the damaged area. It won’t last long-term but can hide small issues temporarily.
Lightweight Patching: Use lightweight spackling compounds for minor dents or holes. They’re easy to apply and dry quickly, but they’re not as durable as proper mudding.
Remember, these are temporary fixes. They won’t last long under normal wear and tear. For a permanent solution, you’ll need to follow the full repair or replacement process.
Rebeading: full removal and reinstallation
Sometimes, the best option is to remove the old bead entirely and install a new one. Here’s when and how:
Signs it’s time to rebead: If your corners are badly damaged, have large gaps or missing sections, or if you’re planning a major renovation that requires new drywall anyway.
Preparation: Remove the old bead using a utility knife and pry bar. Sand the area smooth. Prime to prevent moisture issues.
Bead Selection: Choose a new bead that matches your existing ones in style and material (metal or paper-faced).
Installation and Finishing: Install the new bead following our earlier guide on installation. Remember, rebeading requires more time and effort than simple repairs, but it ensures a clean, uniform look.
Quality, Specs, and Buying Guidance
Compare durability, warranty, and compatibility with the joint compound you plan to use. Look for beads that match your substrate and climate conditions as indicated on the packaging. Check for any limitations listed by the manufacturer.
Read labels and data sheets for proper use, installation methods, and tools. Verify compatibility with your chosen mud type and assess any labeling that guides installation and trimming. When in doubt, consult the product’s instructions and local requirements.
Material durability, cost, and code considerations
The material you choose for your corner bead directly impacts the longevity and appearance of your drywall corners.
- Polymer-based: More expensive but resist cracking and denting. Look for impact resistance ratings. Avoid in areas with high moisture exposure without proper protection.
- Metal (steel or aluminum): Cheaper, durable, and easy to install. Check corrosion resistance for steel; aluminum is lighter but less rigid. Avoid in areas with heavy traffic or impact without reinforcement.
- Paper-faced: Inexpensive, easy to install, but susceptible to damage from moisture and humidity. Look for mold-resistant options. Avoid in bathrooms or kitchens without proper ventilation.
- Plastic (PVC): Lightweight, flexible, and resistant to corrosion. Ideal for curved walls or where impact resistance is not a concern. Avoid in areas with extreme temperatures as they can warp.
- Fiber-reinforced: Offers good strength-to-cost ratio. Reinforcement can be fiberglass or plastic. Look for high tensile strength ratings. Avoid in areas with frequent vibration or impact without proper reinforcement.
Visual checkpoints and inspection checklist
Use this checklist before and after installation to ensure a quality job.
- Pre-install: Check corner alignment; ensure they’re square. Misaligned corners lead to crooked walls.
- During install:</> Inspect nail pattern; evenly spaced nails prevent warping. Too few or too many can cause issues.
- Post-install (before mudding): Check for flushness; any gaps or bulges will show after painting. Use a straight edge to confirm.
- After mudding: Inspect finish quality; any cracks, holes, or uneven surfaces need attention before sanding and painting.
- Final inspection (after painting): Check for any missed issues; touch-ups may be needed.
- Common mistakes to avoid: Skipping pre-install checks can lead to crooked walls. Not inspecting after mudding can result in visible imperfections.
Quick rule: Always check your work at each stage to catch and fix issues early.
Pro tips and common installer mistakes to avoid
Learning from others’ mistakes can save you time, effort, and money.
- Misaligned corners: Always use a corner square or laser level for accurate alignment. Misaligned corners are hard to fix later.
- Inconsistent nail spacing: Aim for 6-8 inches apart. Too few nails can cause warping; too many can crack the drywall.
- Not allowing for compound expansion: Apply compound generously, but allow room for it to expand without cracking the bead.
- Over-sanding: Be careful not to sand through the paper face or damage the metal bead. This exposes the core and weakens the corner.
By avoiding these common mistakes, you’ll achieve professional-looking corners every time.
Conclusion
Take this straight to the job: get a durable, clean corner by choosing the right bead for the corner, prep the wall properly, and follow a disciplined, safe workflow from measuring to painting. Safety comes first, and careful steps now save costly fixes later.
First, run through a simple check in order: confirm the correct corner bead choice for the wall conditions, gather the right tools and materials, clean and square the surface, measure twice and cut as needed, fit the bead snugly, apply tape and mud in thin coats, sand smooth, then test the finish with light paint or primer and address any remaining flaws. Do the work in a clean, dry area, wear eye protection and a dust mask, and work in small sections to avoid overheating or damaging adjacent surfaces.
Common mistakes to avoid are rushing the layout or cutting, trying to force a bead into a misaligned corner, and skipping the dry time between coats or failing to clean tools between steps. A simple safety rule: never mud into a wet or dusty surface, always work in controlled, dry conditions, and never overfill joints or force fixtures into misalignment.
If the corner is severely cracked, warped, or the framing is out of plumb, it makes sense to call a professional instead of chasing a patchwork fix. For most DIYs, you can finish a solid job by sticking to clean prep, patient taping and mudding, and a careful final coat. Stay practical, stay aware of what you’re changing, and you’ll finish with corners that look good and last.
FAQ
What corner bead type should I choose for a high-traffic area or a damp environment?
Choose alloy or steel corner bead for durability in busy spaces. For moisture-prone areas, verify with the manufacturer that the bead is rated for humidity and install with appropriate waterproofing or sealants as recommended.
How do I prevent corner bead from telegraphing (showing through the mud) on a rough wall?
Clean and dry the area, then apply a smooth layer of joint compound before setting the bead. Taping over the bead and building up in thinner coats helps hide imperfections; don’t rush to final finish with a bare, thick coat.
What is the quickest way to fix a bad corner without redoing the whole wall?
Assess the damage and repair in place if possible. You can remove the damaged tape, reset with new tape on the corner bead, then re-mud in thin coats, allowing proper drying time between coats.
When should I replace the corner bead rather than patching it?
Replace if the bead is bent, severely deformed, or corroded and cannot lay flat. If the mounting flange is loose or the bead is cracked, replacement is the safer, longer-lasting option.