
Introduction
Primer is a preparatory coating that helps paint adhere, hide stains, and seal surfaces. It prevents peeling, uneven color, and moisture issues by providing a uniform base. Choose a primer based on the surface and environmental conditions, and always follow the label.
If you see peeling, blistering, or poor adhesion, address the underlying moisture, clean the surface, and re-prime. Sand glossy areas, remove loose material, and apply a fresh coat of primer before painting again. Check product instructions and local rules for drying times and compatibility, and test a small area first.
Key takeaways
- Primer creates grip, seals porosity, and blocks stains for even topcoats.
- Inconsistent results signal need for surface prep and correct primer choice.
- Allow proper dry time and ventilation; rushing cures invites adhesion failures.
- Test before full coating using small area to confirm adhesion and coverage.
- Follow manufacturer directions exactly; incompatible products cause peeling and blistering.
- Safety: wear respirator, gloves, and dispose paints according to local rules.
Table of Contents
- Introduction
- Key takeaways
- Why Primer Matters in Residential Painting — Core Functions
- Problems Primer Prevents
- Types of Primer and When to Use Them
- Choosing the Right Primer for Common Residential Surfaces
- Tools, Materials, and Visual Checkpoints
- Proper Primer Application and Best Practices
- Diagnosing Primer Failure — How to Identify Root Causes
- How to Fix Primer Failures — Step-by-Step Repairs
- Conclusion
- FAQ
Why Primer Matters in Residential Painting — Core Functions
Primer serves as the bridge between substrate and topcoat. It promotes adhesion, seals porous surfaces, and helps create a uniform base for color and sheen. A good primer sets up the finish to be durable and even over time.
Understanding these core roles helps you predict how long the paint job will last and how true the final color will appear. When you choose primer, check that it specifies adhesion, sealing, and surface finish performance on the label or data sheet. If in doubt, consult the manufacturer’s instructions for your exact substrate.
Improve adhesion
Primer’s job is to make sure your paint sticks. It does this by promoting both mechanical and chemical bonding between the substrate – that’s the surface you’re painting, like drywall or wood – and your topcoat.
Mechanical bonding means primer fills in tiny gaps and pores on the surface, giving paint more area to grab onto. Chemical bonding happens when primer reacts with the substrate, creating a strong bond.
Bonding primers are specially formulated for this job. Use them when painting over surfaces like bare wood or new drywall that needs a good grip.
Seal porous surfaces
Primer seals your surface, preventing uneven paint absorption. This is especially important for porous materials like drywall, wood, and masonry.
Without primer, these surfaces can suck up too much paint in some spots and not enough in others, leading to a blotchy finish. Primer creates a uniform barrier, ensuring even paint coverage.
Sealing is crucial for achieving a smooth, consistent topcoat. It’s like giving your surface a quick drink before painting – it takes just enough to make everything even without overdoing it.
Block stains and tannins
Primer’s stain-blocking power is a game-changer. It prevents water stains, smoke residue, tannin bleed from wood, and even rust from showing through your topcoat.
Tannins are natural compounds in wood that can leach out over time, turning your paint yellow or brown. Stain-blocking primer creates a barrier to stop this from happening.
Use stain-blocking primer before painting surfaces like knotty pine, water-damaged areas, or when you’re painting over an old, dark color. It’s your secret weapon for preventing unwanted surprises in your finish.
Problems Primer Prevents
Unprimed or improperly primed surfaces can show stains, tannins, or bleed-through through the topcoat. Peeling and early wear often come from poor adhesion or mismatch with the substrate. A proper primer also reduces uneven color and gloss differences across edges and joints.
Link each common failure back to a primer property: adhesion, sealing, and substrate uniformity. Verify product guidance on compatibility with your substrate and paint system. If you’re unsure, check the label, the data sheet, or contact the manufacturer for specifics related to your project.
Peeling, blistering, and flaking
Proper priming prevents common paint failures like peeling, blistering, and flaking. These issues often stem from poor adhesion, moisture problems, or using incompatible coatings.
To minimize these risks:
- Choose a primer that promotes strong adhesion to your surface.
- Ensure the surface is dry and free of moisture before priming and painting.
- Select a primer compatible with your chosen paint and surface type.
Stain bleed-through and rust
Stains and rust can migrate into your finish, causing discoloration. Stain-blocking and rust-inhibitive primers prevent this by sealing the surface.
To tackle these issues:
- Use a stain-blocking primer to seal tannins and other stains from bleeding through.
- Apply a rust-inhibitive primer on metal surfaces to prevent corrosion.
Mold, mildew, and efflorescence
Primers with mildew resistance can help prevent mold and mildew growth on your walls. Masonry primers also limit salt/efflorescence problems in basements and exterior walls.
To address these concerns:
- Choose a primer with built-in mildewcide for surfaces prone to moisture or humidity.
- Use a masonry primer on basement and exterior walls to prevent efflorescence, a white salt deposit that can appear on masonry surfaces.
Types of Primer and When to Use Them
Latex or acrylic primers are usually easy to work with and clean up with water. Oil or alkyd primers tend to build tougher films and work well on stubborn surfaces. Shellac primers can block stains and odors and dry quickly in tight spaces.
Specialty primers cover unusual substrates or conditions, like high-traffic areas or metal protection. Always compare the product label or data sheet for substrate compatibility and application limits. When in doubt, follow the manufacturer’s instructions for your specific topcoat and surface.
Latex/Acrylic Primers
Latex and acrylic primers are popular choices for residential painting due to their low odor, flexibility, and suitability for interior use. They’re ideal for drywall and previously painted surfaces.
Strengths: Low odor, flexible, great for interiors.
These primers are water-based, making them easy to clean up with just soap and water. They also provide good adhesion and help seal porous surfaces.
Oil-Based and Alkyd Primers
Oil-based and alkyd primers excel at blocking tannins (natural compounds in woods that can bleed through paint) and adhering to metal surfaces.
Benefits: Tannin-blocking, good metal adhesion.
However, they have a strong odor and require mineral spirits for cleanup. They’re best used in well-ventilated areas or outdoors.
Specialty Primers (Stain-Blocking, Bonding, Shellac)
For extreme jobs and problem substrates, specialty primers are the way to go. Stain-blocking primers seal out tough stains like water rings or rust. High-bond primers provide extra adhesion for challenging surfaces.
When to use: Extreme jobs, problem substrates.
Shellac-based primers seal and prime in one step, great for staining projects. Rust-inhibiting primers protect metal from corrosion. Always check product labels for compatibility with your project.
Choosing the Right Primer for Common Residential Surfaces
Drywall, wood, metal, and masonry each respond differently to primer. For drywall, look for primers that seal gypsum dust and prevent flashing. Wood surfaces benefit from primers that block tannins and provide a stable base for paints.
Metal and masonry require primers that address corrosion resistance or porosity. Always perform a small test patch and read label warnings about substrate compatibility and topcoat pairing. If guidance is unclear, check the label, data sheet, or manufacturer instructions for your exact materials.
Drywall and plaster
Before painting drywall, seal any joint compound with a primer. This prevents ‘telegraphing’ – where the texture of joints shows through your paint.
Use a drywall-specific primer for best results. It’s designed to seal compounds and prevent issues with paper or gypsum surfaces.
If you’re dealing with old plaster, ensure it’s sound and clean before priming. A latex primer works well here, sealing any minor cracks and providing a good base for paint.
Wood (raw, stained, painted)
Raw wood needs sealing to prevent tannins bleeding into your paint. Use a stain-blocking primer here.
For knotty or stained wood, use a stain-killing primer. It’s designed to block out any discoloration that might bleed through.
If you’re painting over previously painted wood, sand lightly first. Then, use a latex or oil-based primer, depending on your topcoat. This ensures good adhesion and seals the surface.
Metal and masonry
For ferrous metal, remove rust first using a wire brush or chemical cleaner. Then, use a rust-inhibiting primer to prevent future rusting.
Aluminum needs no special treatment, but ensure it’s clean before priming. A latex or oil-based primer works well here.
For masonry like brick or concrete, remove any efflorescence (white salt deposits) with a wire brush and water. Then, use a masonry-specific primer. It seals the porous surface and prevents moisture issues.

Tools, Materials, and Visual Checkpoints
Gather rollers, brushes, a compatible primer, thinner or water, and protective supplies. Have a mixing container and a stirring tool ready to achieve a uniform film. Keep masking, sanding supplies, and clean rags handy for prep work.
Visually inspect the surface for dust, oils, and old coatings before priming. Check that the primer film looks uniform with no gaps or dry patches after application. If unsure, verify tool compatibility and product guidance on the label or data sheet.
Tools and materials checklist
Before you start, make sure you have all the necessary tools and materials to ensure a successful priming job.
- Brushes: 2-3 inch angled sash brush for cutting in edges; 9-10 inch roller cover for large areas.
- Rollers: High-quality, 9-10 inch roller covers with 3/8 or 1/2 inch nap for smooth surfaces; 1/2 to 3/4 inch nap for textured surfaces.
- Sandpaper: Medium (120-grit) and fine (220-grit) sandpaper for smoothing surfaces.
- Cleaners: TSP or other degreaser; trisodium phosphate substitute; soap and water solution.
- Patching materials: Joint compound, spackling paste, wood filler, or other surface repair materials.
- Primer types: Choose the right primer for your surface: latex/acrylic, oil-based, stain-blocking, bonding, or shellac.
- PPE (Personal Protective Equipment): Safety glasses, gloves, dust mask, and drop cloths.
- Tape: Painter’s tape for protecting edges.
- Ladder: If you’re working on high walls or ceilings.
Quick rule: Having the right tools and materials ensures a smooth, efficient priming job. Don’t skip any items to avoid common mistakes like poor adhesion or uneven coverage.
Visual checkpoints before and after priming
Inspect your surfaces visually before and after priming to ensure a successful job. Here’s what to look for:
- Surface condition: Check for any cracks, holes, or other imperfections that need patching before priming.
- Cleanliness: Ensure the surface is clean and free of dirt, grease, or other contaminants. Use a cleaner if necessary.
- Adhesion: Before priming, lightly scratch the surface with a nail to check for good adhesion. After priming, gently touch the primed area; it should feel dry and not sticky.
- Uniform coverage: Inspect the primed surface for even coverage. Look for any missed spots or areas with too much primer.
- Pinholes: Check for small holes or imperfections that could allow paint to seep through and cause problems later.
- Sheen differences: After priming, the surface should have a consistent sheen. Any variations may indicate areas that need re-priming.
Quick rule: Regular visual checkpoints help catch potential issues early, saving you time and money in the long run.
Proper Primer Application and Best Practices
Start with thorough surface preparation according to the product instructions. Apply thin, even coats rather than one thick layer to avoid sags and inconsistent coverage. Allow adequate time between coats as recommended by the manufacturer.
Control environmental conditions such as temperature and humidity within the ranges stated on the label. Keep an eye on recoat times and ensure compatibility with the intended topcoat by checking product guidance. If needed, refer to the manufacturer instructions or data sheet for specifics.
Surface Prep Steps
Before you prime, clean the surface. Use soap and water for most jobs. For grease or heavy dirt, use a degreaser.
Safety first: Wear gloves and eye protection when using chemicals.
Sand any rough spots with fine-grit sandpaper. Patch holes and cracks with spackling compound or joint compound for drywall.
Vacuum or wipe off dust. Let it dry completely before priming.
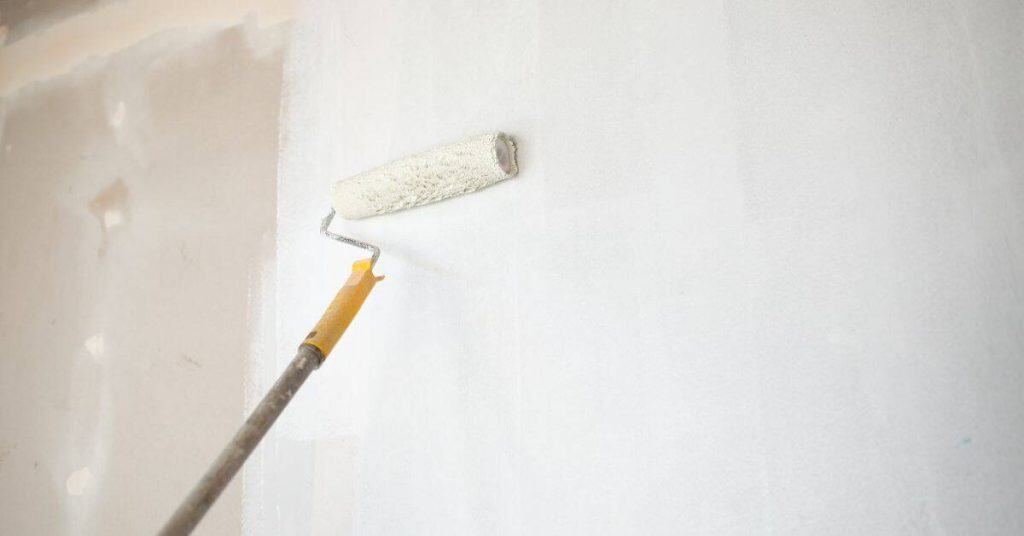
Application Techniques and Coverage
Use a brush for corners and edges, then roll the rest. Work in ‘W’ or ‘M’ patterns to ensure even coverage.
For spraying, use a fine mist setting. Keep the nozzle moving to avoid drips.
Pro tip: Don’t over-apply. Too much primer can cause drips and poor adhesion for your topcoat.
Check for full coverage by looking at the surface from different angles. If you see any missed spots, go back and prime them.
Drying, Recoat Windows, and Compatibility with Topcoat
Follow the manufacturer’s drying times. This is usually 1-2 hours for latex primers, but can be longer for oil-based ones.
Before recoating, do a test patch to check adhesion and color compatibility with your topcoat. Use a small piece of cardboard or a hidden area.
Pro tip: If you’re switching paint families (e.g., from latex to oil), do a compatibility test first. Some don’t play nice together.
Check the sheen and color match in natural light before painting the whole surface.
Diagnosing Primer Failure — How to Identify Root Causes
Observe symptoms like lifting, bubbling, or uneven films and link them to possible causes such as moisture, poor prep, or incompatible products. Moisture-related failures often show in damp areas or around leaks. Improper surface preparation can lead to poor adhesion and early wear.
Use simple tests to confirm causes, such as performing a moisture check or a test patch after cleaning and priming. Always cross-check with product guidance on compatibility and application conditions. If results are unclear, review the label, data sheet, and manufacturer instructions for your materials.
Signs and symptoms with likely causes
If your paint job isn’t holding up, look for these common issues. They’ll point you towards the root cause.
Blistering: Trapped moisture or contamination under the primer is usually to blame. It forces paint off the wall like blisters on skin.
Staining: If you’re seeing stains through your paint, it’s likely because your primer didn’t block them properly. This often happens when using the wrong primer for the job.
Peeling: When paint starts peeling, it’s usually due to poor adhesion. This could be from a dirty surface or using the wrong primer type.
Soft spots: These are signs of moisture trapped in your substrate. They feel soft and spongy when you press on them.
Simple spot tests and inspections
Before diving into repairs, use this checklist to confirm the cause of your primer failure. It’ll save you time and money in the long run.
- Adhesion tape pull: Stick a piece of painter’s tape on the affected area, let it sit for a minute, then pull it off. If paint comes with it, adhesion is poor.
- Moisture meter or touch test: Check for moisture in your walls using a moisture meter or by feeling for damp spots. Moisture can ruin your primer job.
- Test patches: Apply small patches of different primers to see which one works best on the affected area. This helps you choose the right primer for repairs.
- Check surface prep: Ensure you followed proper surface preparation steps. Missing this can lead to primer failure.
- Inspect substrate: Look for any signs of damage or contamination in your substrate. These can prevent primers from adhering properly.
- Verify compatibility: Make sure the topcoat you’re using is compatible with your chosen primer. Incompatibility can cause issues down the line.
- Check drying time: Ensure you waited long enough between coats and before applying the topcoat. Skipping this can lead to problems.
- Examine application technique: Check if you applied the primer correctly. Improper application can cause issues.
Quick rule: Always perform these tests in a hidden area first to avoid ruining your final look.
How to Fix Primer Failures — Step-by-Step Repairs
Start with appropriate surface prep to remove failed primer and contaminants. For spot repairs, apply a compatible primer over the prepared area and recoat as directed. For larger issues, consider re-priming the entire surface with the correct primer type for the substrate.
Follow the product guidance closely when switching primer types and ensure the surface is clean and dry before applying topcoats. When in doubt, consult the label, data sheet, or manufacturer instructions for the recommended repair process and recoat intervals.
Step-by-Step Repair Process
Follow this clear, numbered sequence to fix primer failures like a pro. Safety first, then prep, repair, and finish.
- Inspect the area: Identify failed spots and their causes. Refer back to Diagnosing Primer Failure — How to Identify Root Causes if needed.
- Safety first: Put on gloves, goggles, and a dust mask. Cover nearby surfaces with drop cloths.
- Prep the surface: Lightly sand failed areas using 120-grit sandpaper. Wipe clean with a damp cloth, let dry.
- Apply primer: Use a brush or roller to apply new primer, matching the original type if possible. Follow product guidance for coverage and drying times.
- Check and finish: Inspect your work after drying. Touch up any missed spots before painting over with topcoat.
Small-area fixes and spot-priming
For localized failures, follow these steps to sand, clean, apply spot primer, and blend new paint into existing finish.
Safety first: Wear gloves, goggles, and a dust mask. Cover nearby surfaces.
Lightly sand the failed area using 120-grit paper. Wipe clean with a damp cloth, let dry. Apply spot primer, matching the original type if possible. Let it dry, then lightly sand again to feather edges. Paint over, blending new paint into existing finish.
Re-priming and full-surface remediation
When large areas fail, follow these steps to remove loose coatings, prep, and apply full-coverage primer before repainting.
Use a paint scraper or heat gun to remove loose paint. Sand the entire area using 120-grit paper, then wipe clean with a damp cloth. Apply full-coverage primer, matching the original type if possible. Let it dry according to product guidance before painting over.
When to strip and start over (severe failure)
If you see widespread adhesion failure or contamination, it’s time to strip back to the substrate. Here’s how:
Inspect for severe failures. If found, use a paint stripper or heat gun to remove all coatings. Wear protective gear and follow product guidance. Sand lightly with 120-grit paper, wipe clean, and let dry before priming.
Conclusion
Primer is the shield that makes paint stick, look even, and last years longer. If you respect it, you protect safety, durability, and curb appeal without wasting materials or money.
Check it this way: test a small area first, clean and dry the surface, sand lightly where needed, select the right primer for the surface, apply per the label, let it dry fully, inspect for coverage and adhesion, recoat if required, and fix any failures by tracing back to the root cause before moving on.
Common mistakes to avoid are skipping surface prep, using the wrong primer for the job, and painting in conditions that are too hot, cold, or humid. Wear a respirator or mask, work in a well-ventilated area, and always test a small area first to confirm adhesion and finish before committing to the whole project.
If you face widespread peeling, signs of moisture damage, lead paint concerns, or structural issues, it’s wise to bring in a pro rather than pushing through. Stay methodical, follow the steps, and you’ll finish with a durable, professional-looking result you can be proud of.
FAQ
How can I tell if primer is failing before I paint over it?
Look for peeling, bubbling, or chalky surfaces. If the primer feels soft or seems to wash away with a damp cloth, it may not have cured properly.
What should I do if I see failures after the primer is applied?
Assess the root cause first: moisture, improper surface prep, or incompatible products. Clean the area, address the underlying issue, and re-apply primer following the manufacturer’s instructions.
How do environmental conditions affect primer performance and curing?
Extreme heat, cold, or high humidity can slow curing or cause streaks. Work in moderate conditions and avoid applying primer when surfaces are wet or when rain is expected.
What guidance should I follow when choosing primer for tricky surfaces?
Read the product label and data sheet for surface recommendations. If in doubt, check with the manufacturer instructions or local product guidance to confirm suitability for your specific surface and conditions.