

Introduction
Painting metal with acrylic means applying water-based acrylic paint to a metal surface after proper prep. Common failures come from poor surface prep, slick coatings, or weak adhesion that peels or fades. Check the surface for rust, oil, or oxide and follow label instructions for prep steps.
Weather and temperature can affect adhesion and cure if you paint in conditions that are too cold or humid. If adhesion seems weak, perform a simple adhesion check on a small area and address prep before finishing. Fixes include thorough cleaning, scuffing, and using the right primer or topcoat as labeled; always follow manufacturer guidance and local rules.
Key takeaways
- Prepare metal surfaces with rust removal, degreasing, and light abrasion for good adhesion.
- Temperature and humidity affect cure; avoid painting in extreme cold or damp.
- Common failures include peeling, cracking, and blistering from poor prep or adhesion.
- Test adhesion by a simple tape test after priming to catch issues.
- Repair workflows require spot grinding, re-priming, and compatible topcoat re-application.
- Use compatible primers and topcoats; check manufacturer instructions for metal substrates.
- Safety: work ventilation, eye protection, and proper disposal of solvent-containing coatings.
Table of Contents
- Introduction
- Key takeaways
- Why Choose Acrylic Coatings for Metal and Limits to Expect
- Most Common Failures When Painting Metal with Acrylic
- Diagnosing Failure — Practical Tests and Visual Checkpoints
- Fixes and Repair Workflows for Common Acrylic Failures
- Application Best Practices to Prevent Failures
- Tools, Materials and Test-Gear Checklist
- Safety, Environmental Impact, and Waste Handling
- Cost, Scheduling and Whether to DIY or Hire a Pro
- Conclusion
- FAQ
Why Choose Acrylic Coatings for Metal and Limits to Expect
Acrylic coatings offer good UV resistance, flexibility to accommodate movement, and relatively easy application for metal surfaces. They also tend to maintain color stability under outdoor exposure. Use them for decorative or general protective lines on non-immersive metal parts.
Know the limits: chemical resistance can be limited compared to epoxies or polyurethanes, and solvent sensitivity may require compatible cleaners or thinner choices. Temperature exposure and abrasion can shorten service life, so avoid harsh environments without verifiable performance data. Always verify surface prep requirements and substrate compatibility from the label or manufacturer instructions.
Best-use scenarios and incompatible environments
Acrylic coatings shine on outdoor metals that aren’t immersed in harsh chemicals. They’re great for decorative or general protective lines.
Check service temperatures: Acrylics perform best between 40°F to 120°F (4°C to 49°C). Above 150°F (66°C), they start to lose it. So, avoid high-heat areas like ovens or engines.
Chemical resistance: Acrylics aren’t saints here. They struggle with strong acids, alkalis, and solvents. Keep them away from chemicals if you can.
Comparing acrylics to other coating families
Acrylics aren’t the only game in town. Here’s a quick compare:
Epoxies: Tougher chemically, but less flexible and UV-resistant than acrylics. Use when chemical resistance is key, like in industrial settings or on garage floors.
Polyurethanes: More durable and better for high-traffic areas. They’re pricey, though. If you’ve got the budget and need heavy-duty protection, consider them.
Inorganic coatings: These are tough cookies, resistant to chemicals and heat. But they’re not as flexible or easy to apply as acrylics. Save ’em for when you really need that extra protection.
Most Common Failures When Painting Metal with Acrylic
Typical visual symptoms include peeling, blistering, chalking, faded color, and orange peel, each tied to a root cause such as surface contamination or improper prep. Identify whether the issue is coating-system related or environmental exposure to guide repairs. This quick mapping helps with on-site decisions before repainting.
On-site checks cover substrate-related issues like bare metal rust or galvanic corrosion and coating-system problems such as incompatible primers or poor curing. Use adhesion tests and film-build verifications to confirm readiness for repair and determine the proper primer or topcoat pairing. Follow the symptom-to-solution flow to plan the next steps.
Poor adhesion, peeling and delamination
Adhesion failure is a common issue when painting metal with acrylics. It occurs when the paint doesn’t stick properly to the surface, causing it to peel or lift off.
The main culprits are inadequate surface preparation, contamination (like oil, grease, or dirt), and using incompatible primers. To diagnose adhesion failure:
- Perform a tape pull test: Apply painter’s tape, let it sit for 24 hours, then pull it off. If the paint comes off with it, you’ve got an adhesion issue.
- Check for rust scale removal. If rust is still present under the paint, it might not stick well.
To fix this, re-prep the surface by sandblasting or resanding. Degrease properly using a suitable cleaner. Then, apply an appropriate primer and let it cure before recoating.
Blistering, pimpling and solvent-related defects
Blisters and pimples on painted metal surfaces are usually caused by trapped moisture or solvent entrapment. High humidity during application can also contribute to this issue.
Delayed blistering occurs when moisture gets trapped under the paint as it dries, forming bubbles over time. Immediate blistering happens right after painting due to incompatible products or high humidity.
To identify blisters and pimples:
- Look for raised areas on the surface that may be soft or spongy to touch.
- Check if they appear immediately after painting or develop over time.
To fix blistering and pimpling, remove the affected paint using sandpaper or a scraper. Re-prep the surface, degrease, prime, and recoat, ensuring proper ventilation and low humidity during application.
Chalking, fading, and premature color loss
UV degradation and pigment binder breakdown are common causes of chalking, fading, and premature color loss in acrylic paint on metal. This happens when the paint’s surface becomes powdery (chalking) or loses its original color.
Chalking can be mistaken for pigment wash-off or staining. To differentiate:
- Rub your finger over the affected area. If it turns white or colored, you’ve got chalking.
- Check if the discoloration is uniform. Pigment wash-off or staining tends to be more localized and uneven.
To fix chalking, fading, and premature color loss, lightly sand the affected area using fine-grit sandpaper. Wipe off any dust, then apply a compatible touch-up paint. Ensure the surface is protected from direct sunlight and harsh weather conditions to prevent further degradation.
Diagnosing Failure — Practical Tests and Visual Checkpoints
Begin by listing the failure modes you’re diagnosing—peeling, blistering, chalking, corrosion, or rust creep—and link each to likely causes such as moisture, poor surface preparation, or improper thickness. This helps prioritize repairs. A focused visual check speeds up decisions on site.
Use a simple set of field tests: assess surface cleanliness, check for moisture indicators, and perform basic adhesion checks like a tape pull or cross-hatch test. Document corrosion extent and debonded areas to tailor pretreatment and adhesion strategies for the repair.
Adhesion and Bond-Strength Checks
Before you start any repairs, check the coating’s adhesion. This tells you if the paint is properly bonded to the metal.
- Cross-Cut Test: Use a sharp tool to score the coating at a 45-degree angle. Tape it and pull. If more than 10% of the coating lifts, adhesion is poor.
- Pull-Off Test: For quantitative results, use a pull-off tester. Apply a dollop of adhesive, attach a pull tab, let it cure, then pull. Consult product guidance for pass/fail criteria.
- Edge Lifting: Check edges and corners for lifting. These areas are prone to poor adhesion due to lack of mechanical retention.
- Blisters: Look for film blisters. They indicate poor adhesion or trapped moisture.
- Rust Stains: Rust stains under the coating suggest delamination and substrate corrosion.
- Cracking: Check for cracks, especially around fasteners. They can lead to water intrusion and poor adhesion.
- Chalky Residue: A chalky residue indicates a weak topcoat that’s wearing away, exposing the primer.
- Corrosion Hotspots: Look for corrosion around fasteners or seams. This can cause adhesion loss.
Quick rule: If adhesion is poor, address the underlying issue before recoating to prevent premature failure.
Film Thickness, Continuity & Holiday Detection
Check your coating’s film thickness, continuity, and for holidays (pin-holes) before deciding on repairs.
- Dry-Film Thickness Gauge: Use a DFT gauge to measure the coating’s thickness. Inconsistent readings indicate thin spots or missing areas.
- Visual Inspection: Look for visible inconsistencies, such as thin spots or missed areas.
- Holiday Detector: Use an electrical holiday detector to find pin-holes and discontinuities. These can lead to corrosion under the coating.
- Gloss/Flatness Changes: Check for changes in gloss or flatness. This could indicate thin spots or poor application.
- Edge Lifting: Inspect edges and corners for lifting, which can cause holidays.
- Film Blisters: Look for film blisters. They can hide holidays and lead to further coating failure.
- Rust Stains: Rust stains under the coating suggest holidays and substrate corrosion.
- Cracking: Check for cracks, especially around fasteners. They can cause holidays and water intrusion.
Quick rule: Address any inconsistencies in film thickness or holidays before recoating to prevent further failures.
Contamination & Salt Testing
Before recoating, ensure the surface is clean and free from contaminants like oil, grease, or salts that can cause corrosion.
- Smudge/Alkali Check: Wipe the surface with a damp cloth. If it turns dark or leaves residue, the surface needs cleaning.
- Moisture Indicators: Use moisture indicators to check for trapped moisture. This can cause blistering and delamination.
- Salt Testing: Use a salt test kit to detect chloride contamination. Excessive salts can accelerate corrosion under the coating.
- Oil/Grease Check: Look for oil or grease, which can prevent proper adhesion and cause premature failure.
- Laitance Removal: Check for laitance (a cement-like deposit) on concrete surfaces. It needs to be removed before recoating.
- Corrosion Extent: Assess the extent of corrosion. This helps determine if spot repairs or full-coverage recoat is needed.
- Rust Scale Removal: Check if all rust scale has been removed. Residual scale can cause further corrosion and poor adhesion.
Quick rule: A clean surface is crucial for good adhesion and long-lasting coatings.
Fixes and Repair Workflows for Common Acrylic Failures
Start by rating failure severity from cosmetic issues to potential delamination, which guides whether you spot fix, patch, or replace the system. A clear path reduces wasted effort and helps plan materials. Use the severity to pick the repair strategy.
Before any repair, re-confirm surface cleanliness, moisture levels, and corrosion status. Then follow staged workflows: spot fixes, localized patching, recoat feathering, or full-system overhaul with appropriate primers and patches. Validate each step with adhesion or cure checks before proceeding.
Spot repairs and feathering techniques
For minor issues like chips, peels, or small areas of delamination, a localized repair is often sufficient. Start by cleaning the area with a suitable solvent to remove any dirt or contaminants.
Feathering helps blend the repaired area into the surrounding surface. Use sandpaper to gradually reduce the edge of the damaged area until it blends smoothly with the undamaged coating. Reapply primer to the feathered edges and welds before topcoating.
If the damage is extensive or the adhesion is poor, consider a more comprehensive repair approach. Always test adhesion after any repair work using a pull-off test.
Addressing rust, corrosion and substrate damage
Rust and corrosion undermine the substrate’s integrity. Remove loose rust mechanically, then apply a rust converter to stabilize the remaining rust and convert it into a stable compound.
Choose a corrosion-inhibitive primer for the next step. These primers contain inhibitors that slow down further corrosion. Apply the primer evenly over the affected area, allowing it to dry according to the manufacturer’s instructions.
Before applying the topcoat, test adhesion using a pull-off or cross-cut test. This ensures the new coating will bond properly to the substrate.
When to strip and recoat the full system
Widespread adhesion loss, multiple layers of degraded coatings, or severe corrosion may necessitate complete removal and reapplication. Start by assessing the substrate’s condition. If it’s severely damaged, consider replacing the affected sections before proceeding.
Stripping the old coating can be labor-intensive but ensures a clean surface for new coatings to adhere to. Use suitable strippers, following safety guidelines and manufacturer instructions. After stripping, clean the substrate thoroughly to remove any residue.
Before recoating, confirm the substrate profile is sound and free from contaminants. Conduct adhesion tests and moisture checks to ensure the substrate is ready for new coatings. This approach helps prevent future failures and extends the lifespan of your new coating system.
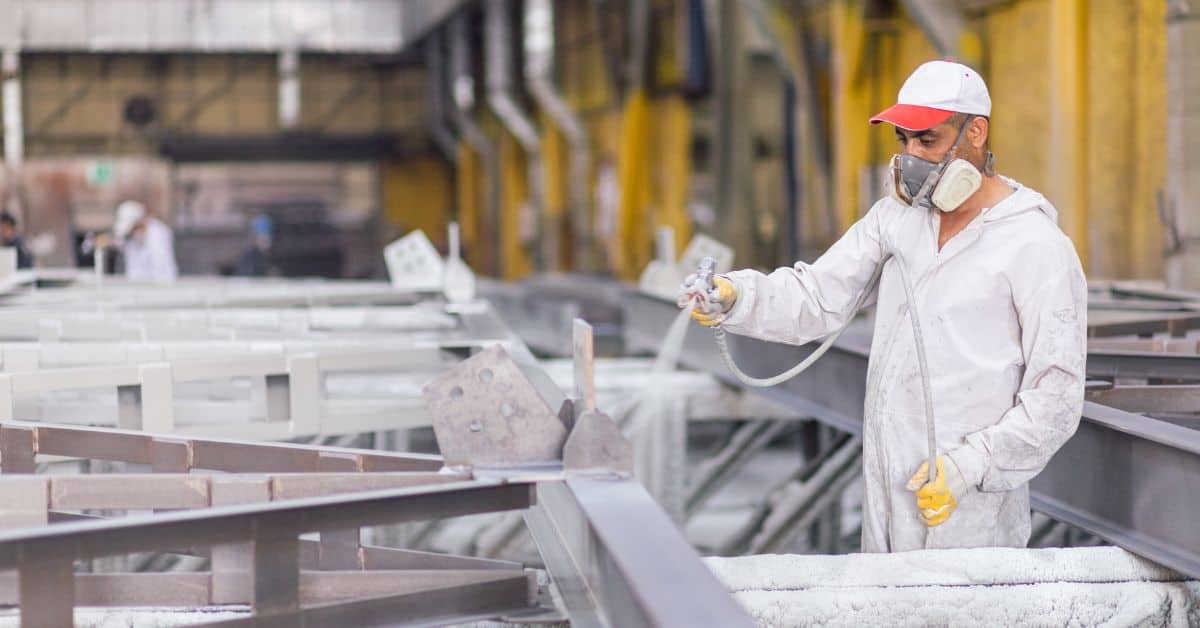
Application Best Practices to Prevent Failures
Lay out exact surface prep needs: remove oils, rust, and old coatings; verify rust conversion where applicable; ensure no moisture or contaminants remain. Clear prep prevents adhesion failures down the line. Check the substrate readiness against label guidance or manufacturer instructions.
Span the rest of the process with controlled conditions and proper film build. Match mixing, pot life, and compatibility to the chosen system, and apply using a method that yields even coverage. Plan for post-application inspection and touch-ups to head off common defects.
Surface preparation standards and visual checkpoints
Before you prime, ensure your metal surface is ready. Use this checklist to confirm.
- Degrease: Remove all oils, greases, and waxes using a suitable cleaner. Incomplete removal can cause adhesion issues later on.
- Remove rust/loose paint: Scrape off any loose paint and treat rust with a converter to prevent it from bleeding through your new coat.
- Profile the surface: Lightly abrade the metal using sandpaper or a wire brush. This creates ‘teeth’ for the paint to grip onto, improving adhesion.
- Check for moisture: Ensure there’s no water trapped under old coatings or within the substrate itself. Moisture can cause blistering and peeling.
- Inspect for contaminants: Look out for dirt, dust, or other debris that could hinder adhesion. A quick swipe with a clean cloth dampened with your chosen cleaner should remove any surface contaminants.
- Verify rust conversion: If you’ve treated rust, make sure the converter has dried completely before proceeding.
- Check for pinholes: Inspect the surface closely for any tiny holes that could allow moisture or air to become trapped under your new paint.
- Ensure no old coatings are peeling: If you find any, remove them completely before proceeding.
Quick rule: Always remember: a properly prepared surface is half the job done!
Environmental and application parameter controls
Temperature, humidity, and ventilation all play crucial roles in successful acrylic paint application. Here’s how to control them:
Temperature: Apply your paint within the recommended temperature range (usually 50-90°F or 10-32°C). Too cold, and your paint may not cure properly; too hot, and it could dry too quickly, leading to poor adhesion.
Humidity: Keep humidity levels below 85% during application and curing. High humidity can cause slow drying, blushing, or other defects.
Wind/ventilation: Avoid painting in breezy conditions if possible. Wind can cause runs, sags, or uneven coverage. Good ventilation is essential to allow solvents to evaporate properly, but avoid drafts that could disrupt the curing process.
Always consult your product data sheet for specific limits and recommendations.
Mixing, thinning, film builds and recoat timing
Proper mixing, thinning, and application techniques ensure even coverage and optimal performance of your acrylic paint. Here’s how:
Mixing: Stir your paint thoroughly following the manufacturer’s instructions. This ensures a consistent color and proper dispersion of pigments and fillers.
Thinning: If necessary, thin your paint with the recommended thinner to achieve the correct consistency for application. Over-thinning can lead to poor coverage and reduced durability.
Film builds: Apply your paint in even, consistent coats to achieve the recommended wet film thickness (usually 2-4 mils). This ensures proper coverage and protection. Too thin, and you risk inadequate protection; too thick, and you may end up with runs or sags.
Recoat timing: Allow your paint to cure for the recommended time before recoating. Recoating too soon can trap solvents under the new coat, leading to wrinkling, blushing, or other defects. Patience is key here!
Tools, Materials and Test-Gear Checklist
Assemble core prep and application tools: wire brush or grinder with a cup wheel, sanding blocks, clean rags, putty knife, painter’s tape, drop cloths, and a good applicator for acrylics on metal. Have a reliable setup for surface checks and touch-ups. Always verify tool suitability with the product instructions.
Stock primers, topcoats, patching compounds, degreaser, rust converter if needed, and compatible sealants. Include test gear for cleanliness and adhesion checks, plus a moisture or humidity gauge for ambient conditions. PPE and a workflow checklist round out a safe, repeatable job.
Essential application and prep tools
Before you start painting, make sure you have all the right tools. Here’s a quick checklist to ensure you’re prepared.
- Wire brush or grinder: To remove loose paint and rust.
- 80–120 grit sanding blocks: For smoothing surfaces and preparing for primer.
- Clean rags/solvent: To wipe off dust and debris after sanding.
- Putty knife or patching supplies: For filling small holes and gaps.
- Painter’s tape: To protect edges and create clean lines.
- Drop cloths: To catch drips and protect surfaces below.
- Quality brush/roller or airless sprayer: For applying primer and paint. Use manufacturer-recommended consumables for best results.
Quick rule: Always use the right tool for the job to avoid damage and ensure a smooth finish.
Test instruments and inspection aids
Before you start painting, it’s crucial to test your surface and materials. Here are some tools to help you do that.
- Surface cleanliness test (grease/oxide): To ensure your metal is free of contaminants.
- Adhesion/pull-off test kit: To check if paint will stick to the surface.
- Dulling or adhesion check after scuffing: To see how well paint adheres after being scratched.
- Gloss/color match tester: To ensure your topcoat matches your primer and desired finish.
- Moisture or humidity gauge: To check ambient conditions that could affect curing.
Quick rule: Test, test, test. It’s the only way to ensure a successful paint job.
Consumables, primers and recommended materials to stock
Having the right supplies on hand will make your painting project go smoothly. Here’s what you should have.
- Corrosion-inhibiting primer: To protect metal from rust and prepare it for paint.
- Chosen acrylic topcoat system: Whether pigmented or clear, ensure it’s compatible with your primer.
- Patching/bonding compounds: For filling large holes or repairing damaged areas.
- Degreaser/metal cleaner: To remove grease and grime from the surface.
- Rust converter (if needed): To stop rust in its tracks before painting.
- Compatible caulk/sealants: For sealing joints and seams to prevent water intrusion.
- Respirator or masks, chemical-resistant gloves, eye protection: For safety during prep, application, and cleanup.
Quick rule: Always check compatibility between your primer, topcoat, and any fillers or sealants you use.
Safety, Environmental Impact, and Waste Handling
PPE should cover eye/face protection, chemical-resistant gloves, appropriate respirators or masks for VOCs, and sturdy footwear. Inspect PPE before each job and train workers in proper donning and doffing. Use a quick PPE condition checklist to stay compliant on site.
Ventilation and workspace design matter: use local exhaust or open-air setups and monitor air quality when indoors. Source low-VOC options and verify claims via SDS or manufacturer notes. Plan waste handling with spill kits, proper disposal routes, and documentation to meet regulations.
Personal protective equipment and ventilation
The right gear keeps you safe. Ventilation keeps the air clean.
- Eye/Face Protection: Safety glasses or goggles, plus a face shield for spray operations. Protect eyes from splashes and particles.
- Chemical-resistant Gloves: Long enough to cover wrists, protect hands from chemicals, but don’t block blood flow – go for breathable materials.
- Respirator/Mask: Use a respirator with P100 filters or an organic vapor cartridge for spray operations. Fit test and train your crew.
- Footwear: Non-slip, chemical-resistant boots to protect feet from spills and slips.
- Ventilation: For indoor projects, use a temporary booth with an exhaust fan. Direct airflow away from workers and bystanders. Monitor VOC levels with affordable detectors like the Gazelab VOC Meter (~$150).
VOCs, disposal and greener alternatives
Solvent-based acrylics have high VOCs. Waterborne options are lower but not zero.
Disposal: Contaminated rags are hazardous waste. Seal them in plastic bags, then dispose at licensed facilities or household hazardous waste programs. Solvents should also be disposed of properly – never pour down drains.
Check local regulations for specific disposal requirements. Some areas have recycling programs for solvents and paint.
Greener alternatives include recycled-content paints, recyclable packaging, and zero-VOC options. Verify claims with SDS, manufacturer notes, or third-party certifications like GREENGUARD or ECOLOGO.
Cost, Scheduling and Whether to DIY or Hire a Pro
Assess whether spot repairs or targeted repainting makes sense versus a full repaint, considering materials, tools, prep work, and potential corrosion defense. Use a break-even mindset to decide if you’re DIYing or hiring out. Always confirm project scope and constraints from the outset.
Schedule around weather and cure times for acrylic systems, map minimum downtime, and plan for inspections between stages. Compare quotes with a clear scope of work, including surface prep standards and cleanup. Factor warranties or manufacturer guarantees into the final decision.
Cost comparison: spot-fix vs full system replacement
When your metal surface starts showing signs of paint failure, you’re faced with a decision: repair or replace? Let’s break down the costs.
Spot Repair: This is cheaper upfront. You only prep and paint affected areas. But access can drive cost up. If it’s hard to reach, you might need scaffolding or lifts.
Full System Replacement: This seems pricier, but consider this: prep work is the same for both. And if unseen damage pops up during prep, you’re already in for a full replacement. Plus, acrylic paint and primer are cheaper by the gallon.
Before committing, calculate both scenarios. Include materials (paint, primer, rust inhibitors), tools, surface prep, coatings for corrosion resistance, labor markup, and contingency for unseen damage.
Project scheduling, staging and access planning
Timing is crucial. Acrylic paint needs dry days to cure properly. Plan your project around this.
Weather’s a factor too. Paint in cool temps? No good. Humidity high? Not ideal either. Check forecasts before starting.
Access and equipment planning can extend timelines. If you need lifts or scaffolding, schedule them early. And remember, downtime costs money. Minimize it by staging work efficiently.
Ventilation’s key too. Acrylic paints have VOCs. Make sure your workspace is well-ventilated to keep fumes at bay.
Criteria for hiring a contractor vs doing it yourself
DIY’s great, but sometimes pros are the way to go. Here’s when:
Complex Failures: If you’ve got rust, pitting, or structural issues, that’s beyond DIY. Pros have the know-how and tools to assess and remediate these.
Confined Spaces: If access is tight, safety’s a concern. Pros are trained for this. They’ll use proper equipment and follow safety protocols.
Specifications or Warranty Needs: Some surfaces need specific prep or paint types to meet specs or warranties. Pros can ensure you’re in compliance.
Before hiring, ask about scope of work, surface prep standards, lead times, cleanup, and insurance. Compare quotes, but remember: cheapest isn’t always best. Safety should be your top priority.
Conclusion
Keep safety front and center. A durable metal finish starts with proper prep, the right acrylic system, and patient, measured application, so you protect the metal and your investment.
Do this next: start with a small test patch, clean and degrease the surface, lightly scuff the metal, choose a compatible acrylic coating and primer if needed, apply thin coats in the correct order, control temperature and humidity, and let each coat cure fully before the next. Inspect as you go and dispose of waste and rags safely. If in doubt, test in a hidden area first and document your results before committing to the whole piece.
Common mistakes to watch for are skipping or rushing surface prep, applying coats that are too thick or too soon, and ignoring the cure and ventilation needs. Follow safety rules: wear eye and skin protection, work in a well-ventilated area, keep flammables away, and handle solvents and waste per local rules. Don’t shortcut the basics, because one bad coat can cost more than the labor you saved.
If the project is structural, large, or involves high-stakes color coverage or corrosion risk, or you see persistent failures despite proper testing, consider hiring a pro. For most DIY tasks, a careful plan, strict adherence to prep and cure times, and conservative expectations will deliver a solid, long-lasting finish and keep you out of trouble. You’ve got this—move methodically, and you’ll get a durable, good-looking result.
FAQ
What are the common adhesion failures when painting metal with acrylic coatings?
Adhesion failures usually start with poor surface prep or a dirty, oily surface. Contaminants, rust, or a glossy, slick metal will resist the coating. Always follow the label for surface prep steps and use a compatible primer if required.
How do weather and temperature affect painting metal with acrylics?
Cold or damp conditions slow cure and can cause condensation under the film. Apply only in dry conditions with the metal at or above the minimum temperature listed by the product. If in doubt, wait for a clearer, warmer day and avoid high humidity periods.
Why do surface preparation issues lead to failures, and what should I do?
Skipping degreasing, rust removal, or proper etching leaves a poor bond. Scrub with a detergent, rinse, and dry thoroughly. Remove rust or old flaky coating, rough up glossy areas, and use a recommended metal primer or bonding agent before applying the acrylic topcoat.
What causes film breakdown, how can I spot it, and what fix is recommended?
Film breakdown comes from UV exposure, solvent attack, or improper curing. Look for cracking, peeling, or chalking on the surface. Clean, sand or abrade the damaged area, and recoat with a compatible system following the manufacturer’s cure times and instructions.