

Introduction
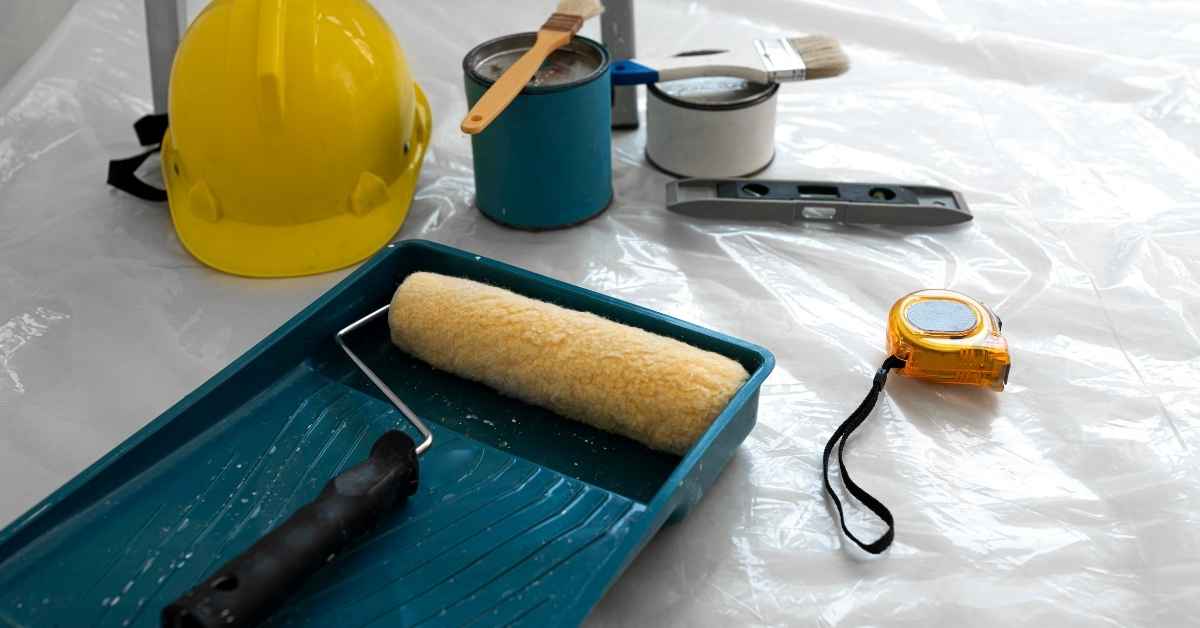
A respirator for painting is protective gear that filters the air you breathe to reduce exposure to paints, solvents, and dust. This article walks you through practical, hands-on steps to decide if you need one and how to use it safely. Think of it as part of your overall work setup, not a last-minute add-on.
Start by identifying the need, such as the presence of lead-based paint or strong fumes, and setting up a clean, contained work area to limit dust. When selecting a respirator, check the label and manufacturer instructions for the intended use, cartridge type, and fit guidance, and always follow local rules. Make sure you don’t paint in closed spaces without ventilation and stop if you notice dizziness, strong odors, or a poor seal.
Key takeaways
- Identify presence of lead-based or other hazardous paint before respirator use.
- Check manufacturer instructions for compatible filters and cartridges for paint tasks.
- Ensure proper fit and perform a seal check each time you don the respirator.
- Set up containment to minimize dust and vapor exposure during work.
- Follow your step-by-step DIY workflow with safety stop points and verifications.
- Clean and dispose of waste according to local rules and guidelines.
- Schedule respirator maintenance, cleaning, and replacement per PPE guidelines.
Table of Contents
- Introduction
- Key takeaways
- Determine If Hazardous Paint (Lead/Old Paint) or Chemicals Are Present
- Choose the Right Respirator and Filters for Paint Tasks
- Fit, Seal Checks, and Proper Wearing Technique
- Set up Containment and Minimize Dust and Vapor Exposure
- Step-by-Step DIY Workflow with Safety Stop Points
- Cleaning, Waste Control, and Safe Disposal
- Respirator Maintenance, Cleaning, and Replacement Guidance
- Budgeting, Common DIY Mistakes, and Safer Alternatives
- Conclusion
- FAQ
Determine If Hazardous Paint (Lead/Old Paint) or Chemicals Are Present
Assess the age of the paint, visible condition, and paint type to gauge hazard risk. Look for pre-1978 era coverings, multiple layers, cracking or peeling, or glossy enamels that may indicate lead-based or mercury-containing paint. Decide if DIY testing is appropriate or if professional testing is required according to your situation.
Recognize practical indicators that warrant testing or pausing work, such as a chalky texture, powdery dust, or surfaces that crumble when scrubbed. If you see brittle or powdery material, stop and consider testing before continuing. Check local records and housing history by looking up permits, renovation histories, or housing data, and contact local health or environmental agencies for known hazards.
Signs that testing is needed
Old paint, especially from before 1978, can contain lead. If you’re working on a home built during this era, stop and test.
Flaking, peeling, or chalking paint should raise a red flag. These surfaces can release harmful dust when disturbed. Pause work, test, then proceed with caution.
If you’re renovating or disturbing large areas of old paint, don’t risk it. Test first. It’s better to be safe than sorry.
When to hire a certified inspector or tester
If you suspect lead paint, don’t DIY. Hire a certified risk assessor. They have the tools and training to ensure accurate results.
Before selling your home, consider hiring a professional. Many states require lead-free certificates for home sales. It’s one less thing to worry about during an already stressful time.
When testing, ask about their certification (look for EPA or state-specific credentials), the type of test they’ll perform, and how they’ll interpret results. Make sure you’re on the same page before they start.
Choose the Right Respirator and Filters for Paint Tasks
Clearly define and compare four respirator options—disposable particulate masks, reusable half-face respirators, full-face respirators, and powered air-purifying respirators—and map each to common paint tasks such as dust generation, paint fumes, and solvent vapors. Identify which hazards each option controls and when combinations or multi-filter setups are warranted. Ensure you understand basic filter categories and replacement timelines.
Provide practical guidance on selecting filters and cartridges (particulate, organic vapor, or combination) and matching them to the contaminant, including typical color codes. Include fit, seal checks, comfort, maintenance, and when to perform fit testing or seek expert evaluation. Add work-area planning and safety considerations for lead paint or volatile additives, ventilation strategies, eye/skin protection, and waste disposal.
Match cartridge/filter type to the job
Choosing the right filter or cartridge for your respirator is crucial. It’s all about matching the protection to the hazard.
For sanding or scraping, you’ll mainly deal with dust. Go for particulate filters. They’re designed to trap tiny particles.
When working with solvent-based paints, organic vapors are the main concern. You need organic vapor cartridges here. They absorb those harmful fumes.
If you’ve got a mix of hazards – like sanding old paint and applying new solvent-based paint – opt for combination filters. They protect against both particulates and organic vapors.
Reusable vs disposable: pros and cons
When it comes to respirators, you’ve got two main options: reusable or disposable. Each has its own set of pros and cons.
Pros of Reusable Respirators
- Cost-effective in the long run
- Better fit with customizable seals
- Durable, lasting for years with proper care
- Reduces waste compared to disposable masks
Cons of Reusable Respirators
- Requires regular cleaning and maintenance
- Needs periodic fit testing to ensure a good seal
- May be more expensive upfront than disposables
- Could harbor bacteria if not properly cleaned
Disposables, on the other hand, are great for short tasks or when you don’t want to deal with maintenance. But they’re not eco-friendly and can add up in cost over time.
How to check manufacturer ratings and approvals
Before you buy, make sure your respirator is up to snuff. Check the manufacturer’s ratings and approvals.
The label should tell you what hazards it protects against and its assigned protection factor (APF). APF is a measure of how well the respirator will protect you in workplace conditions.
If you’re unsure, look for third-party approval listings. Organizations like NIOSH or CE have standards that manufacturers must meet. You can check their websites to see if your respirator is on the list.
And always double-check local regulations. Some places may have specific requirements for respirators.
Fit, Seal Checks, and Proper Wearing Technique
Perform a step-by-step fit test protocol every time you put on the respirator, including fore-and-aft checks and user seal checks. Learn to recognize common seal failure signs around the nose, cheeks, and chin, and verify the seal quickly during the work. Use a quick re-check if any doubt arises about the seal’s integrity.
Explain how facial hair, glasses, and headgear affect fit, and offer practical adjustments or avoidance tips to maintain a proper seal. Outline guidelines for selecting the right respirator size and type for painting tasks, including when to switch models if fit cannot be achieved. Establish clear stopping points: immediately stop if a seal check fails or the respirator feels off, then re-check before resuming.
Daily User Seal Check
Before every use, perform a quick user seal check to ensure your respirator fits snugly and seals properly. Here’s how:
Positive Pressure Check: Close the exhalation valve with your hand, then exhale gently. The fit is good if you feel no air leaking out.
Negative Pressure Check: Inhale sharply through your nose. If there’s no inward leakage of air around the edges of the respirator, it fits well.
Fit Testing and When to Get Professional Help
A user seal check is not a substitute for formal fit testing. If you use tight-fitting respirators regularly or for high-risk jobs, consider getting professionally fit-tested.
Formal fit testing uses a quantitative or qualitative method to ensure your respirator fits properly and provides the expected level of protection.
When to get professional help: If you’re unsure about the fit, if you’ve had issues with user seal checks, or if your job involves high-risk substances, consult a professional for fit testing.
Adjusting for Glasses, Facial Hair, and Other Obstacles
Facial hair, glasses, and other PPE can interfere with a proper respirator seal. Here’s how to adjust:
Glasses: Use a respirator with an adjustable head harness or one designed for use with glasses. Ensure the respirator doesn’t press against your eyes.
Facial Hair: Trim facial hair if possible, as it can interfere with the seal. If trimming isn’t an option, consider using a loose-fitting respirator or adding a special adapter to achieve a proper seal.
Set up Containment and Minimize Dust and Vapor Exposure
Define the physical boundaries by creating a clearly demarcated work zone with plastic sheeting, dropcloths, and sealed doorways; aim for negative pressure if possible and plan entry/exit with signage. Set up a barrier and signage plan to prevent unauthorized entry and designate a clean path for cleanup and waste removal.
Discuss airflow and ventilation controls, including portable air scrubbers or HEPA exhausts, and position intake/exhaust to minimize spreading dust toward occupied areas. Choose low-dust tools and techniques, such as wet methods and enclosed or vacuum-assisted tools, and plan material handling to minimize disturbance. Outline containment integrity checks and stop points if containment is breached, who authorizes cessation, and how to proceed. Conclude with waste, decontamination, and exit protocol to keep personnel and equipment clean.
Building an effective containment zone
Start by defining your work area with plastic sheeting, securing it at the edges and sealing any gaps. Use dropcloths on floors to contain dust and make cleanup easier.
Entry/exit points should be clearly marked with signage and sealed using zip doors or plastic sheeting taped at the bottom. This helps maintain a negative pressure inside the work zone, preventing dust from escaping.
If possible, set up a dedicated airlock – an intermediate space between the work area and the outside world. This reduces the risk of contaminants escaping when entering or exiting the work zone.
Low-dust techniques and tool choices
To minimize dust, opt for low-dust methods and tools. Here are some options:
- Wet sanding: Use water or a specialized sanding liquid to dampen the surface before sanding. This reduces dust by up to 90%.
- Vacuum-assisted sanders: These tools have built-in vacuums that collect dust as you work.
- HEPA-rated vacuum attachments: Use these with regular sanders or paint scrapers to capture dust at the source.
- Enclosed sanding systems: These are like mini tents that fit over your work surface, trapping dust inside.
- Damp cleaning: For prep work, use damp rags or sponges instead of dry ones. This helps capture dust and reduces airborne particles.
Ventilation and airflow management
Exhaust fans are crucial for removing dust and fumes from the work area. Place them near your work surface, blowing air away from you.
Position intake vents to draw in fresh air from a clean source, preferably outside and away from occupied areas. Exhaust vents should be directed towards an open window or outdoors, not into living spaces.
If dust or fumes are building up quickly, increase ventilation by opening windows or using additional fans. If airflow is poor or stagnant, halt work immediately and reassess your setup to prevent exposure.
Step-by-Step DIY Workflow with Safety Stop Points
Define the overall workflow from prep to finish, mapping each phase to a concrete respirator-related checkpoint before moving forward. Include fit tests, seal checks, and user comfort as prerequisites for progress.
Specify containment, ventilation, and air-monitoring requirements at each transition, with explicit pass/fail criteria. Integrate safety stop points for respirator fit verification, seal leakage checks, and PPE integrity checks, plus mandatory reassessment after any procedure that could alter containment or exposure risk.
Step-by-Step Process
The following is a clear, practical sequence of steps for your DIY workflow with safety stop points. It starts with preparation and safety checks, then guides you through the main work, and finishes with cleanup or final checks.
- Preparation: Gather tools, materials, and PPE. Ensure respirator is selected as per earlier instructions.
- Set up containment: Build an effective containment zone to minimize dust and vapor exposure.
- Safety checks: Verify respirator fit, seal integrity, and perform air monitoring before starting work.
- Main work: Proceed with your painting task, following low-dust techniques and tool choices mentioned earlier.
- Mid-work stop points: Pause at specified intervals to reassess respirator fit, check air conditions, and ensure containment integrity.
- Cleanup: Once finished, clean up the area, dispose of materials appropriately, and perform final safety checks.
Pre-work checklist (do not start until…)
Use this checklist before starting any work to ensure your safety and the effectiveness of your respirator.
- Respirator selection: Ensure you’ve chosen the right respirator and filters for the task at hand, as explained earlier.
- Fit testing: Perform a fit test to ensure the respirator seals properly around your face. If it doesn’t fit well, seek professional help.
- Containment in place: Verify that your containment zone is set up effectively and all openings are sealed.
- Appropriate filters installed: Ensure you’ve installed the correct filters for the job. Using the wrong filter can lead to exposure or ineffectiveness.
- Disposal plan: Have a plan in place for disposing of used filters and other waste materials safely.
- Cleaning supplies ready: Ensure you have cleaning supplies ready to clean up any spills or messes promptly.
Quick rule: Always double-check your respirator’s fit and the integrity of your containment zone before starting work.
Mid-work stop points (when to pause and reassess)
During your work, it’s crucial to pause at specific intervals to reassess the safety of your environment. Here are some triggers to look out for:
Filter saturation: If you notice that your filters are becoming clogged or saturated, stop and replace them immediately. Working with saturated filters can lead to exposure.
Visible dust escape: If you see dust escaping from the containment zone, pause and reassess the integrity of your containment. Ensure all openings are sealed properly.
Respirator discomfort: If you start feeling uncomfortable or experience difficulty breathing through your respirator, stop and check its fit and seal. It might be time for a break or a replacement filter.
Before finishing or changing work phases
Before removing containment, switching to a different paint type, or admitting others into the area, perform these checks:
Air monitoring: Check air conditions one last time before finishing. Ensure there are no signs of exposure and that the air is safe to breathe.
Containment integrity: Verify that your containment zone remains intact. If it’s been disturbed, repair or replace any damaged parts.
Cleanliness: Ensure the area is clean before removing containment. This helps prevent dust and debris from spreading to other areas of your home.
Cleaning, Waste Control, and Safe Disposal
Define daily cleanup routines that minimize dust spread and recontamination after painting, including damp wiping, HEPA-filtered vacuuming, and sealing off the work area. Detail how to collect, package, and label waste such as drop cloths, used PPE, filters, and contaminated containers, including container types, leak prevention, and quantity limits.
Outline safe handling and removal procedures for contaminated PPE and respirator components, including cartridge disposal and steps to prevent cross-contamination during doffing. Explain documenting and storing waste temporarily, tracking quantities, and preparing for disposal, plus guidance on local hazardous waste facilities or curbside programs. Conclude with a quick-stopping point: discontinue work if waste cannot be safely contained or transported, or if containment is compromised.
Daily and end-of-day cleaning protocols
Start each day by damp-wiping surfaces with a clean, wet cloth to remove any dust. Use a HEPA-filtered vacuum to suck up the rest. Never use a regular broom – it’ll just kick up more dust.
At the end of the day, do another round of damp-wiping and HEPA-vacuuming. Sweep the floor gently with a soft-bristled brush, going with the grain to avoid stirring up dust.
Launder any contaminated clothing separately in hot water, or dispose of it if it’s beyond saving.
Handling and packaging hazardous waste
Seal paint cans tightly before moving them. Double-bag drop cloths, filters, and other contaminated items to prevent leaks. Use a thick plastic bag for the inner layer and a sturdy trash bag for the outer.
Label each package clearly with a marker, writing ‘Hazardous Waste’ in big, bold letters. Keep labels visible at all times.
Store waste temporarily in a cool, dry place away from heat sources and direct sunlight. Never leave it unattended or overnight.
Local disposal rules and where to check
Before you start any painting project, contact your local waste authority or municipal hazardous waste program. They’ll tell you exactly what you need to do with your paint waste.
Some areas have curbside pickup programs for hazardous waste. Others require you to drop off waste at a designated facility. Always follow their rules – it’s the law.
Keep records of your waste quantities and disposal methods. You might need them for future reference or inspections.
Respirator Maintenance, Cleaning, and Replacement Guidance
Cover cleaning procedures for reusable respirators, including approved cleaning agents and methods, steps to rinse and air-dry components, avoid solvents that can degrade elastomeric parts, and note which parts are washable versus non-washable. Emphasize preventing contamination of filters and exhalation valves during cleaning.
Discuss filter replacement indicators and timing, such as signs of increased breathing resistance or odor breakthrough, and reference manufacturer guidelines for replacement intervals. Include differential pressure checks if applicable and clarify that some filters require replacement after certain job durations. Also cover safe storage practices and routine inspections, plus retirement criteria for worn or damaged units.
Cleaning and disinfecting reusable respirators
After each use, clean your reusable respirator to remove dust, paint chips, and other contaminants. This helps prevent material degradation and maintains the respirator’s effectiveness.
Use a mild soap and warm water solution with a non-abrasive brush to clean the washable parts. Avoid solvents as they can damage elastomeric components. Rinse thoroughly and air-dry completely before storing.
Avoid getting cleaning agents or water on the filters and exhalation valves. These parts are not washable and should be kept dry.
When to replace filters, cartridges, or the respirator
Regularly check your respirator’s filters and cartridges for signs of wear. Here are common indicators that it’s time for a replacement:
Increased breathing resistance: If you feel like you’re working harder to breathe, it might be time to replace the filter.
Odor breakthrough: If you start smelling paint fumes or other odors through your respirator, the filter may no longer be effective.
Degraded seal: Inspect the facepiece for cracks or warping. A degraded seal can let in contaminants and reduce protection.
Always follow the manufacturer’s guidelines for service life and disposal. Some filters may need to be replaced after a certain job duration, regardless of appearance.
Storage and inspection checklist
Before each use and monthly, follow this checklist to ensure your respirator is in good condition and ready for work.
- Straps: Check for wear, fraying, or damage. Replace if necessary.
- Facepiece seals: Inspect for cracks, warping, or other signs of degradation. A degraded seal can compromise protection.
- Valves: Ensure they’re not blocked with debris or paint chips. Blocked valves can cause increased breathing resistance and reduce airflow.
- Nose bridge: Check for cracks or damage. A damaged nose bridge can affect the respirator’s fit and seal.
- Exhalation valve: Ensure it’s not blocked with debris or paint chips.
- Filters: Inspect for signs of wear, such as increased breathing resistance or odor breakthrough.
- Cartridges (if applicable): Check for signs of wear and ensure they’re securely attached.
- Storage container: Store your respirator in a clean, dry area away from direct sunlight and chemicals. Use a protective case if available.
Quick rule: Always inspect your respirator before each use to ensure it’s in good condition and ready for work.
Budgeting, Common DIY Mistakes, and Safer Alternatives
Outline a budgeting framework that identifies core costs like respirator type, filters, maintenance, PPE, and testing for lead or hazardous coatings, and remind readers to check local suppliers or rental options. Include disposal and replacement intervals without locking in figures.
Share cost-saving tips and planning advice, such as renting versus buying, and provide a simple equipment checklist with cadence notes for filter changes. List common DIY mistakes that raise exposure risk and offer safer alternatives in practice, like low-hazard coatings and damp/HEPA cleaning methods. Include decision points for proceeding, pausing, or hiring a pro, and end with a quick 1-page prep checklist to ensure budgeting, testing, and safety steps are covered before work begins.
Common mistakes that cause exposures
Don’t let these common DIY errors put your health at risk. Avoid them to keep exposure levels low.
- Skipping fit tests: A respirator’s not protecting you if it doesn’t fit right. Always do a user seal check.
- Using wrong filters: Choose the right filter for the job. Using an inappropriate one can lead to exposure.
- Poor containment: Contain dust and fumes at the source. Don’t let them spread into your workspace or home.
- Skipping testing: Don’t assume there’s no lead or hazardous coatings. Test first, then proceed safely.
These mistakes can raise exposure risk. Be aware and avoid them.
Safer, lower-toxicity alternatives and techniques
Reduce respirator demands with these safer options. Your lungs will thank you.
Low-VOC/low-odor paints: These emit fewer harmful vapors. They’re easier on your respiratory system.
Mechanical removal alternatives: Sanding, scraping, or using a heat gun can reduce dust. Wear appropriate PPE for each task.
Non-chemical cleaners like water-based solutions or mild soaps can minimize exposure to harsh chemicals.
Budget and sourcing tips
Stick to your budget with these smart shopping and rental strategies. You don’t have to break the bank to stay safe.
Rent vs. buy: If you need high-end gear for a one-off job, consider renting. It’s often cheaper than buying.
Certified replacement filters: Buy from reputable sources to ensure your filters meet safety standards and work as expected.
Check if local programs offer free or low-cost testing, PPE, or respirator maintenance services. Some communities provide these resources to promote safe DIY projects.
Conclusion
Protecting your health and your project’s finish hinges on treating respirator use, containment, and disposal as non negotiables. Stay disciplined now and you’ll avoid costly rework, stubborn warranty issues, and damaged surfaces.
First, run the checks in practical order: test for hazardous paint or chemicals, choose the right respirator and filters, verify a solid seal with a fit check, set up containment to minimize dust and vapor, follow the Step-by-Step workflow with clear safety stop points, clean up and dispose of waste safely, maintain and replace parts as needed, budget realistically, and consider safer alternatives before you start any work. Keep the area controlled, wear the gear correctly every time, and test a small patch first to confirm there’s no adverse reaction.
Common mistakes to avoid are skipping the fit test, using the wrong filters or worn-out cartridges, neglecting containment or dust control, and rushing through steps to save time. A simple safety rule is: seal first, breathe last. Replace filters if you smell chemicals or see degraded cartridges, and never sand or heat paint without proper containment and ventilation. Always finish with proper cleaning and disposal to prevent leftovers from causing future problems.
If the project would require extensive lead paint work, complex chemical exposure, or you’re unsure about the paint chemistry, call a pro for assessment and overhead containment. Otherwise, stay disciplined, follow the stop points, and push ahead only when you’re confident the area is clean, sealed, and properly ventilated. You have the plan—do the work safely, with control, and you’ll get a durable, good-looking result.
FAQ
When do I need a respirator for paint work?
If you’re working on older paint or you’re handling solvents, fumes, or dust, a respirator is necessary. Look for lead or chemical exposure indicators and always check the paint label and manufacturer instructions. When in doubt, treat it as requiring protection and use a suitable respirator and filters.
How should I set up my work area to minimize dust and fumes?
Isolate the area with barriers or plastic to keep dust contained. Ventilate away from living spaces and avoid creating cross-traffic through other rooms. Close doors, cover surfaces, and have the waste bag and disposal setup ready before you start.
What PPE should I use with a paint project, and how do I pick it?
Wear a respirator suitable for the contaminants, eye protection, and gloves. Choose PPE based on the task and the chemical exposure listed on the product label or safety data sheet. If you’re unsure, compare the label instructions and visor/strap options from the manufacturer.
How do I keep dust down and clean up after each painting session?
Wipe or vacuum with a HEPA-equipped vacuum before you finish, and avoid sweeping as it can stir dust. Clean tools and surfaces right after work and seal waste promptly. Schedule a thorough cleanup at the end of the project to prevent crossover dust.