
Introduction
The time it takes to paint a front door can vary depending on several factors, but understanding the timeline helps you plan your project effectively. This guide breaks down the process into manageable steps and estimates how long each task should take.
Whether you’re aiming for a quick refresh or want to ensure you allocate enough time for each step, this detailed timeline will help you achieve a professional-looking result without rushing through the process.
The Complete Timeline: Painting Your Front Door
Painting a front door involves several steps that require careful attention to detail. Here’s a breakdown of each task and an estimated time frame to help you plan your project effectively:
- Preparation (1-3 hours): Cleaning, removing hardware, masking, repairing surfaces, and priming.
- Painting (2-4 hours): Applying coats of paint, allowing drying time between each coat.
- Drying & Curing (8-24 hours): Allowing the paint to dry and cure before reassembling the door.
- Finishing Touches (30 minutes – 1 hour): Reinstalling hardware, touch-ups, and maintenance.
Total estimated time: 12-24 hours, spread over 1-3 days depending on your schedule and the weather conditions.
Key takeaways
The preparation stage is crucial as it sets the foundation for a successful paint job. Taking the time to clean, repair, and prime your door will ensure better adhesion and durability of the finish, ultimately saving you time in the long run.
- Inspect door frame and stop points before painting; plan masking and hardware removal.
- Remove hardware carefully and label components to ease reassembly later.
- Clean, degrease, and dry door surfaces; repairs should be uniform.
- Prime appropriate door material to improve adhesion and finish durability.
- Apply paint in thin, even coats; maintain consistent direction and tool pressure.
- Allow proper drying and protect from dust; use PPE and stop points affect reassembly.
Table of Contents
- Introduction
- Key takeaways
- Quick Project Overview and Key Stop Points
- Tools and Materials Checklist
- Preparing the Door: Cleaning, Removing Hardware, and Masking
- Surface Repair and Priming by Door Material
- Painting Technique — Step-by-Step
- Drying, Curing, and the Stop Points That Affect Reassembly
- Troubleshooting Common Problems and How to Fix Them
- Finishing Touches, Hardware Reinstallation, and Maintenance
- Conclusion
- FAQ
Quick Project Overview and Key Stop Points
This section walks through the full workflow from prep to final finish and reassembly. You’ll see where you can pause without risking a poor result, such as after prep, after priming, and after the first topcoat.
Use this guide to decide whether to work in stages or in one continuous session. If you pause, verify that you’re at a logical separation point and proceed with the next step when ready.
When to pause and why
Knowing when to stop during your front door painting project is crucial. It’s not just about taking breaks, but also preserving the quality of your finish.
Drying time is the most obvious reason. Each coat needs time to set properly. Rushing it can lead to imperfections or even peeling.
Weather changes can also dictate when you pause. If rain’s on the way, stop painting. Moisture can ruin your hard work. Same goes for extreme temperatures – too hot or cold can affect drying and adhesion.
Limited daylight is another reason to halt. Painting in low light can lead to mistakes. It’s better to finish up when you’ve got good natural light or proper task lighting.
Project time management
This job doesn’t have to be a one-day affair. Breaking it down into manageable chunks can help you maintain quality and avoid burnout.
For example, prep work – sanding, cleaning, filling gaps – can take a few evenings. Priming is another step that needs time to dry. You don’t want to rush these critical steps.
Weekends are great for applying topcoats. They usually need two coats with drying time in between. Schedule your painting sessions so you’re not rushed, and always allow for drying time before moving on to the next coat.
Prioritize tasks based on what needs the most time or has the longest dry time. That way, you’re making progress without feeling overwhelmed or rushed.
Tools and Materials Checklist
Gather a focused set of tools and materials categorized by essential, optional, and budget-friendly options. This list covers basic tools, masking supplies, cleaners, primers, paints, and finish cures.
Note which items are optional based on your door material and finish goals. Always verify labels or manufacturer instructions to confirm suitability for your door and climate.
Paint types and finish choices
Use this checklist before you start painting your exterior door to ensure you’re using the right paint type and finish for durability and longevity.
- Check paint base: Exterior doors are exposed to varying weather conditions. Choose between oil-based or water-based (latex) paints.
– Oil-based paints offer better durability and protection against harsh weather but have a longer drying time and strong odor. They’re ideal for wooden doors.
– Water-based paints are easier to clean up, dry faster, and have low VOCs (volatile organic compounds). They work well on metal and fiberglass doors. - Verify paint label: Ensure the paint is labeled as exterior grade. Interior paints won’t withstand outdoor conditions.
– Skip check: Using interior paint can lead to peeling, chipping, and fading within a short period. - Check gloss level: Gloss levels range from flat (no shine) to high-gloss (shiny). Choose based on your door material and desired durability.
– Semi-gloss or high-gloss finishes are best for wooden doors as they highlight the grain and provide better protection. For metal or fiberglass doors, a satin finish offers good durability with less shine. - Confirm paint color: Ensure you’ve chosen the right color by checking your paint can against the door under natural light.
– Skip check: Painting an entire door only to find the color doesn’t match can be time-consuming and costly.
Quick rule: Always choose exterior-grade paints with a gloss level suitable for your door material. This ensures longevity and reduces the need for frequent repainting.
Brushes, rollers, and sprayers explained
Before you start painting your doors, make sure you have the right applicators. This checklist will help you choose the best tools for a smooth finish.
- Check brush size: For doors, use a brush with a 2-3″ nap. This size is ideal for covering large surfaces and getting into corners.
- Inspect brush bristles: Ensure the bristles are firm yet flexible to hold paint well and apply it smoothly. Check for any bent or broken bristles that could leave marks on your door.
- Choose roller cover: For doors, a 9″ roller with a 3/8″ nap is usually best. This size can handle both flat and textured surfaces.
- Examine roller cover material: Synthetic covers are good for most paints, while lambswool or mohair are better for oil-based paints. Check the product label to ensure it’s suitable for your chosen paint type.
- Check sprayer tip size (if using): For doors, use a sprayer with a 1.8-2.0mm tip. This size provides good coverage without overspray or drips.
- Test sprayer pattern: Before painting, test your sprayer’s pattern on a scrap piece of material to ensure it’s even and consistent. Adjust the sprayer if necessary.
- Avoid using cheap applicators: While they may seem like a bargain, low-quality brushes, rollers, or sprayers can leave streaks, missed spots, or an uneven finish. What goes wrong if you skip this: You’ll end up with visible imperfections and may need to repaint.
- Clean applicators properly: After each use, clean your brushes, rollers, and sprayers thoroughly to remove all paint residue. This will extend their lifespan and ensure they’re ready for the next use.
Quick rule: Always choose applicators that match your paint type and surface area. Using the wrong tool can lead to a poor finish and wasted effort.
Protective gear and masking supplies
Before you start painting, ensure you’ve got the right protective gear and masking supplies to keep yourself safe and prevent paint from getting where it shouldn’t. Use this checklist before each painting task.
- Safety glasses – Protect your eyes from paint splatter. Check they fit well and aren’t cracked.
- Dust mask or respirator – Essential when sanding or dealing with old paint. Ensure it fits properly and check the filter type (N, P, R) matches your task.
- Gloves – Protect hands from paint and chemicals. Check they’re not torn and fit well for good grip.
- Drop cloths or plastic sheeting – Lay these down to protect floors and furniture. Ensure they’re large enough to cover the area you’ll be working in.
- Painter’s tape – For masking edges and creating clean lines. Check it’s not old (it loses stickiness over time) and test a small area first.
- Masking paper – For protecting large areas like walls or floors. Ensure it’s the right size for your task and isn’t damaged.
- Old clothes or coveralls – Wear something you don’t mind getting paint on. Check they’re comfortable and not too baggy to prevent tripping.
- Ear protection – If using power tools like sanders or sprayers, protect your ears from loud noise. Check they fit well and reduce noise levels sufficiently.
Quick rule: Always check your gear before you start. Worn-out or incorrectly used protective equipment won’t keep you safe and could lead to accidents or poor results.
Preparing the Door: Cleaning, Removing Hardware, and Masking
Start with a thorough cleaning to remove dirt, grease, and old finishes that could hinder adhesion. Remove or tape off hardware and protect the threshold and surrounding surfaces.
Masking is essential to prevent drips and overspray on adjacent areas. Concentrate on a clean, dry surface as the foundation for good adhesion.
How to remove or secure hardware
Before you start painting, decide whether to remove your door’s hardware – handles, locks, and hinges. It’s best to remove them if you’re planning a complete color change or want a smooth, even finish.
If you’re just touching up or adding a new layer of paint in the same color, it’s quicker to tape around the hardware. Use painter’s tape and carefully press down to seal out paint.
Either way, label each part or take photos for easy reassembly later. Keep screws and small parts safe too – use a small container or magnetic strip.
Cleaning and degreasing techniques
Start by removing dirt with warm water and mild soap. Use a soft-bristle brush or cloth to scrub gently.
For oily spots, use a degreaser specifically designed for the surface material of your door – wood, metal, or fiberglass. Follow the manufacturer’s instructions carefully.
Rinse thoroughly with clean water and let it dry completely before painting. This ensures even paint adhesion.
Masking and drop-cloth strategy
Protect your door’s hinges, glass inserts, and adjacent trim with painter’s tape. Press down firmly to create a tight seal.
Lay down a drop cloth on the floor beneath the door to catch any drips or overspray. Use a canvas or plastic drop cloth – they’re easy to clean and reuse.
If your door has a threshold, protect it with a piece of cardboard or foam board taped in place. This keeps paint off the threshold and prevents accidents while painting.
Surface Repair and Priming by Door Material
Identify common repairs for wood, metal, and fiberglass doors and decide if a primer is needed based on material condition. Check the product label to confirm compatible primers and patch products.
In some cases, professional attention may be necessary, especially on structural damage or severe corrosion. When unsure, consult the manufacturer instructions and local codes for guidance.
Wood doors: filling, sanding, and grain considerations
Start by inspecting your wood door for any small defects like dents or scratches. Use a good quality wood filler to fill these imperfections.
Sand the filled areas once dry using fine-grit sandpaper (120-150 grit) to smooth them out and blend with the rest of the door’s surface. Sand along the grain for best results.
Before priming, consider the grain of your wood door. If it’s open-grained like oak or ash, you might want to use a grain filler or sealer to help paint adhere better and prevent the grain from showing through your finish.
Choose a primer that’s designed for wood doors. Some primers are stain-blocking, which can be helpful if your door has tannin bleed (a common issue with woods like cedar).
Metal doors: rust treatment and bonding primers
First, remove any rust from your metal door using a wire brush or sandpaper. Be sure to wear gloves and eye protection during this process.
For larger rust spots, you might need to use a chemical rust remover. Always follow the manufacturer’s instructions for safe usage.
Once rust is gone, clean the door with a degreasing agent to remove any dirt or residue. This ensures better primer adhesion.
Use a bonding primer designed for metal surfaces. These primers create a strong bond between the paint and the metal, preventing peeling and flaking. Follow the manufacturer’s instructions for application and drying times.
Fiberglass and composite doors: scuffing and adhesion tips
Fiberglass and composite doors have a smooth, slick surface that paint doesn’t adhere well to. To fix this, you need to scuff or abrade the surface. Use fine-grit sandpaper (220 grit or higher) or a ScotchBrite pad for this.
Wipe off any dust with a damp cloth and let it dry completely before priming. This ensures your primer has something to grip onto.
Choose a primer designed for fiberglass or composite surfaces. These primers are formulated to create a good bond between the paint and the slick surface, improving adhesion and durability.
If your door has any deep scratches or gouges, use a filler specifically designed for composites before priming and painting. Sand smooth once dry.
Painting Technique — Step-by-Step
Outline a clear sequence: priming if required, cutting in, applying coats, and detailing panels or recessed areas. Aim for even coverage and smooth transitions between sections.
Follow the product’s instructions for coat order, recoat times, and recommended application methods. Avoid common finish problems by maintaining a consistent technique throughout.
Step-by-Step Process
Follow this clear, numbered sequence to achieve a professional-looking painted front door.
- Check your safety gear and mask off the area. Safety first, always.
- Inspect your door for any missed repairs or imperfections. Fix them now before painting.
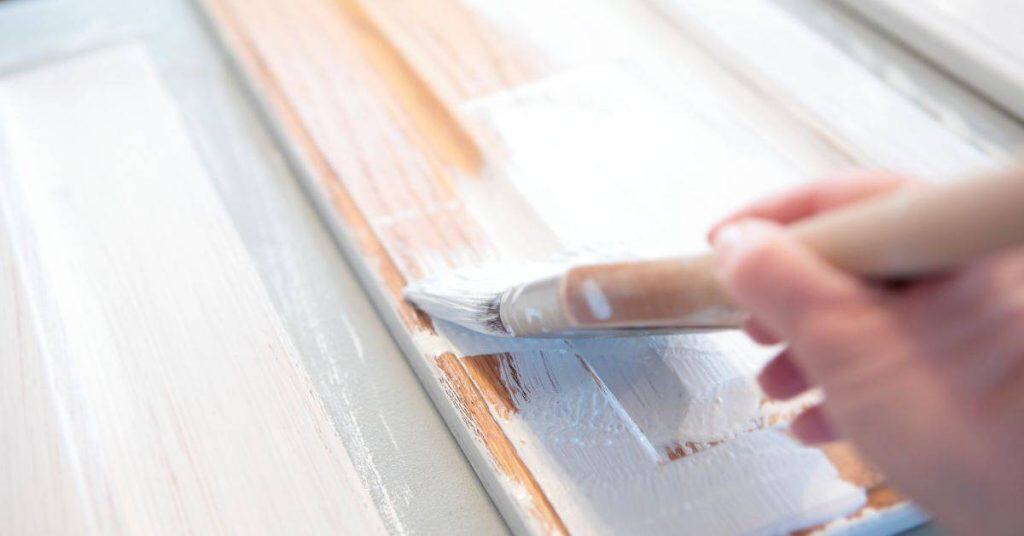
- Start at the top left corner. Apply paint to the door using long, smooth strokes, working from top to bottom, then side to side.
- Let it dry according to the manufacturer’s instructions. Sand lightly with fine-grit sandpaper if needed, then wipe clean before applying the next coat.
- Repeat step 3 for the second and third coats. Inspect your work after each coat to ensure even coverage and no missed spots.
- After final coat dries, remove masking tape slowly at a 45-degree angle to avoid pulling off dry paint.
- Inspect your door one last time. If you’re happy with the result, let it cure according to the manufacturer’s instructions before using or installing hardware.
Cutting in edges and painting around glass
Get crisp lines at jambs and glass panels with these techniques:
For edges, use a 1.5-2″ angled brush. Hold it at a 45-degree angle to the surface. Start at the top, then work your way down, using short strokes that overlap slightly.
For glass, apply painter’s tape along the edge first. Use a small artist’s brush to paint a thin ‘seal’ of paint along the line. This prevents bleeding under the tape. Let it dry before painting the main area.
Pro tip: For hard-to-reach areas or intricate designs, consider using a sprayer for better control and even coverage.
Applying full coats: brush, roller, or sprayer workflow
Achieve smooth, consistent coats with these best practices:
Brush: Use long, even strokes. Work in ‘W’ or ‘M’ patterns to ensure complete coverage and avoid lap marks.
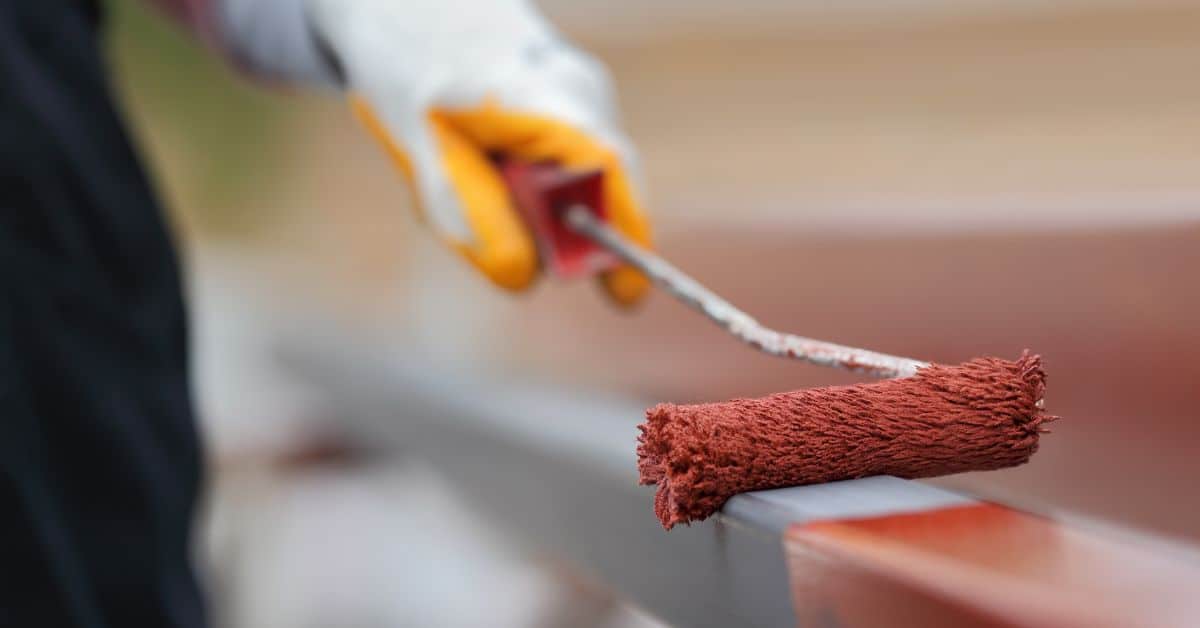
Roller: Apply paint in a ‘Z’ or ‘N’ pattern, starting at the top left corner. Overlap each stroke by about half the roller’s width for even coverage.
Sprayer: Use steady, smooth motions. Keep the nozzle moving to prevent drips and ensure an even coat. Always start and stop spraying outside of your work area.
Working panels, raised details, and recessed profiles
Paint complicated door profiles evenly with these tips:
Start with the highest or most prominent areas first. This helps prevent paint from dripping onto lower surfaces.
For recesses, use a small brush to apply paint in one direction, then blend it out using a larger brush or roller. Work in thin layers to avoid build-up.
Pro tip: For intricate details, consider using a sprayer for better control and even coverage. Always test on a small area first to ensure the finish is as expected.
Drying, Curing, and the Stop Points That Affect Reassembly
Understand the difference between dry-to-touch, handle-safe, and fully cured finishes and how that impacts reassembly. Use these states to judge when to reattach hardware or expose the door to use.
Always consult product instructions and consider environmental factors like temperature and humidity rather than relying on fixed timelines. Plan reassembly around the state of the finish, not a calendar date.
Testing readiness before reattaching hardware
Before you reinstall your door’s hardware, make sure the paint is dry to touch. This means it won’t stick to your fingers or leave any residue.
Here’s a simple test: lightly press your finger on the painted surface. If there’s no mark or transfer, it’s ready for handling. Be gentle though; you don’t want to mar the finish.
Note: Dry-to-touch doesn’t mean fully cured. The door might still be susceptible to damage from heavy use at this stage.
Weather and temperature considerations
The weather plays a big role in how your paint dries and cures. Humidity, temperature, and wind can all affect the process.
High humidity slows down drying. If it’s too humid outside, consider painting indoors or waiting for better conditions. Temperature also matters. Most paints cure best between 50°F to 90°F (10°C to 32°C). Too cold or too hot can hinder curing.
Wind dries things out quickly, which might seem good, but it can cause the paint to crack or peel later on. Try to avoid painting when it’s windy if possible.
Troubleshooting Common Problems and How to Fix Them
Identify typical issues such as runs, sags, orange peel, adhesion failures, and tacky finishes. Use corrective steps like sanding, spot-priming, or a full recoat as indicated by the condition.
Test fixes on a small, inconspicuous area before applying broadly. This helps confirm whether the chosen remedy will work without introducing new flaws.
Fixing runs, sags, and drips
While painting your front door, you might encounter runs, sags, or drips. Here’s how to tackle these:
For minor imperfections, use a brush to level them out while the paint is still wet. Gently drag the bristles along the surface to smooth it.
If you notice major runs or sags, let the paint dry completely, then sand the area lightly with fine-grit sandpaper. Wipe off dust and apply a spot primer before recoating.
Always test on a small area first to ensure your technique works as expected.
Dealing with poor adhesion or peeling
If paint is peeling off your front door, follow these steps to diagnose and fix the issue:
Check for contaminants. Wipe the surface with a damp cloth to remove any dirt, grease, or residue. If peeling persists, move on to the next step.
Inspect your primer. Ensure you’re using a suitable primer for your door material and paint type. If not, apply a spot primer before recoating.
Examine your paint. Make sure you’re using the right paint for your door material and climate. If not, switch to an appropriate paint and apply it after sanding and priming.
Addressing texture problems and brush marks
If you’re unhappy with the texture or brush marks on your painted front door, consider these options:
Sanding: Lightly sand the surface with fine-grit sandpaper to smooth out any rough spots. Wipe off dust and apply a spot primer before recoating.
Change applicator: Try using a different paint applicator, such as a roller or sprayer, to achieve a smoother finish.
Adjust recoat technique: Let each coat dry completely before applying the next. This helps prevent brush marks and ensures better adhesion.
Finishing Touches, Hardware Reinstallation, and Maintenance
Reinstall hardware carefully to avoid marring the finish, and plan for any threshold or weatherstripping adjustments. Ensure alignment and secure mounting during reassembly.
Describe simple maintenance routines and share touch-up techniques for small chips or worn edges. Keep the finish looking fresh with periodic checks and light cleaning schedules.
Reinstalling locks, handles, and kick plates
Before you reinstall your hardware, make sure the paint is fully cured. Refer back to our drying and curing section for details.
To avoid scratches, use a soft cloth or piece of cardboard behind the hardware as a buffer while seating it. This protects both your new paint job and the hardware itself.
When reinstalling locks and handles, take care not to overtighten screws. This can damage the wood and mar your fresh paint. Tighten them just enough to secure the hardware firmly in place.
For kick plates, align them carefully before securing. Use a level if necessary. Once aligned, tap gently with a hammer to set the screws, then tighten with a screwdriver.
Touch-up techniques for chips and nicks
Small chips or nicks can be touched up without repainting the entire door. First, lightly sand the area with fine-grit sandpaper to smooth any rough edges.
Using a small artist’s brush or toothpick, apply touch-up paint to match your door color. Work in thin layers, letting each one dry before adding more. This helps blend the repair into the existing finish.
Once the touch-up is dry, lightly sand the area again with extra-fine grit sandpaper to smooth any raised edges. Then wipe clean and apply a clear sealant to protect the repaired area.
If you’re unsure about matching colors exactly, take a small paint sample to your local hardware store. They can often mix a custom color to match your door’s existing finish.
Seasonal maintenance checks
Regular inspections and cleaning are key to keeping your painted front door looking fresh. Check your door seasonally, or after any major weather event, for signs of wear or damage.
Inspect the paint for chips, cracks, or peeling. Touch up as needed using our touch-up techniques. Also, check all hardware to ensure it’s secure and functioning properly.
Clean your door regularly with a mild soap and water solution. Use a soft cloth or sponge, and rinse thoroughly with clean water. Avoid harsh chemicals that could damage the paint.
In winter, consider applying a coat of wax to protect against snow, ice, and salt. This can help prevent moisture-related damage and keep your door looking its best.
Conclusion
Stand firm on safety and durability: a well-executed paint job will look sharp, hold up to weather, and avoid costly touch ups later. Get the job done right by sticking to the plan, testing as you go, and reassembling only after the finish is fully cured.
First, run through a simple, practical check: confirm you have the right tools and compatible materials, clean and prep the door, remove hardware and mask all edges you don’t want painted, repair and prime according to the door material, apply the coating in thin even coats with proper drying in between, inspect the work and reattach hardware only after the finish is fully cured. Do this in order and don’t skip steps, especially masking, priming, and the stop points that affect reassembly.
Two common mistakes trap DIYers: rushing the coats and skipping test spots, which leads to runs, uneven color, or poor adhesion, and neglecting ventilation and PPE, which can cause fumes or accidents. Safety rules to follow are simple: ventilate, wear eye protection and gloves, clamp or steady the door when you sand or paint, and never force- dry with heat or direct sun. If something feels beyond your comfort zone—like uncertain repairs or unusual door materials—pause and reassess before proceeding.
If real structural issues show up, or you’re unsure about repairs, prime, or reassembly after a major fix, don’t push through alone. A pro can handle tricky patches, weatherproof sealing, or hardware reinstallation with the right fasteners. Stay decisive, stay careful, and you’ll end with a door that looks great and lasts.
FAQ
Can I paint a door that’s already painted or stained without stripping it completely?
Yes, but you’ll still need surface prep. Light cleaning, a dulling of glossy finishes, and a proper primer for the material will help adhesion. If in doubt, follow the primer and paint label instructions.
What kind of finish should I use for a front door?
Choose a durable exterior finish designed for doors. A higher-sheen topcoat often lasts longer against weather, but you’ll want to balance looks with maintenance needs. Always check the label for exterior use and site conditions.
How do I know when it’s safe to rehang and reassemble the door?
Let the paint cure until it feels dry to the touch and looks fully set in the finish. Do not reattach hardware or move the door until the layers feel stable and not tacky. When in doubt, follow the paint manufacturer’s guidance on reassembly readiness.
What could cause peeling or peeling after reassembly, and how can I prevent it?
Poor surface prep, wrong primer, or painting in damp conditions can cause peeling. Prevent it by cleaning thoroughly, using the right primer for the door material, and applying paint when the surface and air are within recommended conditions. If you see issues, reassess the prep and paint choices before touching up.