
Introduction
Tile trim profiles are the finishing edges and transition pieces that give tiles a clean, protected edge and smooth corners as you tile a wall or floor.
Common options include metal trims (like aluminum or stainless steel), PVC trims, and bullnose edge trims, each with its own look and install feel. The best choice depends on your tile, moisture exposure, and how you want the final edge to read in the room, so check what the product says and how it should be installed before committing.
Key takeaways
- Choose trim profile based on edge exposure: metal for durability, PVC for moisture.
- Aluminum vs stainless steel: aluminum lighter but may dent; stainless resists damage.
- PVC trims offer flexible shapes; verify compatibility with tile adhesive and caulk.
- Bullnose and integrated ceramic trims provide clean edges without extra grout lines.
- Tools: snap cutters for aluminum, fine-tooth saw for PVC, and proper PPE.
- Safety: always turn off water/power near install, wear eye protection.
Table of Contents
- Introduction
- Key takeaways
- Quick Overview — What Tile Trim Profiles Do and When to Use Them
- Metal Tile Trim — Characteristics, Pros, and Cons
- PVC Tile Trim — Characteristics, Pros, and Cons
- Bullnose and Ceramic Trim Options — Tile-Integrated Finishes
- Tools and Materials Checklist for Diyers
- Step-by-Step DIY Installation Guide
- Cost, Durability, and Maintenance Comparison
- Common Mistakes, Troubleshooting, and Design Tips for Clean Results
- Conclusion
- FAQ
Quick Overview — What Tile Trim Profiles Do and When to Use Them
Tile trim profiles are preformed edge pieces that protect exposed tile edges, finish corners, and create clean transitions between surfaces; pick a profile, then measure tile thickness and test-fit the trim against the tile edge before buying. Check the product label or data sheet for profile dimensions and suitable substrates so the trim will sit flush with your tile and grout lines.
Choosing the right trim affects durability, water resistance, and the final look of the job; the wrong choice can leave sharp edges, gaps, or an awkward reveal. If you lack the tools or skill to miter tile edges neatly, or if the tile edge will be exposed to wear or moisture, use a trim profile—keep in mind tile thickness, wall vs. floor use, and whether you need a rounded (bullnose) or straight metal/PVC profile for movement and appearance.
Types at a glance: metal, PVC, and bullnose
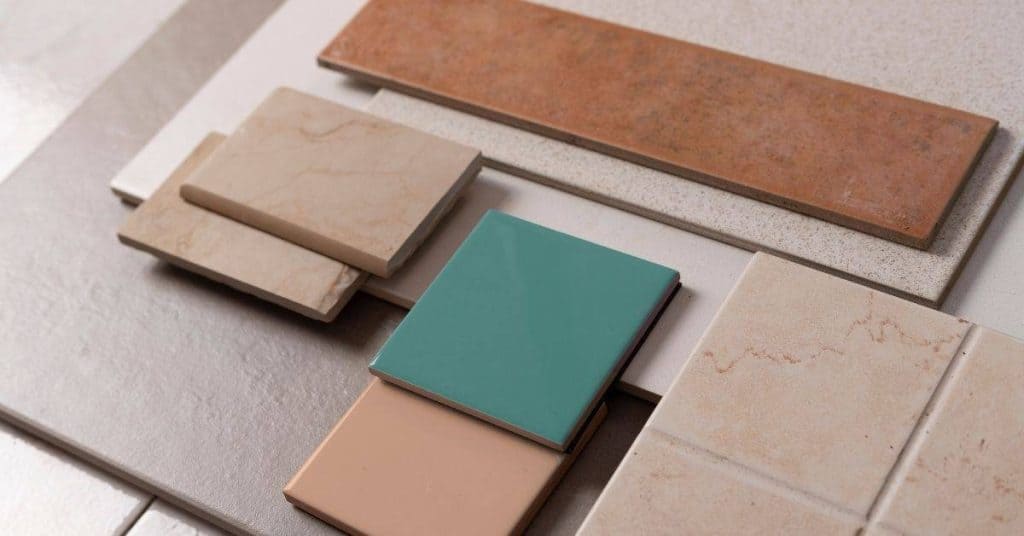
Tile trim profiles come in three main materials. Each has its own look and feel.
Metal trims offer a sleek, modern aesthetic. They’re durable but can dent if not handled carefully.
PVC/ABS trims are lightweight and flexible. They won’t rust like metal but may warp in high heat or direct sunlight.
Bullnose profiles are rounded edges on tiles themselves, not separate trims. They’re great for softening corners but lack the versatility of other trims.
Typical uses and locations
Tile trim profiles are used where tiles meet walls, floors, or each other. They protect edges, finish corners, and create smooth transitions.
You’ll find trims at external corners, like where a wall meets the floor. They prevent chipping and provide a clean look.
Trims also go along edges where tiles meet other surfaces, like countertops or shower walls. They create a neat finish and protect the tile edge.
In showers, trims are used in niches and around shower pans. They help waterproof these areas and provide a clean look.
Metal Tile Trim — Characteristics, Pros, and Cons
Metal trims (aluminum, stainless, anodized finishes) give a slim, modern edge and are durable in high-traffic spots; match trim lip height to tile thickness and dry-fit to confirm finish and alignment. Read the manufacturer instructions for grade and finish limitations so you pick a metal suited to moisture and cleaner exposure on the job.
Metal stands up well to impact and gives crisp lines, but can scratch, dent, or corrode if the grade or finish isn’t right for the environment—those problems show up over time. Expect tighter tolerances when mitering and fastening metal; take care with cut edges (deburr) and choose adhesives or fasteners recommended by the maker to avoid future failures.
Benefits and trade-offs
Metal trims offer durability, slim profiles, and a modern aesthetic. They’re great for high-traffic areas like bathrooms or kitchens.
Durability: Metal trims can handle heavy use, making them ideal for busy spaces. They won’t chip or crack like some other materials.
Aesthetic options: Available in various finishes (aluminum, stainless steel, anodized), metal trims provide a sleek look that complements many design styles.
Corrosion resistance and scratches: Higher-grade metals resist corrosion better. Some may scratch or dent under heavy use, but they’re generally tougher than PVC.
Best applications and environment considerations
Metal trims excel in wet rooms and high-traffic areas. Consider the finish and alloy specs for your specific environment.
Wet rooms: Stainless steel or anodized aluminum is best for shower or bath areas due to their corrosion resistance.
High-traffic areas: Aluminum works well in kitchens, hallways, or other busy spaces. It’s lightweight and durable but may require a protective coating in harsh environments.
Check with the manufacturer: Always verify the finish and alloy specs can handle your specific environment to prevent corrosion or discoloration.
Cutting, joining, and safety tips for metal trim
Use the right tools, wear PPE, and smooth edges to ensure a safe and professional installation.
Tools: Use a miter saw or snips designed for metal. A file or deburring tool helps smooth rough edges.
PPE: Wear safety glasses, gloves, and a dust mask when cutting or handling metal trims to protect yourself from debris and sharp edges.
Edge smoothing: After cutting, use a file or sandpaper to remove any burrs or sharp edges. This prevents injuries and ensures a smooth finish.
PVC Tile Trim — Characteristics, Pros, and Cons
PVC trims are lightweight, easy to cut, and come in many colors to match tile; measure profile dimensions and test a short piece for fit and color match before you commit to a full length. Verify the product label or manufacturer guidance for temperature and UV limits so you don’t use PVC where heat or constant sun could cause warp or fading.
For interior, low-moisture areas PVC is an economical, user-friendly choice that’s forgiving during installation and replacement. It won’t match metal for long-term rigidity or high-heat resistance, so avoid relying on it in heavy-traffic floors, exterior steps, or near heat sources where sag or deformation could occur.
Benefits and trade-offs
PVC trims are the budget-friendly choice for DIYers. They come in a variety of colors to match your tiles, making them an attractive option. Their lightweight construction makes handling and installation a breeze.
Ease of use is another key benefit. You can cut PVC trims with basic tools like a fine saw or utility knife. Plus, touch-ups and replacements are straightforward.
However, keep in mind that while they’re great for quick DIY installs, their abrasion resistance and UV stability aren’t as high as metal trims. They may not hold up as well to heavy use or outdoor exposure.
Best applications and installation considerations
PVC trims shine in interior, low-moisture zones like bathrooms, laundry nooks, and splash zones. They’re perfect for backsplashes and light-duty wall installations where rapid edge finishing is desired.
However, avoid using PVC in high-heat or sun-exposed areas. The heat can cause warping, sagging, or color fade. Also, they’re not ideal for heavy-use or outdoor installations due to their lower durability.
When installing, plan for miters at corners and cut precisely. Follow up with a matching sealant to prevent moisture intrusion. Don’t force trims into misaligned gaps and maintain expansion space for temperature changes.
Cutting and joining PVC trim
Cutting PVC trim is simple with the right tools. A fine saw or utility knife works well. Use a straight edge as a guide for clean, even cuts.
When joining pieces, use a compatible adhesive or sealant to ensure a strong bond. Avoid using too much adhesive to prevent it from oozing out and causing a mess.
To avoid chipping or uneven edges, score the PVC with a utility knife before snapping it. This helps create a clean break. Also, be careful not to overtighten screws when joining pieces; this can cause the trim to crack.
Bullnose and Ceramic Trim Options — Tile-Integrated Finishes
Bullnose and ceramic trims are tile-made edge pieces—single- and double-radius bullnose, quarter rounds and flat liners—that match glaze and finish for a seamless look; source a trim that matches tile thickness and edge profile and dry-fit before setting. Check glaze and edge dimensions on the tile spec sheet to confirm compatibility with your field tiles and grout width.
These trims give an integrated, low-maintenance finish and avoid the metallic or plastic look of applied profiles, which is great for cohesive designs. Cutting and setting ceramic trims needs care to avoid chips and mismatched radii; prepare for wet-sawing and careful mitering or butt joints to keep grout lines even and edges true.
Types of bullnose and where they work best
Bullnose tiles come in three main types: single-radius, double-radius, and quarter-round. Each has its place depending on your tile size and the corner geometry.
Single-radius is a simple curve along one edge. It’s great for countertops, window sills, or any area where you want a smooth, continuous line.
Double-radius has curves on both edges, creating a rounded-off look. This works well in showers, especially around the base to prevent sharp corners.
Quarter-round is half a circle, perfect for wall-to-floor transitions or where you want a subtle curve instead of a hard edge.
Pros/cons vs. add-on profiles
Bullnose tiles offer a seamless, integrated look that matches your tile exactly. They eliminate the need for additional metal or PVC profiles in many installations.
However, bullnose has its drawbacks. It’s not as protective as metal or PVC profiles and can be more susceptible to damage during installation or use. Plus, it lacks the flexibility of add-on profiles, which can be cut and mitered to fit complex shapes.
The choice depends on your project. If you want a seamless look and don’t mind the trade-offs, go for bullnose. But if protection and flexibility are priorities, consider metal or PVC profiles.

Tools and Materials Checklist for Diyers
Gather tools and consumables by task: measuring, cutting, fitting, finishing, and sealing—then tailor the list to your trim type (metal, PVC, or ceramic). For anything you can’t confirm visually, check product instructions or the data sheet for recommended adhesives, cutting blades, and PPE so you don’t buy the wrong consumables.
Right tools and PPE cut rework: measuring tools, appropriate saws or snips, deburring files, compatible adhesives, grout/caulk, and safety gear make the job safer and neater. A dry-fit flow, color-labeled pieces, and a small notes area for on-site measurements reduce mistakes and help you spot mismatches before adhesive goes on.
Tools by material (metal vs. PVC vs. ceramic)
Use this checklist to gather the right tools for your trim type before starting.
- Metal: Tin snips, circular saw with metal-cutting blade, deburring file.
- PVC: Miter saw with fine-tooth blade, PVC-rated utility knife, speed square.
- Ceramic/Bullnose: Compatible saw blade, coping/finishing tools, optional tile nippers.
Quick rule: Having the right tool for each material ensures clean cuts and easy installation.
Materials, adhesives, and compatibility notes
Check these items to ensure your materials play nice together before applying.
- Adhesive: Choose one compatible with tile, backing, and trim material. Check manufacturer guidance.
- Sealant: Select a grout-compatible option that won’t damage or discolor your trim.
- Fasteners: Use nails or screws rated for the material to avoid stripping or breaking.
Quick rule: Incompatible materials can lead to failures, so double-check before applying.
Step-by-Step DIY Installation Guide
Plan and measure first, select the correct trim for tile thickness, prep the substrate, and dry-fit trims before any adhesive or fasteners go on; keep a checklist for cutting, fitting, securing, and finishing. If you need exact fastening or curing instructions, follow the manufacturer’s installation guide for the specific trim product you’re using.
Take your time on miters and level runs, back-butter where necessary, and finish joints with the right grout or sealant to prevent water entry and visible gaps. Check for level, consistent grout lines, and clean seams before the final cure; correct small errors now—later fixes are harder and more visible.
Step-by-Step Installation Process
Now that you’ve prepared your site and gathered your materials, let’s dive into the step-by-step installation process for your concrete project.
-
Lay out your forms: Start by placing your formwork according to your plans. Ensure they’re level and square using a laser level or string line.
Why it matters: Proper formwork ensures your concrete slab is flat, level, and strong.
Check: Use a 2′ level to ensure forms are level and a diagonal measurement to check for squareness. -
Install rebar (if needed): If your project requires reinforcement, install rebar according to the plan. Ensure it’s properly spaced and secured.
Why it matters: Rebar adds strength and helps prevent cracking.
Check: Verify rebar spacing and alignment with your plans. -
Pour concrete: Start at one corner of the formwork, pouring concrete in a continuous motion. Use a shovel or concrete rake to spread it evenly.
Why it matters: Proper pouring ensures an even distribution of concrete and helps prevent voids.
Check: Watch for any low spots or air pockets as you pour. -
Finish the surface: Once the forms are filled, use a bullfloat to smooth the surface. Then, use an edger to finish the edges.
Why it matters: Finishing the surface helps prevent cracking and ensures a smooth, even look.
Check: Run your hand over the surface to feel for any rough spots or low areas. -
Cure concrete: Cover the slab with plastic sheeting to retain moisture. Keep it wet for at least 7 days.
Why it matters: Proper curing helps concrete reach its full strength and prevents cracking.
Check: Ensure the plastic is secure and that there are no dry spots.
Pro tip: Consider using a concrete mix with integral waterproofing additives to protect your slab from moisture damage.
Prep, layout, and measuring tips
First off, measure your space. Allow for grout lines – that’s about 1/8″ on each side. Dry-fit your pieces before fixing to ensure everything fits snug.
Check base compaction. It should be solid as a rock. If not, fix it before laying a single tile. Trust me, you don’t want to do this job twice.
Lay out your tiles in the pattern you want. Start from the center and work your way out. This helps avoid cutting tiles at the edges. And remember, keep those grout lines consistent.
Installation sequence (adhere, set, finish)
Alright, listen up. You’ve prepped your surface and laid out your tiles. Now it’s time to stick ’em down, press ’em in, and make ’em look pretty. Here’s how:
First off, check your adhesive. It should be mixed according to the manufacturer’s instructions. You don’t want it too thin or too thick. Aim for a consistency like peanut butter.
Now, grab your trowel. Start with the notched one to spread the adhesive over a manageable area. Then, use the straight edge to smooth it out and get that even coverage. Press those tiles in firmly, making sure they’re well-aligned and level. Use spacers for consistent grout lines.
Once your tiles are set, let the adhesive cure according to the manufacturer’s instructions. Then, it’s time to finish up. Mix your grout, spread it on, and wipe off the excess. Let it dry, then apply a sealer if needed. And there you have it – a job well done!
Safety and finishing checkpoints
Use this checklist once you’ve completed the installation sequence (adhere, set, finish) to ensure a safe, professional-looking result.
- Wear appropriate PPE: Gloves, safety glasses, and a dust mask are essential. Check your gear before starting.
- Control dust: Use wet cutting or vacuuming to minimize concrete dust. Check local regulations for safe disposal.
- Smooth sharp edges: Inspect all edges for sharp points. Sand them smooth with a concrete edge tool. Check by running your hand along the edge.
- Check reveal and transitions: Visually inspect where new concrete meets existing surfaces. Ensure they’re even and flush. Use a level if needed.
- Verify surface flatness: Walk on the surface to check for any soft or uneven spots. Use a straight edge to confirm it’s flat.
- Inspect control joints: Ensure they’re cut deep enough (usually 1/4″ – 3/8″) and wide enough (usually 1/8″). Check the manufacturer’s recommendations.
- Check curing progress: After 24 hours, lightly mist the surface to check for proper curing. It should darken slightly if it’s curing correctly.
- Inspect for cracks or defects: Look for any hairline cracks or other defects. Seal immediately if found.
Quick rule: Always follow the manufacturer’s instructions and local building codes to ensure a safe, durable concrete installation.
Cost, Durability, and Maintenance Comparison
Match cost expectations to material: PVC is typically the lowest-cost option, metal sits mid-to-high depending on finish, and bullnose cost tracks with the tile—confirm local prices and warranty details before you buy. Consult manufacturer warranty and product data before assuming lifespan or maintenance needs, since claims and performance vary by product and environment.
Durability depends on exposure: metals resist wear but may need higher-grade alloys for corrosive environments; PVC is easy to replace but sensitive to heat and UV; ceramic bullnose lasts with the tile but breaks if struck. Factor in maintenance: cleaning method, inspection schedule, and when a trim should be replaced—plan purchases and spare pieces accordingly to avoid mid-job delays.
Cost factors and what to check
Before you buy, use this checklist to understand the cost drivers.
- Material: PVC is cheapest, metal mid-range, bullnose varies with tile cost.
- Finish: Textured or special finishes add cost.
- Linear footage: More trim means higher cost. Measure carefully.
- Brand: Known brands may charge more but offer better warranties.
- Installation complexity: Complex cuts and layouts increase labor costs.
- Local suppliers: Prices vary by region. Get local quotes.
- Warranty terms: Check manufacturer warranties to understand coverage.
- Edge conditions: Irregular edges may require custom cuts, adding cost.
Quick rule: Always get local quotes and compare brands for the best deal.
Longevity and maintenance needs
Each trim type has its own lifespan and care requirements. Here’s what to expect:
Metal: Regularly clean to prevent corrosion. Inspect for patina or tarnish every 6-12 months.
PVC: Clean with mild soap and water. Inspect for cracks or warping annually.
Ceramic bullnose: Wipe clean with a damp cloth. Check for tile movement or cracking every 6-12 months.
Signs of wear include scratches, chips, or discoloration. Replace or touch up as needed to maintain your trim’s lifespan.
Common Mistakes, Troubleshooting, and Design Tips for Clean Results
The usual DIY traps are poor measuring, wrong adhesive or setting material, and sloppy miters that leave gaps or lippage—measure twice and dry-fit components before cutting or gluing. Consult product instructions when adhesives or sealants behave unexpectedly, and vary your check method by material (label, technical sheet, or manufacturer guidance) to find the right fix.
For quick fixes: reseat or back-butter trims to correct a loose run, re-cut miters that don’t close, and use small shims or caulk for minor gaps instead of forcing pieces into misaligned slots. Choose trim profiles that match tile scale and room use so the edge treatment supports the design rather than drawing attention to imperfect work.
Mistakes to Avoid and How to Fix Them
Here are some common mistakes DIYers make when installing tile trim and practical ways to fix or prevent them.
- Inaccurate measurements: Double-check your cuts. Use a miter saw with the right blade for your material, and take your time.
- Wrong adhesive or setting materials: Always use the recommended adhesive for your trim type. Read labels carefully to avoid using expired or incompatible products.
- Mismanaged mitre joints: Ensure your mitres are tight and even. Use a miter gauge and clamps to keep them steady during cutting.
- Visible adhesive squeeze-out: Apply adhesive sparingly, and use a damp sponge to wipe away excess before it dries.
- Lippage (uneven edges): Ensure your tiles are even before installing trim. Use spacers and check diagonally for level.
Regularly inspect your work in progress to catch and fix issues early.
Design Tips: Matching Trim to Tile and Room Style
Tile trim can be a subtle accent or a bold feature. The key is to choose one that complements your tile, fixtures, and overall room style.
For a subtle look, pick a trim color/finish close to your tile’s grout. This will make the trim recede into the background, allowing your tiles to take center stage.
To create a bold feature, choose a contrasting color or finish for your trim. This can add visual interest and define spaces, like shower areas or kitchen backsplashes.
When in doubt, test different options using paint samples or trim scraps before committing to a final choice.
Conclusion
Choosing the right trim profile and installing it with solid prep saves you from costly fixes and gives you clean, durable edges that last.
First, confirm your profile choice matches the tile edge and environment, test fit on a scrap piece, then lay out a careful plan for cutting and miters. Prep the surface, cut square, deburr edges, and install with the recommended adhesive or fasteners in a logical sequence. Seal joints where water exposure is possible, and finish with a final wipe and inspection to ensure everything sits true and level.
Common pitfalls to avoid are mixing metals that can corrode, skipping surface prep, using the wrong adhesive, cutting rough or uneven angles, and over-tightening fasteners. Safety rules are simple: wear eye and hand protection, cut away from your body, double-check measurements before cutting, and verify moisture and cleanliness of the installation area before bonding. If something looks wrong in test fits, stop and reassess rather than forcing a fit.
If the project starts to feel uncertain—like you’re fighting gaps, uneven edges, or you’re unsure of substrate compatibility—call in a pro. A quick consult can save you from rework and damage. Stay steady, follow the plan, and you’ll finish with a sharp, professional-looking edge that lasts.
FAQ
What are the common metal tile trim options, and when should you use aluminum versus stainless steel?
Aluminum trims are light, easy to cut, and work well for most indoor projects. Stainless steel trims resist corrosion better and stand up to moisture longer, but they cost more and can be harder to cut.
What are the main PVC tile trim types, and how do you tell them apart?
PVC trims come in various profiles like flat edge, small or large transition, and corner pieces. Look for labels or datasheets that list the profile, size, and whether it’s designed for ceramic or porcelain tile; choose based on your tile thickness and edge reveal.
When should you use bullnose or ceramic edge trims, and how are they installed?
Bullnose trims give a rounded edge for a clean finish on exposed tile edges. Ceramic edge trims are integrated with the tile and can hide raw edges with a seamless look; install them according to the trim’s manufacturer instructions and ensure compatible tile thickness.
What are practical installation tips for different trim types to keep edges clean and joints tight?
Use the right adhesive and fasteners for the trim material, and align trims with tile seams to avoid gaps. Cut trims square, deburr edges, and check that the trim sits flush with tile surfaces before setting with adhesive or grout. If unsure, verify with product label, manufacturer instructions, or local guidelines.