
Introduction
Painting tile-look backsplashes is painting over existing tile to resemble new tile when replacement isn’t possible.
This approach keeps the project simple and lets you update color and texture without tearing out walls. Doable for DIYers who are comfortable with prep, basic priming, and a steady hand with brushes or rollers.
Start with thorough cleaning, degreasing, and scuffing the tile so paint sticks. Follow product labels for primer and finish, and check compatibility with tile and grout. If unsure, test a small area first and follow drying times and sealing guidance from the instructions.
Key takeaways
- Evaluate replacement viability vs. painting based on tile condition and grout integrity.
- Choose tile-look paint with epoxy or enamel base for durability against splashes.
- Prep thoroughly: degrease, seal porous edges, and abrade glossy surfaces for adhesion.
- Prime with a stain-blocking, compatible primer before applying multiple thin coats.
- Use proper tools and technique to mimic tile patterns without overworking joints.
- Regular maintenance: wipe spills promptly and reseal surface to preserve look.
- Wear eye protection and gloves; fumes and dust require ventilation.
Table of Contents
- Introduction
- Key takeaways
- Quick Decision Guide — Paint Vs. Replace
- Best Paint Types for Tile-Look Backsplashes
- Surface Preparation and Adhesion Strategy
- Painting Techniques for Authentic Tile-Look Results
- Grout and Joint Treatment Options
- Durability, Maintenance, and Cleaning Post-Paint
- Tools and Materials Checklist
- Costs, Time Estimates, and Project Planning
- Conclusion
- FAQ
Quick Decision Guide — Paint Vs. Replace
Painting a tile-look backsplash can be a practical, cost-conscious option when the surface is sound and the design meets your goals. It works best for minor damage, color changes, or when you want a quick refresh with less mess. If the tile or substrate shows cracking, loose pieces, or moisture intrusion, replacement may be the safer route.
Key decision factors include substrate condition, heat and moisture exposure, and your long-term plans for the space. Always verify substrate stability, exposure levels, and product labels before choosing a path. If in doubt, consult manufacturer instructions or local codes for guidance.
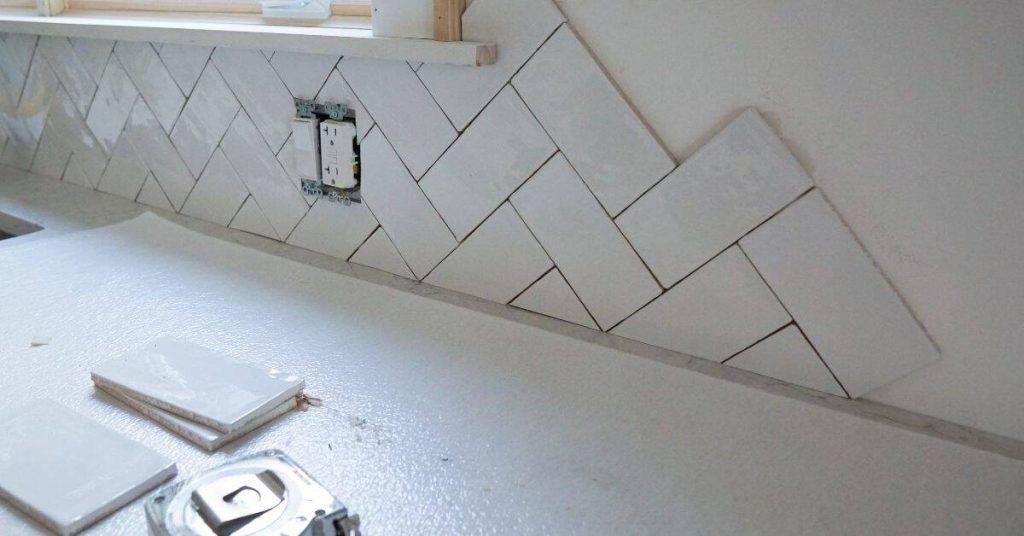
Assess tile and grout condition
Before you grab that paintbrush, take a close look at your tiles. You’re checking for any signs of trouble that might make painting a bad idea.
Loose tiles are a red flag. Tap them gently. If they sound hollow or wobble, they need to be secured or replaced before painting.
Check for mold. It can hide in grout lines and behind tiles. If you find any, it needs to be cleaned up and the cause fixed before painting.
Deep staining on tiles might not come off with paint. And if there are structural issues, like cracks in the wall or substrate, they need fixing first.
When replacement is necessary
Sometimes, painting just isn’t enough. Here are some clear signs that you need to replace your tiles.
Water damage is a big one. If there’s active leaks, or the substrate behind the tiles is crumbling, it’s time for new tiles.
Don’t ignore any cracks in the tiles. They can let water in and cause more damage over time. And if you find any mold behind the tiles, it needs to be dealt with immediately.
If you’re not sure, don’t hesitate to consult a pro. They can check behind the tiles and give you an expert opinion.
Best Paint Types for Tile-Look Backsplashes
Epoxy and two‑part systems offer strong adhesion and durability but require careful mixing and ventilation. These are often used where moisture and heat are ongoing concerns. For DIY projects, a waterborne epoxy or an acrylic latex with bonding primer can provide good adhesion with easier cleanup.
Oil/alkyd options remain a choice where you need tough, long-lasting film—though they require proper ventilation and dry times. Match the finish to your needs by checking the product label and manufacturer data sheet for heat resistance and moisture performance. Consider the surface and environmental conditions to decide which type is most appropriate.
Epoxy and two-part coatings
Epoxy paints are tough, durable, and resistant to heat and moisture. They’re perfect for tile-look backsplashes in kitchens and baths.
Pros: Excellent adhesion, high durability, great for areas with steam or water exposure.
Cons: Longer cure time (up to 72 hours), strong fumes during application, requires thorough surface prep. Recoat windows can be long too.
Bonding primers plus acrylic or alkyd topcoat
A high-bond primer creates a strong base for your topcoat to adhere to. Pair it with an acrylic or alkyd paint for a durable finish.
Pros: Good adhesion, versatile for different surfaces including glazed tile, lower VOC options available.
Cons: Acrylic paints may not be as heat-resistant as epoxy. Alkyd paints have longer drying times and strong fumes.
For lower odor, opt for waterborne acrylics. They’re also easier to clean up with just soap and water.
Specialty paints (heat-resistant, kitchen-safe)
For areas near stoves or ovens, consider heat-resistant paints. They can withstand high temperatures and are safe for food prep surfaces.
Check labels: Temperature rating – ensure it’s high enough for your needs. Food-surface safety – look for NSF/ANSI Standard 51 certification. VOC guidance – lower is better for indoor air quality.
Examples: Some heat-resistant paints are designed specifically for kitchen backsplashes, offering both heat and moisture resistance.
Surface Preparation and Adhesion Strategy
Start with a thorough cleaning to remove soap, oil, and mineral residues. Degloss the surface so the primer can bite in, then scuff-sand any glossy areas to roughen the texture. If the finish is very smooth, light etching can help with adhesion.
Prime with a high‑bond product suited to tile‑look surfaces, and vent the space for safety. Read the label for surface compatibility and recoat times, and follow the manufacturer’s instructions precisely. Protect nearby areas and wear appropriate personal protective equipment.
Cleaning and degreasing
Start by removing any loose dirt, dust, or debris from your tile-look backsplash with a soft-bristled brush or broom.
For grease and soap scum: Use a solution of warm water and dish detergent. Apply it with a sponge or cloth, let it sit for 10-15 minutes, then scrub gently to remove the residue. Rinse thoroughly with clean water.
Avoid harsh chemicals: Do not use abrasive sponges, steel wool, or strong cleaning agents like bleach or ammonia as they can damage grout and substrate.
Scuffing, etching, and testing adhesion
To improve paint adhesion, you’ll need to scuff up the surface. You can do this manually with fine-grit sandpaper (220 or 320 grit) or chemically using a phosphate-based cleaner.
If using sandpaper, wear a dust mask and lightly scuff the surface in a circular motion. Wipe off any dust with a damp cloth.
For chemical etching, apply the cleaner according to manufacturer’s instructions, let it sit for 10-20 minutes, then rinse thoroughly.
Before painting, perform an adhesion test: Apply painter’s tape to the surface, let it sit for at least 30 minutes, then pull it off. If paint comes off with it, you need more prep. If not, your surface is ready for primer.
Choosing and applying the right primer
Choose a bonding primer designed for tile surfaces. Epoxy primers can also be used, but they may not be necessary unless you’re painting over stained or heavily soiled areas.
Stain-blocking primers can help with discoloration issues, but they should be used in addition to a bonding primer, not as a replacement.
Apply the primer using a high-quality paintbrush or roller, following manufacturer’s instructions for coverage and drying times. Typically, you’ll apply 2-3 thin coats, allowing each to dry according to the recommended recoat time.
Safety first: Work in a well-ventilated area and wear appropriate safety gear, including gloves, goggles, and a respirator if needed.
Painting Techniques for Authentic Tile-Look Results
For a solid color, apply even coats using the right roller and brush technique to minimize lap marks. You can add faux tile highlights or subtle grout shadowing to mimic real tiles without creating a heavy texture. Keep strokes smooth and consistent to avoid streaks.
Experiment with a light spray pattern on small sections for even coverage, then finish with a brushing pass to blend edges. Avoid overloading tools to prevent runs or pooling. All methods should be guided by product instructions and tested on a small area first.
Solid-color refinishing
Start by applying your chosen primer, following the manufacturer’s instructions. This ensures a smooth, even base for your paint.
Next, apply your first coat of acrylic or alkyd topcoat using a high-quality roller. Work in small sections at a time to maintain a wet edge and avoid lap marks.
Let it dry according to the product instructions, usually around 24 hours. Then, lightly sand with fine-grit sandpaper to remove any raised grain or imperfections. Wipe off dust with a damp cloth.
Apply your second coat in the same manner as the first. This should give you a uniform, durable solid color finish.
Faux tile and grout shading techniques
To simulate grout lines, use painter’s tape to mask off stripes where you want your ‘grout’ to be. Apply a lighter shade of paint here using a small brush or even a toothpick for precision.
For added depth, try glazing or dry-brushing with a darker shade. Glazing involves applying a thin layer of dark paint over the base color and wiping off excess with a clean cloth. Dry-brushing is similar but uses a nearly dry brush to lightly skim the surface.
If you’re feeling confident, you can freehand your grout lines instead of using tape. Just remember to work from top to bottom in small sections to maintain control over your line width.
Let each layer dry completely before moving on to the next to avoid smudging or blending colors unintentionally.
Seamless finish near edges and trim
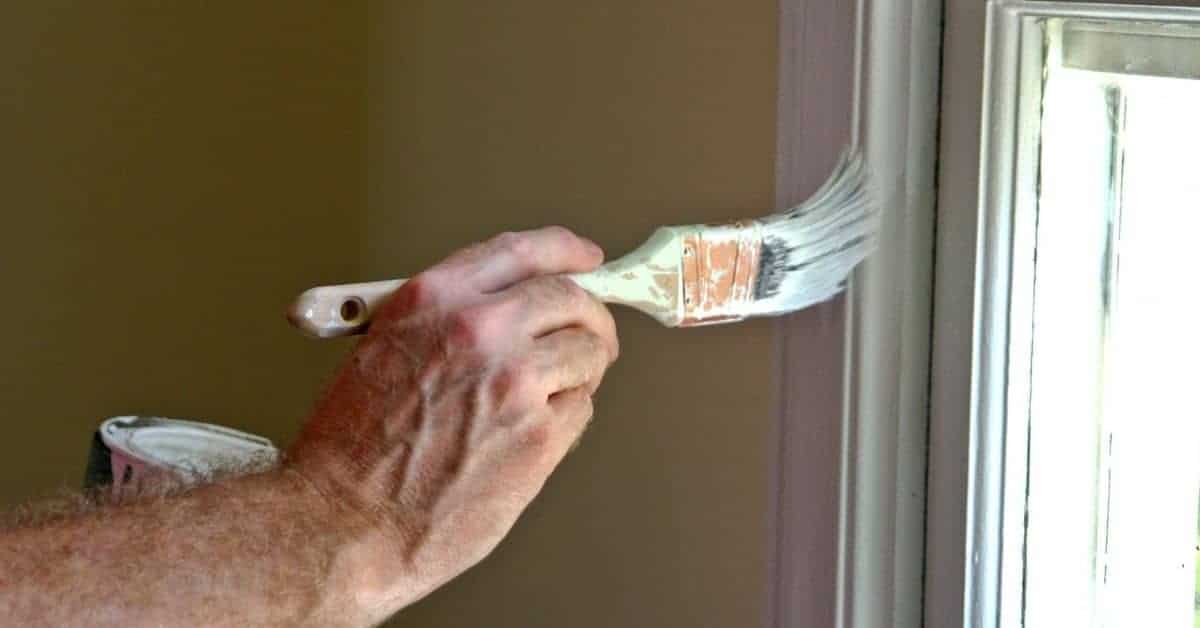
When painting near edges like counters, cabinets, or trim, use a high-quality angled brush to ‘cut in’ along these lines. This involves carefully applying paint right up against the edge without getting any on the adjacent surface.
To avoid visible ridges where your paint meets these surfaces, lightly feather the edge with your brush. This means gradually reducing the amount of paint on your brush as you approach the line so there’s no harsh transition.
Once your paint is dry, apply a thin bead of painter’s caulk along any gaps between your tile and adjacent surfaces. Let it dry, then lightly sand and wipe off to seal these edges and prevent peeling or chipping.
Finally, apply a light coat of paint over the caulked areas using a small brush. This seals everything in place and gives you a seamless finish.
Grout and Joint Treatment Options
You can paint over grout lines with a color that blends into the tile or provides a deliberate contrast. Masking the grout while painting can keep lines clean while you finish the surface. Recoloring grout products are options to consider if you want a longer-lasting look.
Sealing guidance matters: some coatings require sealing after curing, while others may not. Check the product label for grout compatibility, sealers, and maintenance intervals. Plan for possible touch-ups if grout edges wear differently than the tile faces.
Recoloring vs. masking grout
When your grout’s looking tired, you’ve got two main options: recolor or mask it.
Recoloring involves using paint or a grout pen to change the color. It’s quick and easy but might not last as long as masking. It’s best for minor discoloration.
Masking, on the other hand, fills in the grout lines with caulk or another filler. This gives a fresh look but can be more time-consuming. It’s great for hiding cracks and wear.
Both methods need good prep work – clean, dry surfaces. And both might need touch-ups over time. Choose based on your wall’s condition and the look you want.
Repairing and sealing grout before painting
Before you paint, check your grout. If it’s cracked or crumbling, repair it first. Use a grout saw to remove damaged areas, then fill with new grout.
Once repaired, let it cure. Then, seal it. A good sealer protects against moisture and stains. Choose one compatible with your paint – ask at the store if you’re unsure.
Sealing’s crucial. It helps your paint job last longer by keeping moisture out. But don’t skimp on prep work – clean surfaces take sealant better.
Let the sealer dry fully before painting. This could take a day or two, so plan ahead.
Durability, Maintenance, and Cleaning Post-Paint
Life expectancy depends on prep quality, the product chosen, and actual use conditions. Daily care should avoid abrasive cleaners that can dull or scratch the finish. Use gentle cleaners and soft cloths to preserve the look over time.
Be aware of factors that shorten durability, such as high heat exposure, damp conditions, and heavy scrubbing. Follow the manufacturer’s cleaning recommendations and avoid products that may degrade the film. Regular inspection helps you catch issues early.
Routine cleaning and stain removal
Use warm water and a soft cloth to clean your painted backsplash daily. Avoid harsh chemicals like bleach or abrasive sponges that can damage the paint.
For grease spots, mix equal parts dish soap and warm water. Apply with a sponge, let it sit for 5 minutes, then wipe off gently. Never scrub hard as it can wear down the finish.
To remove stubborn stains, use a soft-bristled brush or an old toothbrush dipped in your dish soap mixture. Work from top to bottom and rinse with clean water.
Touch-ups and periodic refresh
For small chips or scratches, touch up with leftover paint mixed earlier. Store it in an airtight container at room temperature for up to a year.
To apply, use a small artist’s brush or a cotton swab. Work quickly before the paint dries out. Let it dry completely before wiping off excess paint from the surrounding area.
If touch-ups aren’t enough – like after heavy scuffing or fading – consider a full refresh. It’s easier and cheaper than trying to match an old paint color.
Tools and Materials Checklist
Assemble a DIY-friendly set of tools including rollers, brushes, masking supplies, and a high‑bond primer. Include epoxy kits or compatible coatings if you’re choosing a two‑part system. Safety gear like gloves and a respirator is essential for ventilation and protection.
Check product labels for surface compatibility, drying times, and recoat windows. Have extra pads, rags, and painter’s tape on hand to keep lines clean. Consider optional tools that help achieve a professional finish if you’re aiming for a high-end look.
Safety and ventilation gear
Before you start mixing or pouring concrete, ensure you have the right safety and ventilation gear to protect yourself from harmful fumes and skin contact.
- Respirator: Check it fits properly and is suitable for concrete dust. Verify it’s in good condition and not expired.
- Gloves: Inspect them for tears or wear. They should be thick enough to protect your hands but flexible enough to work comfortably.
- Safety Glasses: Ensure they provide adequate protection from debris and are comfortable for extended use.
- Ear Protection: If using power tools near the concrete, check you have earplugs or earmuffs to protect your hearing.
- Ventilation: If working indoors, ensure there’s adequate ventilation. Open windows and use fans if necessary.
- Clothing: Wear long sleeves, long pants, and sturdy boots to protect your skin from concrete splashes.
- Concrete Mixing Area: Ensure it’s clean, flat, and free of debris to prevent accidents while mixing or pouring.
- First Aid Kit: Check you have a basic first aid kit on site in case of minor injuries.
Quick rule: Always prioritize safety. If you’re unsure about any gear, check the manufacturer’s instructions or consult with a professional before proceeding.
Suggested applicators and masking supplies
Use this checklist before you start applying your concrete sealant or overlay to ensure clean lines and long-lasting edges.
- Roller with 1/2″ nap: Check the roller cover’s nap length. A 1/2″ nap is ideal for most sealants and overlays as it provides even coverage without leaving marks.
- 9″ or 18″ roller frame: Ensure your roller frame fits the job. A 9″ frame is good for small areas, while an 18″ frame covers more ground quickly.
- Angled sash brush (1.5-2″): Inspect your angled sash brush. It’s crucial for cutting in edges and applying sealant to trim materials.
- Masking tape (3/4″ or 1.5″): Check the width of your masking tape. A 3/4″ tape is suitable for most jobs, but you might need a wider 1.5″ tape for larger areas or to create patterns.
- Blue painters’ tape: Ensure you’re using blue painters’ tape, not regular masking tape. Blue tape has a stronger adhesive and won’t peel off easily when wet.
- Caulk or trim material: Verify the caulk or trim material is compatible with your sealant or overlay. Check the manufacturer’s instructions to ensure proper adhesion and longevity.
- Scissors or utility knife: Have a sharp pair of scissors or a utility knife on hand to cut your masking tape and create clean lines.
- Plastic drop cloths: Inspect your plastic drop cloths. They should be large enough to protect the areas you’re not working on from spills and drips.
Quick rule: Always test your applicators, tapes, and sealants on a small, hidden area first to ensure compatibility and proper application.
Costs, Time Estimates, and Project Planning
Plan for prep, coat cycles, and curing windows without relying on exact numbers here. Budget considerations include primer, coatings, and any masking or sealer you choose. More complex color changes or grout work can affect overall time and cost.
Note factors that increase cost or time, such as damaged substrate, extensive masking, or multiple coats. Always check product cure times and local labor rates if you’re hiring work out, and confirm scheduling with your supplier or contractor before starting.
Time breakdown (prep, coats, cure)
Painting a tile-look backsplash isn’t a quick job. Here’s a typical timeline:
Prep: 1-2 days. This includes cleaning, repairing grout, and masking off areas.
Coats: 3-4 coats, with each coat taking about 2 hours to apply plus drying time. Allow at least 4 hours between coats for best results.
Cure: 72 hours minimum before touching or washing. Some products may take longer, so check the label.
Budgeting and value trade-offs
The cost of your project depends on several factors:
Materials: Higher quality paints and sealers last longer but cost more. Cheap paint may peel or fade quicker.
Prep needs: If your tiles are in poor shape, prep costs can add up. Consider hiring a pro for extensive repairs.
Tooling & labor: DIY saves money on labor but you’ll need to buy or rent tools. Hiring a contractor ensures quality work but adds labor costs.
Conclusion
You can get a durable, good-looking tile-like backslash that won’t break your budget or your walls, but success hinges on clean prep, the right paint choice, and careful application. Start with a small test area and follow a steady process to protect the surface and your time.
Check the substrate for dents or moisture, verify a clean, dry surface, choose a paint type that fits your budget and durability needs, prime if the product calls for it, apply in thin, even coats with proper drying times, and finish with appropriate top coats or sealant if recommended. Do the job in stages: prep, prime, paint, inspect, and cure before using the area normally. Test your first steps on a hidden patch to confirm adhesion and color before committing to the whole splash.
Common mistakes to avoid are skipping surface prep, over-wetting joints, applying too thick a coat, and ignoring cure times. Safety rules are simple: ventilate, wear eye and skin protection, and work with a dry or only lightly damp surface until you know the paint will hold. If the tile look is central to a high-traffic area, or if moisture, substrate damage, or peeling paint shows up in the test area, call a pro instead of pushing on. Stay practical, stay patient, and stay safe—the finish should look steady, last well, and be easy to maintain. You’ve got this.
FAQ
Can I paint over glossy tile, or do I need to do priming and surface prep first?
Glossy tile needs a bonding primer designed for slick surfaces. Lightly scuff the glaze with fine sandpaper to give the primer something to bite, then clean the dust off. Follow the primer label for dry times and whether you should apply a sealer first.
What if the tile glaze is peeling or the grout is cracked or missing?
Repair any peeling glaze and fix damaged grout before painting. Patch cracks or gaps with appropriate grout or patching compound, then clean and dry the area thoroughly. Do a test area to confirm the repair holds before committing to full painting.
How long will the paint last, and how should I maintain a painted backsplash?
Durability depends on use, cleaning, and proper curing. Use a soft cloth and mild cleaners; avoid harsh scrubbers. Follow the product’s cure instructions and recoat or touch up as needed after cleaning or wear shows up.
How do I choose the right topcoat or sealer for a tile-look backsplash?
Pick a durable enamel topcoat labeled for kitchens and moisture-prone areas. Check the label for compatibility with tile and the primer you used, and test a small area first. Ensure an appropriate sheen (often satin or semi-gloss) for wipeability and fake-grout aesthetics.