
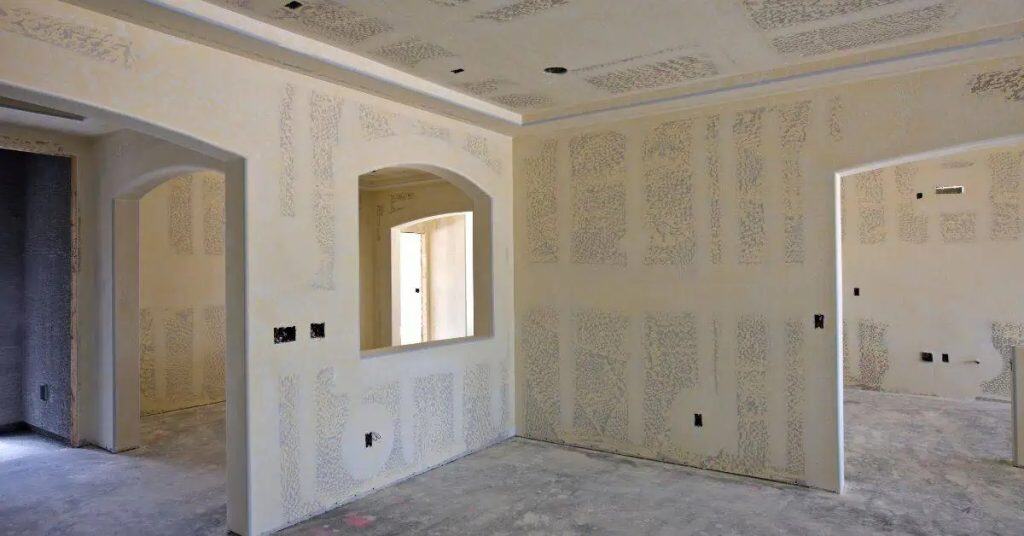
Introduction
Patching drywall after removing a tile backsplash involves repairing damaged drywall, smoothing feathered seams, and re-skimming the surface so it’s ready to paint. You’ll want to address old mastic footprints, tears, and any ridges or gouges left behind. Check for water stains or loose paint and plan repairs accordingly before you proceed.
Start by scraping away residual adhesive and loose texture, then apply patch compound to fill gouges and tears, feathering the edges onto clean drywall. If the area is textured, embed a mesh or tape over seams as needed, then apply additional coats until the surface is flush and smooth. Once dry, sand lightly, wipe down the dust, and follow the manufacturer’s instructions for priming and painting.
Key takeaways
- Inspect area for moisture damage and identify backing materials before patching.
- Clear dust, cover floors, and set plastic to control dust and debris.
- Wear eye protection and gloves; turn off electricity to outlets near work.
- Use a sharp utility knife to remove mastic in manageable, controlled lifts.
- Patch tears with drywall tape and joint compound, feather edges flush.
- Sand lightly, skim with lightweight compound, then prime before painting.
Table of Contents
- Introduction
- Key takeaways
- Assess the Damage and Scope the Job
- Safety, Site Prep, and Environment Control
- Tools and Materials Checklist
- Removing Old Mastic and Adhesive Residue Safely
- Repairing Tears, Gouges, and Missing Drywall
- Skim Coat Strategy and Material Selection
- Sanding, Texture Matching, and Visual Checkpoints
- Priming, Painting, Sealing, and Final Edge Details
- Conclusion
- FAQ
Assess the Damage and Scope the Job
Start by inspecting the surface for adhesive residue, torn paper, gouges, and signs of moisture. Use what you find to decide what needs to be repaired and what materials to use. If the damage is light and the substrate is sound, plan a small patch; if not, expect a section replacement.
A simple rule of thumb is to fix little issues with patches and compatible adhesives, but replace a full section when moisture, large gouges, or loose substrate are present. This matters because the wrong choice wastes time and can fail later, especially under use or humidity. Always check product labels or datasheets for specific instructions, since mix ratios, cure times, and suitability vary.
Inspect substrate and adhesive stains
Start by removing any loose mastic with a scraper. Look for:
Bonded thinset: If you see bits of sand or cement stuck to the wall, it means there’s still thinset underneath. You’ll need to grind this off.
Black adhesive stains: These indicate where mastic has seeped into the drywall paper. They won’t come off easily and may require extra sanding.
Rusted fasteners: If you find any, they’ll need to be removed and replaced with new ones.
Soft or delaminated paper: Gently press the drywall. If it feels soft or gives way, the paper may have separated from the gypsum core. This area will need extra attention during repair.
Decide repair vs replace
Before you start patching, decide if you need to cut out and replace the drywall section. Here’s how:
Patching is best for surface damage: small holes, cracks, or tears in the paper that don’t go through to the gypsum core.
Replace if you find:
– Wet rot: Any softness or discoloration indicates moisture damage.
– Large seams: If the tear is more than a few inches long, it’s easier to cut out and replace.
– Compromised studs: If the wall feels wobbly or you see cracks in the drywall at the studs, they may be damaged.
If you’re unsure, err on the side of caution. It’s better to replace a section than risk further damage trying to patch it.
Safety, Site Prep, and Environment Control
Wear proper PPE and keep a clean work area. Ventilate well and set up containment to control dust and fumes from heat or chemical removal. Protect cabinets and countertops so you don’t scar or stain them.
Good PPE and ventilation save you from inhaling junk and keep the rest of the house clean. Containment helps you finish faster with fewer surprises, and protecting surfaces prevents costly damage. Check the label or datasheet for PPE and ventilation guidance if you’re unsure.
Personal protective equipment and ventilation
The first line of defense against dust and chemicals is your PPE. Here’s what you’ll need:
- Respirator: A half-face respirator with a P100 filter will protect you from inhaling drywall dust and mastic fumes. Make sure it fits properly.
- Eye protection: Safety glasses or goggles will shield your eyes from debris. Consider using goggles if you’re prone to dust sensitivity.
- Gloves: Wear work gloves to protect your hands from cuts and chemicals. Disposable gloves can be used for handling mastic.
- Ventilation: Seal windows and doors with tape or plastic sheeting to contain dust. Use an exhaust fan, like a box fan in a window, to remove air from the room.
- Optional: HEPA vacuum: For a cleaner job, consider renting a HEPA vacuum for around $50-$75 per day. It’ll help control dust and make clean-up easier.
Protect adjacent finishes and utilities
Before you start, protect the areas around your work zone to prevent damage. Here’s how:
Tape off cabinets, countertops, and other nearby surfaces with painter’s tape and plastic sheeting. This will create a barrier against dust and debris.
Protect floors by laying down drop cloths or rosin paper. Secure them with tape to keep them in place.
Temporarily shut off nearby plumbing or electrical utilities if they could be affected by your work. For example, turn off water supply valves under sinks and unplug any nearby appliances.
Tools and Materials Checklist
This section gives you a simple checklist of the tools and consumables you’ll need for mastic removal, drywall repair, and skim coating. Focus on quality where it counts and decide what to borrow from a neighbor or rental place and what to buy for regular use. Keep the list practical and easy to follow, avoiding mishaps and rework.
Having the right tools and materials speeds the job and keeps the finish clean. It matters because wrong staples, dull scrapers, or cheap joint compound waste time and money. When in doubt, check the product label or datasheet for use, safety, and application guidance.
Essential tools
Before you start any concrete work, make sure you have all the essential tools on hand. This checklist will help you verify that you’ve got everything you need to get the job done right.
- Concrete Scraper: Check blade condition; replace if dull or damaged. Test by running it along a flat surface – it should glide smoothly.
- Oscillating Tool (optional): Ensure it’s in good working order with no excessive vibration. Try cutting through a small piece of wood to test its functionality.
- Drywall Knife: Inspect for bends or nicks; straighten or replace as needed. Check trowel edge – it should be smooth and even.
- Mixing Drill: Verify drill’s condition, checking for proper speed and torque. Test by mixing a small batch of concrete to ensure it works correctly.
- Sanding Tools (for finishing): Inspect sandpaper; replace if worn or torn. Check sander – it should run smoothly with no excessive noise.
- Backing Supports: Ensure they’re sturdy and can hold the weight of wet concrete. Test by applying gentle pressure to confirm stability.
Quick rule: Always inspect your tools before starting any work. Damaged or poorly functioning tools can lead to costly rework and poor results.
Recommended materials and product types
Before you start your drywall project, use this checklist to ensure you have the right materials. Check each item as you gather your supplies.
- Drywall Compound (Setting-type): Read label for setting time and mix ratio. Ensure it’s suitable for your project size and timeline.
- Pre-mixed Joint Compound: Check consistency; it should be smooth, not lumpy or separated.
- Drywall Tape: Confirm it’s paper tape, not mesh. Ensure it’s wide enough for your joint width.
- Bonding Primer: Read label to ensure it promotes adhesion and is suitable for your compound type.
- Stain-blocking Primer: Check label for stain-blocking claims. Use before painting to prevent stains from bleeding through.
- Joint Compound Alternatives (e.g., lightweight, all-purpose): Read label for intended use and properties. Ensure it’s suitable for your project needs.
- Fasteners: Check length and type (screws/nails) match drywall thickness and stud spacing.
- Caulk: Read label for intended use (e.g., paintable, sandable). Ensure it’s suitable for your project needs and finish.
Quick rule: Always read product labels to confirm compatibility with other materials and local conditions. Skipping this can lead to improper curing, adhesion issues, or poor final finishes.
Removing Old Mastic and Adhesive Residue Safely
Start with the gentlest removal method and test a small, hidden area first. Only move to stronger methods if the adhesive resists, and decide early whether you must remove all residue or if skimming is acceptable.
Residue left under a new layer can cause bonding problems and moisture traps later on. Following the right order saves time and prevents damage; always check the product label or datasheet for how to proceed.
Mechanical removal techniques
Start by scraping off any loose mastic with a putty knife. Be gentle to avoid tearing the drywall paper.
For stubborn residue, use an oscillating tool fitted with a scraper blade or a plane. Work carefully, applying steady pressure. If you feel resistance, back off and try again at a different angle.
Remember, the goal is to remove the mastic, not the drywall. Be patient and take your time.
Heat and chemical methods — risks and limits
Heat guns can soften old mastic, making it easier to remove. But beware of overheating the drywall paper. Keep the gun moving and maintain a safe distance.
Adhesive solvents like denatured alcohol or methyl ethyl ketone (MEK) can dissolve stubborn residue. Apply with a brush, let it soak in, then scrape off. But be cautious — solvents give off harmful fumes. Ventilate well and use personal protective equipment.
Know when to stop. If the mastic isn’t budging, switch back to mechanical removal. You don’t want to damage the drywall or expose yourself to excessive chemicals.
Repairing Tears, Gouges, and Missing Drywall
Tears, gouges, and missing drywall should be repaired with a method that fits the damage size. For torn paper, skim and tape; for medium holes, patch plugs or backing; for extensive damage, install new drywall sections.
Using the right method keeps walls flat and strong, and it saves you time on long-term repairs. If you’re unsure, follow the product instructions and, when in doubt, ‘check the label/datasheet’. Avoid shortcuts or skipping steps, or you’ll pay for it later with cracks or a uneven finish.
Small tears and paper damage repair
First, score around the tear with a utility knife to loosen any remaining paper. Apply bonding primer to the damaged area and let it dry.
Embed a piece of drywall tape into the primed area using a taping knife. Press firmly to ensure good adhesion.
Mix some joint compound and apply a thin coat over the tape, feathering the edges to blend with the surrounding wall. Let it dry, then lightly sand and apply another thin coat if needed.
Patching larger holes and installing backing
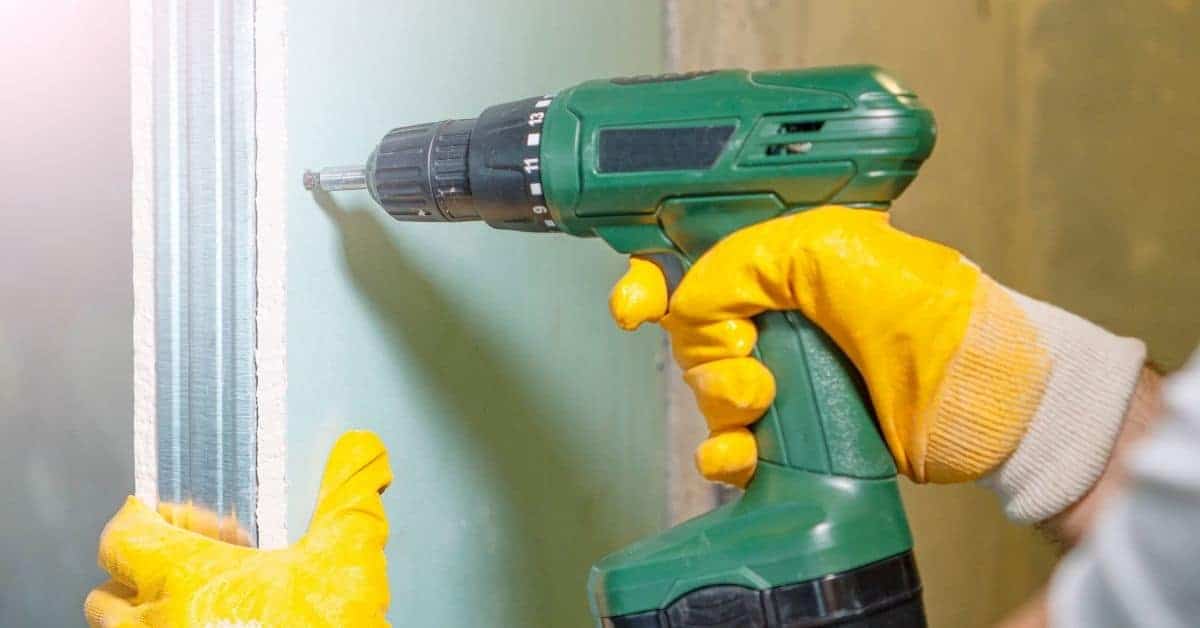
For holes up to a few inches, install backing strips. Apply drywall adhesive to the back of the strip and press it firmly into place around the hole.
If the hole is larger, cut a piece of drywall to fit. Apply adhesive to both the patch and the wall, then press the patch into place. Secure with screws driven just below the surface.
Apply joint compound over the patch, feathering the edges. Let it dry, then sand lightly before applying another coat if needed.
Skim Coat Strategy and Material Selection
Skim coating is about building up thin, even layers in the right order. Decide between quick-setting compounds and all-purpose joint compound, then apply one layer at a time. Use multiple thin layers when the surface needs more build or to hide imperfections.
Choosing the right mix and layer sequence saves headaches later. It helps you avoid cracks, shrinkage, and uneven patches. Check product labels and instructions for your mix and surface to stay safe and get a smooth finish.
Choosing Setting-Type Compound vs Air-Dry Mud
When it comes to skim coats, you’ve got two main options for your mud: setting-type compounds and air-dry mud. Both have their pros and cons.
Setting-type compounds dry faster and are harder, making them great for filling deep repairs where you need a quick turnaround. They’re also less likely to shrink or crack as they cure. But here’s the catch – they’re tougher to sand and rework once they’ve set.
Air-dry mud, on the other hand, is easier to sand and rework while it’s still wet. This makes it ideal for fine-tuning your finish or fixing any imperfections before the final sanding. However, it takes longer to dry and can be more prone to shrinking and cracking if not applied correctly.
Before you make your choice, check the product instructions for working time. And remember, no matter which one you pick, always ensure you’ve got a solid base with proper compaction. Skim coats can’t fix poor prep work.
Applying the skim coat and feathering technique
The key to a smooth skim coat is mixing your compound right. Check the manufacturer’s instructions for specific ratios, but aim for a consistency like thin peanut butter.
Start by spreading the mix with a 12″ trowel, working it into the surface in small sections. Use a 6″ trowel to smooth out any ridges or air pockets. For a really smooth finish, use a magnesium float after the compound starts to set but is still workable.
Feathering edges is crucial to prevent visible lines where your repair meets the existing wall. Start at the edge of the damaged area and spread the compound outwards in a tapering motion, reducing the thickness as you go. This should create a smooth transition from your repair to the original surface.
Apply multiple thin coats for best adhesion. Let each coat set according to the manufacturer’s instructions before lightly sanding with fine-grit sandpaper and vacuuming off any dust. Then, apply the next coat. This layering technique helps prevent cracking and ensures a strong bond between your skim coat and the wall.
Sanding, Texture Matching, and Visual Checkpoints
Sanding, texture matching, and visual checks are your path to a near-invisible repair. Start with light, even sanding to smooth the patch edges. Compare the texture with the surrounding backsplash and adjust until the surface reads continuous.
This matters because a good match makes the primer and paint disappear. It gives you a durable repair that won’t shout for attention. If unsure about the right grit, patch material, or texture technique, check the product label or datasheet for guidance.
Sanding best practices and dust control
Start sanding once the skim coat is completely dry. This step smooths out any remaining imperfections.
- Use progressive grits: Start with 120-grit, then move to 150 and finally 220 for a smooth finish.
- Dust collection or HEPA vacuum: Use one to keep your workspace clean and reduce the risk of breathing in dust.
- Avoid over-sanding paper: Be careful not to sand through the paper, which can cause drywall damage.
- Edges and corners: Pay extra attention here. Use a sanding sponge or folded sandpaper for better control.
- Wet sanding: For final passes, use water to prevent dust and achieve a smoother finish.
- Avoid dry sanding too long: Prolonged dry sanding can cause paper to tear or edges to crumble.
- Check for level: Use a straight edge to ensure the patched area is level with the surrounding wall.
- Feel for smoothness: Run your hand over the patch. It should feel as smooth as the rest of the wall.
Quick rule: Always wear a dust mask and safety glasses when sanding.
Matching texture and final visual inspection
Before priming, ensure the patch matches the surrounding wall’s texture and is ready for paint.
- Texture match: Use a knockdown texture spray or orange peel roller to mimic existing texture. Apply lightly for best results.
- Check for smoothness: Run your hand over the patch. It should feel like the rest of the wall.
- Inspect for level: Use a straight edge to ensure the patched area is level with the surrounding wall.
- Look for imperfections: Check for any missed spots, nicks, or gouges that need touch-up sanding.
- Check for dust: Ensure there’s no residual sanding dust. Wipe down if necessary.
- Inspect edges: Make sure the patch blends seamlessly with the surrounding wall.
- Color match: If possible, compare the patch to an adjacent, unpatched area to ensure color match before priming.
- Final check: Step back and look at the entire wall. The patch should blend in seamlessly.
Quick rule: Always do a final walkthrough with good lighting to catch any missed spots.
Priming, Painting, Sealing, and Final Edge Details
Priming, painting, and sealing a backsplash starts with using a stain-blocking or bonding primer over any adhesive stains. Use the right caulk at the seams where backsplash meets walls or countertops, and add moisture protection behind the tile if needed. If in doubt, check the primer label for stain coverage and bond strength.
This matters because proper bonding and sealing prevent peeling, mold, and water damage in kitchens and baths. Select products that match your substrate and follow the label or datasheet; if you’re unsure, check local rules and disposal guidelines.
Priming and blocking adhesive/metal stains
Before you start painting, you need to prime the patched area. But not just any primer will do. If you’ve got old mastic or metal stains, you’ll want a stain-blocking primer.
These primers are designed to seal in and block out stains that could bleed through your paint. They’re especially useful when dealing with adhesive residue or rust from the old tile backsplash.
Pro tip: Always follow the manufacturer’s instructions for application and drying times. And remember, a good primer is key to a lasting finish.
Final paint, caulk, and waterproofing considerations
Now that your patch is primed, it’s time to pick a paint. In high-moisture areas like kitchens, opt for a semi-gloss or gloss finish. These are more durable and easier to clean.
When it comes to caulking, less is more. Apply a thin bead along the seam where your backsplash meets the countertop or cabinets. Use a damp finger to smooth it out and create a tight seal.
Waterproofing: If you’re planning on re-tiling, consider installing a thin waterproof membrane or backer behind the new tile. This can help prevent moisture from getting trapped and causing damage over time.
Conclusion
Finish with a patch that stays true to the room: safety first, durability second, and a look that blends with the rest of the wall. If you do this right, you avoid call-backs and you get a surface that paints smooth and lasts.
Check that electricity and water are shut off where you’re working, inspect for any hidden damage behind the old mastic, clean and dry the area, remove all adhesive safely, repair tears and gouges with appropriate drywall compound, choose a skim coat and apply it evenly, sand in light layers, test texture until it matches, then prime, paint, seal, and finalize with clean edge details before you call it done.
Avoid common mistakes that wreck results: don’t skim over torn edges or skip repairs, don’t over-wet mud or rush drying, and don’t skip priming or edge sealing. Keep the workroom ventilated, wear a mask and eye protection, and test a small area first to confirm adhesion and texture before committing to the whole patch.
If you find rot, major framing issues, or moisture behind the backsplash, or the patch still looks uneven after a couple of passes, it’s time to bring in a professional. Stay steady, stay safe, and you’ll finish strong and move on to the next project with confidence.
FAQ
How do I know if the drywall behind the tile area is too damaged and needs more than patching?
Look for soft spots, deep gouges, or areas that crumble under light pressure. If studs or backing are loose or rotten, you’ll need to fix those first before patching. When in doubt, verify with a quick pry test and follow up with proper repairs per label and instructions.
What’s the safest way to remove stubborn mastic without tearing into the drywall?
Use a scraper and a heat source or solvent applied to a small area, working gradually. Keep the blade flat and light to avoid gouging. If you’re unsure about products, check the adhesive label or manufacturer guidance and work in small sections.
How do I know when the drywall patch is ready for the skim coat?
The patch should be securely embedded and flat to the surface with no loose edges. It should feel solid when you press it and sit flush with the surrounding wall. If you’re unsure, test for adhesion and skin contact with a light probe before moving on.
What should I watch for when matching texture after skimming?
Keep your skim coat even and allow it to dry according to the product instructions. Practice on a small, inconspicuous area if possible and compare to adjacent walls before final finishing. If you spot texture or sheen differences, assess your technique and product guidance, then adjust as needed.