

Introduction
Concrete curing indoors means managing excess moisture so the mix dries evenly and won’t trap water that causes problems. Moisture comes from rain, groundwater, and interior activities, and your curing plan should keep the surface and near-surface air balanced. Keep the space accessible for air, avoid sealing off all drying paths, and use safe moisture control methods while the concrete cures.
Moisture problems often stem from inadequate grading, defective gutters, or improper window wells that channel water toward the slab. Capillary suction pulls moisture up through the concrete, so focus on preventing water entry from above and below before finishing. For basement areas, address gutters, downspouts, and grading as practical steps, and check product labels or manufacturer instructions for any curing or sealing products you plan to use, plus local rules.
Key takeaways
- Control indoor moisture by sealing leaks, directing gutters, and proper ventilation.
- Capillary action pulls moisture through concrete; use vapor barriers and damp-proofing coatings.
- Inspect for inadequate grading and window wells before pour to reduce damp intrusion.
- Manage moisture sources like rain, groundwater, and interior activities with a plan.
- Follow manufacturer instructions and local codes; improper curing risks health and structure.
- During curing, control humidity and airflow to prevent mold while finishes cure properly.
- Post-pour inspections and drying protocols prevent mold and mess without downtime.
Table of Contents
- Introduction
- Key takeaways
- Why Indoor Concrete Curing Matters: Risks to Health, Finishes, and Structure
- Sources of Moisture to Manage During Indoor Curing
- How Moisture Moves Through Concrete and Assemblies
- Indoor Curing Methods That Control Moisture Without Creating Mold
- Site Prep and Moisture Evaluation Before Pouring Indoors
- Practical Moisture-Control Strategies During and After Curing
- Preventing Mold and Finishing Without Mess
- Tools, Materials, Standards, and DIY Cost-Effective Tips
- Conclusion
- FAQ
Why Indoor Concrete Curing Matters: Risks to Health, Finishes, and Structure
Indoor curing blends chemistry and environment in ways that can affect crack formation, strength, and finish integrity. Improper moisture control can lead to cracking, curling, and delamination of finishes when humidity is high or uneven. Excess moisture in the air can accelerate efflorescence and other surface issues that undermine long term durability.
Moisture also ties directly to indoor air quality and habitability. Mold growth, dust, and particulate issues can rise where curing moisture is not managed, especially near vents and wet activities. Look for signs like musty odors or visible staining to gauge risk and plan monitoring.
Health and indoor air risks
Improper concrete curing indoors can lead to persistent dampness, creating an ideal environment for mold growth. Mold can cause or worsen allergies, asthma, and other respiratory issues.
Be concerned if you notice musty odors, visible mold, or increased allergy symptoms after pouring concrete indoors.
Excess moisture also increases dust and particulate matter, further degrading indoor air quality. Keep humidity levels in check to protect your family’s health.
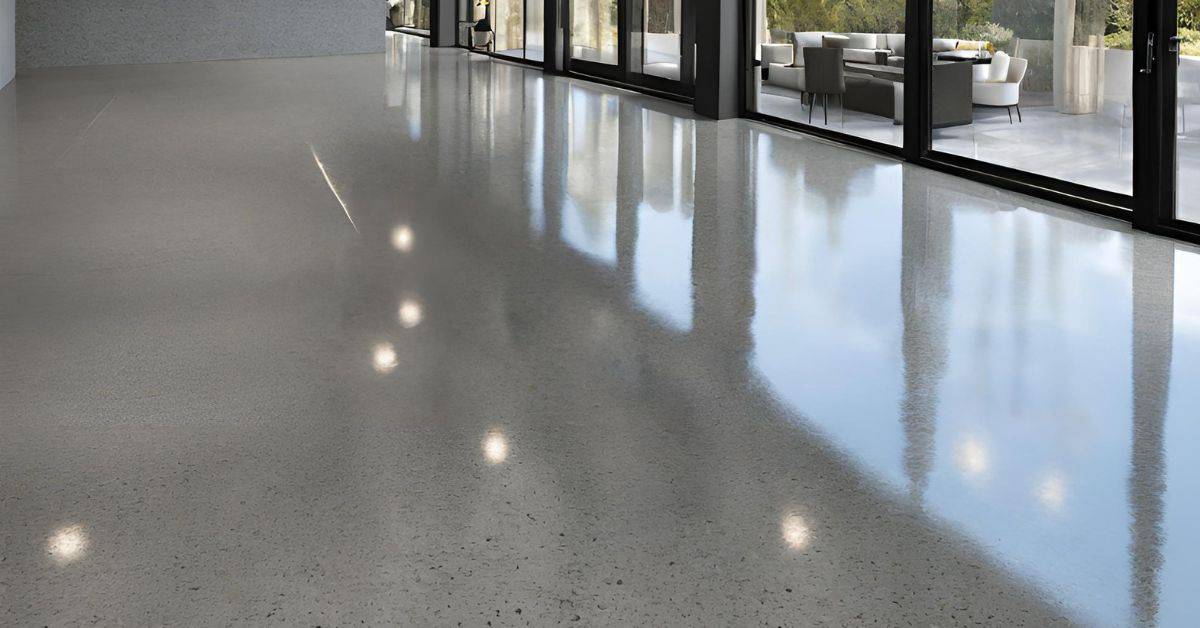
Damage to concrete and interior finishes
Concrete that’s not properly cured can suffer from surface spalling, where the top layer flakes off. This weakens the structure and ruins the finish.
Excess moisture drives efflorescence – a white, powdery deposit on the surface. It’s unsightly and can lead to delamination of applied finishes like paint or tile.
Curing-related moisture can also cause adhesive failure, leading to peeling or cracking of interior finishes.
Balancing proper curing with moisture control
Concrete needs moisture to cure properly. But too much ambient moisture can foster mold growth and cause other issues.
To strike a balance, use sealants or barriers to prevent excess moisture from penetrating the concrete. Keep humidity levels between 40-60% relative humidity (RH) for optimal curing without encouraging mold.
Proper ventilation is key too. Use fans or open windows to maintain air circulation and prevent stagnant, damp air.
Sources of Moisture to Manage During Indoor Curing
Identify all indoor moisture inputs that affect curing, including substrate moisture and humidity from the space itself. Groundwater or high basement humidity can push moisture into the slab, while construction moisture can linger after pours. Plan for these sources before you begin.
Indoor activities add to the load as well, from showers and cooking to humidification and HVAC operation. Track how vapor moves through slabs, walls, and any vapor barriers, and note seasonal swings that change moisture levels. Check labels and manufacturer instructions to confirm acceptable practices.
Substrate and Groundwater Contributions
Before pouring, check your subgrade. Residual water here can seep into your new slab.
Damp slabs-on-grade are a common issue. Capillary rise can bring moisture from the ground up into your concrete.
If you’re working in a basement, groundwater could be an issue. High water tables or hydrostatic pressure can push moisture through cracks or porous materials.
Address these issues before pouring. Seal the subgrade, ensure proper drainage, and deal with any dampness in the slab.
Interior Sources and Construction Activities
Indoor moisture isn’t just from outside. Plumbing leaks, humidifiers, or even drying materials can raise relative humidity (RH) during curing.
Occupant activities like cooking, showering, or laundry also contribute to indoor moisture. These tasks increase RH, which can affect your concrete’s cure.
Construction activities can bring in extra moisture too. Rain or snow tracked inside, wet materials, or even breathing (yes, really) can raise RH.
Control these sources as much as possible during curing. Fix leaks promptly, vent humid tasks to the outside, and keep doors open for ventilation when practical.
Exterior Drivers That Affect Indoor Curing
Moisture from outside can sneak in and affect your concrete’s cure. Poor grading around your foundation lets water seep in.
Clogged gutters or downspouts direct water towards your foundation instead of away from it. This increases the risk of moisture intrusion.
High water tables around your basement can push moisture through cracks or porous materials, raising RH inside.
Before pouring, ensure your grading is proper, gutters are clear, and any basement cracks are sealed. Regularly inspect and maintain these areas to keep moisture out.
How Moisture Moves Through Concrete and Assemblies
Moisture moves in three main ways: diffusion of water vapor, capillary rise in porous concrete, and liquid movement through microcracks. Temperature and humidity gradients drive each pathway and determine where control is needed. Understanding these helps you target the right barriers.
Moisture travels through assemblies by following interfaces between concrete, insulation, vapor barriers, and finishes. Permeability, sealants, and coatings influence how much moves and where it collects. Watch for signs like damp patches or efflorescence as clues to pathways.
Capillary suction and liquid transport
Concrete is porous. Water loves these tiny gaps. It gets sucked up, like a straw in a drink.
This capillary action pulls water from below into your slab. Through joints too. Even microcracks can fill with water this way.
Key point: Keep water away from the bottom of your slab to stop this happening.
Vapor diffusion and vapor pressure gradients
Water turns into vapor, a gas, when it’s hot. This vapor moves through materials, like concrete, seeking cooler spots.
Indoors is usually cooler than outdoors. So, water vapor from outside wants to get inside your concrete. Then, when it hits the cool interior, it condenses back into liquid water.
Key point: Control indoor humidity and seal exterior surfaces to stop this happening.
Air leakage and the stack effect
Air moves through cracks, sump pits, and openings. Like how smoke rises in a chimney, air moves from low to high pressure.
This airflow carries moisture. When it hits cooler surfaces inside, condensation happens. That’s moisture on your walls or ceilings.
Key point: Seal air leaks and ensure proper ventilation to stop this happening.
Indoor Curing Methods That Control Moisture Without Creating Mold
Set clear goals for curing indoors: keep the slab hydrated enough for strength while avoiding excessive humidity that feeds mold. Do not rely on a single method; verify compatibility with the surface and finishes by checking product instructions and labels. When in doubt, compare options against your space and project type.
Evaluate methods like curing blankets, plastic sheeting, or controlled misting against humidity management needs. Consider how sealers, curing compounds, or post-cure sealants interact with the environment and future floor coverings, and document recommended use cases from the manufacturer.
Wet-curing alternatives and best practices
Indoor concrete curing doesn’t always mean soaking. Controlled wet methods can keep your slab hydrated without drowning it.
Plastic sheeting or curing blankets are popular choices. They trap moisture, keeping the surface damp but not flooded. Follow product guidance for application and removal to avoid excess ambient humidity.
Misting or fogging is another option. It keeps the slab hydrated without oversaturating it. Use a fine mist and control humidity levels to prevent mold growth. Monitor moisture content with a meter, pausing curing if RH exceeds 70-80%.
Never leave wet coverings on too long. They can trap moisture, leading to condensation and mold. Keep an eye on your slab, adjusting methods as needed.
Curing compounds and temporary membranes
Curing compounds and breathable membranes slow surface evaporation, helping concrete gain strength without excess moisture buildup.
Curing compounds form a thin, flexible film on the surface. They reduce water loss but allow some vapor transmission. Apply according to manufacturer instructions for best results.
Breathable membranes, like curing blankets or plastic sheeting with holes, also control evaporation. They let excess moisture escape while keeping the slab hydrated. Choose products that meet industry standards and follow application guidelines.
Both have pros and cons. Curing compounds can be messy to apply and remove. Membranes may not adhere well to rough surfaces. Select based on your project’s needs and manufacturer recommendations.
Internal curing admixtures and mix design considerations
Internal curing reduces external moisture needs by incorporating water-retaining materials into the concrete mix. This helps control ambient humidity during curing.
Admixtures like fly ash, slag, or silica fume absorb water, releasing it slowly as the concrete hardens. They also improve strength and durability. Consult suppliers for application guidance and mix design adjustments.
Internal curing doesn’t eliminate the need for surface protection entirely. It just reduces it. Use temporary membranes or compounds to control evaporation at the surface while internal curing happens below.
Remember, every project is unique. What works best depends on your concrete mix, slab size, and indoor conditions. Always consult with a professional if you’re unsure.
Site Prep and Moisture Evaluation Before Pouring Indoors
Before a pour, lay out a moisture plan that fits the space. Note indoor humidity targets and the ventilation approach you will use during cure. Create a controlled environment window if needed to prevent excess moisture exposure.
Document moisture testing and substrate checks, then outline subgrade prep steps and barrier placements. Plan for drainage and containments to keep moisture away from the pour area, and review safety and mold prevention procedures with the crew.
Moisture assessment tools and checks
Before you pour, it’s crucial to assess the moisture levels of your slab and substrate. This helps prevent issues like delamination and mold growth during curing.
- Visual Checks: Look for signs of moisture damage, such as stains or efflorescence. It’s free and easy but not conclusive.
- Moisture Meters ($30-$150 to rent): These measure the moisture content in your substrate. Ideal for concrete slabs, they’re quick and non-destructive. Aim for readings below 4% for new slabs.
- Calcium Chloride Test ($20-$50 per test): This is a more accurate method that measures moisture by weight gain. It’s recommended before pouring but can be messy and time-consuming.
- Non-Invasive Moisture Meters ($100-$300 to buy): These use radio waves or capacitance to detect moisture without damaging surfaces. They’re more expensive but offer peace of mind.
- Follow Manufacturer’s Guidelines: Always follow the specific product thresholds and testing methods recommended by your concrete supplier or manufacturer.
Subgrade, vapor retarder, and drainage prep
Preparing the subgrade, placing a vapor retarder, and ensuring proper drainage are key to controlling moisture during curing.
Subgrade: Ensure your base is clean, level, and well-compacted. Remove any organic materials or debris that could decompose and cause issues later on.
Vapor Retarder: Place a 6-mil polyethylene sheet over the subgrade before pouring. This prevents moisture from migrating upwards into your slab. Seal seams and edges to ensure it’s effective.
Drainage: Ensure water can drain away from your pour area. This might involve installing temporary floor mats, containment zones, or even a simple slope away from the slab. Never let water pool under your slab!
Coordinating exterior fixes before interior curing
Before you start your indoor pour, address any moisture issues outside to prevent them from affecting your cure.
Gutters: Ensure they’re clean and directing water away from your foundation. Clogged gutters can cause water to back up and seep into your basement or slab.
Grading: Make sure the ground around your home slopes away from the foundation. This prevents water from pooling next to your walls or slab, which could lead to hydrostatic pressure problems.
Window Wells & Sump Pits: Check these for cracks or leaks. Seal any issues before pouring to prevent moisture from entering during cure.
Practical Moisture-Control Strategies During and After Curing
Set a target RH range and implement simple monitoring with reliable sensors. Place meters thoughtfully and establish a routine for readings during the cure. Use this data to adjust methods as needed to maintain a balanced environment.
Balance ventilation, dehumidification, and heat to support even curing without creating drafts or condensation. Plan temporary enclosures and sequencing to avoid trapped moisture, and outline a post-cure drying plan to finish cleanly.
Using dehumidifiers and ventilation safely
Dehumidifiers and proper ventilation are your best friends during indoor concrete curing. They keep moisture levels in check, preventing mold and mess.
Dehumidifiers remove excess water vapor from the air. But be careful not to overdry the substrate. Follow manufacturer guidelines to avoid drawing too much moisture out of the concrete, which can cause it to cure too quickly and weaken.
Ventilation is key too. Open windows when humidity levels are low, use exhaust fans when needed, but avoid drafts that could hinder uniform curing. Keep doors closed when fans are running to maintain a consistent environment.
Temporary heating, insulation, and enclosures
Heating and insulating your concrete during curing helps stabilize temperature and humidity. But remember, too much heat can cause condensation and mold if not monitored.
Use space heaters or temporary heating blankets to maintain a consistent temp around 70-80°F (21-27°C). Insulate with plastic sheeting or foam boards to keep that heat in. Monitor humidity levels closely to prevent condensation from forming on cooler surfaces.
Temporary enclosures can help too, but they need proper venting to avoid trapping moisture. Seal doors and gaps with draft barriers to maintain a controlled environment without creating a breeding ground for mold.
Sequencing work to minimize exposure
Scheduling your work right is crucial to keep moisture under control. You don’t want high-moisture activities overlapping and trapping excess water.
Here’s a suggested sequence: Pour the concrete, let it set initially, then apply curing compounds or temporary membranes. After that, dewatering can begin. Make sure each step is complete before moving on to avoid trapping moisture.
Plan your finishes and wet trades carefully too. Avoid applying them while high-moisture activities are ongoing. Allow controlled drying time before applying any finishes to prevent mold growth and surface staining.
Preventing Mold and Finishing Without Mess
Keep an eye on moisture during curing by tracking ambient humidity and surface moisture. Promptly address damp spots and encourage even air flow to prevent pockets where mold could take hold. Schedule inspections within a practical window after curing to catch issues early.
Plan finishing timing around tack-free or dry-to-touch conditions and choose compatible finishes with cured concrete. Verify surface compatibility, test adhesion areas, and maintain a clean, dust-free environment to prevent mess and failures.
Mold-prevention monitoring and quick actions
Keep an eye on your concrete during curing. Moisture is inevitable, but mold isn’t.
Monitor: Use a hygrometer to track humidity levels. Keep it around 50-60% for best results. Check corners and edges where moisture can hide.
Act fast: If you see condensation or signs of mold, clean and dry the area immediately. Don’t let moisture linger.
Sealing, insulation, and joint treatments for finished spaces
Once cured, seal your concrete to keep moisture out. This isn’t just about preventing mold; it’s also about protecting your finish.
Seal: Use a compatible sealer that suits your chosen finish. Low-odor options are best indoors.
Insulate: Insulate perimeters to prevent moisture from getting in through cracks or gaps.
Joints: Detail control joints properly to limit future cracking and moisture intrusion.
When to call professionals
DIY is great, but sometimes you need a pro. Here’s when to pick up the phone:
Water intrusion: If water keeps coming in despite your best efforts, it’s time to call a waterproofing specialist.
Mold: Widespread mold growth needs professional remediation. Don’t try to tackle it alone.
Structural cracks: Cracks wider than a credit card need a structural engineer’s eye. Safety first, always.
Tools, Materials, Standards, and DIY Cost-Effective Tips
Put together a lean kit for indoor curing that covers moisture meters, hygrometers, plastic sheeting or curing blankets, a dehumidifier and fans, vapor barriers, and compatible curing compounds or sealants. Align your selections with project needs and space constraints.
Consult standards, datasheets, and code references before starting, and cross-check product labels and SDS for indoor air quality guidance. Look for budget-friendly substitutions and practical visual checkpoints to keep progress on track.
Tools and materials checklist
Use this checklist before you start your indoor concrete curing project to ensure you have all the necessary tools and materials.
- Moisture meter: To check subgrade moisture levels before pouring. Skipping this can lead to excessive moisture trapped under your slab, causing issues later on.
- Hygrometer: To monitor humidity levels during curing. Neglecting this can result in improper curing and potential damage to the concrete.
- Plastic sheeting or curing blankets: For containment and moisture retention. Not using these can cause rapid drying, leading to weak concrete.
- Dehumidifier/fan setup: To control humidity levels and provide ventilation. Without this, mold growth is a risk.
- Vapor barrier: To prevent moisture from the subgrade from migrating into the slab. Skipping this can lead to excessive moisture in your concrete.
- Curing compounds or sealants: Compatible with your concrete mix and conditions. Not using these can result in improper curing, leading to weak concrete.
- Tape measure: To ensure proper containment layout and placement of equipment.
- Thermometer: To monitor temperature during curing. Rapid temperature shifts can cause cracks or other damage.
Quick rule: Always verify compatibility with your specific concrete mix and manufacturer instructions to avoid common mistakes.
Material specs, standards, and what to check
Before purchasing materials, consult these guidelines to ensure you’re meeting industry standards and manufacturer requirements.
- ASTM C156/C156M: Standard Test Method for Sampling and Testing Fly Ash or Bottom Ash for Use as a Mineral Admixture in Portland-Cement Concrete. Check this standard to ensure your fly ash meets quality control criteria.
- Manufacturer datasheets: Review these to understand product application, coverage rates, and compatibility with other materials.
- Warranty requirements: Ensure products meet warranty conditions before purchasing.
- VOC compliance notes: Check for low or zero VOC emissions to maintain indoor air quality.
- Product SDS (Safety Data Sheet): Review this to understand product hazards, handling, and storage requirements.
- Curing standards: Consult ASTM C309/C309M for standard practice for curing concrete. This helps ensure proper curing methods are used.
- Moisture test standards: Review ASTM F2170 and F1869 to understand moisture testing procedures and acceptable moisture content levels in slabs.
Quick rule: Always consult manufacturer datasheets, industry standards, and product SDS before purchasing materials to ensure proper performance and safety.
Visual checkpoints, common failure signs, and budget-minded tips
Regularly inspect your curing project for these visual cues to ensure everything is proceeding as expected.
- Damp rings: On walls or ceilings indicate excessive moisture. If seen, address the source of moisture immediately.
- Efflorescence: A white, powdery deposit on surfaces can signal high moisture levels. If present, consider using a vapor barrier.
- Condensation: On windows or other surfaces indicates high humidity. If noticed, adjust your dehumidifier/fan setup.
- Cracking or delamination: In containment materials can indicate improper installation or equipment failure. Inspect and repair as needed.
- Mold growth: Any signs of mold should be addressed immediately to prevent spread and potential health issues.
- Concrete surface appearance: Check for proper curing, uniform color, and no visible cracks or defects.
- Equipment condition: Regularly inspect dehumidifiers, fans, and other equipment to ensure they’re functioning properly.
Quick rule: While DIY is cost-effective, some tasks like mold remediation or complex equipment repairs may require professional help. Know when to call in the experts.
Conclusion
Indoor curing is about control. When you manage moisture, you protect health, preserve finishes, and keep the slab straight and strong. Do the steps now with discipline, and you’ll avoid costly touch ups later.
First, confirm the plan: check for moisture sources before you pour, verify that the space is clean and sealed where needed, test airflow and humidity, and set your curing method to match the job. Then proceed in sequence: prep and test a small area if you’re unsure, install any needed moisture barriers, pour and monitor moisture movement as you go, maintain temperature and airflow for the cure, and finish with ongoing protection until the concrete reaches the right set. Keep notes on readings and adjustments so you can repeat or fix fast if conditions shift.
Common mistakes to avoid are obvious but costly: don’t pour into a space with hidden dampness or rising humidity, don’t leave the space open to drafts or direct heat that speeds uneven curing, and don’t skip the post-pour checks or move on to finishing while moisture is still high. Use safe practices: test areas first, follow fair curing times, and limit handling until the surface is hard enough. If the space can’t be kept within safe moisture and temperature ranges, or you see signs of mold risk, stop and reassess before proceeding.
If moisture control becomes too complex or large for a DIY job, or you run into uncertain readings, call in a professional for a quick assessment. With careful planning and steady execution, you’ll get a durable, clean finish that lasts and looks right. Stay practical, stay safe, and stay on track.
FAQ
What are common indoor moisture sources that can flood a curing slab?
Rainwater and groundwater can seep in through walls or floors, even when you aren’t pouring. Interior activities like bathing, laundry, or high humidity can add moisture that drafts into the curing space. Keep an eye on any leaks and manage humidity with simple ventilation when you can.
How do improper site conditions cause moisture problems for indoor pours?
Bad grading or low spots let water collect around the foundation and floor edges. Defective gutters or overflowing downspouts push water toward the slab. Window wells that aren’t drained can give groundwater a path into the space.
What is capillary suction and how does it affect curing indoors?
Capillary action pulls moisture from the ground into the concrete. Indoors, this can push damp air or water up into finished spaces if the slab isn’t properly sealed or if humidity is high. Controlling moisture at the source and sealing the surface helps slow this effect.
What practical steps can I take to control moisture during indoor curing?
Keep surfaces and airdrying areas as dry as possible with ventilation and dehumidification. Use a moisture barrier if your plan allows, and follow the concrete manufacturer’s curing instructions. Check labels and local rules if you’re unsure about products or methods.