

Introduction
Getting ready for exterior painting means inspecting the surface, cleaning, repairing defects, and gathering the right tools before you start. Take a measured approach by noting any peeling paint, loose siding, mold, or cracks, and plan fixes in order. Make sure surfaces are clean and dry, and that you have masking and primer ready.
Common exterior issues require simple fixes like cleaning and patching, priming, and selecting the right finish. Check labels and manufacturer instructions for compatible products and follow local safety rules. If in doubt, test a small area first to confirm adhesion and finish quality.
Key takeaways
- Inspect exterior substrates for peeling paint, cracks, or water damage before painting.
- Test cleaning methods on inconspicuous areas to avoid surfacing damage.
- Ensure proper primer and coating compatibility to prevent adhesion failures.
- Seal joints and gaps with compatible caulk to stop moisture intrusion.
- Schedule painting in dry, moderate conditions and avoid wet surface finishing.
- Wear eye protection, gloves, and respirators when sanding or applying coatings.
Table of Contents
- Introduction
- Key takeaways
- Pre-Paint Planning and Initial Inspection
- Tools and Materials Checklist
- Cleaning and Surface Preparation
- Repairing Common Substrate Issues
- Addressing Paint Adhesion Failures and Surface Defects
- Caulking, Joints, and Trim Prep
- Priming, Paint Selection, and Coating Systems
- Timing, Weather, and Application Best Practices
- Conclusion
- FAQ
Pre-Paint Planning and Initial Inspection
Start with a slow walk around the exterior, noting every surface and its condition. Document problem areas with quick sketches or photos so you have a written record to reference later. Use this walk to set a realistic scope and timeline based on what you actually see, not what you hope for.
Identify peeling paint, cracks, or rot, and note substrate types you’ll be dealing with. Check for moisture signs, staining, and any safety concerns on ladders or scaffolding. Reference manufacturer instructions or local rules when you’re unsure about requirements for preparation or coatings.
Visual checkpoints checklist
Use this checklist during your initial walk-around inspection to identify visible issues that need addressing before painting.
- Peeling paint: Check for any areas where paint is lifting or separating from the surface. This could be due to poor prep work, moisture, or age.
- Cracking: Inspect for hairline cracks or larger fissures. These can let in water and lead to bigger problems if not fixed.
- Stains: Look for discoloration that might indicate mold, mildew, or other underlying issues.
- Rot: Check wood surfaces for soft spots, crumbling, or dark areas, which could signal rot.
- Efflorescence: Inspect for white, powdery deposits on masonry surfaces. This is a sign of moisture migrating through the wall.
- Blistering: Check for raised, bubble-like formations in the paint. This usually indicates that moisture from below has become trapped under the paint film.
- Chalking: Rub your hand over painted surfaces to check for a white, powdery residue. This means the paint is breaking down and needs to be repainted.
- Photograph and map issues: Document each problem area with a photo and mark its location on a diagram of your home’s exterior. This will help you plan your repairs and painting.
Quick rule: Don’t skip this visual check. It’s your first line of defense against hidden problems that could derail your project.
Diagnose underlying causes
Use this checklist to determine if the issues you’ve found are purely cosmetic or signs of deeper problems.
- Moisture stains: Check for water stains on ceilings and walls. These could indicate a leaky roof or plumbing issue that needs to be fixed before painting.
- Warping or sagging: Inspect doors, windows, and other structural elements for signs of warping or sagging. This could indicate structural issues that need professional attention.
- Mold or mildew: Look for signs of mold or mildew growth. If found, you’ll need to address the moisture source and clean the area before painting.
- Cracking around windows and doors: Check for cracks around openings. These could be due to settling or movement and may need professional repair.
- Sagging or delaminating siding: Inspect your home’s exterior cladding for signs of sagging, warping, or peeling. This could indicate water damage or poor installation.
- Exterior trim condition: Check the condition of exterior trim. Damaged or rotting trim should be replaced before painting.
- Gutter and downspout function: Ensure your gutters and downspouts are functioning properly to prevent water damage.
- Consult a pro for complex issues: If you find signs of structural damage or other complex problems, consult a professional for assessment and advice.
Quick rule: Don’t just paint over problems. Addressing the underlying cause will save you time and money in the long run.
Permits, HOA rules, and local regulations
Before starting any exterior painting project, ensure you’re compliant with relevant permits, homeowners association (HOA) rules, and local regulations.
- Check for permits: Contact your local building department to find out if you need a permit for your painting project. Some areas require permits even for exterior paint jobs.
- Review HOA guidelines: If you live in an area with an HOA, review their rules and regulations to ensure your chosen colors and materials are approved.
- Check lead-based paint rules: If your home was built before 1978, it may contain lead-based paint. Check local and federal guidelines for safe removal and disposal.
- Evaluate environmental disposal requirements: Find out how to dispose of old paint and other materials in an environmentally friendly way. Some areas have specific rules for this.
- Check zoning laws: Ensure your project complies with local zoning laws, which may restrict the size or type of structures you can build or paint.
- Review property setback requirements: Check if there are any restrictions on how close to property lines you can paint or make changes.
- Consult a professional for complex rules: If you’re unsure about any regulations, consult a local painting contractor or building inspector for advice.
Quick rule: Always check the rules before you start. Fines and delays can be avoided with a little upfront research.
Tools and Materials Checklist
Gather a basic, DIY-friendly toolkit: brushes, rollers, and a paint tray, plus a scraper and stiff brush for loose material. Include a putty knife, sanding block, and a caulk gun for repairs. Have drop cloths, ladders or scaffolding, and a garden hose or power washer on hand for cleaning.
Stock safety gear like gloves, eye protection, and a respirator or mask as needed. Choose high-quality primers and topcoats appropriate for your substrate, and keep caulk, wood filler, and masonry repair products ready. Always verify product labels or data sheets for compatibility with your surface and climate.
Safety and PPE essentials
Before you start any exterior painting or finishing work, safety should be your top priority. Use this checklist to ensure you’re well-protected.
- Eye Protection: Wear safety glasses or goggles to protect your eyes from debris and paint splatter.
- Respirator or Mask: Use a respirator or dust mask to protect against harmful particles, especially when sanding or working with old paint.
- Gloves: Wear work gloves to protect your hands from cuts, scrapes, and chemicals.
- Head Protection: If you’re using ladders or scaffolding, wear a hard hat to prevent head injuries.
- Ladder Safety: Inspect your ladder before use, ensure it’s on stable ground, and maintain three points of contact while climbing.
- Staging Safety: If using staging, secure it properly and keep it level. Always have someone spotting you when working at heights.
- Clothing: Wear long sleeves, long pants, and closed-toe shoes for full-body protection.
- Follow SDS: Always follow the safety data sheets provided with your products to ensure proper handling and disposal.
Quick rule: Never compromise on safety. If you’re unsure about any aspect, stop and reassess before proceeding.
Prep and repair tools
Before painting or finishing, you’ll need to prep your surfaces. Use this checklist to gather the right tools for the job.
- Scrapers: Use 5-in-1 or putty knives to remove loose paint and prepare surfaces for sanding.
- Wire Brushes: Use stiff-bristled wire brushes to remove rust, dirt, and loose paint from metal surfaces.
- Sanders: Use orbital or palm sanders with 120-grit sandpaper to smooth surfaces. Power tools can speed up the process but use them carefully.
- Caulk Guns: Have a caulk gun on hand for filling gaps and cracks before painting.
- Cleaners: Use appropriate cleaners like TSP (trisodium phosphate) or bleach to remove dirt, grease, and mildew. Always rinse and let surfaces dry completely before painting.
- Putty Knife: Use a small putty knife for applying spackling compound to nail holes and minor dents.
- Hammer and Nails: Have a hammer and nails ready for tacking down loose edges or securing drop cloths.
- Tape Measure: Use a tape measure to ensure accurate cutting and placement of materials.
Quick rule: The right tool makes all the difference. Invest in quality tools that will last and make your job easier.
Paint, primer, and specialty products
Choosing the right paint and related products is crucial for a successful exterior finish. Use this checklist to guide your purchases.
- Exterior Primer: Choose an oil-based or latex primer suitable for your surface type (wood, metal, masonry). Priming seals surfaces and improves paint adhesion.
- Topcoat Paint: Select a high-quality exterior acrylic latex paint with good coverage and durability. Check labels for UV protection and mildew resistance.
- Stain or Sealant: For wooden surfaces, choose an appropriate stain or sealant to protect against moisture and enhance natural wood grain.
- Mold Inhibitors: Add mold inhibitors to your primer and paint to prevent mold and mildew growth on damp surfaces.
- Paint Compatibility: Ensure all your paints, primers, and sealants are compatible. Check labels or consult a paint professional if unsure.
- Caulk: Choose a paintable caulk suitable for exterior use to fill gaps and cracks before painting.
- Paint Brushes and Rollers: Invest in good-quality brushes (2-2.5 inches) and rollers (9-inch, 3/8-inch nap) for smooth application.
- Painter’s Tape: Use painter’s tape to mask off areas you don’t want to paint. Remove it before the paint dries for clean lines.
Quick rule: Always check product labels and consult with a paint professional if needed. The right products make all the difference in exterior painting success.
Cleaning and Surface Preparation
Begin with a thorough cleaning to remove dirt and mildew, using the appropriate cleaning method for the surface. Lightly scrub with a brush on horizontal and tricky areas to lift grime, then rinse completely. Let everything dry before moving to repairs.
Treat mildew with a product labeled for mold and mildew control, following the label precisely. Avoid using high-pressure methods on soft materials, and test a small area if you’re unsure about finish compatibility. Verify that the surface is dry and free of loose material before priming or painting.
Pressure Washing and Washing Alternatives
Before you start scrubbing, decide on the best cleaning method for your surface. Pressure washers are powerful but can damage delicate surfaces if not used correctly.
Use a pressure washer for tough dirt and grime on robust surfaces like concrete or brick. But remember, high pressure can strip paint or damage soft materials. Always test in an inconspicuous area first.
For softer surfaces like vinyl siding or wood, opt for low-pressure washing or manual scrubbing with a brush and detergent. Follow your surface’s manufacturer guidelines to avoid any damage.
Mildew and Algae Treatment
Black spots on your exterior could be mildew or algae. Here’s how to tell and treat them:
First, inspect the area. Mildew appears as black or gray patches, while algae looks like slimy, green streaks.
To remove, use a cleaner specifically designed for your surface (concrete, wood, etc.). Follow the manufacturer’s instructions. Most require scrubbing, letting it sit, then rinsing off. Safety first: wear gloves and eye protection.
Drying and Weather Considerations Post-Wash
After washing, surfaces need to dry completely before painting. Here’s why:
Moisture can cause paint to peel or bubble. So, let surfaces dry per product instructions. This could take a few days to a week, depending on the weather.
Hot, sunny conditions speed up drying. But if it’s humid or raining, surfaces may take longer. Check local forecasts and adjust your painting schedule accordingly.
Repairing Common Substrate Issues
Fix wood rot or soft spots with solid patches or replacement where needed, using products rated for exterior use. For masonry, fill cracks with an appropriate exterior filler and allow full cure time per label. For metal, remove rust and apply a rust-inhibiting product before finishing.
On stucco or vinyl, follow substrate-specific repair instructions and avoid overcoating unstable material. If you’re unsure about a repair method, check the manufacturer’s guidance or local building codes. Prioritize durable repairs that will accept primer and topcoat evenly.
Wood: rot, splits, and loose boards
First off, you gotta inspect carefully. Rot looks like dark, crumbly wood. Splits are easy to spot – they’re cracks running with the grain. Loose boards move when you poke ’em.
For rot and splits, your options are: replace or repair. If it’s small (< ~1/4″), patch it. Use a wood hardener first, then epoxy filler. For bigger damage, replace the whole board. Make sure to use treated lumber for outdoor applications.
Preparing repaired wood for priming? Sand it smooth, let it dry, then clean off any dust. Now you’re ready for that primer!
Masonry and concrete: efflorescence, cracks, and spalling
First things first, efflorescence is that white powdery stuff you see on your masonry or concrete. It’s salt deposits brought to the surface by moisture. To remove it, use a stiff brush and wire scrubber, then rinse with clean water.
Now, cracks. They happen, but we don’t want them turning into big problems. For hairline cracks (less than 1/8″), just clean ’em out and apply a flexible concrete sealer. Wider ones need to be chiseled out, cleaned, and filled with an appropriate repair mortar or caulk.
Lastly, spalling. That’s when chunks of your masonry or concrete start falling off. It’s usually due to water getting in and freezing. To fix, remove all loose material, clean the area, and apply a bonding agent before patching with new mortar or concrete.
When it comes to finishes, make sure they’re breathable. You don’t want to trap moisture in there. Check product labels and manufacturer instructions to ensure you’re using something that allows your masonry substrate to breathe.
Metal, stucco, and vinyl specific fixes
Alright, let’s tackle those metal, stucco, and vinyl issues. Remember, prep is key here.
Metal: Rust’s your enemy. Scrape it off, sand smooth, then hit it with a rust-inhibiting primer. Don’t skimp on this step, or you’ll be back here next year. Use a good quality exterior paint to finish.
Stucco: Hairline cracks happen. Fill ’em with an elastic stucco patching compound. Once dry, sand smooth and match the texture using a stiff brush or comb. Don’t go crazy with the trowel; you want it to blend, not stand out.
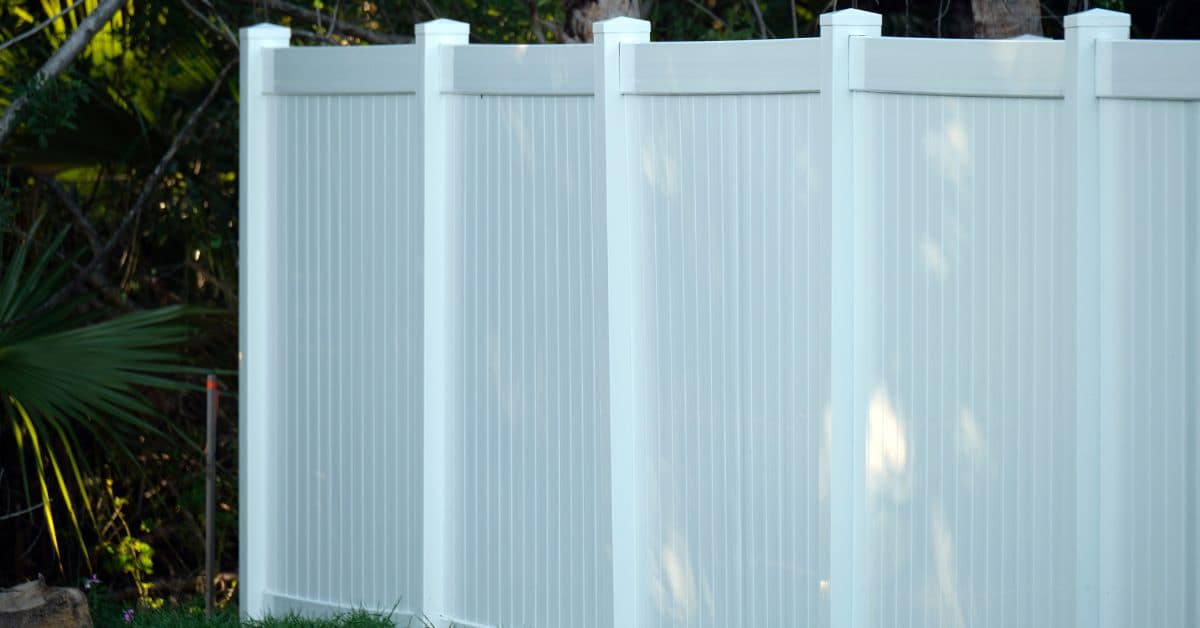
Vinyl: Check those fasteners. Tighten any loose ones, replace any busted ones. Clean the siding good first, then use a paint designed for vinyl. Don’t use oil-based paints; they’ll trap moisture and peel. And for Pete’s sake, don’t power wash it unless you know what you’re doing. You can damage the siding real easy.
Addressing Paint Adhesion Failures and Surface Defects
Identify the root cause of peeling, blistering, chalking, or alligatoring, such as moisture, improper substrate, or incompatible coatings. Prepare the surface by removing failed paint and smoothing edges for a solid key. Repair underlying issues before applying new coatings.
Use proper abrasion and cleaning to create a clean, dry, and dust-free surface. Follow with a compatible primer and topcoat, and verify the chosen products are suitable for the substrate. Revisit any areas where adhesion problems recur and adjust prep accordingly.
Peeling and flaking paint
Paint peels for a few reasons. Poor adhesion, moisture behind the paint, or incompatible coatings can cause it.
Removal: Scrape off loose paint. Use a paint stripper if needed. Sand smooth.
Prep: Prime with a bonding primer to ensure good adhesion. Let it dry before painting.
Blistering, bubbling, and delamination
Moisture or heat can cause paint to blister or bubble. You’ll see raised, often circular areas.
Detection: Use a screwdriver or awl to gently poke these areas. If they’re soft or release moisture, it’s moisture-related.
Remedial actions: Identify and fix the source of moisture. Let it dry completely. Sand smooth. Prime with a bonding primer before recoating.
Chalking and faded finishes
Chalking happens when paint’s binder breaks down, leaving a powdery residue. Fading is loss of color due to sun exposure.
Cleaning: Use a soft-bristle brush or cloth with mild detergent and water. Gently scrub. Rinse clean.
Stabilization: Apply a paint stabilizer to prevent further chalking. Let it dry before repainting. Choose a high-quality, UV-resistant paint for best results.
Caulking, Joints, and Trim Prep
Inspect seams, window/door joints, trim, and flashing for gaps or cracking. Remove old caulk and debris, then clean joints before applying new sealant. Choose a high-quality exterior caulk that matches the movement and climate of the area.
Prep joints by smoothing and tooling for a uniform finish, and ensure surfaces are dry. Pair caulking with compatible primers or paints as required by the product data sheet. Recheck joints after curing for signs of shrinkage or failure.
Selecting the right sealant
The first step in caulking is choosing the right sealant. Exterior caulks face harsh conditions, so look for these qualities:
Flexibility: It should bend and move with surfaces without cracking.
Adhesion: Ensure it sticks well to your surface – check compatibility charts if unsure.
Paintability: Choose one that accepts paint easily. Silicone-based caulks usually don’t take paint, so avoid those unless you’re not painting.
Proper joint prep and application
Before applying caulk, clean joints thoroughly. Use a wire brush or scraper to remove old caulk and debris.
For wide gaps, use backer rod. It’s a foam strip that keeps the caulk from sagging. Insert it into the gap before applying caulk.
Apply caulk using a caulking gun at a steady pace. Tool the bead with a damp finger or a caulk smoother to ensure a smooth, even seal.
Let it cure according to the manufacturer’s instructions before painting.
Trim and detail sanding/stabilizing
Before caulking, prep your trim. Use a paint scraper or sandpaper to feather old paint at edges – this ensures smooth transitions.
Sand surfaces lightly with fine-grit sandpaper (120-220) to create a uniform profile for painting. Wipe off dust with a damp cloth.
For small trim defects, use wood filler or spackling compound. Let it dry, then sand smooth and wipe clean.
If your trim is loose, nail or screw it back in place, filling any holes if necessary.
Priming, Paint Selection, and Coating Systems
Determine when primer is needed based on substrate and condition, and apply it evenly for a solid base. Match primer to the topcoat and substrate per the manufacturer instructions, using the right sheen and system for exterior exposure. Avoid skipping primer on porous or repaired areas.
Choose the exterior paint system and sheen that fit your climate and maintenance goals, and verify compatibility with substrates like wood, masonry, or metal. Consider a multi-coat system if required by the topcoat selection, and confirm any color or finish restrictions with product data sheets.
When and what kind of primer to use
A primer’s job is threefold: block stains, improve adhesion, and seal the surface. When to use it?
Always prime bare surfaces or previously painted surfaces with poor adhesion.
Choose a primer based on your substrate:
– Bare wood: Use a stain-blocking primer like shellac-based or acrylic.
– Masonry/concrete: Opt for a masonry primer to seal and prepare the surface.
– Existing paint: If adhesion is good, you might not need a primer. Test first.
Choosing paint type, finish, and color considerations
Exterior paints come in latex (water-based) or oil/alkyd (solvent-based). Latex is more durable and easier to clean.
Finish matters. High-gloss resists moisture but shows imperfections. Flat hides defects but is harder to clean.
Consider your climate:
– Hot, humid regions: Choose high-gloss or satin for better durability and easier cleaning.
– Cold regions: Opt for flat or eggshell as they can handle freeze-thaw cycles better.
Compatibility and testing
Before painting, test your new paint on a small, hidden area to ensure it adheres well and looks right.
Check product labels for compatibility:
– Latex to latex: Usually compatible. But if the old paint is very dark, you might need a primer.
– Oil/alkyd to latex: Not recommended due to different chemical compositions.
If unsure, do a small test patch and wait 24 hours before deciding.
Timing, Weather, and Application Best Practices
Plan prep and application around reliable weather windows, avoiding rain, high humidity, or extreme heat when possible. Monitor forecast changes and adjust the schedule to keep coatings from getting compromised. Keep a simple log of days you worked and surface conditions for reference.
For application technique, use appropriate rolling, brushing, or spraying methods for your exterior and follow label directions. Maintain consistent approach and keep edges damp to prevent lap marks, while protecting adjacent surfaces from splatter. Always verify product instructions for surface preparation and tool compatibility before starting.
Scheduling around weather and seasonality
Timing your concrete work right is half the battle. Here’s what you need to know about Mother Nature:
Temperature matters. Concrete needs warmth to set properly. Too cold, it won’t cure right. Check product labels for minimum temps. Generally, aim for 50°F (10°C) and above.
Avoid rain and moisture. Rain can wash away cement and slow curing. Keep an eye on forecasts. If rain’s coming, cover your pour or wait it out.
Seasonality plays a role too. Summer’s hot but can be too dry. Winter’s cold, plus snow and ice complicate things. Spring and fall often provide the best balance.
Application methods and technique tips
When it comes to applying concrete, you’ve got three main methods: brushing, rolling, or spraying. Each has its place, so let’s dive in.
Brushing: This is your best bet for small jobs or repairs. Use a stiff-bristled brush to work the concrete into those tight spots. But beware, it’s labor-intensive and slow. Check your label for recommended mixing and application times.
Rolling: For larger surfaces like driveways or patios, a roller is your friend. It covers ground fast and gives you an even finish. But watch out for runs – keep your roller moving at a steady pace and overlap each stroke by about half to avoid lines. Remember, concrete sets up quick, so don’t try to cover too much area at once.
Spraying: This is reserved for pros with specialized equipment. If you’re thinking of renting a sprayer, think again – it’s tricky and easy to mess up. You’ll need a helper to follow behind and smooth out the concrete before it sets. Plus, cleanup is a nightmare. Stick to brushing or rolling unless you know what you’re doing.
Working safely at height and protecting property
When it comes to concrete work, safety is your top priority. Here’s what you need to know about working at heights and protecting your property.
Ladders and Scaffolds: Always use sturdy, well-maintained ladders or scaffolds. Check them before each use for any damage. Make sure they’re secure and level before climbing. Remember, three points of contact at all times – two hands and one foot, or two feet and one hand.
Protecting Property: Lay down drop cloths or tarps to protect nearby surfaces from concrete spills. If you’re working near landscaping, use plywood or cardboard to shield plants and grass. Check local rules about protecting public property if you’re working near sidewalks or streets.
Waste Disposal: Have a plan for waste materials like plastic sheeting, drop cloths, and concrete bags. Don’t leave them lying around where they can cause trips or falls. Check with your local waste management department about how to dispose of concrete waste properly.
Conclusion
Get the job done right the first time by finishing with solid prep, solid protection, and solid results. Safe methods protect you, the structure, and your wallet from costly fixes down the line.
Do this next: verify the surface is clean and dry, note any repairs needed, fix adhesion and substrate issues, seal joints and trim, choose a compatible primer and coating, and watch the weather. Start with a small test patch to confirm adhesion and color, then work through the plan in a steady, organized pass-up from walls to trim, checking every detail as you go.
Avoid these mistakes: rushing through cleaning or skipping a test patch, using the wrong primer or incompatible coating, and ignoring moisture or flashing issues. Safety rules to follow are simple: wear eye and skin protection, ladder and scaffold you can trust, and never apply coatings in extreme heat, cold, or wind; test a small area first and stop if anything looks off.
If the surface shows deep rot, extensive substrate damage, failed structural elements, or you’re unsure about primer and coating compatibility, call a pro. When in doubt, a quick consult can save time, money, and a restart later. Stay steady, stay safe, and you’ll get a durable, great-looking finish you can be proud of.
FAQ
How can I spot moisture or leaks that will ruin paint adhesion before I start?
Look for dark stains, bubbling, or wet spots on the surface. If it’s damp, let it dry fully and fix the source first. Always check that the surface feels dry to the touch after a rain and during a dry spell before proceeding.
What should I do with peeling or blistering paint on the exterior?
Scrape loose paint away and feather the edges. Clean the area, let it dry, then apply a compatible patch or filler for small cracks. Prime the repaired spots if the substrate is porous or the coating is old.
How do I handle hairline cracks and small gaps in siding or stucco?
Fill cracks with an appropriate exterior filler or sealant, tool smooth, and wipe away excess. If gaps are wide or reappear, may need a backing material or a more robust sealant option. Check that the product label matches exterior use and is paintable.
How can I test paint adhesion before committing to a full coat?
Do a small adhesion test on an inconspicuous area following the product’s instructions. If the coating lifts or peels when you lift a tape or scraper, choose a different system or consult the manufacturer guidelines. Always confirm the substrate is properly prepared and dry according to the product’s label.