
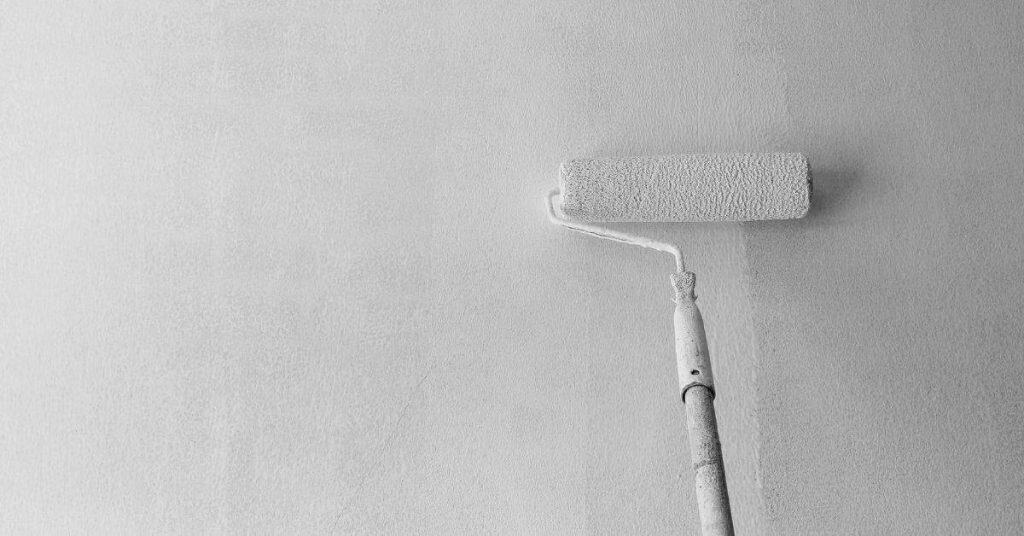
Introduction
Alligatoring paint is a surface condition where the film cracks into finger-like ridges that resemble alligator skin. This happens when the old coating becomes brittle or loses adhesion to the substrate. The result is a rough, uneven finish that often signals it’s time to address the finish before repainting.
Deciding whether to strip depends on what’s under the cracked finish and your local rules. Follow the paint label and any safety instructions to choose an appropriate stripping method and to protect yourself. If you’re uncertain, check guidance on the label or ask for advice from a knowledgeable source before starting.
Key takeaways
- Inspect alligatoring finish first, note depth and substrate before stripping.
- Test for lead paint where applicable; follow local regulations and guidelines.
- Choose stripping method based on substrate: chemical, heat, or mechanical.
- Wear eye protection, gloves, and mask; ventilate area and manage waste.
- Repaint only after surface dries, cleans, and primed to prevent recurrence.
Table of Contents
- Introduction
- Key takeaways
- What Is Alligatoring Paint?
- Common Causes of Alligatoring
- Severity Assessment: When Is Stripping Required?
- Substrate-Specific Guidance (Wood, Metal, Masonry, Drywall)
- Stripping and Removal Methods: Options, Pros, and Cons
- Step-by-Step Workflow for Stripping and Repainting
- Tools, Materials Checklist and Safety/Disposal Guidance
- Repainting Best Practices and Prevention of Recurrence
- Conclusion
- FAQ
What Is Alligatoring Paint?
Alligatoring is a paint failure that shows up as a network of irregular cracks on the surface. The cracks resemble an alligator’s skin, which is where the name comes from. It signals the coating film is losing integrity and cannot flex with the substrate.
This pattern is different from simple peeling or blistering because the cracks run across the surface while some intact areas remain beneath. Understanding the pattern helps you diagnose whether the problem is adhesion, film structure, or substrate movement.
Visual characteristics and how to recognize it
Alligatoring paint has a distinctive, scaled appearance. It looks like the skin of an alligator – hence the name. You’ll see cracks forming tiny, irregular shapes, often resembling diamonds or hexagons.
The scale of these cracks can vary. Some might be barely visible, while others could be large enough to feel with your fingertips. If you run a finger over the surface, it should feel rough and bumpy.
Active alligatoring will show signs of deep cracking. The paint may flake off in small pieces when gently scraped with a nail or a coin. Cosmetic alligatoring might look similar but won’t show these signs of active failure.
How alligatoring differs from crazing, peeling, and checking
Alligatoring is different from other paint failures. Here’s how to tell them apart:
Crazing – Cracks are fine and hairline, like a spider web. They don’t affect the film integrity, just the surface.
Peeling – Paint lifts off in large sheets or strips. You’ll see edges lifting away from the surface.
Checking – Cracks are long and straight, often running parallel to each other. They don’t form patterns like alligatoring.
Common Causes of Alligatoring
The primary culprits are poor adhesion between coats, or coatings that don’t work well together. Incompatible products often fail when a new layer is applied over an old one. Over-thinning can also weaken film formation and durability.
Underlying substrate movement and improper surface preparation contribute as well. In reality, several factors can collide to create alligatoring, so look for multiple signs rather than a single culprit.
Coating incompatibility and application errors
Steer clear of these common mistakes to prevent alligatoring.
- Hard over soft: Applying a hard coating over a softer one creates tension, leading to alligatoring. Stick to compatible coatings.
- Improper recoating: Recoating too soon or too late can cause problems. Follow the manufacturer’s recommended recoat window.
- Over-thinning: Thinning paint too much reduces its ability to adhere and form a proper film, leading to alligatoring. Avoid over-thinning.
- Incorrect application: Rolling or brushing on paint too thickly can cause it to sag and run, leading to issues later on. Apply evenly and smoothly.
Remember, these are common pitfalls. With careful planning and execution, you can avoid them.
Substrate and environmental contributors
Underlying issues with the substrate or environment can contribute to alligatoring. Here’s what to watch out for:
Substrate movement: Wood expands and contracts with humidity changes, while metal can rust and move. Ensure your substrate is stable before painting.
Moisture issues: Paint doesn’t like water. Keep the surface dry during application and allow it to cure properly.
Extreme temperatures/humidity: Painting in extreme conditions can lead to problems. Aim for moderate temperatures and humidity when possible.
Age and UV/weathering effects
Over time, even the best paint systems can succumb to alligatoring due to age and weathering.
Long-term degradation: Paint breaks down over time. This is normal, but it increases the risk of alligatoring.
Loss of flexibility: As paint ages, it loses its ability to stretch and bend with the substrate. This lack of flexibility can lead to cracking and alligatoring.
Repeated cycling: Temperature changes cause substrates to expand and contract. Over time, this can cause even a sound paint system to alligator.
Severity Assessment: When Is Stripping Required?
Use a practical framework that weighs adhesion, extent of cracking, and what you see on the surface. Spot repairs may be enough if the damage is limited and the substrate is solid. Widespread cracking usually points to more extensive removal and re-coating.
Run simple checks like probing a small area for looseness and listening for a hollow feel behind the coating. Observe the substrate condition after moisture exposure and note any gaps or soft spots that could affect long-term results.
Simple tests to evaluate adhesion and depth
Before you decide how much paint to strip, do some quick checks. These help you understand if the problem is just surface deep or if it goes all the way down.
Scrape/Tap Test: Use a scraper or even a coin to gently scrape the paint. If it comes off easily and in large flakes, that’s a sign of poor adhesion. Tap the area with a hammer. If it sounds hollow, there might be substrate damage.
Tape Pull: Apply painter’s tape over the alligatoring, press down firmly, then pull it off quickly. If paint comes off with it, that means the top layers aren’t adhering well to each other or the underlying layer.
Probing: Use a screwdriver or awl to probe the cracks. If it goes in easily and hits something soft or hollow, you’ve got substrate damage that needs addressing.
Surface area and pattern considerations
The size and spread of alligatoring can tell you a lot about how much stripping is needed. Small, isolated patches might just need spot repairs.
Check the visual characteristics earlier in this guide to see what patterns you’re dealing with. If it’s a few small, disconnected areas, you could get away with spot repairs. But if it’s large, interconnected patterns, full stripping is likely your best bet.
Remember, alligatoring is like a disease – it spreads. Even if it looks contained now, it might not stay that way. It’s often better to bite the bullet and do the job right the first time.
When underlying substrate damage mandates full stripping
Sometimes, alligatoring is just a symptom of a bigger problem – damage to your substrate. If that’s the case, you’ll need to strip down to bare substrate before making any repairs.
Look for signs like rot, rust, or efflorescence. These could indicate moisture issues that need addressing. Also, check for structural movement – cracks in the wall or warping of the surface.
If you find any of these issues, don’t just paint over them. That’s like putting a band-aid on a broken bone. You’ll need to strip all the paint, fix the underlying problem, and then repaint.
Substrate-Specific Guidance (Wood, Metal, Masonry, Drywall)
Wood requires attention to grain movement and existing coatings; sometimes stripping reveals a fresh surface that accepts new coatings better. Metal surfaces need rust control and compatible primers to prevent future bonding issues. Masonry can hold moisture that drives alligatoring, so it may need drying and proper vapor-permeable coatings.
Drywall is sensitive to moisture and pad-coated films; stripping must avoid exposing damaged paper or fiberglass. Tailor the repair and priming steps to each material, and address any underlying issues before repainting.
Wood surfaces
Alligatoring paint on wood surfaces can be a sign of rot or moisture damage. Inspect the area for any signs of decay.
Mechanical removal is usually the best method here, using tools like scrapers and wire brushes to gently remove the paint. Be careful not to damage the wood further.
If you find rot, replace the affected area before repainting. If it’s minor, you can repair with wood filler and sand smooth.
Always prep wood surfaces by sealing any exposed areas with a primer or sealer to prevent future moisture issues.
Metal surfaces
Rust is the enemy on metal surfaces. Remove all rust scales using a wire brush or sandpaper before stripping paint.
Mechanical stripping works well here, but beware of flash rusting. Wipe off any exposed metal with a damp cloth immediately after stripping.
Apply an appropriate primer to seal the metal and prevent rust recurrence. Use a rust-inhibitive primer if necessary.
If rust continues to form under the paint, you may need to treat the underlying rust or replace the metal altogether.
Masonry and stucco
Salt or efflorescence buildup can cause alligatoring on masonry surfaces. Remove any visible salt deposits with a wire brush or acid wash.
Check the mortar integrity. If it’s crumbling, repoint before painting. Rigid exterior coatings over porous masonry often lead to moisture trapping and further damage.
Full removal of the old paint is necessary here. Use a chemical stripper or mechanical method like sandblasting, ensuring you don’t damage the substrate.
After stripping, apply a breathable primer to allow moisture escape and prevent future alligatoring.
Interior drywall and plaster
Alligatoring inside often signals previous incompatible coatings or moisture issues. Inspect for any water damage or mold.
If the alligatoring is minor, you can skim coat with joint compound to smooth out the surface. For larger areas, consider replacing entire panels.
Spot-prime any bare spots before repainting to prevent future issues. If moisture is the culprit, find and fix the source before proceeding.
Always use a primer designed for your specific substrate and paint type to ensure compatibility.

Stripping and Removal Methods: Options, Pros, and Cons
Chemical strippers offer thorough removal but require proper ventilation and disposal practices. Mechanical abrasion is effective on many surfaces but can damage softer substrates if not controlled. Heat-assisted methods can speed up removal but must be used with caution on flammable or sensitive materials.
Consider a combination approach when appropriate, and always follow local disposal rules for the removed material and used chemicals. Match the method to the substrate and the extent of alligatoring to reduce risk.
Chemical strippers and how to choose one
When it comes to chemical strippers, you’ve got three main types: solvent-based, caustic, and biobased. Each has its own strengths and weaknesses.
Solvent-based strippers are great for tough films like urethanes and enamels. They’re quick-acting but can be harsh on some substrates. You’ll need good ventilation with these.
Caustic strippers, like potassium hydroxide or sodium hydroxide, work well on latex paints. They’re less harmful to the environment but can damage certain surfaces if left on too long.
Biobased strippers use natural ingredients and are safer for you and the environment. They might take longer to work but are a good option when dealing with sensitive substrates or indoor projects.
Mechanical removal (sanding, scraping, media blasting)
For mechanical removal, you’ve got a few tools at your disposal. Hand and power sanding are great for small areas and fine details. Use coarse grits to remove paint quickly, then switch to finer grits for smoothing.
Scraping is another option. It’s labor-intensive but effective. Use a sharp scraper and work in small sections.
Media blasting is powerful but can cause surface damage if not done right. It’s best used on large, flat surfaces like concrete or metal. Always wear protective gear and contain the dust to keep your workspace clean.
Heat-assisted removal and cautions
Heat guns and infrared tools can make stripping a breeze by softening paint for easy scraping. They’re great for large areas and tough films.
But be careful. Heat methods can pose fire risks, especially on dry, flammable surfaces. Always keep a fire extinguisher nearby.
If your home has lead-based paint, heat methods are a big no-no. Heating lead paint releases toxic fumes. Opt for wet methods instead to minimize dust and reduce the risk of exposure.
Step-by-Step Workflow for Stripping and Repainting
Start with a careful inspection to identify the extent of cracking and any moisture issues. Contain debris and protect surrounding areas before you begin work. Check compatibility of primers and topcoats before committing to a full repaint.
Proceed to test patches on small areas to confirm adhesion and finish. After stripping and repairing the substrate, apply appropriate priming and then the new coating in the recommended sequence. Verify that the coating system remains compatible across layers.
Step-by-Step Process
This section guides you through the practical steps of stripping and repainting, ensuring a successful outcome.
- Preparation: Gather tools, wear protective gear, and set up containment to control paint chips and dust. Safety first!
- Inspection: Check for loose or peeling paint. Use a putty knife to gently scrape any suspect areas.
- Main Work: Choose your stripping method (chemical, mechanical, heat) and follow the product’s instructions carefully.
- Cleanup: Remove all residue with appropriate cleaning methods. Let it dry completely before moving on.
- Final Checks: Inspect the surface for any missed spots or damage. Address them before priming.
Inspection, Test Patch, and Method Selection
Before starting, use this checklist to inspect your surface and perform a small test removal.
- Check paint condition: Look for alligatoring, peeling, or flaking. Gently scrape with a putty knife to assess adhesion.
- Test strip area: Choose an inconspicuous spot and apply your chosen stripping method. If it works well, proceed; if not, try another method.
- Inspect substrate: After removing paint, check for any hidden damage or issues that need addressing.
- Avoid skipping this step: It helps prevent costly mistakes and ensures the best results.
Quick rule: Always perform a test patch before committing to a full strip. It’s your best bet for avoiding surprises.
Substrate Repair and Preparation After Removal
After stripping, clean the surface thoroughly to remove any residue. Use a wire brush or scraper if needed.
Treat rust: If you’re working on metal, treat any exposed rust with a suitable primer or converter before proceeding.
Repair and fill: Address any damage (rot, cracks, holes) using appropriate materials. Sand smooth for best paint adhesion.
Primer Selection, Compatibility, and Topcoat Planning
Choose a primer that’s compatible with your substrate and final coating type. Read manufacturer recommendations for best results.
Check compatibility: Ensure the primer is suitable for your surface and won’t interfere with paint adhesion or performance.
Plan topcoat: Consider your desired finish, color, and sheen. Check manufacturer guidelines for recoat conditions to avoid disappointment.
Tools, Materials Checklist and Safety/Disposal Guidance
Assemble PPE such as eye protection, gloves, and a respirator as needed. Gather removal tools, scrapers, brushes, and drop cloths for containment. Have a disposal plan for debris and used chemicals that follows local rules.
Include surface protection like masking and drop cloths, containment for dust, and appropriate cleaning supplies. Keep safety and environmental disposal at the forefront throughout the project to avoid issues later.
Essential tools and protective equipment
Before you start stripping paint, make sure you have the right gear to protect yourself and get the job done safely.
- Respiratory protection: Use a respirator or dust mask for chemical strippers and sanding. Don’t skip this – inhaling particles can cause serious health issues.
- Gloves: Wear heavy-duty gloves to protect your hands from chemicals and debris.
- Eye protection: Use safety glasses or goggles to shield your eyes from splashes and dust.
- Protective clothing: Wear long sleeves, pants, and closed-toe shoes to cover your skin and protect your feet.
- Power tools (if needed): Have a sander, heat gun, or media blaster ready for mechanical removal methods. Check they’re in working order before starting.
- Scrapers: Have various types on hand – straight, curved, and corner scrapers – to tackle different surfaces.
- Drop cloths: Use these to protect floors and catch debris during the stripping process.
- Ventilation (for sanding): Ensure you have adequate ventilation or use a respirator with a P100 filter for sanding tasks.
Quick rule: Always prioritize safety gear. It’s the first line of defense against potential hazards.
Containment, cleanup, and disposal best practices
Keeping your workspace clean and disposing of waste properly are crucial steps in the stripping process.
- Dust containment: Use plastic sheets or tape to seal off areas you don’t want dust to enter. This helps keep your home cleaner during the project.
- Waste collection: Have trash cans or bags ready for collecting paint chips, debris, and used materials.
- Residue cleaning: Use a damp cloth or mop to clean up residue after stripping. This helps prevent dust from spreading.
- Lead/asbestos testing (if unsure): Before starting, test for lead or asbestos using a certified kit. If present, follow local regulations for disposal.
- Local disposal rules: Check with your city or county for guidelines on disposing of paint waste and used chemicals.
- Waste segregation: Keep hazardous materials separate from regular trash to ensure safe disposal.
- Cleanup crew (if needed): Hire a professional cleanup service for large jobs to ensure all waste is disposed of properly.
Quick rule: Always check local regulations and follow them closely when disposing of paint waste and used chemicals.
When to call a professional
While DIY stripping can save you money, there are times when it’s best to hire a pro. Here are some scenarios to consider.
- Suspected lead/asbestos: If your home was built before 1978, test for lead paint. If present, hire a certified professional to strip it safely. The same goes for asbestos in older homes.
- Extensive structural damage: If the substrate has significant damage or needs major repairs, consider hiring a pro to ensure the surface is properly prepared before painting.
- Large commercial jobs: For big projects like office buildings or retail spaces, it’s often more efficient and safer to hire licensed contractors with the right equipment.
- Complex surfaces (if unsure): If you’re dealing with intricate details, ornate moldings, or unique surfaces, a pro can help ensure a thorough and careful job.
- Time constraints: If you don’t have the time to do it yourself, hiring a professional can save you stress and ensure the project is completed quickly.
Quick rule: When in doubt, err on the side of caution. It’s better to hire a pro than risk damage or injury.
Repainting Best Practices and Prevention of Recurrence
Choose coatings that pair well in flexibility and finish with the substrate. Always follow manufacturer instructions for surface preparation, application conditions, and cure times. Document product choices to guide future touch-ups or repaints.
Limit risks by running small test areas and verifying compatibility before full-scale work. Maintain the substrate health by addressing moisture, movement, and ongoing maintenance as needed to prevent future alligatoring.
Matching paint flexibility and system design
The key to preventing alligatoring is using compatible primer and topcoat systems that have similar flexibility and thickness. This ensures long-term adhesion and helps prevent cracking.
Flexibility matters. Paint needs to stretch and contract with temperature changes without breaking. Using a rigid paint over a flexible surface, or vice versa, can lead to problems.
Stick with the same manufacturer’s system if possible. They’ve designed their primers and topcoats to work together. If you must mix brands, ensure they have similar properties.
Thickness also plays a role. Too thick, and paint can’t flex; too thin, and it may crack. Follow manufacturer guidelines for coat thickness.
Application conditions and technique tips
Control your environment to prevent alligatoring. Paint needs the right temperature and humidity to cure properly.
Check the label. Each paint has its own sweet spot for application. Stay within those limits.
Temperature: Most paints need 50-90°F (10-32°C) to apply and cure. Humidity: Ideal is 40-70% RH. Too high, and paint may not dry; too low, and it might crack.
Control coat thickness. Too much, and paint can’t dry evenly; too little, and you won’t get good coverage or protection. Use a wet film gauge to keep it consistent.
Maintenance and monitoring to catch early signs
Regular visual inspections help catch small failures before they spread into alligatoring. Make it a habit, especially in areas with temperature extremes.
Look for cracks. Even tiny ones can grow if not addressed. Check corners, edges, and anywhere paint might be stressed.
Touch up small failures promptly. This seals the surface and prevents moisture from getting in. Use a touch-up pen or brush, applying just enough to fill the crack and level with the surrounding paint.
If you find alligatoring, don’t wait. Strip and repaint before it gets worse. Follow our step-by-step guide for stripping and repainting.
Conclusion
Dealing with alligatoring is about making the surface durable again and doing it safely. If you don’t strip properly, you may trap moisture, peel again, or ruin the substrate. Plan for a solid, repeatable workflow and you’ll protect the look and the structure.
To move forward, treat the job like a small project with a clear sequence: evaluate the paint condition, select a compatible stripping option, test in a hidden spot, follow the chosen method step by step, clean and dry completely, then prime and repaint with proper safety gear. Start with a small test area, verify the coating integrity, ventilate, and work in good light. Check the substrate for damage as you go and adjust your plan if you see wood rot, rust, or loose plaster.
Common mistakes to avoid are rushing the stripping step, skipping a test patch, and ignoring safety gear or disposal rules. Always wear eye protection and a respirator if you’re working with fumes, work in a well-ventilated space, and keep the work area contained to prevent dust and debris from spreading. Don’t skip surface prep or over-apply heat or solvent beyond what the guidance allows. If the project starts showing structural issues, or if you’re unsure about the substrate, call a professional rather than pushing on and risking bigger damage.
When the signs point to serious damage or tricky substrates, professional help can save time and cost. If you decide to proceed alone, stay deliberate, document every step, and finish with a proper primer and finish coat. With the right approach, you’ll finish clean, durable, and ready for years of protection.
FAQ
How can I tell if I actually need to strip, not just clean and repaint over alligatoring?
If you see cracking that looks like a reptile pattern and the paint below feels loose, it’s a sign the surface needs more than cleaning. A light scrape should reveal firm material beneath; if it flakes or peels easily, stripping is likely required. Check the substrate and follow manufacturer instructions for any coating removal steps.
What’s the safest first step before any stripping work starts?
Protect yourself with eye and skin protection, and dust containment if you’re sanding. Remove loose paint with a scraper or putty knife carefully, and keep the area well-ventilated. If you’re unsure about lead paint or other hazards, pause and consult local rules or product labels before proceeding.
How do I choose between stripping methods for a DIY project?
Consider the surface type, condition, and your comfort with methods like chemical strippers, heat, or mechanical removal. Read product labels and follow disposal guidelines. If in doubt, pick a method whose manufacturer instructions match your surface and safety setup.
What should I do about disposal after stripping and repainting?
Contain and bag debris properly and follow local disposal rules for paint waste and related materials. Do not mix waste streams unless the product labels allow it. When in doubt, check with your local waste authority or the product manufacturer for guidance.