
Introduction
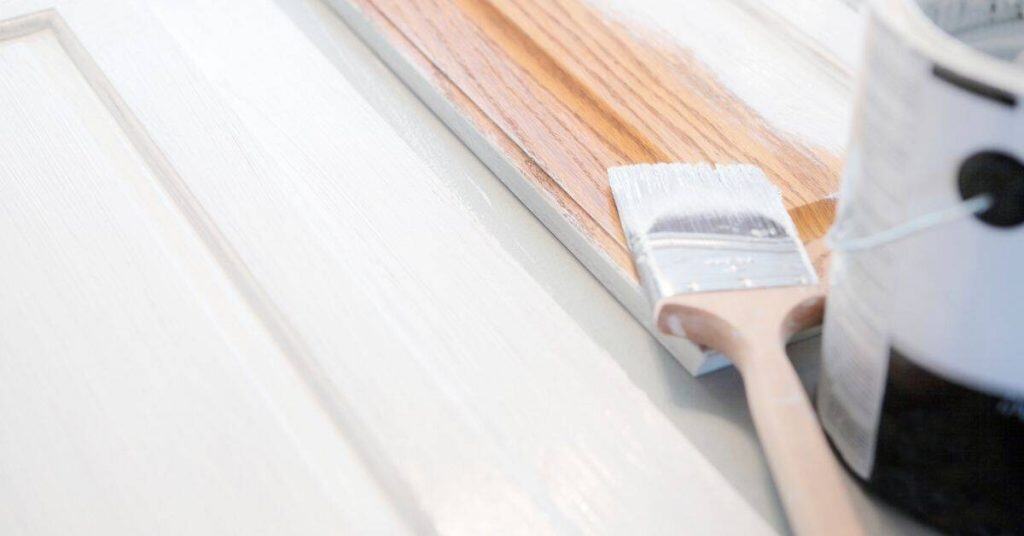
Paint that looks like wood is a finish that imitates grain and texture with color. It’s DIY-friendly when you use the right tools and patient technique. This article walks you through practical methods and common fixes.
If the grain comes out wrong, start by cleaning and re-evaluating your base coat. Use manufacturer instructions and label notes to pick the right glaze, brush, or roller and test on a scrap first. Keep expectations realistic and check local guidelines or product specs for limits on coatings.
Key takeaways
- Inspect surface for grain direction and repair any cracks before painting.
- Prime properly and test adhesion on a hidden area prior to full coats.
- Use a quality brush or sponge technique to mimic real wood grain.
- Match scale grain to the surface size for believable results.
- Safely ventilate, wear eye protection, and keep pets away during work.
- Practice on scrap panels before committing to the final piece.
Table of Contents
- Introduction
- Key takeaways
- Why Fake-Wood Paint Is Used and Realistic Expectations
- Tools and Materials Checklist
- Step-by-Step Faux-Wood Methods (Detailed Techniques)
- Visual Design and Scale: How to Make Grain Look Believable
- Common Failures and Their Root Causes
- Fixes and Corrective Workflows for Failed Jobs
- Testing, Visual Checkpoints, and Practice Exercises
- Maintenance, Durability, and Long-Term Touch-Ups
- Conclusion
- FAQ
Why Fake-Wood Paint Is Used and Realistic Expectations
Choosing a painted wood look can be about saving money, improving moisture resistance, and giving tired furniture a fresh life. It sets realistic expectations that the finish mimics wood, not the real stuff, and isn’t always the best choice for every shape or edge. Good candidates include clean, stable wood surfaces and properly prepared substrates; veneers and solid wood often look better with real veneer or solid wood.
This matters because your result depends on prep, product, and application, not just the color. Check the label for substrate compatibility and follow the manufacturer’s instructions for priming, sealing, and maintenance. For disposal, follow local household hazardous waste rules and don’t dump leftovers or rinse water down drains or onto soil.
Best surfaces and situations for faux-wood paint
Faux-wood paint works best on smooth, even surfaces. Here’s what you can use it on:
MDF and plywood: These are great bases. Just make sure they’re sanded smooth.
Primed metal: Paint adheres well to primed metal. It’s perfect for reviving old furniture or appliances.
Existing painted wood: You can paint over existing paint, but it must be in good condition and properly cleaned.
But avoid using faux-wood on:
Rough surfaces: Paint won’t stick well to rough or textured surfaces. Sand them smooth first.
Wet areas: While paint can mimic wood, it’s not as moisture-resistant. Avoid using it in bathrooms or kitchens near water sources without proper sealing.
Always test adhesion on the specific substrate before you start painting to ensure it sticks.
What faux-wood can and cannot mimic
Faux-wood paint is designed to look like real wood, but it’s not the same. Here’s what you need to know:
It can mimic the appearance of various woods. With different colors and grains, you can get a realistic look.
But it cannot replicate texture or depth. Real wood has natural grain and variations that paint can’t match. It also won’t feel like real wood to the touch.
And while faux-wood can look warm, it might not have the same natural warmth as real wood. This is especially true with lighter colors or when used in large areas.
So, manage client or homeowner expectations. Faux-wood is a great alternative for cost and maintenance reasons, but it’s not a perfect substitute for real wood.
Tools and Materials Checklist
This is your practical inventory: tools, applicators, and consumables you’ll actually use from prep to finish. It includes budget options and places where a higher-quality tool can matter. For any item, check the label or datasheet to confirm suitability.
Quality now saves trouble later; a decent brush or roller, the right mixing containers, and proper PPE keep a project on track and safer. Don’t fall for junk that breaks mid-task or wears out fast. If you’re unsure, compare labeled features and follow the manufacturer’s guidance for your specific material and job.
Essential graining tools and applicators
Before you start, make sure you have the right tools for the job. Here’s a quick checklist.
- Graining combs: For creating wood grain patterns. Choose ones with varying depths for realism.
- Rocker tool: Smooths out paint and creates even texture. Use it after applying glaze.
- Bristle brushes (natural or synthetic): For cutting in edges and applying base coats. Synthetic are cheaper but less durable.
- Foam rollers: Apply paint quickly and evenly. Use them for large, flat areas.
- Rags: Blend edges and create soft transitions between colors or glazes.
- Disposable trays: Mix paints and glazes in these. They’re cheap and easy to clean up.
Quick rule: Don’t skimp on tools. Cheap brushes can leave bristles in your paint, ruining the finish.
Paints, glazes, primers, and topcoats — specs to check
Read labels carefully before buying. Here’s what to look for.
- Compatibility: Make sure all products are compatible with each other and the surface type.
- Base type: Water-based paints are easier to clean up but oil-based offer better durability. Choose what fits your needs.
- Dry time: Consider how long you can work before the paint dries. Faster drying times mean less working time.
- Sheen: Matte to satin finishes are best for faux-wood effects as they mimic natural wood grain.
- Glaze:paint mixing: Follow manufacturer instructions. A common mix is one part glaze to three parts paint.
Quick rule: Always follow the manufacturer’s guidelines for best results and safety.
Safety, ventilation, and disposal
Your health and safety are important. Here’s what to consider before you start painting.
- PPE: Wear gloves, goggles, and a respirator when handling solvents and paints.
- Ventilation: Ensure the area is well-ventilated. Open windows or use fans to circulate air.
- Solvent handling: Always follow safety guidelines when using solvents. Keep them away from heat sources and open flames.
- Disposal rules: Check local regulations for disposing of paint and solvent waste. Some areas have specific recycling programs.
Quick rule: Never mix different types of solvents or paints as this can cause dangerous reactions.
Step-by-Step Faux-Wood Methods (Detailed Techniques)
Here are proven faux-wood methods you can follow from prep to finish. Each method includes prep, basecoat, grain application, and a final coat so you can choose what fits your skill and the project size.
Choosing the right method matters because it saves time and avoids messy results. You’ll get practical context on what to expect, how the texture holds up, and how to adjust for different wood looks.
Step-by-Step Process
This section walks you through a clear, numbered sequence of practical steps for applying faux-wood methods. It starts with preparation and safety checks, then guides you through the main work, and finishes with cleanup or final checks.
- Preparation: Clear the area, lay drop cloths, and gather tools. Safety first – ensure proper ventilation and wear protective gear.
- Surface Preparation: Clean, sand, prime, and let dry. Fill any gaps or holes.
- Basecoat Application: Apply basecoat color using a roller or brush. Let it dry according to the manufacturer’s instructions.
- Graining: Using your chosen method (brush-and-glaze, combs, etc.), apply the grain effect. Work quickly and evenly.
- Finishing Touches: Apply topcoat, let dry, then clean up tools and area.
Basic brush-and-glaze faux wood (beginner)
This method uses a single glaze layer to create a simple, linear grain effect. It’s perfect for beginners.
Start by applying your basecoat color. Once dry, mix your glaze with the chosen grain color. Dip your brush in the glaze, then pull it along the surface in long, steady strokes, mimicking wood grain.
Tip: Work quickly and evenly to avoid streaks or missed spots. Let it dry, then apply a topcoat.
Combs, rockers, and chains for realistic grain (intermediate)
For more realistic results, use combs, rockers, or chains. These tools create long, continuous grain patterns.
Load your tool with glaze, then pull it along the surface. Change the spacing between strokes to vary grain scale. For knots and wavy patterns, use a rocker tool.
Remember: Work quickly and consistently for best results. Let it dry, then apply a topcoat.
Layered techniques: sponging, feathering, and distressing (advanced)
Advanced techniques involve building depth with multiple translucent layers. Start with a basecoat, then apply glaze using a sponge for varied texture.
Feather the edges of your grain to blend it seamlessly into the basecoat. For knots, use a rocker tool or sponging technique. Distress the surface subtly with sandpaper or steel wool.
When to stop: Look at your work critically. More layers don’t always mean better – know when you’ve achieved the desired effect.
Visual Design and Scale: How to Make Grain Look Believable
Grain looks believable when you match its size and scale to the object, vary contrast, and place knots without repeating patterns. Keep color temperature in check so the wood doesn’t look off. The goal is a natural, non-repeating grain rather than a toy-like texture.
Think of grain as a story on the surface. If you keep everything too uniform, it screams fake; use variety in knot placement and grain direction to read as real wood. When you’re unsure about the right scale, check the product label or datasheet for guidance.
Choosing the right grain scale and contrast
The first rule of believable grain is: size matters. Match your grain width to the size of the object you’re painting.
For small pieces, like cabinets or picture frames, use thin, delicate lines. For large surfaces, like walls or furniture, go wider.
Pro tip: Viewing distance plays a role too. Up close, fine details work. Far away, broader strokes are needed.
Contrast is key too. Darker grains on lighter backgrounds look natural. But avoid stark contrasts; it’s unnatural and looks fake.
Creating convincing knots and imperfections
Knots are what make wood, well, wood. But they can’t look like stickers slapped on.
Use a small brush or even a toothpick to dab on knots. Vary their size and placement. Don’t follow a pattern; nature doesn’t.
Pro tip: Imperfections aren’t perfect. Some knots should be bigger, some smaller. Some close together, others far apart.
To create cracks or wormholes, use a thin brush and dark glaze. Again, vary their size and placement. Randomness is your friend here.
Common Failures and Their Root Causes
Common faux-wood failures show up as poor adhesion, obvious pattern repetition, wrong scale, sheen mismatch, or bubbling. These happen when you skip surface prep, pick the wrong product, or rush the job—things you can fix with proper prep and following the right steps on the label.
Knowing the culprits helps you avoid repeat mistakes. It matters because adhesion, look, and finish depend on choosing the right product for the surface, doing a proper test patch, and following the manufacturer instructions exactly. When in doubt, check the label or datasheet for guidance on prep, timing, and application.
Adhesion, blistering, and peeling causes
Adhesion failures are a common issue with faux-wood finishes. They usually manifest as bubbling, blistering, or peeling paint. Here’s what causes them:
Surface contamination: Dirt, grease, or previous coatings can prevent the new paint from sticking properly. Always clean and prime surfaces before painting.
Incompatible products: Using incompatible paints, primers, or topcoats can lead to adhesion problems. Stick to recommended product combinations.
Moisture issues: High humidity or damp surfaces can cause blistering. Ensure surfaces are dry and well-ventilated before painting.
Unnatural looking grain: repetition and wrong scale
One of the quickest ways to spot a fake wood finish is unnatural-looking grain. Here’s why:
Repetitive patterns: Using the same tool or brush stroke repeatedly creates a repetitive pattern that doesn’t mimic real wood.
Wrong scale: Using tools that are too large or small for the surface area can make the grain look unnatural. Choose tools based on the size of your project.
Poor contrast/edge blending: Inconsistent grain depth and lack of edge blending can make the grain look artificial. Vary your pressure and use a glaze to create natural-looking edges.
Sheen, texture, and brush-mark problems
An unnatural sheen or visible brush marks can give away your faux finish. Here’s how to avoid these issues:
Sheen mismatches: Using a sheen that doesn’t match the wood you’re trying to mimic will make your finish look fake. Choose a sheen that matches the real wood as closely as possible.
Visible brush strokes: Heavy or uneven brush strokes can create an unnatural texture. Lighten your touch and use long, smooth strokes for a more natural look.
Lap marks: These occur when you paint over wet edges, creating visible lines. Avoid lap marks by keeping a ‘wet edge’ while painting and using a consistent stroke length.
Fixes and Corrective Workflows for Failed Jobs
Fixes and corrective workflows start with a stepwise plan. For each failure type, begin with light fixes and testing, then move to bigger repairs or a full strip-and-repaint if needed. Stop and call a pro when tests show repeat problems, structural concerns, or unsafe materials.
Testing before committing to wide repairs saves time and money. It helps you see what actually needs changing and prevents wasted effort. Use the test patches to judge adhesion, moisture, and finish compatibility; if things don’t behave the way you expect, reconsider before big work.
Surface prep and small-spot repairs
For minor issues, don’t redo the whole piece. Here’s how to fix them:
Feather-sanding: Lightly sand problem areas with fine-grit sandpaper, following the grain. Wipe clean.
Spot priming: Apply a thin layer of primer to seal and prepare the area for touch-up.
Re-applying glaze: Using a small brush, apply glaze in thin layers, blending it into surrounding areas. Work quickly before it dries.
Reworking fake grain that looks repetitive or flat
Break up repetitive patterns with these tactics:
Overlay a second glazed layer: Apply a new glaze layer in a different direction or pattern to disrupt repetition.
Rescale grain: Use a different tool (comb, rocker) to create varied grain sizes and break up patterns.
Selective blending: Gently blend problem areas with surrounding grain using a damp cloth or sponge to soften harsh lines.
When to remove and start over (and how)
Sometimes, it’s best to strip and start fresh. Here are signs and methods:
Signs: Heavy peeling, large blisters, or unfixable grain issues indicate full removal is needed.
Stripping/sanding: Use a paint stripper or sand lightly with coarse-grit paper to remove old finish. Always wear proper protection.
Re-priming checklist: Ensure surface is clean, dry, and free of debris before applying primer for better adhesion.
Testing, Visual Checkpoints, and Practice Exercises
The key point is to build and test small panels that copy the real substrate, lighting, and viewing distance, then use a quick set of visual checkpoints to approve the test before full application. This gives you a practical, hands-on way to verify how it will look and perform.
Doing this early saves time and material and helps you avoid big surprises on the main job. Visual checkpoints to use include edge control, color and shade match, texture feel, and uniform sheen or finish; if you need a number or spec, check the label/datasheet.
Mock-up panels and approval checklist
Before diving into your project, create test panels to ensure your paint job will look like real wood. This helps you avoid costly mistakes.
- Color Match: Check if the color matches your desired shade under different lighting conditions.
- Grain Realism: Inspect the grain pattern for believability and variation.
- Adhesion: Scratch or tap the panel to ensure the paint adheres well. Poor adhesion can lead to peeling later on.
- Sheen Consistency: Ensure the sheen is consistent across the panel.
- Tool Marks: Check for any unwanted brush or roller marks.
- Knots and Imperfections: Verify that knots and imperfections look natural and convincing.
- Repetition: Ensure there’s no repetitive pattern in the grain. This can make it look fake.
- Documentation: Note down all the products used, their ratios, and any specific techniques applied.
Quick rule: If your test panel doesn’t pass these checks, don’t proceed with the full job. Make adjustments and retest.
Exercises to train consistency and avoid pattern repetition
Practice makes perfect, especially when it comes to creating convincing wood grain. Here are some exercises to help you achieve consistency.
- Tool Speed: Practice applying paint at a consistent speed to maintain even coverage and grain realism.
- Pressure Control: Work on controlling the pressure you apply while using your tools to avoid uneven results.
- Grain Rhythm: Practice creating a natural, flowing grain pattern. Repetition can help train your eye and hand.
- Knots and Imperfections: Practice creating convincing knots and imperfections consistently.
- Sheen Consistency: Work on maintaining consistent sheen across your practice panels.
Quick rule: Regular practice helps avoid common faux-grain errors. Make it a habit to do these exercises before starting any project.
Maintenance, Durability, and Long-Term Touch-Ups
Your topcoat largely determines durability and how easy the surface is to clean. Choose a finish and color you can match later, and plan touch-ups for worn spots as part of the maintenance routine. Sheen level and color must be matched when you touch it up.
Keeping notes on what you used helps when you need to refresh. Match sheen and color in repairs, and follow manufacturer cleaning guidelines to avoid dulling or peeling. Always check the label or datasheet for recoat or maintenance instructions.
Choosing and applying compatible topcoats
Matching the right topcoat to your paint or glaze is crucial for durability. A clear coat should be compatible with the base layer, so they don’t react negatively over time.
Gloss level plays a big role too. Higher gloss can highlight imperfections, while lower gloss might not last as long. For realism, aim for satin or semi-gloss. They mimic natural wood’s sheen and are easy to clean.
Always spot test before applying. Use a small, hidden area to check for any reactions between the topcoat and base layer. Let it dry completely before proceeding.
Touch-up techniques and aging gracefully
Over time, even faux wood needs touch-ups. Discreet touch-ups are key to maintaining a natural look. Use a small, fine-tipped brush for precision.
Color matching can be tricky. If you’ve run out of paint, try mixing a new batch using your original formula. If that’s not possible, use a color-matching service at a hardware store.
Intentional aging techniques can help touched-up areas blend in. Lightly sand the area before touching up to mimic natural wear. After drying, gently rub with steel wool or fine-grit sandpaper to distress it slightly.
Conclusion
Finish with confidence by locking in the look through careful prep, patient applications, and a proper topcoat. This matters for safety, durability, and a convincing grain that lasts.
To finish strong, prep the surface completely, test your technique on a small patch first, mix colors to match scale, apply in thin passes with clean tools, let each coat dry fully, inspect the result in good lighting, seal with the right topcoat, and maintain a regular touch-up schedule.
Avoid common missteps: skip or skim prep, overwork the faux grain, rush coats or skip drying times, use the wrong brush or roller, or skip sanding between layers; and follow safety rules by ventilating the area, wearing a respirator or mask, gloves, and eye protection, plus protecting nearby surfaces and flooring from spills.
If the surface is irregular, large, or the stain/paint is failing despite careful work, it may be wiser to bring in a pro instead of forcing a fix. Stay patient, follow the workflow, and you’ll protect your investment and keep the finish looking real and durable for years to come.
FAQ
What should I check first if my faux grain looks off after finishing?
First, inspect the base coat for uniform color and the glaze for even spread. Look for brush marks, lap lines, or pooling. If anything looks uneven, you may need to sand lightly and recoat according to the product instructions.
Why does grain sometimes disappear or blur after a second coat?
Overworking the glaze or applying it too thick can blunt the grain. Too little contrast between layers also makes grain fade. Check the label for recommended recoat times and load versus technique guidelines.
How do I fix a bad grain impression without starting from scratch?
Try a light touch-up using the same technique you used originally, with a fresh tool and clean glaze. If a full recoat is needed, sand the affected area lightly and reapply in thin, even layers. Always test on a scrap piece first.
What safety steps should I follow during fixes and touch-ups?
Ventilate the area well and wear a mask if sanding creates dust. Use eye protection and gloves, and clean brushes and tools thoroughly after use. Check product labels for any specific safety tips or drying times.