

Introduction
This article offers practical house painting tips and techniques, focusing on common issues and how to fix them. We’ll keep it hands-on, with step-by-step ideas you can try on your own walls.
From prep to finish, we’ll cover common problems you’ll run into and practical fixes you can implement. Expect plain language, real-world checks, and signposts to verify things like surface condition, humidity, and drying. If you hit a snag, look at the product labels and manufacturer instructions for limitations and safety notes.
Key takeaways
- Prep surfaces thoroughly: remove loose paint, clean dust, and repair peeling edges.
- Prime appropriately: choose compatible primer for substrate and topcoat type.
- Use quality brushes/rollers and work in manageable sections for even coverage.
- Apply thin coats, allow adequate drying, and avoid overworking finish.
- Protect surroundings and wear PPE; cover floors, wear eye/respiratory protection.
- Inspect after each coat; fix drips, laps, and uniform sheen before final cure.
Table of Contents
- Introduction
- Key takeaways
- Surface Preparation Essentials
- Choosing Paint, Primers, and Materials
- Application Techniques for Professional Results
- Common Problems and How to Fix Them
- Trim, Windows, Doors, and Delicate Details
- Exterior-Specific Considerations
- Safety, Testing, and Environmental Practices
- Maintenance, Scheduling, and Visual Quality Checkpoints
- Conclusion
- FAQ
Surface Preparation Essentials
Thorough prep is the foundation for a long-lasting paint job. It sets the stage for good adhesion and even appearance. You should plan cleaning, repairing, sanding, and priming before any finish coats.
Start by cleaning surfaces to remove dirt and grease, then repair cracks or damaged areas. Lightly sand to create a key, wipe away dust, and apply a primer where needed. This sequence helps the topcoat stick and stay smooth over time.
Cleaning, mildew removal, and degreasing
Before you start painting, it’s crucial to clean the surface thoroughly. Dirt, grease, and mildew can prevent paint from adhering properly.
For general cleaning, use a solution of warm water and mild detergent. Apply with a soft-bristle brush or cloth, then rinse off with clean water.
To remove mildew, mix one part bleach to three parts water. Wear gloves and protective clothing when using this solution. Apply it to the affected area, let it sit for about 15 minutes, then scrub and rinse.
For greasy surfaces, use a degreaser specifically designed for the material you’re working with. Always follow the manufacturer’s instructions.
Scraping, sanding, and feathering edges
The next step is to remove any loose paint and create a smooth surface. Start by scraping off any peeling or flaking paint using a paint scraper.
For smooth surfaces like walls and doors, use medium-grit sandpaper (around 120-grit). For rougher surfaces like wood siding, start with coarse sandpaper (80-grit) and finish with medium.
Feathering edges is important to create a smooth transition between the old paint and the new. This involves sanding the edge of the surface at an angle, creating a feathered effect.
Always wear a dust mask when sanding to protect your lungs from harmful particles.
Repairing cracks, holes, and rotten wood
Inspect the surface for any cracks, holes, or signs of rot. These need to be repaired before painting.
For small cracks and holes, use a spackling compound or joint compound. Apply with a putty knife, let it dry according to the manufacturer’s instructions, then sand smooth.
If you find rotten wood, you’ll need to replace that section entirely. Cut out the damaged area using a saw, then measure and cut a new piece to fit. Secure it in place with screws or nails, then apply exterior wood glue along the seam for added strength.
Always allow filled areas to cure completely before painting. This could take anywhere from a few hours to a full day, depending on the material used.
Choosing Paint, Primers, and Materials
Know the differences between paint types, sheens, and primer roles before you buy. Each choice affects durability, washability, and finish look. Matching products to the surface is key for a lasting result.
Check the product datasheets for compatibility with your substrate and previous coatings. Look at primer requirements, topcoat compatibility, and recommended environmental conditions. When in doubt, verify with the manufacturer instructions or local guidelines to avoid issues.
Paint types and sheens explained
Choosing the right paint is crucial for a lasting, attractive finish. Here’s what you need to know about common exterior and interior paint bases and finishes.
Exterior Paints: Opt for 100% acrylic latex paints. They’re durable, flexible, and resist fading and peeling. Semi-gloss or satin sheens are best for siding; flat sheens work well on stucco or rough surfaces.
Interior Paints: Latex is again your friend – it’s easy to clean up, dries quickly, and has low VOCs. For walls, choose an eggshell or satin finish for easy cleaning. Semigloss or gloss are great for trim and cabinets.
Specialty Paints: Consider using paint with added protection against mold, mildew, or UV rays where needed. Always check product datasheets to ensure compatibility with your surface and existing coatings.
Primer selection and adhesion boosters
A good primer ensures better paint adhesion and can help seal surfaces. Here’s when to use which type:
Bonding Primers: Use on bare or poorly prepared surfaces, like new drywall or previously painted surfaces with poor adhesion. They create a strong bond between the surface and your topcoat.
Stain-Blocking Primers: Ideal for covering stains from water damage, smoke, or tannin bleed (from wood). Apply before painting to prevent these issues from bleeding through your paint.
Adhesion Promoters: Sometimes, you’ll need an extra boost. Adhesion promoters are added to the paint or applied separately to improve bonding on challenging surfaces like glass, metal, or plastic.
Tools and materials checklist
Before you start painting, gather these essential tools and materials for a smooth job:
- Brushes: Natural bristle for oil-based paints; synthetic for latex. Choose quality brushes for better results.
- Rollers: Microfiber or lambswool covers work well with most paints. Get a variety of sizes to tackle different jobs.
- Tapes: Painter’s tape is a must for clean lines. Use it before painting and remove while the paint is still wet.
- Caulks: Have a selection on hand – acrylic latex caulk works well with most paints; silicone caulk is ideal for bathrooms and kitchens.
- Masks: Protect your face, eyes, and hands with appropriate masks and gloves.
- Sandpaper: Medium-grit sandpaper (120-150) for prep work; fine-grit (220+) for smoothing edges.
- Drop Cloths: Protect your floors with canvas or plastic drop cloths.
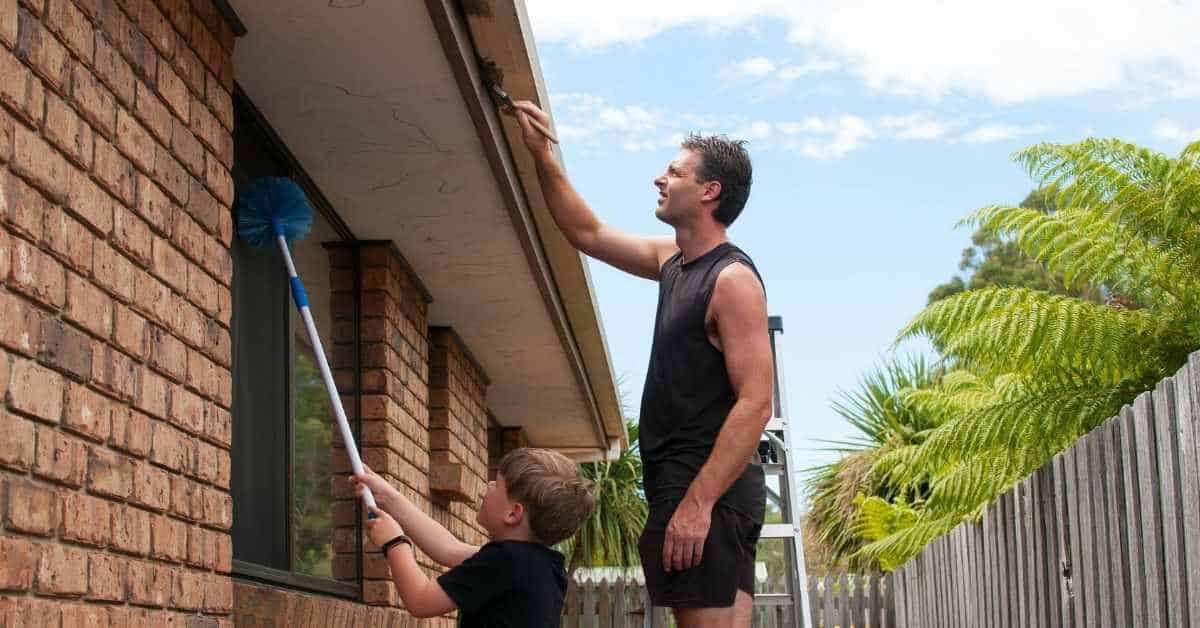
- Ladders/Scaffolding: Ensure you have safe access to high areas. Always follow safety guidelines when using ladders or scaffolding.
Quick rule: Don’t skimp on quality tools – they’ll make your job easier and give better results.
Application Techniques for Professional Results
Develop a rhythm for cutting in, rolling, and occasional spraying to ensure uniform coverage. Keep brush and roller edges wet enough to blend without lap marks. Plan your moves in manageable sections to avoid overlapping dry edges.
Follow manufacturer instructions for application conditions, including temperatures and humidity. Work systematically, maintaining consistent pressure and speed. Practice on a hidden area if you’re unsure about technique or finish texture.
Brushing and Rolling Best Practices
Start by choosing the right brush for your job. For cutting in, a 1-2″ angled sash brush works well. For rolling, use a high-quality roller cover with a 3/8″ or 1/2″ nap.
Loading technique: Dip your brush about 1-2″ into the paint and tap off excess on the lip of the can. For rollers, fully submerge in paint, then roll it out on the grid until evenly coated.
Stroke patterns: Use a ‘W’ or ‘M’ pattern for walls to ensure even coverage and minimize lap marks. Work from top to bottom, overlapping each stroke by about 50%.
Spraying Setup and Technique Basics
Choose a sprayer based on your project size – small jobs can use handheld units, while larger ones may need airless or HVLP systems.
Nozzle choices: Larger nozzles (e.g., 0.12″ for exterior) provide better coverage but less detail. Smaller nozzles (e.g., 0.017″ for interior) offer more control but slower application.
Overlap technique: Overlap each pass by about 50% to ensure even coverage and minimize visible spray lines. Keep your distance consistent – typically 6-12″ away from the surface.
Cutting In, Edging, and Blending
Ceilings: Use a steady hand and guide (like painter’s tape) to create clean lines. Start at one corner, pull the brush along the edge, then fill in the rest.
Trim and corners: Again, use guides for straight edges. For corners, cut in from both sides, then blend with a backrolling technique – roll over the edge with a dry roller to smooth out any lines.
Remember, less is more when cutting in. Work slowly and deliberately to avoid over-applying paint and creating drips or runs.
Common Problems and How to Fix Them
Identify common finish failures like peeling, blistering, or cracking by inspecting edges and surfaces. Root causes often relate to poor adhesion, moisture, or improper surface preparation. Early detection helps you pick the right fix.
For fixes, remove and re-prepare the affected area, then recoat with proper primer and topcoat. Use the same type of finish and ensure the substrate is dry and clean. Always follow the product label and manufacturer instructions for reapplication timelines and conditions.
Peeling, flaking, and loss of adhesion
If paint is peeling off your walls, it’s likely due to poor surface preparation or incompatible coatings. Here’s how to fix it:
Step 1: Remove the loose paint using a scraper or putty knife.
Step 2: Sand the area lightly with fine-grit sandpaper to smooth out any rough spots and improve adhesion for the new coat.
Step 3: Clean the surface with a degreaser or TSP substitute to remove any remaining residue. Let it dry completely.
Step 4: Prime the area using an appropriate primer, such as an oil-based primer for oily surfaces or a stain-blocking primer for water stains. Allow it to dry according to the manufacturer’s instructions.
Step 5: Repaint the area with your chosen paint, following the application techniques mentioned earlier in this guide.
Blistering, bubbling, and fisheyes
These issues can be caused by moisture from the substrate or environmental conditions. Here’s how to fix them:
Step 1: Allow the blisters to dry completely. If they’re still wet, you’ll need to wait until they’re fully dried before proceeding.
Step 2: Carefully cut or scrape off the blistered paint using a utility knife or scraper.
Step 3: Sand the area lightly with fine-grit sandpaper to smooth out any rough spots and improve adhesion for the new coat. Wipe away any dust with a damp cloth.
Step 4: Inspect the substrate for any signs of moisture or water damage. If present, address these issues before proceeding with painting.
Step 5: Prime the area using an appropriate primer that can seal and block moisture, such as a shellac-based primer. Allow it to dry completely according to the manufacturer’s instructions.
Step 6: Repaint the area with your chosen paint, following the application techniques mentioned earlier in this guide.
Mildew, staining, and discoloration
Persistent stains and mildew growth can be unsightly and difficult to remove. Here’s how to treat them:
Step 1: Identify the cause of the stain or mildew. If it’s mildew, you’ll see a fuzzy, black or green growth on the surface.
Step 2: Clean the affected area using a solution of bleach and water (about 1 part bleach to 3 parts water) for mildew, or a heavy-duty cleaner like TSP substitute for stains. Follow the manufacturer’s instructions for proper dilution and application.
Step 3: Rinse the area thoroughly with clean water and allow it to dry completely.
Step 4: Apply a stain-blocking primer to seal in any remaining stains or mildew spores. Allow it to dry according to the manufacturer’s instructions.
Step 5: Repaint the area with your chosen paint, following the application techniques mentioned earlier in this guide. Consider using a paint with built-in mildewcide to prevent future growth.
Trim, Windows, Doors, and Delicate Details
Masking and caulking are essential to clean, crisp lines on trim. Use painter’s tape with careful placement to protect adjacent surfaces. Choose paint with appropriate durability for trim details.
Prepare surfaces by removing loose paint and sealing gaps with compatible caulk. Apply primer if required for the material, then finish with a compatible topcoat. Pay attention to overlapping joints and edges for a seamless look.
Preparing and Painting Trim and Moldings
Start by sanding your trim lightly with fine grit sandpaper. This helps paint adhere better and creates a smooth finish.
Use a primer to seal the surface, prevent tannins from bleeding through, and improve paint adhesion.
When painting, use a good quality brush with angled bristles for crisp lines. Work in manageable sections, applying even strokes along the grain of the wood.
For best results, let each coat dry completely before sanding lightly and applying the next one.
Caulking, Sealing, and Weatherproofing Joints
Choose a high-quality paintable caulk suitable for your joint type. For outdoor use, pick one with good flexibility and water resistance.
Before applying, clean the joint thoroughly to remove dirt and debris. Use a caulk gun to apply a smooth bead along the gap.
Wet your finger or a damp rag to smooth out the caulk and create a tight seal. Allow it to dry according to the manufacturer’s instructions before painting.
Regularly inspect caulked areas for cracks or gaps, and touch up as needed to maintain a weatherproof barrier.
Protecting Hardware and Glass
Before painting, remove any hardware like hinges or knobs. Use painter’s tape to mask off areas you don’t want painted, such as glass or metal fixtures.
For windows, apply tape along the edges of the glass. For doors with glass inserts, cover the entire area with plastic sheeting secured by tape.
When painting, work carefully around masked areas to avoid overspray or drips. After painting, remove the tape and hardware, then reinstall once the paint is completely dry.
Regularly clean and inspect your hardware to ensure it’s functioning properly and looking its best.
Exterior-Specific Considerations
Weather and seasonal timing influence product selection and application windows. Substrate type, such as wood or masonry, also changes your approach. Plan to work within the manufacturer’s environmental limits.
Consider surface exposure, such as sun, wind, and rain, when choosing coatings. Verify that the chosen system is rated for exterior use on your substrate. If unsure, consult the product label or manufacturer instructions for outdoor suitability.
Weather, Temperature, and Humidity Impacts
Painting outdoors means dealing with Mother Nature. Weather conditions can affect your paint job’s outcome.
Temperature: Most paints work best between 50°F to 85°F (10°C to 29°C). Too cold, and the paint won’t adhere or dry properly. Too hot, and it dries too fast, leading to poor coverage.
Humidity: High humidity can cause issues too. It slows down drying time, which can lead to mildew growth. Aim for less than 80% relative humidity when painting.
Look out for signs it’s unsafe to paint: rain, high winds, or extreme temperatures. If you see them, wait for better conditions before starting.
Surface-Specific Tips: Wood, Stucco, Brick, Vinyl
Different surfaces need different prep and paint. Here’s what to do:
Wood: Prime first to seal the wood and improve paint adhesion. Use an exterior-grade acrylic or oil-based primer.
Stucco: Ensure it’s clean, dry, and free of efflorescence (white powder). Apply a masonry primer before painting with 100% acrylic latex paint.
Brick: Clean the surface, let it dry, then apply a masonry primer. Use a 100% acrylic latex paint for best results.
Vinyl: Clean with a mild detergent, rinse, and let it dry. Apply a high-quality exterior acrylic latex paint designed for vinyl siding.
Preventing Water Intrusion and Rot
The key to long-lasting exterior paint is keeping moisture out. Here’s how:
Flashing: Install flashing around windows, doors, and other openings to direct water away from your home.
Trim Detailing: Ensure trim pieces are caulked and sealed properly at joints and seams to prevent water intrusion.
Paint System: Use a paint system designed for your surface that provides good moisture resistance. Apply primer, paint, and any necessary sealants according to the manufacturer’s instructions.
Safety, Testing, and Environmental Practices
Wear appropriate personal protective equipment and ensure proper ventilation during prep and paint work. Use gloves, eye protection, and a respirator or mask as needed. Keep a clean, organized work area to minimize hazards.
Follow guidelines for lead testing if you’re working on older structures and consider low-VOC options to reduce odors and emissions. Handle materials per label directions and store them safely away from children and pets.
Personal protection, ventilation, and tool safety
Your safety and comfort on the job are paramount. Here’s what you need to know.
- Eye Protection: Safety glasses or goggles shield your eyes from debris and paint splatter. Consider those with side shields for extra protection, around $10-$20.
- Respirator: For sanding or spraying, use a respirator to protect against dust and fumes. Half-face models are affordable, around $30-$50.
- Gloves: Protect your hands with work gloves, especially when using power tools. Disposable gloves for painting tasks start at $2 per pair.
- Ear Protection: Use earplugs or earmuffs when operating loud power tools to prevent hearing damage. Basic pairs are around $5-$10.
- Ladders and Scaffolding: For working at heights, use secure ladders or scaffolding. Rentable options start at $25 per day for ladders, more for scaffolding.
Lead paint, older homes, and testing protocols
If your home was built before 1978, it may contain lead paint. Disturbing this paint can release harmful dust.
When to suspect lead: Peeling or chipping paint, especially in older homes, should raise a red flag. Always test before disturbing any old paint.
Use a lead test kit, available at hardware stores for around $10-$20. Follow the instructions carefully to avoid false results.
If lead is present, consider hiring a professional certified in lead abatement. They have specialized equipment and training to minimize risks. Alternatively, use safe work practices like wet sanding or scraping and proper disposal of waste.
Cleanup, disposal, and greener product choices
Proper cleanup ensures a safe working environment and protects the planet. Here’s how:
Paint Brushes and Rollers: Clean with soap and water immediately after use. Disposable options are available but generate more waste.
Solvents: Use paint thinner or mineral spirits to clean up oil-based paints. Dispose of these responsibly at a hazardous waste facility, not down the drain.
Greener Choices: Opt for low-VOC (volatile organic compounds) or zero-VOC paints to reduce emissions. Recyclable packaging is another eco-friendly choice. Look for these features when shopping for paint and supplies.
Maintenance, Scheduling, and Visual Quality Checkpoints
Create a routine inspection plan to catch touch-ups before they worsen. Schedule annual or seasonal checks to maintain appearance and protection. Use visual checkpoints to judge adhesion, uniform color, and edging quality.
Plan touch-ups for small areas rather than a full repaint when possible. When the finish shows wear beyond repair, prepare for a full repaint following the same prep and application steps. Confirm with your own quality standards and any local rules before sign-off.
Routine maintenance and inspection checklist
Use this checklist seasonally to keep your paint job in tip-top shape.
- Spring: Check for peeling or chipping paint, especially on south-facing walls. Why? Sun exposure breaks down paint faster.
- Summer: Inspect caulking around windows and doors. Why? Heat expands materials, which can cause gaps.
- Fall: Check for mildew or mold growth on north-facing walls. Why? Fall rains create ideal conditions for growth.
- Winter: Inspect for cracks in paint, especially around corners. Why? Cold temperatures cause materials to contract.
- Touch-ups: Repaint any small areas with matching paint before they get bigger.
- Wash walls: Gently clean dirt and grime with a soft brush and mild detergent. Why? Dirt breaks down paint over time.
- Check hardware: Tighten any loose screws or hinges. Why? Movement can cause paint to chip off.
- Trim plants: Keep shrubs and trees trimmed away from walls. Why? Plants hold moisture, which can damage paint.
Quick rule: A little maintenance goes a long way in extending your paint job’s life.
When to repaint versus repair
Use this checklist to decide whether to touch up, repair, or repaint an area.
- Peeling: If it’s small and localized, touch up. If large areas are peeling, you may need to repaint or replace substrate.
- Cracking: Small cracks can be patched and painted over. Large cracks may require more extensive repair.
- Chipping: Small chips can be touched up. Large chips might need sanding, priming, and repainting.
- Mold or mildew: If it’s small, clean and touch up. If it’s widespread, you may need to replace the substrate and repaint.
- Substrate condition: Check for rot, warping, or other damage. If found, repair before painting.
- Adhesion: Scrape a small area with a nail. If paint comes off easily, it’s time to repaint.
- Color fading: If it’s uniform, you might just need a fresh coat of paint. If it’s patchy, there may be underlying issues.
- Texture changes: If the surface feels rough or bumpy, sand and repaint.
Quick rule: The sooner you address problems, the less likely you are to need a full repaint.
Visual checkpoints and quality standards
Use this checklist before signing off on a paint job to ensure it meets your expectations.
- Uniform coverage: Check for any missed spots or areas with uneven color. Why? Inconsistent coverage looks unprofessional.
- Clean lines: Inspect edges where paint meets trim, windows, and doors. Why? Sloppy edges make a job look amateurish.
- No runs or drips: Check for any excess paint that’s dried in unwanted patterns. Why? Runs and drips are signs of poor application technique.
- Color match: Compare the newly painted area to surrounding walls. Why? A color mismatch is noticeable even if it’s subtle.
- Sheen consistency: Check that the sheen is consistent across the entire surface. Why? A change in sheen can indicate poor application or quality issues.
- No bubbles or wrinkles: Inspect for any imperfections in the paint film. Why? Bubbles and wrinkles are signs of improper preparation or application.
- Edges: Check that edges are straight and even, with no paint buildup. Why? Crooked edges or buildup can make a job look sloppy.
Quick rule: A good paint job should look uniform, clean, and professional from any angle.
Conclusion
You now have a clear path to a durable, great-looking finish, and you know how to keep people safe while you work. The key is controlled steps, careful prep, and sensible checks at every stage.
Start with a simple checklist: inspect and repair all surfaces, clean and dry the work area, mask and protect what you don’t want painted, select the right primer and paint, test a small patch to confirm color and adhesion, follow proper drying times, apply in even coats, and clean up and store materials safely when you’re done. Do each step in order, and only move on when the previous one is done and looks right.
Common mistakes to avoid include skipping surface prep, piling on paint or primer, and painting in unsuitable conditions or without testing first. Safety rules matter: wear eye protection and a mask when sanding or spraying, keep the area ventilated, never work on wet or frosty surfaces, and dispose of rags and cans according to local rules. If you feel unsure about repairs, lead paint concerns, or exterior work in harsh weather, don’t push past your limits.
When in doubt about problem spots, timing, or exterior conditions, consider calling a professional rather than forcing a fix. Stay patient, follow the steps, and you’ll finish with a professional look and minimal risk of costly mistakes. You’ve got this—finish strong and enjoy the solid, lasting results.
FAQ
Why is my paint peeling or flashing off after it dries?
Peeling usually means the substrate wasn’t properly prepared or the old paint wasn’t compatible. Check the surface for loose material and clean or scrape before re-coating. Follow the manufacturer’s instructions for primers and allow proper cure/adhesion time between coats.
What causes fisheyes or cratering in the finish, and how do I fix them?
Fisheyes come from contaminants like oil, wax, or silicone on the surface. Wipe with a degreasing cleaner and let it dry completely before applying fresh coats. If you still see fisheyes after a repair, spot-prime the problem area and re-apply the finish as directed by the product label.
Why are there roller marks or lap lines in a new paint job?
Roller marks show inconsistent technique, inadequate thinning, or working too slowly in one area. Keep a wet edge and maintain even pressure while rolling. If marks persist, use the same tools and technique for a light, uniform second coat per the product instructions.
What should I do about blistering or wrinkling on exterior paint?
Blisters or wrinkles mean the surface trapped moisture or heat under the film. Remove loose paint, let the surface dry fully, and address moisture sources before repainting. Prime or seal appropriately and apply coats only when conditions meet the product label guidelines.