
Introduction
Painted floor ideas are patterns and coatings applied to a floor to add color, pattern, and durability. Before you paint, prep the floor by cleaning, sanding any high spots, and fixing loose patches so the paint can grip. Check for dust and remove it to avoid bubbles.
Choosing paint suitable for floors matters, so look for floor-grade enamel or latex options and follow the label for prep and top coats. Techniques for hiding plywood seams and imperfections include applying thin coats, caulking seams, and using color-blocking patterns to blur flaws. After you finish, clean the surface and plan for wear by selecting a finish that resists scuffs and last-minute touch-ups as needed.
Key takeaways
- Align plywood seams with masking tape and thin filler before paint.
- Prep surface: clean, dry, sand dull high spots, and remove old coatings first.
- Choose floor-grade epoxy or polyurethane paints rated for concrete or plywood.
- Hide seams and imperfections with skim coat or patching compound before painting.
- Seal with compatible topcoat and cure fully; wear PPE during application.
- Test wear resistance on a small area and avoid solvent-based cleanup on wood.
Table of Contents
- Introduction
- Key takeaways
- Can You Paint Plywood and Other Subfloors?
- Planning Your Painted Floor Project
- Tools and Materials Checklist
- Prep: Removing Coverings, Repairing, Sanding, and Handling Seams
- Paint Selection for Wear Resistance and Safety
- Painting Techniques and Pattern Ideas
- Sealing, Curing, and Testing Wear Resistance
- Conclusion
- FAQ
Can You Paint Plywood and Other Subfloors?
Painting plywood or other subfloors is appropriate for budget renovations, utility spaces, or areas where a durable underlayment finish isn’t required. Use it to refresh a tired surface or to create a defined look in basements, garages, or workshops. Consider wear, moisture risk, and future plans when deciding if this approach fits your project.
Remember it’s cosmetic, not a substitute for finished hardwood or concrete, and it may not hold up in high-traffic or moisture-prone areas. Check moisture readings, local building rules, and the product label for limits. Prep thoroughly with cleaning, sanding or abrading, filling seams, vacuuming, and removing protrusions before applying primers and paints designed for floors.
When painting is a good option
Painting plywood or other subfloors can be an affordable and quick solution, but it’s not always the best choice. It works well when you’re looking for a temporary fix, or if you want to add color and pattern to a space that won’t see heavy foot traffic.
Start by checking your subfloor’s condition. If it’s in good shape, with no major cracks or damage, painting can give it new life. Also consider the room’s intended use. Painting is great for basements, garages, or utility spaces where durability isn’t a top priority.
Remember: This is a cosmetic fix. It won’t replace the feel and durability of finished hardwood or concrete floors.
Limitations and when to replace the floor instead
Painting subfloors isn’t a long-term solution. Moisture, heavy traffic, and time can all take their toll on painted surfaces.
Before you start, test for moisture. If your subfloor is damp, painting won’t help – it might even trap moisture, leading to rot or mold. Also, check the floor’s structure. If there are major cracks, gaps, or soft spots, replacement might be the only option.
Consider: Painting can hide damage, but it won’t fix it. If you’re unsure about your subfloor’s condition, consult a professional before proceeding.
Special cases (garages, basements, exterior)
Garages and basements present unique challenges. Moisture is a big concern in both spaces. In garages, you also have to deal with vehicle fluids that can damage paint.
For these areas, consider alternative approaches. Epoxy coatings are durable and resistant to moisture and chemicals. They’re great for garage floors. In basements, you might want to consider waterproofing before painting.
Outdoor spaces: Painting exterior subfloors is generally not recommended due to weathering and wear. Opt for durable materials designed for outdoor use instead.
Planning Your Painted Floor Project
Define the scope clearly by identifying which rooms or areas will be painted and the current floor material involved. Decide if this will be a full refinishing or a maintenance touch-up. Set goals for durability, color, and timeline from prep to cure.
Weigh the DIY versus pro option by considering your skill, tools, time, and any warranty needs. Note how temperature, humidity, and ventilation affect work and curing. Plan the sequence from moisture checks to priming, painting, and any decorative steps.
Assessing scope and room-by-room priorities
Start by evaluating each room for your painted floor project. Not all rooms are created equal, so prioritize based on traffic level, existing floor material, and pattern complexity.
Traffic Level: High-traffic areas like kitchens, hallways, or entryways need more durable paint and sealer. Low-traffic rooms can get away with less robust options.
Existing Floor Material: Some materials are easier to paint than others. Plywood and concrete are typically straightforward, while existing coatings may require extra prep work.
Pattern Complexity: Simple solid colors or stripes are quicker and easier than intricate patterns. Plan your most complex designs for rooms with lower traffic.
Budgeting and sourcing materials
Material choices directly impact your project’s outcome and cost. Here’s what to include in your budget:
- Paint: Quality paint with good coverage and wear resistance is key. Look for 100% acrylic latex paints rated for floors.
- Primer: A good primer promotes better adhesion and helps seal the surface. Choose one that’s compatible with your paint and floor material.
- Sealer: A durable sealer protects your painted floor from moisture, stains, and scratches. Polyurethane or varnish are popular choices.
- Tools: You’ll need paintbrushes, rollers, painter’s tape, sandpaper, and possibly a paint sprayer for larger areas.
- Patch Materials: Depending on your floor’s condition, you might need joint compound, wood filler, or concrete repair mix to fix holes or cracks before painting.
Check local prices and coverage specs to estimate costs accurately. Using the wrong materials can lead to cracking, staining, or weak bonds that won’t last.
Timeline and scheduling considerations
Scheduling your painted floor project requires understanding key constraints like drying/curing windows and adverse weather conditions.
Drying/Curing Windows: Paint and sealers need time to dry and cure between coats. Plan for these intervals in your schedule, typically 24-48 hours for drying and 30 days for full curing.
Adverse Weather: Avoid painting or sealing in extreme temperatures (below freezing or above 90°F) or high humidity. These conditions can affect paint adhesion and cure times.
Time Between Coats: Most paints and sealers require at least two coats for optimal coverage and protection. Plan your schedule accordingly, allowing time for each coat to dry and cure before applying the next one.
Tools and Materials Checklist
List essential prep tools and safety gear first: respirator, gloves, knee pads, drop cloths, scrapers, putty knife, sanding blocks or an orbital sander, vacuum, and microfiber cloths. Include a reliable moisture meter and masking supplies.
Choose floor-appropriate paints, primers, and sealers, including urethane or epoxy primers, top coats, and stain blockers. Consider options for durability and wear resistance, plus optional patterning aids like stencils and tape for clean lines.
Paints, primers, and sealers to consider
Before you start painting your concrete floor, make sure you have the right products. This checklist helps you choose the best paints, primers, and sealers for your project.
- Floor-specific paint: Look for ‘floor paint’ or ‘concrete paint’ on labels. These are designed to adhere better and withstand foot traffic.
- Abrasion resistance: Check the label for abrasion resistance ratings. Higher numbers mean better durability.
- Recommended topcoat: Ensure the paint suggests a compatible topcoat (like polyurethane or epoxy) to enhance protection and longevity.
- VOC level: Opt for low or zero VOC paints to minimize environmental impact and reduce strong odors.
- Stain blocker primer: If your concrete floor has stains, use a stain-blocking primer before painting to prevent bleed-through.
- Epoxy or urethane primer: For better adhesion and durability, consider using an epoxy or urethane primer designed for concrete floors.
- Top coat compatibility: Ensure the top coat is compatible with your chosen paint. Check manufacturer guidelines to avoid incompatibility issues.
- Moisture resistance: If your floor is prone to moisture, choose a paint and sealer that offer good moisture resistance.
Quick rule: Always follow the manufacturer’s recommendations for best results.
Tools and safety equipment
Safety first! Use this checklist to gather essential tools and personal protective equipment (PPE) before starting your concrete floor painting project.
- Respirator: Wear a respirator with a particulate filter to protect against paint fumes and dust.
- Gloves: Use gloves to protect your hands from chemicals and debris. Choose ones that allow for good grip.
- Knee pads: Knee pads will make the job more comfortable, especially when sanding or applying paint near the floor.
- Drop cloths: Protect your floor and keep your workspace clean with drop cloths.
- Scrapers: Use 5-in-1 scrapers to remove loose concrete, paint, or other debris from the surface.
- Putty knife: A putty knife is useful for applying filler and smoothing out surfaces.
- Sanding blocks/orbital sander: Sanding helps improve paint adhesion. Choose a sander that’s comfortable to use and suitable for your floor size.
- Vacuum: Use a vacuum to clean up dust before painting to ensure good adhesion.
- Microfiber cloths: Microfiber cloths are great for wiping down surfaces and applying paint or sealers.
Quick rule: Always prioritize safety. Ensure proper ventilation, use PPE, and follow manufacturer guidelines for tool usage.
Material specs and standards explained
Understanding material specifications helps you choose the right products for your concrete floor painting project. Here’s what to look for:
- VOC level: Volatile Organic Compounds (VOCs) contribute to air pollution. Opt for low or zero VOC paints and sealers.
- Recommended substrate: Check if the product is suitable for concrete substrates. Some products may require a primer before application.
- Recommended topcoat compatibility: Ensure the paint and sealer are compatible to avoid peeling, cracking, or other issues.
- Cure time: Consider the cure time for both paint and sealer. This affects when you can walk on or cover the floor.
- Moisture resistance: If your concrete floor is prone to moisture, choose products with good moisture resistance ratings.
- Abrasion resistance: Check the abrasion resistance rating (usually measured in cycles) to ensure durability under foot traffic.
- Adhesion promoter: Some products may require an adhesion promoter for better bonding to concrete surfaces.
- Manufacturer technical data sheets: Always consult manufacturer guidelines for specific product usage, safety precautions, and expected results.
Quick rule: Never assume. Always check product labels and manufacturer guidelines to ensure the best results.
Prep: Removing Coverings, Repairing, Sanding, and Handling Seams
Define the prep scope by noting the substrate, removing coverings, and flagging moisture or structural concerns that affect adhesion. Plan the sequence to ensure a solid, dust-free surface before coating begins.
Emphasize safety and cleanliness with a dust-control plan, PPE, and sanitation. Address repairs for cracks and seams with appropriate fillers and plan for cure times before sanding and priming. Seal seams and gaps as needed to prevent telegraphed edges after paint.
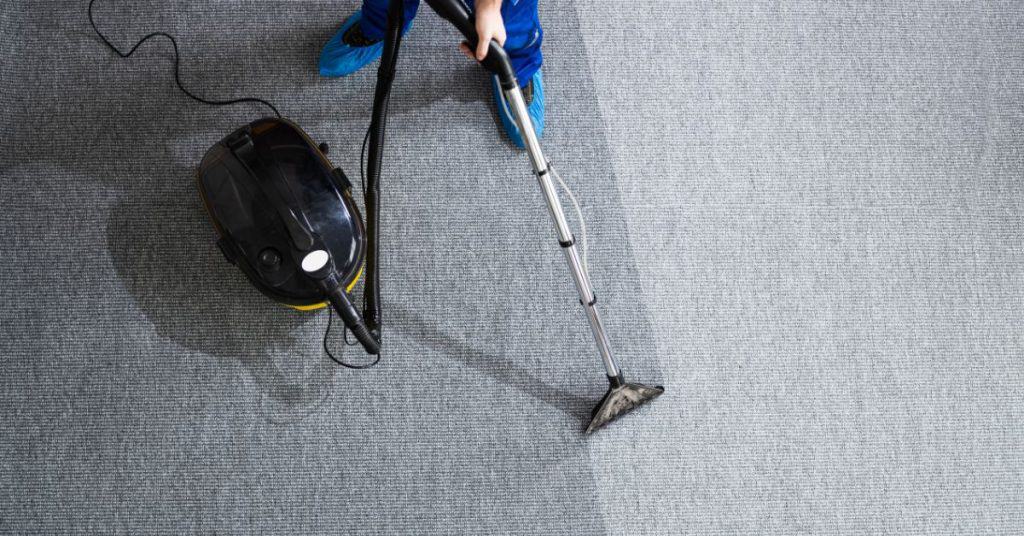
Removing Carpet, Tack Strips, and Old Finishes
Start by wearing gloves to protect your hands. Use a utility knife to cut the carpet into manageable sections. Then, use a pry bar to lift up one corner of the carpet and pull it back.
Be careful not to damage the underlying plywood. Once you’ve removed the carpet, scrape off any remaining adhesive with a putty knife. Remove tack strips using a pry bar or claw hammer. If there’s an old finish like wax or varnish, strip it using a chemical stripper and follow safety instructions on the label.
Inspect the plywood for damage or rot. If you find any issues, address them before proceeding with your painted floor project.
Filling Seams, Gaps, and Damaged Boards
First, assess the condition of your subfloor. If there are large gaps or missing boards, you might need to replace them entirely.
For smaller gaps or damaged seams, use a flexible filler like caulk or a wood filler specifically designed for floors. For wider gaps, consider using a backer rod before applying the filler. Allow it to cure according to the manufacturer’s instructions.
If you’re leaving seams visible as part of your design, ensure they’re clean and free of debris. For butt joints or moldings that affect the finish, use a flexible filler or seam tape to create a smooth surface.
Sanding, Cleaning, and Priming
Start with coarse sandpaper (around 60-80 grit) to remove any remaining imperfections. Sand with the grain of the wood for a smooth finish. Use a HEPA vacuum or tack cloth to remove dust after each pass.
Moisture is your enemy here, so test for it using a moisture meter before priming. Once you’ve confirmed the subfloor is dry, select a primer based on your substrate and paint system. For example, use an oil-based primer for oil-based paints or a latex primer for water-based paints. Apply the primer evenly with a roller or brush, following the manufacturer’s instructions.
Paint Selection for Wear Resistance and Safety
Define performance criteria such as wear resistance, slip resistance, odor/VOC levels, and compatibility with plywood. Explain how these factors trade off and what to prioritize for your space. Use the criteria to guide your finish choice.
Compare suitable systems like porch/garage paints, epoxy coatings, and hybrid options. Include guidance on primers, surface prep, and whether to add topcoats for additional protection or slip resistance. Consider safety and maintenance implications as you choose.
Best paint types for durable floors
When it comes to painted floors, durability is key. Here are the top paint types that’ll give you long-lasting results:
Floor Enamels: These water-based paints are great for high-traffic areas like kitchens and hallways. They’re tough, easy to clean, and have good stain resistance.
Epoxy Systems: For concrete floors or garages, epoxy is the way to go. It’s highly resistant to chemicals, stains, and abrasions. Plus, it can be tinted to match your desired color.
Acrylic-Urethane Blends: These offer a balance between durability and flexibility. They’re good for both plywood and concrete floors, providing excellent adhesion and wear resistance.
Topcoats, additives, and slip resistance
To boost your floor’s durability and safety, consider these topcoat options and additives:
Polyurethane or Clear Coats: These add an extra layer of protection against scratches and stains. They also enhance the floor’s longevity by preventing the paint from wearing off.
Anti-Slip Additives: For areas prone to spills or moisture, consider adding anti-slip agents to your topcoat. They provide traction without affecting the floor’s appearance.
Remember, while these add-ons can improve maintenance and safety, they might slightly alter the finish’s look and feel. Always test them on a small area first.
Eco-friendly and low-VOC options
If you’re looking to minimize your environmental impact, consider these low-odor, low-VOC alternatives:
Low-VOC Paints: Many manufacturers now offer paints with reduced volatile organic compounds. These are less harmful to the environment and have lower odor levels.
Natural or Plant-Based Sealers: For added protection and slip resistance, consider natural sealers like linseed oil or plant waxes. They’re eco-friendly but may require more frequent reapplication.
Before choosing any low-VOC option, always check the manufacturer’s curing times and ensure they’re suitable for your specific floor type.
Painting Techniques and Pattern Ideas
Start with solid prep basics: cleaning, degreasing, crack repair, and the right primer. Establish a clear plan for sections to keep edges sharp and even. Prepare for patterns by testing methods on scraps before committing to the main floor.
Explore patterns like straight lines, checkerboard, or faux tile with masking. Use the proper paints for floors and plan an efficient workflow that minimizes feathering and bleeding. Include edge work first and maintain wet edges for a seamless look.
Basic solid colors, stripes, and borders
For even coverage and crisp lines, start by planning your layout. Measure and mark out your room’s dimensions to determine the best placement for your pattern.
Stripes: Use a laser level or chalk line to create straight lines. Apply painter’s tape along these lines before painting to maintain sharp edges. For transitions at doorways, use a long straight edge and a level to ensure accuracy.
Borders: Similar to stripes, measure and mark out your border’s width. Use tape to mask off the area you want to paint. Apply your chosen color, then carefully remove the tape once dry for clean lines.
Stencils, checkerboard, and faux-tile methods
For intricate patterns like stenciling or faux tiles, use templates designed for floor painting. These can be purchased or made using heavy-duty cardstock.
Stenciling: Apply tape to secure the stencil in place. Use a foam roller or brush to apply paint within the stencil’s design. Lift the stencil carefully once dry, and repeat for adjacent areas.
Checkerboard: Divide your room into squares using tape. Paint every other square with your chosen color, then remove the tape once dry. For a more complex pattern, use multiple colors or vary the size of the squares.
Faux tile: Use a tile stencil and apply paint in sections. Work in small areas to maintain wet edges and prevent bleeding. Once complete, remove the stencil and allow the paint to dry.
Visual checkpoints and common application problems
Inspect your work throughout the painting process to catch issues early. Use this checklist during application:
- Lap marks: Check for visible lines where two coats overlap. To prevent, maintain a ‘wet edge’ by working in small sections and not overworking the paint.
- Bleed: Look for paint seeping under tape or into unwanted areas. Ensure tape is firmly pressed down before painting and use a sharp edge to remove it once dry.
- Pudding: Check for excessive paint buildup in corners or edges. Avoid overworking the paint and use a brush with even bristles.
- Missed spots: Inspect your work closely to ensure no areas were missed. Use a flashlight to check hard-to-see places.
- Uneven coverage: Check for light or dark patches. To prevent, use thin coats and maintain consistent pressure when rolling or brushing.
- Tape pull-away: Ensure tape doesn’t lift during painting. Press down firmly before painting and use a low-tack tape designed for delicate surfaces.
- Drips and runs: Check for paint dripping from edges or running down walls. Work in small sections to maintain control over the paint.
- Poor adhesion: Look for paint peeling or flaking. This can be caused by improper surface preparation or using the wrong primer. Ensure your surface is clean, dry, and primed correctly.
- Color inconsistency: Check for variations in color. To prevent, mix your paint thoroughly before use and ensure you’re using the same batch throughout the project.
Quick rule: Inspect your work regularly to catch problems early. A little extra time spent checking can save you from having to redo entire sections.
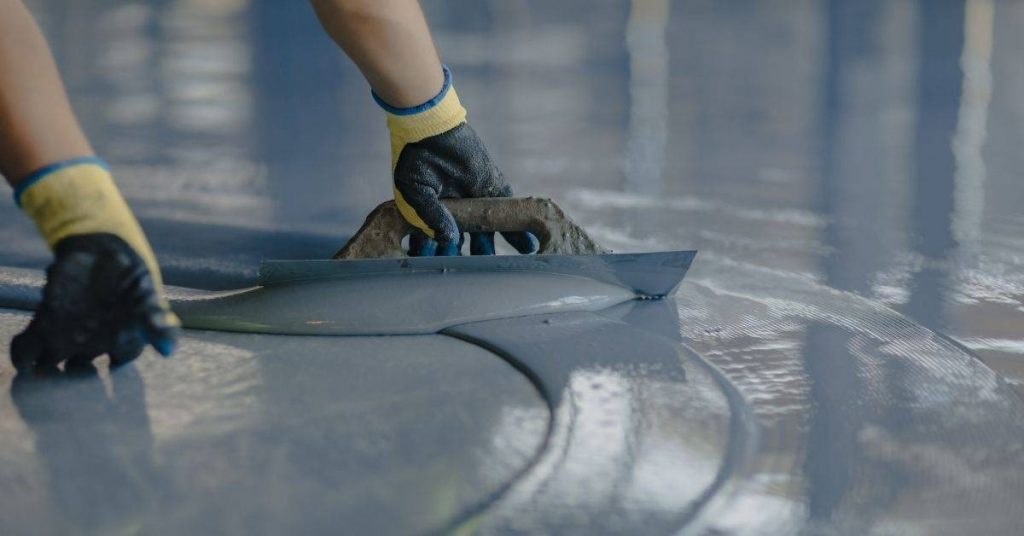
Sealing, Curing, and Testing Wear Resistance
Review sealing options suitable for painted floors and how each affects gloss, moisture tolerance, and wear. Confirm whether you need penetrating sealers, epoxy topcoats, or solvent-based finishes. Check the label for compatibility with your paint system.
Before sealing, ensure the paint is cured and the surface is clean and dust-free. Describe the application method, coats, drying times, and ventilation needs. Plan simple tests for adhesion and wear, and know when recoat or remediation is required.
Choosing and applying sealers/topcoats
When selecting a sealer, match its chemistry to your paint type. Water-based paints usually require water-based sealers; solvent-based paints need solvent-based ones.
Epoxy or polyurethane topcoats provide excellent wear resistance and gloss. They’re great for high-traffic areas but have longer drying times.
Apply using a roller, brush, or squeegee. For nicks, use a putty knife to fill before sealing. Apply 2-3 coats, allowing 4-6 hours between each. Follow safety guidelines and maintain proper ventilation.
Curing guidelines and how to test readiness
Follow manufacturer cure times for best results. Keep the area temperature between 60-85°F (15-29°C) during curing.
To check adhesion, perform a small tape pull test: apply tape, let it sit, then peel off. No paint should stick to the tape.
For hardness, scuff the area with a non-metallic object. If no mark remains, it’s ready for light foot traffic after 24 hours and full use after 7 days.
Monitoring durability and when to refresh
Inspect your floor regularly. Look for signs like loss of gloss, small chips or cracks, or water spots. These indicate it’s time to recoat.
Clean using a mild detergent and warm water. Avoid harsh chemicals that can degrade the seal.
Reapply sealant every 2-3 years, depending on traffic and wear. If you notice aging or failure of the sealant, consider re-sealing or recoating as soon as possible to prevent further damage.
Conclusion
You now have a solid, durable painted floor plan in hand. Focus on proper prep, correct paint choices for wear, and solid sealing to keep the look and performance long after the job is done.
Start by verifying a clean, dry surface, then confirm your primer and topcoat choices are suited for the floor type and traffic. Check that you have all tools ready, remove coverings completely, repair and sand where needed, and handle seams with care before you roll on color. Test a small area first, then proceed in calm, even sections to avoid laps and drips, and seal when the pattern or color is set.
Common mistakes are skipping surface prep, choosing the wrong product for the subfloor, and rushing curing. Never skip removing old coverings or patching gaps, never mix incompatible paints, and never sand so aggressively that you go through the substrate. Wear proper mask and eye protection, ventilate well, and keep a damp rag handy for cleanups to avoid sticky mistakes.
If you encounter structural damage, a large crack, or persistent moisture, it’s wise to call a professional rather than push ahead. When in doubt, err on the side of testing first, then scale back complexity if needed. With careful prep, sensible product selection, and patient application, your painted floor will stand up to wear and look right for years to come.
FAQ
What’s the best way to prep a subfloor before painting?
Start with a clean, dry surface. Remove loose particles, dust, and old coatings. Patch holes and repair cracks, then sand rough spots smooth and wipe down the dust.
How do I choose paint that will hold up on a painted floor?
Look for floor- or deck-grade paints or epoxy/urethane blends rated for floors. Check the product label for wear resistance and indoor use. Follow the manufacturer instructions for curing and ventilation.
How can I hide plywood seams and surface imperfections?
Fill seams with a compatible filler, then sand flush. Use a light, even coat or a roller for seamless coverage. Consider a pattern or decorative technique that helps mask small flaws.
What’s the right way to clean a painted floor and keep it looking good?
Use a soft broom or dust mop for debris. Clean with a mild, non-abrasive cleaner and avoid harsh chemicals. Let spills dry, then wipe with a damp cloth to prevent streaks and dulling.