
Introduction
Painting a concrete porch floor that sees de-icers means applying a durable coating to protect the surface from salt damage and freeze-thaw while making it easier to clean. This article guides a hands-on approach, from choosing coatings to prep and simple techniques you can do yourself. Keep in mind that prep and proper product selection matter more than speed.
You’ll want to understand coating types, surface prep steps, and the basic application flow so you don’t waste time or money. We’ll talk about de-icer resistance, how to prepare a clean, sound surface, and what to expect when applying coatings in layers. Check labels and local rules for curing times and safety, and compare options within a safe price range.
Key takeaways
- Assess substrate moisture and use breathable coatings to prevent peeling from salt exposure.
- Proper surface prep: remove loose debris, etch or grind rough, ensure dry substrate.
- Evaluate coating types: epoxy, polyurethane, or acrylic options based on porch use.
- Follow manufacturer instructions for curing times and environmental limits before use.
- Budget coatings with maintenance in mind: cost varies by durability and repair needs.
- Safety first: wear respirator, gloves, and eye protection during prepping and painting.
Table of Contents
- Introduction
- Key takeaways
- Which Coating Types Resist De-Icers and Salt Damage
- Assess Your Porch: Substrate, Moisture, and Seasonal Timing
- Tools, Materials, and PPE Checklist
- Step-by-Step Surface Preparation
- Priming and Application Techniques for Longevity
- Drying, Curing, and When It’s Safe to Use the Porch
- Maintenance, Winter Care, and Long-Term Performance
- Cost Considerations, Product Specs, and Safety Compliance
- Conclusion
- FAQ
Which Coating Types Resist De-Icers and Salt Damage
This section defines the coating families covered: epoxy, acrylic, polyurethane/urethane, and penetrating sealers. It explains how each forms a barrier, either film-forming or penetrating, to resist salt and de-icers. You’ll see which systems stay on the surface versus seep in to the pores.
Discussing freeze-thaw cycles, you’ll learn about bond retention, microcracking risk, and how moisture is managed during cure for each option. It also covers salt and detergent exposure implications and the potential for salt migration or efflorescence under different systems. Prepare for maintenance and prep needs that maximize salt resistance, including surface profiling, moisture content checks, cleanliness, and porosity considerations.
Epoxy and Epoxy Hybrids
Epoxies are tough, durable coatings that form a strong bond with concrete. They resist salt and de-icers well due to their chemical resistance.
Advantages: Excellent adhesion, outstanding chemical resistance, and high durability.
Weaknesses: Epoxies can yellow over time when exposed to UV light. They’re also less flexible than some other options, making them prone to cracking if the substrate moves.
Epoxy hybrids combine epoxy with other resins for better flexibility and UV resistance. Consider them for high-traffic areas or where movement is expected.
Acrylics and Cement-Based Paints
Acrylic and cement-based paints are easy to apply and offer good breathability, allowing moisture to escape. They’re less resistant to chemicals than epoxies but still provide some protection.
Advantages: User-friendly application, breathable for moisture management, and relatively inexpensive.
Limitations: Less chemical resistance compared to epoxies or polyurethanes. They may not last as long in heavy de-icer environments.
Use these coatings where de-icer exposure is light to moderate, and you prefer a paint-like finish over a more industrial look.
Polyurethane/Urethane Topcoats and Penetrating Sealers
Polyurethanes and urethanes offer excellent abrasion resistance and UV stability. They’re often used as topcoats over other systems for added protection.
Advantages: High durability, outstanding UV resistance, and great for high-traffic areas or harsh climates.
Usage: Apply urethanes as a topcoat over epoxies or acrylics for extra protection. Penetrating sealers soak into the concrete to protect from within, ideal for new or porous surfaces.
Penetrating sealers don’t form a film, making them less prone to peeling or flaking. However, they offer less surface protection than topcoats and may require additional maintenance.
Assess Your Porch: Substrate, Moisture, and Seasonal Timing
Begin with a clear assessment of surface condition: document cracks, spalling, scaling, or previous coatings to decide repairs or leveling before coating. This sets the foundation for adhesion. Note any structural concerns that could affect performance.
Then check substrate characteristics such as porosity and exposure of aggregate, and identify areas needing patching or special primers. Perform moisture testing and inspect for dampness or efflorescence that signals moisture risk. Plan the seasonal timing by targeting dry, moderate weather windows and allowing adequate cure time, keeping in mind that longer windows may help with multiple coats.
Visual and Tactile Substrate Inspection
Before you start painting, give your porch floor a thorough once-over. This checklist helps ensure your coating job lasts.
- Cracks: Check for hairline to wide cracks. Ignoring them can lead to water seepage and further damage.
- Spalling: Look for flaking or chipping concrete. This indicates weak spots that need repair.
- Scaling: Feel the surface. If it’s rough like sandpaper, it’s scaling. Sandblast or grind to remove before painting.
- Efflorescence: White powdery deposits mean moisture is present. Address this before coating.
- Oil stains: Check for grease, oil, or other contaminants. Clean these off before painting.
- Aggregate exposure: Feel for exposed aggregate. If so, consider a non-slip coating.
- Previous coatings: Identify old paint or sealers. Some may need removal before applying new coats.
- Repairs needed: Note areas that require patching, leveling, or special primers for best results.
Quick rule: A thorough inspection now saves time and money later.
Moisture Testing and Why It Matters
Concrete breathes. Too much moisture can ruin your paint job. Here’s how to test for it.
Use a moisture/vapor test (MVER) or the calcium chloride test. Both are simple and available at hardware stores.
Test in multiple spots, especially where dampness, efflorescence, or staining is visible. High moisture readings (2 lbs/1000 sq ft/day) mean your concrete needs more drying time or a moisture barrier before painting.
Ignoring high moisture levels can cause paint to peel, bubble, or fail entirely.
Seasonal and Temperature Considerations
Timing is crucial for a successful paint job. Here’s what to consider:
Ideally, temperatures should be between 50°F-90°F (10°C-32°C). Check your product labels for specific limits.
Avoid painting in freezing temperatures or when rain or heavy dew is expected. Concrete needs time to cure (at least 7 days) without interference from weather elements.
For multiple coats, allow a longer window between applications. This ensures each coat cures properly before the next one goes on.
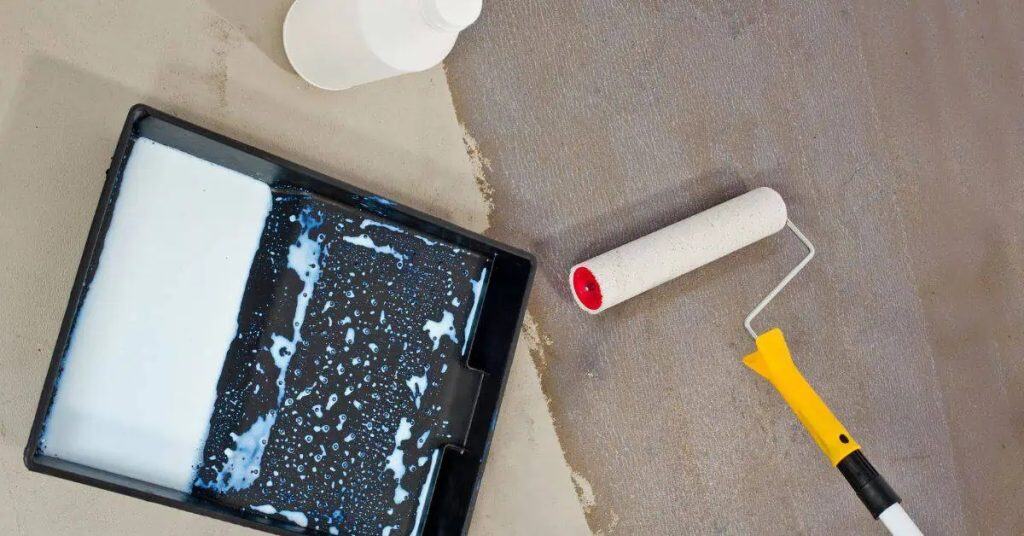
Tools, Materials, and PPE Checklist
List essential PPE and safety procedures tailored for concrete coating work, including respirators for solvents, splash goggles, chemical-resistant gloves, protective clothing, and hearing protection. Ensure on-site ventilation and proper storage of chemicals. These steps keep you safe during prep and application.
Inventory core tools for surface prep and coating application, such as a pressure washer or degreaser setup, grinders with diamond cups, edgers, rollers, extension poles, trays, squeegees, and a mixing drill with a paddle. Have cleaners, degreasers, etchers or neutralizers if needed, and a broom, air blower, and containment supplies ready for cleanup and dust control.
Tools and application equipment
Before starting your concrete project, ensure you have the right tools. Use this checklist to verify each item.
- Grinder/Etcher: Check if it’s in good working condition. Test it by running it briefly on a scrap piece of concrete to see if it etches properly.
- Pressure Washer: Ensure it has enough pressure (at least 3000 PSI) and flow rate (at least 4 GPM). Check the nozzle for any clogs or damage.
- Concrete Mixer: If renting, ensure it’s the right size for your project. A typical mixer can handle about 8 cubic feet of concrete at a time.
- Rollers (for smooth finishes): Check if they’re in good condition and have the right nap length for your finish (usually 3/16″ or 1/4″).
- Brushes (for broom finishes): Ensure they’re stiff enough to create texture. Check bristles for any damage.
- Squeegees: Verify they’re long enough to reach the full width of your pour and are in good condition with no bent or broken edges.
- Sprayers (for sealers): Check if they have adjustable spray patterns. Test it on a scrap piece of material to ensure even coverage.
Quick rule: Always check your tools before starting any task. Faulty equipment can lead to poor results and costly rework.
Materials and product selection guide
Before you start any concrete repair or resurfacing project, use this checklist to ensure you’ve got the right materials. Review it when you’re gathering supplies and again on-site before starting work.
- Primer: Check label for compatibility with your substrate (concrete, masonry, etc.). Confirm it promotes adhesion of your patching compound.
- Patching Compound: Ensure it’s suitable for the repair type (fillers, mortars, or grouts). Verify it matches the existing concrete strength and appearance.
- Topcoat Sealer/Finish: Choose based on desired finish (gloss, satin, matte) and performance needs (UV resistance, durability). Check compatibility with your patching compound.
- Additives (Anti-slip Aggregates): If using, confirm they’re compatible with your topcoat. Test a small area to ensure the desired slip-resistance is achieved.
- Cement: Check it’s Type I or II for general-purpose use. Ensure it’s within its storage and use lifespan (usually 90 days).
- Sand/Aggregate: Verify it matches the size required by your mix design (fine, medium, coarse). Check for cleanliness to avoid contamination.
- Water: Use clean water. Avoid using water with high salt or mineral content that could affect concrete performance.
- Mixing Equipment: Ensure you have a suitable mixer (electric, gas-powered, or manual) for the volume of concrete you’ll be mixing.
Quick rule: Always check product labels and manufacturer instructions to ensure compatibility between materials. Skipping this can lead to delamination, reduced performance, or even failure of your repair.
Safety gear and ventilation
Before starting any concrete work, ensure you have the right safety gear and proper ventilation. This checklist will help you prepare.
- Gloves: Check for durable, water-resistant gloves to protect your hands from concrete’s harsh chemicals. Ensure they fit well for a good grip.
- Eye protection: Wear safety glasses or goggles with side shields to prevent debris and splashes from reaching your eyes.
- Respirator (for solvents): If using admixtures or accelerators, wear a respirator rated for organic vapors. Check the product label for specific recommendations.
- Ear protection: Use earplugs or earmuffs if you’re using power tools near the work area to protect your hearing from prolonged noise exposure.
- Safety shoes: Wear sturdy, closed-toe shoes with good traction to prevent slips and falls. Check for any loose or missing safety features before starting.
- Ventilation (mixing): When mixing concrete, ensure the area is well-ventilated to avoid inhaling dust. Open windows, use fans, or work outdoors if possible.
- Ventilation (application): During application, maintain good airflow around the work area to disperse any harmful fumes from accelerators or sealers.
- Clothing: Wear long-sleeved shirts and long pants to protect your skin from concrete and debris. Check for any tears or damage before starting.
Quick rule: Always prioritize safety gear and proper ventilation to protect yourself and others from potential hazards on the jobsite.
Step-by-Step Surface Preparation
Assess substrate readiness by checking moisture, existing coatings, porosity, and de-icer damage. Confirm the porch is sound and suitable for coating adhesion. Document any issues before proceeding with repairs.
Follow with thorough cleaning to remove debris, dirt, and algae, using a stiff brush and appropriate cleaner. Spot-clean oil or grease stains and ensure the surface dries fully before moving on to degreasing and repairs as needed.
Step-by-Step Process
Follow these practical steps to prepare your concrete porch floor for painting, ensuring optimal adhesion and durability.
- Assess substrate readiness: Check moisture levels using a moisture meter. Inspect for existing coatings, porosity, de-icer damage, and structural integrity.
- Thorough cleaning: Remove loose debris with a stiff brush or broom. Wash the surface with an appropriate cleaner, scrubbing algae and dirt. Spot-clean oil or grease stains.
- Degreasing and contaminant control: Apply a concrete degreaser or detergent, scrub thoroughly, rinse, and allow complete drying. Repeat if necessary to remove all contaminants.
- Repairs and patching: Fill cracks, chips, and spalled areas with a compatible concrete patch material. Feather the edges and cure per product guidelines for best results.
- Surface profiling: Create a mechanical profile using light grinding or etching where recommended to enhance adhesion. Capture dust with a vacuum during profiling.
- Final dust removal and moisture check: Thoroughly vacuum the surface, use a tack cloth if needed, and verify dry conditions with a moisture meter before priming or coating.
Cleaning and Degreasing Best Practices
Pressure washing is an effective way to remove dirt, algae, and efflorescence. Use a detergent or degreaser to tackle grease and oil stains.
Efflorescence, a white powdery substance, should be removed before applying any coating. A stiff brush and pressure washer can help with this task.
Degreasing is crucial for adhesion. Apply the degreaser, scrub thoroughly, rinse, and allow complete drying. Repeat if necessary to ensure all grease and oil are eliminated.
Repairing Cracks, Spalls, and Joint Treatment
Choose a compatible concrete patch compound for filling cracks, chips, and spalled areas. Ensure the repair material matches the substrate’s properties.
Feather the edges of repairs to create a smooth transition between the old and new surfaces. This helps prevent delamination and promotes adhesion.
Address expansion and control joints by cleaning them out and filling with a flexible joint sealant or compound. This prevents water intrusion and maintains the structural integrity of your porch.
Creating the Correct Surface Profile (Mechanical vs Chemical)
Mechanical profiling, such as light grinding or diamond scarifying, is often preferred for durable adhesion. It creates a rough surface that improves paint adhesion.
Acid etching can also be used to create a profile but may not be as effective in removing existing coatings or contaminants. Always follow manufacturer guidelines when choosing the right method for your project.
Capture dust with a vacuum during profiling to maintain a clean work environment and prevent respiratory hazards. Wear appropriate PPE, including a respirator, when working with concrete dust.

Priming and Application Techniques for Longevity
Define the primer’s purpose for de-iced concrete and how surface conditions affect adhesion and stain resistance. Use the guiding principles of bonding primers, penetrating acrylic or epoxy primaries, and concrete sealers based on the planned coating system.
Detail mixing, pot life, and environmental considerations to avoid premature skinning or foaming. Outline stepwise application techniques for rollers, brushes, and sprayers, emphasizing wet-edge control and proper edge work to prevent lap marks. Include timing, recoat windows, ventilation reminders, and quick troubleshooting tips for common issues.
Choosing and applying a primer or bonding coat
A primer is your first line of defense against de-icer damage. It seals variable porosity, improves adhesion, and enhances stain resistance.
When to use: Always use a primer on de-iced concrete. Alkali in fresh concrete can affect paint adhesion; a primer seals it. Dusty or moist surfaces need priming too.
Choose based on your topcoat:
– Bonding primers for latex paints
– Penetrating acrylic/epoxy prims for epoxy coatings
– Concrete sealers for clear finishes
Rolling, brushing, and spraying methods
Consistent coverage is key. Use a nap length roller suitable for your paint type (e.g., 1/4″ or 3/8″ for latex).
Techniques:
– Back-rolling: Roll away from the edge to avoid puddling
– Maintain wet edge: Keep roller in paint until finished to prevent lap marks
For brushing, use a 2″ or 3″ angled brush. Spraying needs proper equipment and technique; practice on scrap material first.
Anti-slip treatments and decorative options
De-icer exposure makes surfaces slippery. Add anti-slip treatments for safety:
– Broadcast aggregate (e.g., sand, glass beads) into wet paint
– Use non-slip additives mixed into your topcoat
For aesthetics, consider simple finishes like stains or integral colors. Avoid complex designs that could trap de-icing salts and cause damage.
Drying, Curing, and When It’s Safe to Use the Porch
Clarify the milestones of drying to touch, walk-on readiness, and full cure, with guidance on how season and conditions influence these stages. Emphasize that de-icers can affect cured coatings differently and at what stage exposure becomes a concern. Understanding these milestones helps you plan safely.
Provide decision criteria for coating choice based on expected traffic and de-icer use, including when to re-enter after application and what maintenance follows curing. Include practical checks such as moisture status and ambient conditions, and note how rushing cure or weather events can impact performance.
Typical cure milestones and what to check
Before you start walking on your porch or applying de-icers, make sure it’s properly cured. Here’s a checklist to guide you.
- Dry-to-touch: Surface feels dry but may still be sticky. Check by lightly touching the surface with a clean, dry cloth. Skip this and you might track dirt or damage the coating.
- Light foot traffic (walk-on): You can walk on it without leaving marks. Test by walking across the porch. Don’t rush this; heavy traffic too soon can ruin the coating.
- Full cure: Coating is fully hardened and ready for de-icers. Check product labels for exact times. De-icers before full cure can damage the sealant.
- Moisture testing: Ensure no moisture is trapped beneath the surface. Use a moisture meter if unsure. Trapped moisture can cause bubbling or peeling.
- Ambient temperature: Check it’s within product limits (usually 50-90°F). Too hot or cold can slow cure times or damage the coating.
- Humidity levels: Keep them below 80% for best results. High humidity can cause condensation and hinder curing.
- Tack-free time: Check product labels for when you can recoat without damaging the surface. Re-coating too soon can ruin both coats.
- Full cure time: Again, check labels. This is when your porch is fully protected from de-icers. Exposing it too early can cause damage.
Quick rule: Always follow product label guidelines for best results.
Cold-weather curing tips
Curing in cool or wet weather can be tricky. Here are some strategies to help:
Temporary enclosures: Consider setting up a temporary tent or enclosure around your porch to trap heat and reduce humidity. This can accelerate the cure process.
Heaters: Use construction heaters to warm the area, but be careful not to overheat it. Follow product limitations for safe temperatures.
Protect from rain: Keep your porch dry during curing. Cover it with plastic sheeting if necessary. Rain can wash away sealants or slow cure times.
Patience is key: Curing in cold weather takes longer. Be patient and allow the full recommended cure time before exposing your porch to de-icers or heavy traffic.
Maintenance, Winter Care, and Long-Term Performance
Set a routine cleaning cadence that minimizes coating wear in de-icer exposure, recommending sweeping, light washing, and mild cleaners. Avoid harsh abrasives that dull the finish and readied surfaces for inspections. Establish a simple schedule you can follow year-round.
Outline recoat intervals and signs that a refresh is needed, such as staining or gloss loss. Share best practices for de-icing to protect coatings and how to touch up worn areas with spot priming and resealing. Include long-term maintenance planning and record-keeping to extend life.
Recommended winter practices around de-icers
Safety’s priority, but so is your porch’s finish. Here’s how to keep both:
Choose safe de-icers. Sodium chloride (rock salt) and calcium chloride are common, but they can damage concrete over time. Magnesium chloride or acetate-based products are gentler.
Apply sparingly. Too much de-icer can cause slush to refreeze, creating a slippery mess. A thin layer should do the trick.
Spread evenly. Uneven application can lead to patchy melting and refreezing. Use a spreader or shovel for even coverage.
Inspecting and repairing wear and damage
Regular checks keep small issues from becoming big problems:
Inspect every spring. Look for chips, peeling paint, or worn non-slip surfaces. A quick walk around should suffice.
Repair promptly. Touch up minor chips and peels as soon as you spot them. For larger issues, follow the repair procedures from earlier in this guide.
Refresh non-slip surfaces. If your porch has a non-slip treatment, reapply it every few years or as needed to maintain traction and protect the surface.
Cost Considerations, Product Specs, and Safety Compliance
Break down typical cost factors including materials, surface prep tools, protective gear, and any patching products needed. Use this as a planning guide rather than a final price, so you can compare options accurately. Look for hidden costs like disposal or special preparation steps shown on product labels.
Explain how to read technical data sheets and manufacturer information for primers and coatings, including coverage, cure times, compatibility with de-icers, and warranty details. Highlight safety and compliance checks such as SDS reviews, PPE requirements, ventilation guidelines, and local building codes before buying or applying coatings.
Materials vs Labor: Budgeting and Estimating
The right materials ensure a durable, long-lasting porch floor. Here’s how to estimate quantities and factors that drive price:
- Primer: Use a high-quality acrylic primer for better adhesion. Look for low VOCs (volatile organic compounds) for reduced odors and environmental impact. Avoid primers with high VOCs, as they can cause health issues.
- Coatings: Opt for 100% acrylic or polyurethane coatings designed for concrete and de-icer resistance. Check the coverage rate to ensure you buy enough. Poor coverage leads to weak spots and early failure.
- Cleaners: Choose a cleaner that removes dirt, grease, and efflorescence. Avoid cleaners with harsh chemicals that can damage the concrete surface.
- Protective gear: Buy quality safety glasses, gloves, and respiratory protection. Cheap gear offers little protection and can cause discomfort or injury.
- Floor patch/etching products: Use a high-quality, fast-setting repair mortar for cracks and spalls. For etching, choose an acid-based product to ensure proper surface preparation. Poor quality products result in weak repairs and inadequate adhesion.
Reading Product Data Sheets and Safety Data Sheets
Before purchasing, read both the product data sheet (PDS) and safety data sheet (SDS) to ensure you’re making an informed decision.
PDS: Check these specs:
- VOC content: Lower VOCs mean less odor and better environmental friendliness.
- Temperature limits: Ensure the product can handle your climate’s extreme temperatures.
- Adhesion tests: Look for ASTM D4541 or similar test results to ensure good bond strength.
SDS: Follow these safety guidelines:
- Personal protective equipment (PPE): Wear the recommended gear to protect yourself from chemical exposure.
- Ventilation: Ensure proper ventilation or use products outdoors as advised.
- Disposal: Follow local regulations for safe disposal of leftover materials and packaging.
Conclusion
Get this right and your porch stays durable, looks sharp, and resists salt and de-icer damage. Safety and proper prep beat speed and shortcuts every time, especially on concrete that faces winter use.
First, verify the substrate, moisture, and timing, then gather PPE and the necessary tools, test a small patch to confirm adhesion and color change, clean and repair any cracks, and follow primer and coating directions in the correct order. Check the product specs and safety compliance, apply in the recommended temperature window, and allow each coat to dry and cure fully before letting traffic back on the surface.
Common mistakes trip people up: skipping surface prep or ignoring moisture, choosing the wrong coating for de-icers, and rushing drying or curing. Always test in a small area, follow the manufacturer specs, and avoid applying in extreme conditions. If the porch will see heavy salt exposure year after year and you’re unsure about substrate issues, it makes sense to call a professional rather than push ahead. Stay steady, work methodically, and your porch will hold up season after season.
FAQ
What coating materials work best on a concrete porch that gets de-icer and salt exposure?
Look at the label for salt resistance and wear rating. Epoxy, polyurethane, and acrylic concrete coatings are common options, but performance varies by surface condition and climate. Check the manufacturer instructions for substrate prep and bond specs before choosing.
How should I prep the surface before applying a coating to ensure good adhesion?
Clean thoroughly to remove dirt, oils, and old coatings. Repair cracks and joints, then roughen the surface slightly with a scoring or light mechanical abrasion if the product calls for it. Always follow the product label for moisture limits and curing notes.
What’s the right way to apply coatings on a porch that sees winter use and de-icing chemicals?
Apply in thin, even coats as directed by the product instructions. Maintain proper temperature and avoid pooling. If you’re unsure about reactivity with salt or moisture, check the manufacturer’s guidelines and consider a test patch first.
What are the cost and maintenance trade-offs between coating types for a DIY project?
Higher-durability coatings cost more up front but last longer and resist de-icers better. Simpler acrylic sealers are cheaper but may need more frequent reapplication. Always compare warranty terms and maintenance needs on the product label.