
Introduction
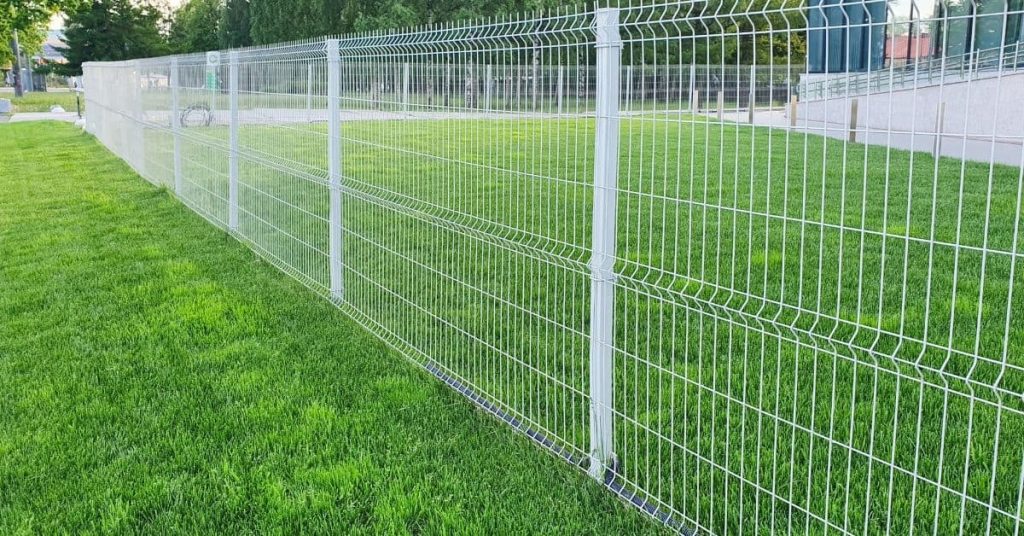
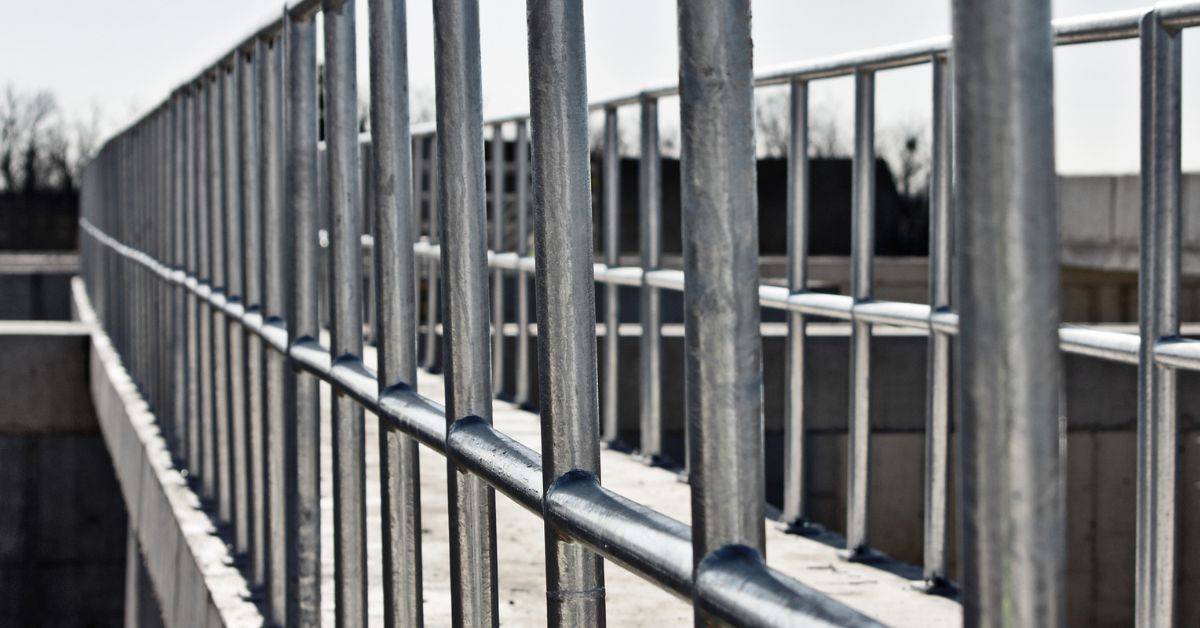
Painting galvanized metal is applying a coating to galvanized steel to improve protection and appearance. This article helps you understand why to paint, when weathering matters, and how to clean and prime before a finish coat. It keeps things practical with steps you can check on the job.
To prepare, clean the metal and remove any loose rust or coatings, then rinse and dry. Priming is typically recommended; use a primer labeled for galvanized metal and follow the label for dry times. Choose paints and primers designed for metal and galvanized surfaces, and verify compatibility with your environment and local rules.
Key takeaways
- Why paint galvanized metal: protects corrosion-prone areas and eases maintenance long-term.
- Weathering helps remove loose zinc but requires proper cleaning before primer.
- Inspect for peeling paint, rust, or damaged coating; plan repairs and timeline.
- Cleaning methods by surface condition: wire brush, degreaser, rinse, and dry thoroughly.
- Profiling and surface prep: roughen glossy areas, remove oils, and dust; consistent treatment.
- Primers and topcoats: choose zinc-rich or epoxy-zinc primers; check label for metal compatibility.
- Safety note: wear gloves and eye protection when cleaning and sanding.
Table of Contents
- Introduction
- Key takeaways
- Why Paint Galvanized Steel?
- How Weathering Changes the Galvanized Surface
- Inspection, Communication, and Project Timeline
- Cleaning Methods by Surface Condition
- Profiling and Surface-Prep Techniques
- Choosing Primers and Topcoats for Galvanized Metal
- Application Best Practices and Environmental Considerations
- Safety, Tools, Costs, and Common Mistakes
- Conclusion
- FAQ
Why Paint Galvanized Steel?
Painting galvanized steel can protect against environmental stressors in specific environments and improve the overall appearance of the metal. A duplex system with primer and topcoat often yields better long-term performance and easier maintenance than coating alone. Consider situations where a visible connection, decorative surface, or wear indicator benefits from a colored, uniform finish.
In many cases, primer plus topcoat enhances adhesion and provides UV protection, while the topcoat delivers color and weather resistance. The coating also helps with inspection and spot repairs, making wear easier to see and address. Use your label, data sheet, or manufacturer instructions to confirm compatibility with the galvanizing and local rules before choosing a system.
Benefits of painting vs. leaving bare galvanizing
Galvanized steel has a protective zinc coating that prevents corrosion. However, painting can enhance this protection and offer additional benefits.
Corrosion Protection: Painting adds an extra barrier against moisture and chemicals, extending the life of the galvanizing. It’s especially useful in harsh environments like coastal areas or industrial settings.
Aesthetic Options: Paint allows you to change the color and appearance of your steel, matching it with your architectural scheme or improving its overall look.
UV/chemical Resistance: Painting provides UV protection, preventing the zinc from degrading due to sunlight exposure. It also enhances chemical resistance, protecting against acids, alkalis, and other corrosive substances.
When you should NOT paint galvanized metal
Painting isn’t always necessary or beneficial. Here are a few situations to consider:
Sacrificial Corrosion Strategy: Galvanizing works by sacrificing the zinc coating to protect the steel. Painting can interfere with this process, so it’s not recommended if you’re relying on this strategy.
Badly Damaged Zinc: If the galvanizing is severely damaged or worn away, painting won’t provide much protection. It’s better to repair or replace the metal before painting.
Indoor, Dry Environments: In dry, indoor environments with no risk of moisture or chemical exposure, leaving the galvanizing bare may be sufficient and more cost-effective than painting.
Duplex systems and return on investment
A duplex system combines galvanizing with a paint system, providing enhanced protection and longevity. Here’s how it can save you money in the long run:
Extended Life: The combination of galvanizing and painting extends the service life of the steel, reducing the need for frequent repairs or replacements.
Reduced Lifecycle Costs: While the initial cost of painting may seem high, it’s often offset by the reduced maintenance and replacement costs over time. This makes duplex systems a cost-effective choice in many situations.
Cost-Effective Specifications: Duplex systems are typically most cost-effective when used on steel that’s exposed to harsh environments or has a long service life expectancy. It’s less beneficial for short-term, indoor applications.
How Weathering Changes the Galvanized Surface
Atmospheric exposure creates distinct surface states on galvanized metal, from fresh zinc to white rust and aged patina. Each state forms under different conditions and signals a different prep approach. Understanding these states guides cleaning and readiness for coating.
Weathering alters surface chemistry and physics, including oxide scales and moisture retention, which affects adhesion and how the surface accepts paint. Contaminants such as dirt, oil, and salts must be addressed in a specific order to restore a suitable bond. Check the surface visually and with simple moisture tests to decide on extra steps as needed.
Newly galvanized surfaces
Freshly exposed zinc surfaces can be either bright or dull. The smoothness of these surfaces poses a challenge for paint adhesion.
The key here is to create a profile, a slight roughness on the surface. This gives the paint something to grip onto. You can achieve this through light abrasion with sandpaper or by using an abrasive blaster.
Remember, too much profiling can damage the zinc layer, so be gentle.
Partially weathered surfaces
After days to months of exposure, galvanized metal starts forming electrostatically-bound zinc compounds and organics. These are tough to prepare due to their sticky nature.
The first step is to remove any loose dirt or debris with a dry brush. Then, use a mild detergent solution to clean the surface. This will help break down the sticky compounds.
Be sure to rinse thoroughly after cleaning to remove all detergent residue.
Fully weathered surfaces
After years of exposure, zinc carbonate patina forms on the surface. This patina is stable and provides good corrosion protection.
In most cases, it’s best to leave this patina intact. However, if you decide to paint, ensure the patina is firmly attached. You can test this by gently scraping a small area with a coin or a nail. If the patina flakes off easily, remove it completely before painting.
Fully weathered surfaces are often easiest to coat because they have a good profile and stable chemistry.
Inspection, Communication, and Project Timeline
The inspection should cover coating evenness, adhesion, any holidays, rust spots, and physical damage that could require refurbishment before painting. Decide early if sweep blasting or cleaning is needed to meet a acceptable surface condition. Document findings for the next steps.
Map out who needs to be informed and how, from galvanizer to specifier to the painter. Establish response times and approvals to prevent rework and delays. Align on current coating specs and any deviations before priming begins.
What to check during inspection
Before painting, inspect the galvanized surface thoroughly. Use this checklist to ensure a successful outcome.
- Surface evenness: Check for any unevenness or inconsistencies in the galvanizing. Inadequate coverage can lead to rusting and poor paint adhesion.
- Adhesion test: Gently scratch the surface with a coin or a key. The coating should not flake off. Poor adhesion may indicate a need for refurbishment.
- Holidays (uncoated spots): Inspect for any bare metal spots that can cause rust and affect paint performance.
- Rust spots: Check for signs of rust, which indicates the galvanizing may have been compromised.
- Physical damage: Look for dents, scratches, or other physical damage that could impact paint adhesion.
- Patina vs. shiny surface: A patina indicates a weathered surface ready for painting. Shiny surfaces need more preparation.
- Dross/skimmings: Check for any remaining dross or skimmings from the galvanizing process, which can affect paint adhesion.
- Welds: Inspect welds for proper penetration and cleanliness. Contaminated or poorly welded areas may not accept paint well.
- Contaminants: Look for any contaminants like oil, grease, or dirt that can interfere with paint adhesion.
- Passivation agents: Test for passivation agents using a simple acid test. Excessive passivation can hinder paint adhesion.
Quick rule: A thorough inspection ensures the surface is ready for painting and helps avoid costly rework.
Coordinate with the galvanizer and other stakeholders
Effective communication with all parties involved is crucial to ensure a successful painting project.
- Galvanizer: Inform them about your intention to paint. They can provide insights on the specific coating and any special considerations.
- Fabricator: Discuss design changes that may affect galvanizing or painting. They should know if duplexing is intended.
- Specifier: Confirm the coating specification aligns with your project’s requirements. Ask about any deviations from standard practices.
- Site supervisor: Coordinate access to the site for inspection, preparation, and painting phases.
- Painter: Consult them on surface preparation methods, primer type, and topcoat selection based on the galvanized coating.
- Preferred contact method: Establish a preferred way of communication (email, phone, etc.) for quick resolution of issues.
- Response times: Agree on response times to avoid delays in the project timeline.
- Approvals: Define who needs to approve changes or deviations from the original plan to prevent rework.
Quick rule: Clear communication ensures everyone is on the same page, reducing risks and preventing costly mistakes.
Planning timeline and weather windows
Proper sequencing of tasks and consideration of weather conditions are key to a successful painting project.
- Inspection: Schedule the initial inspection before any surface preparation begins.
- Surface preparation: Plan for cleaning, profiling, or refurbishing the galvanized surface as needed.
- Priming: Allow enough time for applying the primer and ensuring it cures properly.
- Topcoat application: Schedule this phase after the primer has fully cured.
- Handoffs: Define clear handoff points between galvanizing/inspection and painting crews to maintain project momentum.
- Weather windows: Plan for dry, suitable ambient conditions as per product guidance. Humidity and temperature can affect paint performance.
- Cure times: Allow sufficient time for each coat to cure before moving on to the next phase or exposing the surface to moisture.
- Buffers for weather and site access: Build in extra time to account for unexpected weather delays or changes in site access.
Quick rule: A well-planned timeline with consideration for weather conditions ensures a successful painting project that meets your schedule and quality expectations.
Cleaning Methods by Surface Condition
Define common states such as new galvanized, lightly chalky, oxidized, or heavily corroded, and explain how they dictate cleaning choices. The goal is reliable readiness without harming the zinc. Use this as a guide to select the right steps.
Follow a logical sequence: degrease, rinse, abrade if needed, then rinse and air-dry. Use mechanical or chemical cleaning as the situation requires, and avoid etching when it isn’t necessary. Always verify surface cleanliness before moving on to profiling or priming.
Alkaline and Detergent Cleaning
Use water-based alkaline cleaners to remove oils and organic soils from your galvanized metal. These cleaners are suitable for lightly chalky surfaces, where a gentle touch is needed.
Always follow manufacturer dilution instructions. Over-dilution can leave residue, while under-dilution may damage the surface.
Rinse thoroughly with fresh water after cleaning to remove all cleaner residue. Inspect for any remaining oils or soils before proceeding.
Acidic Etching and Neutralization
For oxidized, ruffled surfaces, use acid-based treatments to remove zinc compounds. This is not recommended for new/unweathered galvanized metal, as it can damage the protective layer.
Test a small area first to ensure the acid strength and application time are correct. Rinse thoroughly with fresh water afterwards.
Neutralize the surface with a suitable neutralizer, like sodium bicarbonate or ammonia, to stop the etching process. Rinse again and inspect for any remaining zinc compounds.
Solvent Cleaning
For heavily corroded or peeling coatings, use solvents to remove greasy contaminants. This method is not suitable for new/unweathered galvanized metal, as it can strip the protective layer.
Use a clean cloth for each wipe to avoid redistributing dirt. Change cloths frequently and dispose of them properly according to local regulations.
Ventilate the area well during solvent use, and avoid over-wetting the surface to prevent rust formation. After wiping, inspect for any remaining residues before proceeding.
Profiling and Surface-Prep Techniques
Define the concept of an anchor profile and why it should be created without removing zinc. Keep roughness within practical ranges for DIY painting and avoid exposing raw metal. A proper profile helps coatings grip without sacrificing corrosion protection.
Compare mechanical and chemical profiling methods, selecting based on coating age, corrosion level, and exposure. Use non-damaging techniques for home projects and avoid aggressive blasting on galvanized surfaces. A clear sequence keeps the surface clean, degreased, inspected, profiled, rinsed, and dried before primer application.
Sweep (Brush) Blasting and Abrasive Selection
Sweep blasting, also known as brush blasting, is a gentler profiling method for galvanized metal. It uses an angled approach with soft abrasives to clean the surface without damaging or removing zinc.
Benefits: This technique helps maintain the protective zinc layer and reduces the risk of over-etching or under-preparation.
For galvanized surfaces, opt for non-metallic abrasives like plastic or glass beads. They’re gentler than metallic media and won’t damage the zinc coating. Consult industry standards (like SSPC-SP 10/NACE No. 6) for suitable media selection based on surface condition.
Chemical Pretreatments, Wash Primers, and Etch Primers
Wash primers and etch-type pretreatments use chemical reactions to prepare galvanized surfaces for painting. They work by lightly etching or converting the zinc surface to improve paint adhesion.
How they work: These products react with the zinc layer, creating microscopic anchor points that help paints bond better.
Wash primers typically have a thin film characteristic and are applied using brushes or spray equipment. Etch primers may require specific application methods and dwell times to ensure proper reaction with the zinc surface. Always follow manufacturer guidelines for best results.
Mechanical Profiling and Passivation Testing
Mechanical profiling methods like grinding or sanding can be used on galvanized metal, but they must be done carefully to avoid removing too much zinc. The goal is to create a minimal anchor profile without compromising the protective layer.
Limits: Remove only enough material to achieve the desired roughness (usually 1-3 mils) and expose fresh metal for bonding.
After mechanical profiling, consider passivation testing. This involves applying a solution that reacts with any exposed zinc or passivation agents that could affect paint adhesion. Industry tests like ASTM D6057 can help detect these issues before painting begins.
Choosing Primers and Topcoats for Galvanized Metal
Primer chemistries suitable for galvanized metal vary, and the choice should reflect indoor versus outdoor exposure, humidity, and salt exposure. Assess the current surface condition, including intact galvanizing or spots with rust or contamination, before deciding on a primer. Use labels and manufacturer guidance to confirm compatibility.
Explain how primer and topcoat pairings interact, including solvent versus waterborne systems and UV resistance. Consider test patches and practical application notes to avoid common failures like adhesion loss or premature wear. Rely on product instructions to verify recoat windows and environmental constraints.
Primer types that work on galvanized surfaces
Galvanized metal needs specific primers to protect and prepare it for topcoats. Here are three common types:
Wash Primers: These water-based primers clean and prime in one step, removing light rust and contaminants. They’re ideal for indoor use or lightly soiled surfaces.
Zinc-Rich Primers: These contain high levels of zinc dust, providing excellent corrosion resistance. Use them on outdoor exposure, salt spray zones, or where heavy rust is present. They require a clean, dry surface for good adhesion.
Etch Primers: These acid-based primers remove mill scale and light rust, promoting better paint adhesion. They’re useful when surfaces have intact galvanizing but need better bonding for topcoats. Always follow manufacturer guidelines for application and safety.
Matching topcoats to environment and primer
Topcoats should complement your primer choice and protect against the intended exposure. Here’s how:
Indoor/Protected Environments: Acrylic or alkyd paints are suitable. They provide good color retention, are easy to apply, and have reasonable durability.
Outdoor/Exposed Environments: Polyurethanes or epoxies offer better UV resistance and durability. Epoxies require compatible primers; polyurethanes can often be used over suitable primers without a separate topcoat.
Always check manufacturer compatibility data to ensure your primer and topcoat work together effectively. Apply test patches to confirm adhesion, appearance, and performance before full application.
Long-term maintenance and repainting strategies
Regular inspection and timely touch-ups extend your paint system’s service life. Here’s how to plan:
Inspection Intervals: Inspect painted surfaces annually, looking for signs of rust, blistering, or peeling. Address any issues promptly to prevent further damage.
Maintenance Coats: Instead of fully stripping old paint, clean and lightly abrade the surface, then apply a new primer and topcoat. This maintains the existing system’s integrity while refreshing its protection. Follow manufacturer guidelines for recoating windows and environmental constraints.
By following these strategies, you’ll maximize your paint system’s service life and maintain a durable, attractive finish on your galvanized metal surfaces.
Application Best Practices and Environmental Considerations
Plan around daily conditions to minimize dew, condensation, and rapid drying. Identify acceptable application windows and monitor both surface and ambient temperatures to ensure a proper cure environment. Use simple tools to keep conditions in check.
Discuss dew point awareness, moisture control, and how to prevent coating on surfaces approaching moisture presence. Provide guidance on achieving correct film build through coats and thickness targets, plus general curing principles without proprietary times. Organize the workflow to minimize weather-related delays and maintain good ventilation and cleanliness.
Environmental conditions and readiness checks
Before you start painting, check the weather. It’s crucial for adhesion and drying.
Temperature: Galvanized surfaces need 50°F (10°C) minimum. Ambient air should be 20°F (11°C) warmer than the surface.
Humidity: Keep it below 85%. Dew point should be at least 10°F (6°C) lower than the surface temperature.
Wet film/thickness, flash times, and inspection
Before applying the topcoat, check your work. This ensures a smooth finish.
- Wet Film Thickness: Aim for 2-4 mils (50-100 microns). Too thin, it won’t protect. Too thick, it’ll sag or run.
- Flash Time: Let the primer dry between coats. Follow your product’s recommended time – usually 15 to 30 minutes.
- Surface Dryness: Check with a light touch. If no paint comes off, it’s ready for the next coat.
- Dust and Contamination: Inspect for any dirt or debris. Remove if found – they’ll show up in your finish.
- Runs and Sags: Look for these. If present, lightly sand and repaint.
- Pinholes: Check for tiny holes. Seal with a spot primer before topcoating.
- Edge Coverage: Ensure all edges are fully coated. Missed spots will rust.
Quick rule: Always inspect after each coat. It’s easier to fix now than later.
Safety, Tools, Costs, and Common Mistakes
Prepare a practical PPE list and a quick safety briefing for everyone on site. Emphasize eye, skin, and respiratory protection appropriate to the work. Outline basic safety steps for handling tools and chemicals and maintaining a tidy work area.
Draft a sensible tools and materials inventory, including brushes, grinders, primers, topcoats, solvents, and disposal bags. Consider budget factors and potential rental needs, and keep a running tally of PPE and containment supplies. Identify common mistakes and practical fixes to prevent rework and protect the coating system.
Tools, PPE, and waste handling checklist
Use this checklist before starting any galvanized metal painting project to ensure you have everything needed for safety, efficiency, and proper disposal.
- Safety glasses (ANSI-rated): Protect your eyes from debris and splashes.
- Solvent-resistant gloves: Essential for handling cleaning solvents and paint.
- Respirator or N95 mask: Mandatory if ventilation is poor to protect against fumes.
- Long sleeves: Shield your skin from chemicals and paint.
- Hearing protection (for power tools): Protect your ears from loud noises.
- Wire brushes: For removing rust and loose coatings.
- Stiff bristle brushes: For general cleaning and profiling.
- Angle grinder with dust attachment: For heavy-duty profiling and cleanup.
- Power sander: For smoothing surfaces before painting.
- Paint rollers/brushes: For applying primers and topcoats.
- Compatible primers and topcoats: Ensure they’re suitable for galvanized metal.
- Cleaning solvents: For removing residues and preparing the surface.
- Masking tape and drop cloths: To protect surrounding areas from paint.
- Disposal bags: For collecting waste materials.
Quick rule: Always check local regulations for solvent disposal to keep your work area safe and environmentally friendly.
Cost and time factors to estimate
The cost of painting galvanized metal varies depending on the preparation method used. Simple cleaning is the cheapest but takes less time than more thorough methods like sweep blasting or chemical pretreatments.
Rust inhibitors, primers, and topcoats specific to galvanized metal will add to your costs. Don’t forget to factor in protective coverings and PPE. Rental tools may also incur additional fees.
Time-wise, proper surface preparation can take up to 70% of the total project time. Painting itself is usually quick compared to prep work.
Tip: Always obtain quotes from contractors and check material prices at multiple suppliers to get the best deal.
Common mistakes and troubleshooting guide
Avoid these common pitfalls to ensure a successful galvanized metal painting project.
- Inadequate cleaning: Why: Dirt, grease, or contaminants can cause poor paint adhesion. How to avoid: Thoroughly clean the surface using appropriate solvents and techniques.
- Skipping rust inhibitors: Why: Rust can form under the paint if not inhibited. How to avoid: Apply a rust-inhibiting primer or use a wash primer with inhibitor.
- Over- or under-priming: Why: Too little primer leaves the surface vulnerable, too much wastes product and time. How to avoid: Follow manufacturer’s guidelines for application rates.
- Using incompatible products: Why: Incompatible primers or topcoats can lead to poor adhesion or premature failure. How to avoid: Ensure all products are compatible and suitable for galvanized metal.
- Failing to mask surrounding areas: Why: Overspray can damage nearby surfaces. How to avoid: Use masking tape and drop cloths to protect adjacent areas.
If you encounter any of these issues, stop work immediately, assess the problem, and take corrective action before proceeding. In some cases, you may need to restart the entire process.
Conclusion
Proper prep and careful steps make galvanized metal paint last. Take the weathering, cleaning, and priming rules seriously so the finish stays durable and eyesores don’t show up later.
Follow this practical sequence in plain terms: inspect the surface and note any rust or peeling, test a small area for adhesion, clean according to the surface condition, profile the surface as needed, choose a compatible primer and topcoat, apply per the product instructions, and let it cure with good ventilation and dry conditions while avoiding rain or extreme heat. Always wear PPE, work in a clean area, and dispose of waste and rags safely.
Watch for mistakes and stay safe: don’t skip weathering or cleaning, don’t use the wrong primer or topcoat for galvanized metal, don’t paint in damp, windy, or dusty conditions, and don’t rush the drying times. Don’t skip a small-area test first, and always protect yourself with eye and skin protection, gloves, and good ventilation.
If you’ve got extensive corrosion, structural damage, or a large surface, or if the weather window won’t cooperate, it’s time to call a pro. For a DIY finish, stay disciplined with the prep, follow the product guidance, and you’ll end up with a durable, good-looking result that holds up to weather and time.
FAQ
Why should I paint galvanized metal?
Paint helps protect the metal from moisture and wear. It also improves appearance and can seal minor surface flaws. Always verify with the paint label that it’s compatible with galvanized surfaces.
How do I prepare galvanized metal for painting, including weathering and cleaning?
Let the metal weather as needed per the project, then clean to remove dirt, oils, and wax. Use the cleaner or degreaser the manufacturer recommends and follow with a rinse. If in doubt, check the product instructions and local guidelines before applying primer.
Do I need to prime galvanized metal, and what primers work best?
Yes, priming helps paint adhere and last longer. Use primers formulated for galvanized steel or cold-rolled steel, and follow the label for surface prep and curing. Always confirm compatibility with both the primer and the topcoat you plan to use.
What surface profiling methods should I use before painting, and what safety steps matter?
Profile the surface with a method that won’t damage integrity, such as approved cleaning or light abrasion per the manufacturer. Options can include wash primers or controlled mechanical methods, but avoid tearing the coating. Wear eye and skin protection, follow all tool safety notes, and read the product label for safety requirements.