

Introduction
Chalk paint topcoats are either wax or polyurethane (poly) finishes that protect and change the feel of the painted surface; wax leaves a softer, low-sheen hand while poly gives a tougher, more durable film. Choose wax for a velvety, easy-to-touch finish and poly for higher abrasion and moisture resistance, and check the product label or manufacturer instructions for compatibility and cure times. On porous or previously finished wood, do a small test patch to confirm adhesion and appearance before treating the whole piece.
Sticky surfaces usually come from applying too much product, not letting layers fully cure, or using the wrong product over the paint, so thin, multiple coats and following dry times is the safe approach. If stickiness appears, gently clean and let it cure longer, or strip and recoat following the label directions; when in doubt, check the finish manufacturer’s instructions or ask your paint supplier. Proper ventilation, clean tools, and avoiding heavy application in high humidity will help prevent tacky results.
Key takeaways
- Wax yields softer sheen; polyurethane provides tougher, wipeable protection when cured.
- Seal chalk paint after proper curing to prevent stickiness and odor development.
- Lightly sand between coats to improve adhesion and reduce tackiness risk.
- Test topcoat on scrap or inconspicuous area before full project application.
- Maintain stable humidity and temperature during application to minimize stickiness.
- Wear mask and ensure good ventilation; hazardous fumes vary by product type.
Table of Contents
- Introduction
- Key takeaways
- Why a Topcoat Matters for Chalk-Painted Furniture
- Wax Topcoats: Types, Benefits, and Limitations
- Polyurethane Topcoats: Water-Based Vs Oil-Based and Hybrid Options
- Correct Application Techniques to Prevent Sticky Finishes
- Diagnosing and Troubleshooting Sticky Chalk Paint Topcoats
- Environmental and Product Factors That Lead to Stickiness
- Maintenance, Longevity, and When to Reseal
- Tools, Materials Checklist, and Visual Checkpoints
- Conclusion
- FAQ
Why a Topcoat Matters for Chalk-Painted Furniture
A topcoat gives chalk-painted furniture both functional protection and the final look you want. It shields the porous paint from stains, scuffs, and moisture while allowing you to control sheen and the surface feel.
Chalk paint by itself is often soft and vulnerable, so a proper sealer improves durability and wear resistance. Check the paint and topcoat labels or technical data sheets to confirm compatibility and recommended use before sealing.
Common misconceptions about chalk paint finishes
You might’ve heard that chalk paint doesn’t need sealing. That’s a myth, folks. Chalk paint is porous and absorbs moisture, making it prone to stains and water damage without a topcoat.
Another misconception is that any topcoat will do. Not true. Some topcoats can yellow over time or not adhere well to chalk paint. Always choose a topcoat designed for chalk paint.
When is a topcoat optional? If your piece is purely decorative, like a wall hanging, and won’t face daily wear or spills, you might get away without a topcoat. But for furniture that sees regular use, a topcoat is a must.
How surface feel and longevity are affected
A topcoat changes the tactile experience of your chalk-painted piece. Wax gives a soft, velvety feel. It’s great for pieces you want to look and feel like they’ve been around for ages.
Polyurethane, on the other hand, provides a harder, more durable finish. It feels smooth and protective under your touch. It’s ideal for high-traffic areas or pieces that need extra protection.
Long-term wear? Wax is beautiful but not as tough as poly. It can scuff and chip over time. Polyurethane holds up better to daily use and abuse, making it a great choice for longevity.
Wax Topcoats: Types, Benefits, and Limitations
Wax topcoats come mainly as paste wax and liquid wax, and each gives a soft, low-sheen look with a hand-rubbed feel. They are forgiving to touch-ups, easy to repair, and tend to work well over porous, matte chalk paints when applied correctly.
Wax has limits: it offers moderate protection against water and abrasion and can attract buildup or become tacky under some conditions. Refer to the product label or manufacturer instructions for proper application method and recoat windows to avoid problems.
When wax is the right choice
Wax topcoats are perfect for low-traffic decorative pieces. They give a soft, subtle sheen that’s hard to beat.
Easy touch-ups: Scratches and marks can be easily buffed out with a bit of extra wax.
However, they do need regular maintenance. Expect to reapply every 2-3 years or so, depending on use.
Drawbacks of wax (including stickiness risk)
Wax isn’t perfect. It can attract humidity and heat, causing it to soften or even become tacky.
Buildup: If not applied correctly, wax can build up in certain areas, creating an uneven finish.
It’s also not ideal for high-traffic surfaces or humid environments. And remember, it doesn’t play nice with all substrates – incompatible ones can lead to stickiness too.
Polyurethane Topcoats: Water-Based Vs Oil-Based and Hybrid Options
Polyurethane sealers include water-based, oil-based, and hybrid formulations that differ in appearance, odor, and handling. Water-based polys usually dry clearer and with less smell, while oil-based types can deepen color and have stronger fumes; hybrids sit between those behaviors.
Polys generally give tougher, longer-lasting protection than wax but vary in flexibility and cure characteristics, so check the product data sheet for compatibility with chalk paint and for recommended recoat and cure guidance. Consider tradeoffs of look, durability, and ventilation when picking a sealer for furniture.
Best uses for poly topcoats
Polyurethane topcoats are ideal for high-traffic furniture and surfaces that need strong abrasion resistance. They form a tough, durable film that protects your chalk paint finish.
Use poly on pieces like dining tables, kitchen cabinets, or entryway consoles where they’ll see daily use and wear.
Note: Poly can darken or amplify the color of your chalk paint slightly. Test in an inconspicuous area first to ensure you’re happy with the final look.
How poly can reduce or create stickiness
Proper application is key to preventing stickiness with polyurethane. Use a good quality brush and apply thin, even coats.
Mistakes to avoid:
- Using incompatible primers or paints – ensure all products are designed to work together.
- Trapping solvents – allow each coat to dry completely before applying the next.
If you notice tackiness, it’s likely due to trapped solvents. Let it sit for a few days in a well-ventilated area. If it doesn’t cure, sand lightly and apply another thin coat.
Correct Application Techniques to Prevent Sticky Finishes
Proper prep and application are the biggest factors in avoiding sticky topcoats: clean, sand or degloss as needed, and remove dust before sealing. Apply thin, even coats with the right tool and follow the product’s instructions for dry times and recommended environment.
Work in controlled conditions and test a small area first so you can confirm dry and cure behavior before finishing the whole piece. If uncertain, consult the manufacturer instructions or product data sheet for specifics on number of coats and recoat timing.
Surface Prep and Cleaning Checklist
Before applying your topcoat, ensure your chalk paint surface is clean and ready. Use this checklist to avoid common pitfalls.
- Remove contaminants: Wipe down with a damp cloth to remove dust, dirt, or residue. Any leftovers can cause adhesion issues.
- Ensure full cure: Wait at least 24 hours after painting before applying the topcoat. Rushing can trap solvents and lead to stickiness.
- Scuff glossy areas: Lightly sand glossy spots with fine-grit sandpaper (220-320) to promote adhesion. Skipping this can cause the topcoat to peel off.
- Test for tackiness: Gently touch the surface. If it’s still sticky, wait longer before applying the topcoat.
- Check for grease or oil: Wipe with a degreasing soap if needed. Greasy spots can prevent adhesion and cause bubbles.
- Remove any loose paint: Sand off flaking areas to create a smooth surface. Loose paint can lift the topcoat.
- Wipe away sanding dust: Use a tack cloth or damp cloth to remove sanding residue. Dust can cause imperfections in your finish.
- Dry completely: Ensure there’s no moisture left on the surface. Water spots can ruin your topcoat application.
Quick rule: Always test a small, hidden area first to ensure your prep work is sufficient.
Layering and Drying Practices to Avoid Trapping Solvents
Proper application techniques help prevent solvent entrapment, which can lead to sticky finishes.
- Thin coats: Apply thin, even layers. Thick applications trap solvents and take too long to cure.
- Time your coats: Allow 24-48 hours of drying time between each coat. Rushing can trap solvents and cause stickiness.
- Control temperature: Maintain a consistent temperature (ideally 70-85°F or 21-29°C) during application and drying to ensure proper curing.
- Ventilate properly: Ensure adequate airflow around the piece. Trapped heat can prevent solvents from evaporating properly.
By following these practices, you’ll minimize the risk of trapping solvents and ending up with a sticky finish.
Diagnosing and Troubleshooting Sticky Chalk Paint Topcoats
Start by identifying whether the tack is coming from wax, poly, or underlying paint—simple feel tests and a small solvent check can help differentiate causes. For wax issues, buffing or reapplying a thin coat of paste wax may help; for poly tackiness, incomplete cure or incompatibility are common culprits.
Use a small, inconspicuous test area and follow a stepwise fix: clean, allow extra cure time, thin or remove and recoat according to the product’s guidance. If you can’t tell the source, refer to product labels or manufacturer troubleshooting notes before attempting aggressive correction.
Quick tests to identify the problem
Before you dive into fixing your sticky chalk paint topcoat, let’s first figure out what caused it. We’ll use simple, safe tests to distinguish between wax residue and uncured poly or contamination.
Wax Residue Test: Gently drag your fingernail across the affected area. If it feels rough or leaves marks, you likely have excess wax that needs buffing out.
Poly or Contamination Test: Use a cotton swab dampened with mineral spirits to rub the sticky spot. If the stickiness goes away, you’ve got uncured poly or contamination. Be sure to test in a hidden area first!
Fixes for sticky wax and for tacky poly
Now that you’ve identified the culprit, let’s tackle those stickiness issues. Remember, safety first – wear gloves and work in a well-ventilated area.
Sticky Wax: Lightly sand the affected area with fine grit sandpaper (220 or higher). Wipe off dust with a damp cloth. Apply a small amount of clear wax, let it sit for 15 minutes, then buff it out with a clean cloth. If that doesn’t do the trick, consider removing all the wax and starting over.
Tacky Poly: For light cases, gently abrade the area with fine steel wool or sandpaper, then wipe clean. Reapply poly in thin coats, allowing proper drying time between each. If it’s still tacky after a few days, you might need to remove all the poly and start fresh. When in doubt, consult a pro.
Environmental and Product Factors That Lead to Stickiness
Humidity, temperature, and airflow during drying have a major effect on how a topcoat cures and whether it becomes sticky. Product age, storage conditions, and compatibility with the underlying paint or primer also influence tack problems.
Always check product labels and storage recommendations, and consider replacing old or poorly stored products rather than risking a finish failure. If conditions are questionable, wait for more favorable drying conditions or test on scrap before proceeding.
How humidity, temperature, and ventilation affect cure
High humidity can slow down the drying and curing process of your chalk paint topcoat. This can lead to a sticky surface if not given enough time to dry properly.
Low temperatures also impact curing. In cold conditions, the topcoat may take longer to harden, increasing the risk of stickiness.
To mitigate these issues:
– Improve airflow around your project. Use fans if necessary.
– Maintain a controlled environment with consistent temperature and humidity levels.
– Allow for adequate drying time before applying any topcoat.
Products and incompatibilities to watch for
Certain products can react negatively with others, leading to stickiness. For instance, using oil-based products over water-based paints can cause issues.
Always check product labels for compatibility information. If unsure, perform a small patch test before applying the topcoat to your entire project.
Follow manufacturer guidelines for storage and age of products. Using old or improperly stored materials can also lead to stickiness problems.
Maintenance, Longevity, and When to Reseal
Routine care keeps sealed concrete working and prevents sticky build-up or tacky surfaces. Watch for dull spots, increased dirt retention, or areas that pick up scuffs—those are signs the topcoat needs attention or reapplication. For wax and poly finishes, use gentle cleaning and reconditioning methods recommended by the product label or datasheet.
Keeping up with light cleaning saves you from heavy stripping later and extends the look and protection of the floor. Reconditioning with the right product and technique restores slip resistance and prevents dirt from embedding, so check the manufacturer instructions and test a small area before treating the whole surface.
Cleaning and gentle maintenance techniques
Regular cleaning is key to keeping your chalk paint topcoats looking their best. Use a soft, damp cloth with mild dish soap for routine dust removal.
Never use abrasive cleaners or scrub pads, as they can damage the finish and cause tackiness.
For tougher grime, try a mixture of equal parts white vinegar and warm water. Wipe gently in the direction of the grain. Rinse with clear water and dry thoroughly.
How often you clean depends on use. High-traffic pieces may need monthly cleaning, while less-used items can go longer between cleanings.
When to strip and reseal versus spot repair
Deciding when to strip and reseal your chalk paint topcoat depends on the extent of tackiness and underlying damage.
For minor tackiness or small areas, spot repairs might be enough. Lightly sand, clean with a suitable solvent (like mineral spirits for poly), and recoat.
If tackiness is widespread but the finish is still intact, consider stripping and resealing. This involves removing the old topcoat, lightly sanding, cleaning, and applying a new layer of wax or poly.
For severe damage or heavy buildup, a full refinish might be necessary. This means stripping off all old paint and starting fresh with new chalk paint and topcoat.
Tools, Materials Checklist, and Visual Checkpoints
Gather the right tools—soft cloths for waxing, quality brushes or applicators for poly, abrasives for prep, and appropriate safety gear—before you start. Having a small test board and cleaning supplies on hand helps confirm technique and cure under your shop conditions.
Use visual checkpoints during the job: even coverage, absence of streaks or bubbles, and a consistent sheen after curing indicate a good application. If anything looks off, stop and consult the product instructions or data sheet before continuing.
Visual and Tactile Checkpoints for Each Stage
Use this checklist after painting, between coats, and at final cure to ensure a non-sticky finish.
- After Painting: Surface should look evenly coated with no drips or runs. If missed spots are present, they may become sticky.
- Between Coats: Each coat should dry to a non-tacky finish before applying the next. Touch lightly; if it feels sticky, let it dry longer.
- Final Cure: After final cure (usually 24-72 hours), surface should be completely non-sticky and ready for use.
Quick rule: Always check, never assume. A few seconds can save hours of trouble.
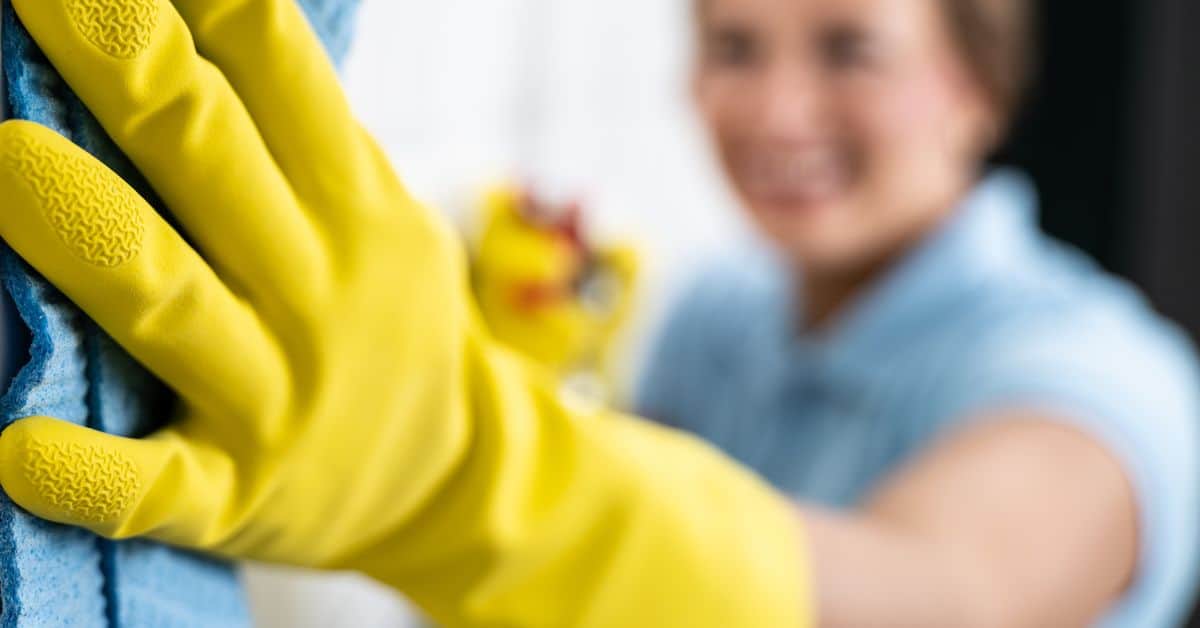
Safety and Disposal Basics
Follow these guidelines to ensure a safe working environment and proper waste disposal.
- Ventilation: Ensure adequate ventilation. Open windows, use fans, or work outdoors when possible.
- Gloves: Wear gloves suitable for the product to protect your hands from irritation and solvent transfer.
- Rags Disposal: Allow rags to dry completely before disposing. Never leave them in a pile, as they can spontaneously combust.
Quick rule: Always consult product labels for specific safety and disposal instructions.
Conclusion
Safety and durability come from decisions you make now: test patches first, choose the right topcoat for your furniture and climate, and follow a controlled, stepwise process to avoid a sticky or damaged finish.
Test a small hidden spot, then decide between wax or a polyurethane based on your use and care plan; clean and lightly prep the surface, apply thin, even coats with proper drying times, keep environments controlled for temperature and humidity, and inspect between coats for any tack or dust; ventilate and wear basic safety gear, and keep your tools clean and ready for the next pass.
Common mistakes are rushing coats, skipping test areas, or ignoring humidity and cure times, and the safety rules are simple: never force a finish, always test first, and allow full cure before use; if you see ongoing stickiness after multiple passes or a surface that won’t level, it’s time to pause and seek advice rather than pushing through, and consider bringing in a pro for stubborn spots or large pieces to avoid costly mistakes.
When in doubt about a tough surface or tricky environmental factors, don’t hesitate to consult a professional and get a quick, practical plan; finish with confidence, protect your work, and enjoy a durable, trouble-free result that looks good for years.
FAQ
How should I check if a topcoat is compatible with chalk-painted furniture?
Read the product label and the datasheet. Look for chalk paint compatibility, recommended surfaces, and any cautions about wax or sealer use.
What common mistakes cause sticky finishes with wax or poly?
Avoid applying thick coats and rushing the job. Humidity or dust during application, or not following drying times, all lead to tacky surfaces.
How can I fix a surface that stays sticky after coating?
Wait for the finish to fully dry according to the product instructions. If still tacky, apply a thin, compatible coat per the label and ensure the area is clean and dry before reapplying.
When should I recoat or switch products to prevent stickiness?
Follow the manufacturer’s guidance on cure times and recoat windows. If stickiness persists after the recommended cure period, use the same product as a recoat or a product specifically labeled as compatible with chalk paint topcoats. Check local rules or the manufacturer instructions for best results.