

Introduction
Applying soap to your Tadelakt surface is a crucial maintenance task, but it’s also time-sensitive. Understanding the timeline of this process ensures you maintain water resistance and avoid streaks effectively.
From preparation to application and curing, each step takes a specific amount of time. Let’s break down the Tadelakt soap application process into a clear, manageable timeline.
For the full guide, see Tadelakt Soap Application: How to Maintain Water Resistance Without Streaks.
The Complete Timeline for Tadelakt Soap Application
To maintain your Tadelakt surface in optimal condition, follow this detailed timeline for applying soap:
- Surface Preparation: 1-3 days
– Cleaning and removing dust: 1 day
– Damp curing: 1-2 days (depending on climate) - Soap Application: 4-6 hours per application
– Applying soap in thin, even coats: 2-3 hours
– Buffing to a sheen and refining texture: 2-3 hours - Curing and Drying: 12-72 hours
– Allowing the surface to cure and dry completely between applications or maintenance checks
Total time required for each application cycle is approximately 4-8 days, depending on your climate and the condition of your Tadelakt surface.
Key takeaways
The preparation stage significantly impacts the overall timeline. Ensure you allocate sufficient time for cleaning, dust removal, and damp curing to create an optimal base for soap application.
- Understand soap layer purpose to balance water resistance and breathable surface.
- Prepare tools and materials: soap, trowel, damp sponge, roller, and sealant.
- Follow surface prep steps; clean, damp cure, and plan reapplication intervals.
- Apply olive oil soap in thin, even coats with controlled pressure.
- Watch for streaks during cure; wipe immediately and refine texture as needed.
- Maintain maintenance schedule and reapplication cues; wear eye protection and ventilation.
Table of Contents
- Introduction
- Key takeaways
- What the Soap Layer Does and Why Application Technique Matters
- Tools and Materials Checklist
- Surface Preparation and Planning Before Reapplication
- Step-by-Step Soap Application Process
- Preventing and Removing Streaks
- Long-Term Maintenance to Preserve Water Resistance
- Troubleshooting, Inspections, and When to Call a Pro
- Safety, Environmental Concerns, and Cost Considerations
- Conclusion
- FAQ
What the Soap Layer Does and Why Application Technique Matters
Olive oil soap forms a thin, chemically active film on lime plaster that changes surface tension and encourages water to bead rather than soak in; it’s the finishing reaction between fatty acids in the soap and the alkaline surface that creates the repellent skin. Check the soap’s product label or manufacturer’s instructions to confirm it’s recommended for lime-based plasters before use.
How you apply that soap—coverage, thickness, evenness, and the level of buffing—determines whether you get uniform water resistance and a consistent sheen or visible streaks and haze. Understand that soap treatment is a surface conditioning and maintenance step, not a structural waterproofing solution: verify structural or below-surface waterproofing needs separately and plan additional barriers or sealants when moisture intrusion is a substrate issue.
Historical and functional context
Tadelakt, an ancient Moroccan lime plaster technique, has traditionally used olive oil soap to create a water-resistant surface. The process dates back centuries, with soap being applied by hand in circular motions.
The chemistry behind this lies in the interaction between the lime in tadelakt and the fatty acids in the soap. When the two react, they form a protective layer that repels water.
Key takeaway: The historical use of soap in tadelakt is not just about tradition; it’s based on sound chemical principles.
How soap creates water resistance (practical overview)
The water resistance of tadelakt comes down to the soap film that forms on its surface. Here’s how it works:
Soap molecules have a hydrophilic head and a hydrophobic tail. When applied, these tails point outwards, creating a barrier that repels water. This is why water beads up and rolls off instead of being absorbed.
Even coverage is crucial for consistent water resistance. Streaks or uneven application can lead to weak points where water can penetrate.
Remember: The better the soap film, the better the water resistance.
Tools and Materials Checklist
Gathering the right tools and materials keeps the job practical and predictable: trowels, plastic smoothing tools, rubbing stones, soft natural sponges, lint-free cloths, brushes, sanding blocks, a small water/dropper bottle, pH test strips, and a simple humidity/temperature gauge are typical essentials. Read product labels or the technical data sheet for any soap or sealer you buy to confirm compatibility with lime-based plasters and safe dilution instructions.
For soap options, list traditional olive oil soap and savon noir-style products, and consider modern lime-compatible formulations—check the ingredient list for unexpected solvents, binders, or additives that may react with lime. Include consumables and testing items (extra plaster for touch-ups, replacement rubbing stones, small patch boards for compatibility tests) and perform a small patch to verify no streaking or adverse reaction before treating the whole surface.
Choosing the right soap and comparing types
Before you start, check these points to ensure you’re using the best soap for your Tadelakt project.
- Traditional olive oil soaps: Look for high olive oil content (70-100%) and no added chemicals. They’re natural but may require more effort to apply.
- Commercial saponified soaps: Check if they’re specifically designed for lime-based plasters. Some have added binders or solvents that can cause issues.
- Savon Noir alternatives: Ensure they’re made from natural ingredients and are suitable for lime plasters. Some may not provide the same water resistance.
- Modern equivalents: Check if they’re formulated with fatty acids (like stearic or palmitic) that work well with lime plaster. Follow recommended dilution/curing practices.
- Ingredients list: Ensure it’s clear and doesn’t hide unknown binders or additives that could cause problems.
- Recommended use: Check if it’s intended for lime-based plasters, lime putty, or cementitious renders. If unsure, perform a patch test.
- Compatibility with lime plaster: Confirm this on the label to avoid streaks, efflorescence, or reduced water resistance.
- pH level: Soap should be slightly alkaline (around 8-10) for compatibility with lime plaster. Test with pH strips if unsure.
Quick rule: Always perform a small patch test before full application to check for any adverse reactions.
Equipment, PPE, and preparation supplies
Gather these tools and materials before you start your Tadelakt project to ensure a smooth process with minimal streaking.
- Brushes: Soft-bristled brushes are best for applying soap. Hard bristles can scratch the surface.
- Sponges: Natural sea sponges work well for smoothing and polishing. Synthetic ones may leave residue.
- Buckets: Use separate buckets for mixing plaster, water, and soap to avoid contamination.
- Mixing tools: A sturdy trowel or paddle mixer will help you mix your plaster and soap solutions evenly.
- Protective gear: Wear gloves to protect your hands from lime burns. Safety glasses are also a good idea.
- Cleanup materials: Have plenty of rags, towels, and a trash bag ready for easy cleanup.
- Humidity/temperature gauge: Monitor your environment to ensure it’s within the recommended range (40-70% humidity, 50-80°F).
- Extra plaster mix: Keep some spare mix on hand for touch-ups and repairs.
Quick rule: Clean your tools thoroughly after each use to prevent streaking and ensure a smooth finish.
Surface Preparation and Planning Before Reapplication
Start by assessing the wall for cleanliness and integrity: remove soap scum, oils, dust, efflorescence, and loose material so the soap film can form uniformly; if you suspect previous sealers or contaminants, test a discrete area. Use simple tests—wipe, swab, or a pH strip—and verify results against product instructions to decide if deeper cleaning or stripping is required.
Inspect for cracks, delamination, moisture intrusion, and flatness, and plan multiple small test patches in representative areas to gauge adhesion, color change, and water beading. Set up staging and contamination controls (drop cloths, plastic sheeting, ventilation) and document planned repair steps and a maintenance schedule so you have a clear workflow before reapplication.
Visual and moisture checks
Before you start, give your tadelakt surface a thorough once-over. You’re looking for any contaminants that might interfere with the new soap layer’s adhesion.
Check for: soap scum, oils, efflorescence, or loose plaster. Use a soft brush and vacuum to remove dust and residue. The surface should feel clean and slightly porous for even adhesion.
Next, inspect for moisture problems. Tadelakt is water-resistant, but it’s not waterproof. Look out for signs of rising damp or moisture intrusion. If you’re unsure, perform a small test application in an inconspicuous area to gauge how the surface reacts.
Environmental and scheduling considerations
Tadelakt soap application is sensitive to environmental conditions. Temperature, humidity, and airflow all play a role in how well your new layer adheres and dries.
Ideal conditions: Aim for temperatures between 50-80°F (10-27°C) with moderate humidity and good airflow. Avoid direct water exposure until the surface is fully cured to prevent streaking or uneven patina.
Plan your work accordingly. If it’s too hot, humid, or cold, consider rescheduling for a more suitable day. And remember, tadelakt needs time to breathe – keep windows open and fans running if possible.
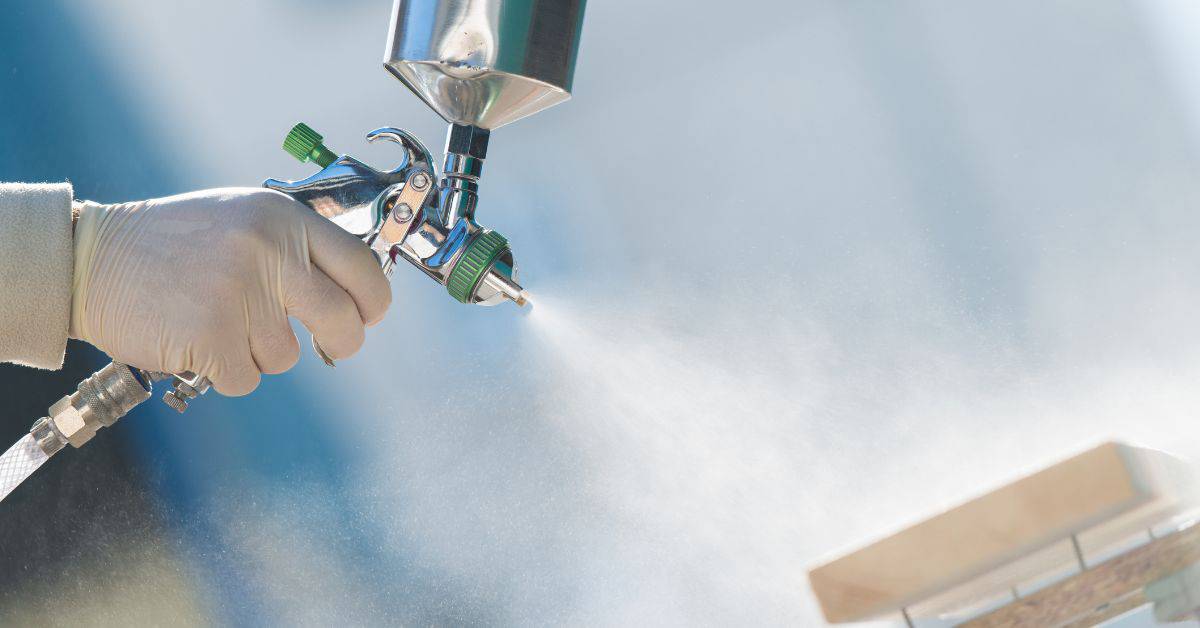
Step-by-Step Soap Application Process
Prepare materials and PPE, then mix the soap according to its instructions and your test-patch results; if dilution is recommended, follow the product guidance and confirm consistency on a sample card. Confirm substrate readiness—clean, dry to the level the manufacturer specifies, and with consistent porosity—before applying across the whole surface.
Apply using a controlled technique (small, overlapping circular or spiral passes often work better than long straight strokes) to maintain an even skin of soap and avoid localized buildup that causes streaks. Allow the recommended curing window, then buff progressively with soft cloths or rubbing stones as advised by the product data sheet, and test water repellency on a small area before finishing cleanup and tool care.
Step-by-Step Process
The following steps guide you through applying tadelakt soap for a streak-free, water-resistant finish.
- Preparation and Safety: Gather materials (trowels, sponges, PPE), check surface compatibility, and ensure proper ventilation. Read product instructions.
- Mixing Soap: Follow manufacturer’s guidelines to mix soap with water or other additives. Test on a sample area first.
- Surface Preparation: Ensure the substrate is clean, dry, and primed if necessary. Test for porosity using a damp sponge.
- Application: Using a trowel, apply soap in thin, even coats with consistent pressure. Maintain a ‘skin’ of soap on the surface to avoid streaks.
- Drying and Buffing: Allow each coat to dry according to manufacturer’s recommendations (usually 24-72 hours). Buff or refine using a clean, damp sponge to achieve desired sheen.
- Final Checks: Inspect for any missed spots or streaks. Apply additional coats if needed, following the same process.
- Clean-up: Clean tools thoroughly with water and mild soap to prevent residue buildup.
Preparing and diluting the soap
Start by gathering your tadelakt soap and any pigments or additives you plan to use. Follow manufacturer’s guidelines for dilution ratios.
For solid soaps, dissolve them in warm water using a clean bucket. Stir gently until fully dissolved. If using concentrated liquid soap, dilute it according to the manufacturer’s instructions.
Before applying, test your mixture on a small, hidden area to ensure proper consistency and color. Adjust as needed.
Pro tip: Always follow manufacturer recommendations for dilution ratios to avoid thin spots or lumps.
Application technique and motion
Using a trowel, apply the soap mixture in thin, even coats. Maintain consistent pressure across the surface to avoid streaks.
Work in small sections, using overlapping strokes to ensure full coverage. Blend edges gently to avoid visible lines between passes.
Apply soap in a ‘coil’ or ‘spiral’ motion, starting from one corner and working your way outwards. This helps maintain an even thickness and prevents runs.
Remember: The key to streak-free application is thin, even coats with consistent pressure.
Drying, buffing, and layering
Allow each coat of soap to dry according to the manufacturer’s recommendations. This usually ranges from 24 to 72 hours, depending on humidity levels.
Once dry, use a clean, damp sponge to gently buff or refine the surface. This helps achieve the desired sheen and removes any excess material that could cause streaks in subsequent coats.
Inspect the surface for any missed spots or streaks. If necessary, apply additional coats following the same process. Tadelakt typically requires 2-3 coats for optimal water resistance.
Note: In humid conditions, allow extra drying time between coats to prevent mildew growth.
Preventing and Removing Streaks
Streaks most commonly come from uneven application thickness, over-wetting, incompatible cleaners, or uneven drying conditions; avoid these by keeping a consistent trowel angle, controlled volumes of soap, and monitoring environmental humidity. If unsure whether a cleaner is safe, check the label for lime-compatibility or perform a patch test first.
If streaks appear, correct them locally with gentle reworking: lightly re-scrape or re-wet and re-trowel the affected area, then re-burnish once the surface accepts it; for persistent issues, a targeted patch test with a different application method helps isolate the cause. Use moisture meters or simple droplet tests to confirm uniform repellency and repeat corrective work only after verifying compatibility and surface readiness.
Common application errors that cause streaks
Avoid these common pitfalls to prevent streaking during your tadelakt soap application.
- Pooling: Avoid letting the soap sit in one place too long. Keep moving it across the surface evenly.
- Dirty tools: Ensure your trowel and other tools are clean before starting to prevent dirt streaks.
- Varying humidity: Maintain consistent humidity levels during application to avoid streaking due to moisture differences.
- Uneven application thickness: Keep your trowel angle consistent for even coverage and thickness.
By avoiding these mistakes, you’ll minimize the risk of streaks in your finished tadelakt surface.
Corrective steps for existing streaks
If streaks appear after application, don’t worry. Here’s how to address them gently and effectively:
Light streaking: Gently re-scrape or burnish the affected area using a damp cloth and light pressure. This should help even out the sheen without compromising the mortar.
Entrenched marks: For deeper streaks, targeted re-wetting and re-troweling may be necessary. Spot apply more soap, let it sit briefly, then trowel it in again to blend with the surrounding surface.
If streaking persists or worsens, it might be time for a deeper repair, such as removing and reapplying the affected area entirely.
Long-Term Maintenance to Preserve Water Resistance
Base maintenance on performance: inspect and test the surface for droplet beading and sheen loss rather than following a rigid calendar, and document conditions to guide decisions. Maintain with neutral, non-acidic cleaners and low-moisture methods; if a product’s instructions are unclear, consult the manufacturer or do a small trial rather than guessing.
Use simple spot water tests and visual checks for streaking, discoloration, or mineral deposits to trigger reconditioning steps such as gentle cleaning or a restricted re-application of a compatible treatment. Keep a maintenance log with dates, test results, and products used so you can identify trends and avoid over-sealing or using incompatible materials that create streaks or change the finish.
Cleaning routines and product compatibility
To maintain your Tadelakt surface’s water resistance and streak-free appearance, follow these cleaning guidelines:
Use neutral, non-acidic cleaners. Avoid products with harsh chemicals or acidic components that can damage the lime-based surface. Always check labels for warnings about acidity or harsh chemicals.
Before using any cleaner on your Tadelakt surface, test it first on an inconspicuous area to ensure it doesn’t cause discoloration or damage.
Minimize moisture exposure during cleaning. Wipe surfaces dry after each use to prevent water from sitting and potentially breaking down the soap layer.
When and how to retreat the soap layer
Retreating the soap layer is necessary when its performance starts to diminish. Here’s how to know when it’s time:
Conduct a spot water test. Place a few drops of water on the surface. If they bead up and roll off, your Tadelakt is still protected. If they spread out or darken the surface, retreatment is needed.
Inspect for visible signs of wear like loss of gloss, microcracks, or mineral deposits. These can indicate that the soap layer’s water repellency has been compromised.
When retreating, follow these steps to minimize streaking and build-up:
– First, clean the surface with a compatible cleaner as described above.
– Allow it to dry completely.
– Apply a new layer of Tadelakt soap or a compatible lime-based sealer using the same technique as your initial application.
– Let it cure according to the manufacturer’s instructions.
Troubleshooting, Inspections, and When to Call a Pro
Look for clear diagnostic signs: loss of bead formation, repeated streaking after fixes, discoloration, mold or efflorescence, and plaster flaking—use simple at-home checks like swab tests and small water drops to compare areas. If tests suggest continuing moisture behind the plaster, or if large areas delaminate or mold returns after cleaning, that indicates a problem beyond routine maintenance.
For minor, well-contained issues you can try spot repairs and reconditioning; call a restoration specialist for persistent dampness, significant delamination, suspected structural leaks, or when repeated DIY attempts fail. When in doubt, document the problem with photos, note test results, and check the scope against manufacturer guidance before deciding whether to hire a pro.
Visual checkpoints and simple tests
Regularly inspect your Tadelakt surface to ensure its water resistance and overall health. Use this checklist for quick, at-home assessments.
- Water beading: Lightly mist the surface. Water should bead up and roll off, indicating repellency.
- Sheet water test: Pour a small amount of water onto the surface. It should sheet off quickly without leaving puddles or dark spots.
- Color consistency: Check for discoloration or stains, which could indicate moisture intrusion or improper cleaning.
- Mold/mildew inspection: Look for any greenish-black or white patches, especially in corners or behind fixtures.
- Flaking or delamination: Gently scrape the surface with a fingernail. If material comes off easily, there may be underlying issues.
- Recurring streaks: Check for persistent streaks after cleaning, which could indicate improper application or wear.
- Unexpected moisture: Inspect for dampness or water spots where they shouldn’t be, such as behind fixtures or under cabinets.
- Grout joint integrity: Ensure grout is intact and not crumbling. Cracked grout can allow water intrusion.
Quick rule: If any of these checks fail, address the issue promptly to prevent further damage.
Common failures and practical remedies
Identify and address common Tadelakt issues with these practical troubleshooting steps. If problems persist, consult a professional.
- Loss of repellency: Reapply soap layer following the original application process. Ensure you’re using compatible cleaning products.
- Discoloration: Clean gently with a mild, pH-neutral cleaner. If stains persist, consider reapplying the soap layer.
- Mold/mildew: Scrub with a solution of water and bleach (1:8 ratio), then apply a fresh soap layer to prevent recurrence.
- Flaking/delamination: Remove loose material, clean the surface, and reapply the soap layer. If the area is large, consider professional restoration.
- Recurring streaks: Re-evaluate your cleaning technique or products. If streaks persist, consult a pro for advice tailored to your specific situation.
- Unexpected moisture intrusion: Inspect and repair any cracks, hairline fissures, or damaged grout joints. If the problem persists, there may be underlying structural issues requiring professional attention.
- Efflorescence: Remove white deposits with a solution of water and muriatic acid (1:8 ratio), then clean and reapply the soap layer.
Quick rule: If DIY remedies fail to resolve issues, or if problems are extensive, consult an experienced Tadelakt/restoration contractor for professional advice and restoration services.
Safety, Environmental Concerns, and Cost Considerations
Follow common-sense safety: ensure good ventilation, wear gloves and eye protection, and use a respirator if there’s dust or strong fumes during scraping or mixing. For disposal, contain rinse water and soap residues—check local regulations and product guidance for permitted disposal or treatment rather than dumping down drains.
Choose the least-harmful product that the label or technical sheet confirms is compatible with lime-plaster systems, and minimize water use and runoff with containment and filtration options on-site. Budget for regular consumables (cleaners, PPE, replacement rubbers/stones) and plan for occasional professional assessment for major repairs, using conservative, test-based decisions rather than frequent blanket re-sealing.
Safe handling and ventilation
When working with tadelakt soap, safety is paramount. Here are some simple measures to keep you safe:
Gloves protect your hands from irritation caused by prolonged contact with the soap.
Eye protection, such as goggles, shields your eyes from any splashes or dust during mixing and application.
Adequate ventilation is crucial. If working in a confined space like a basement or bathroom, ensure there’s enough airflow. Use fans if necessary to keep the area well-ventilated.
Environmental impact, disposal, and health notes
Choosing an eco-friendly soap is important. Lime-based soaps are typically biodegradable but check the label to be sure.
As for disposal, do not pour rinse water or residue down drains. Contain them in sealed containers and dispose of according to local regulations. Some cities allow composting or reuse of certain materials.
Always check the product’s safety data sheet for information on allergens, volatile organic compounds (VOCs), and other potential health hazards. This will help you make an informed decision and take necessary precautions during application.
Conclusion
If you follow the right soap layer technique and keep the surface clean and dry, you’ll protect the work and avoid costly touchups while keeping the water resistance looking steady and clean.
Test a patch first, confirm the area is dry and dust-free, then gather and verify your tools and materials, plan the order of application, apply in controlled sections with even motion, allow proper cure time between coats, and finish with a light inspection to ensure bead and film formation before you expose the surface to water. Do not rush any step, monitor for scent or haze issues, and keep the area ventilated and dry during curing.
Common mistakes to avoid are skipping surface prep, applying in a wet or humid condition, and overworking the soap layer, which can cause streaks or thin spots. Always wear eye protection and gloves, work in a well-ventilated area, test a small area first, and clean up spills promptly to prevent staining or etching.
When to call a pro: if you notice persistent streaking, uneven curing, or signs of bond failure after the initial work and fixes, or if the surface is complicated by cracks or movement, bring in an experienced contractor. Stay steady, stay safe, and you’ll keep the finish durable and trouble-free for years to come.
FAQ
What tools and materials do you need for tadelakt soap application?
Have on hand olive oil soap, a soft cloth or sponge, a natural stone or rubber trowel, and clean water. You’ll also want a non-abrasive pad for gentle buffing and a plastic bucket for mixing or rinsing. Check labels or manufacturer instructions for any product-specific notes.
What is the step-by-step process for applying olive oil soap?
Dampen the surface lightly, then apply the olive oil soap in small, circular motions to the tadelakt finish. Work in sections and wipe off excess soap as you go. Buff with a clean cloth until the surface takes a slightly matte look and feels smooth.
How often should you maintain and clean the surface to preserve water resistance?
Do regular light cleanings as needed with a mild, pH-neutral cleaner and a soft cloth. Reapply or refresh the soap when the surface begins to look dry or loses its smooth, resilient feel. Always follow product labels for any maintenance intervals.
How can you tell when reapplication is necessary and how to fix streaking issues?
Reapplication is needed when water stops beading or the surface looks dull or dry. If streaks appear, re-wipe with clean water, then reapply a fresh coat of soap and buff until even. For persistent streaks, re-check surface preparation and ensure you’re not over-wetting or under-buffing during maintenance.