
Introduction
Use lime-compatible mineral pigments to prevent streaking in lime plaster and paint.
The guide explains how pigment choice, grinding, and mixing affect consistency, and provides practical steps for selecting pigments and achieving even color.
You’ll learn simple tips, common pitfalls to avoid, and how to test color and application techniques before full coverage.
Key takeaways
- Test pigments on small lime samples before full-scale mixes to gauge color.
- Achieve consistency by maintaining uniform pigment grind and dispersed suspension in lime.
- Use pre-mixed pigment slurries with lime binder to reduce streak risk.
- Schedule application in thin, even coats with proper trowel pressure.
- Seal surfaces and protect from rapid drying to prevent color migration.
- Document recipes and environmental conditions for repeatability across batches.
Table of Contents
- Introduction
- Key takeaways
- Why streaks happen with mineral pigments and lime
- Choosing the right mineral pigments for lime mixes
- Tools, materials and prep checklist to prevent streaks
- Preparing pigment-lime blends: recipes and ratios
- Step-by-step application techniques to avoid streaks
- Testing and sample boards: how to evaluate before committing
- Common problems and troubleshooting streaks
- Additives, binders and modifiers — what helps and what harms
- Finishing, maintenance and long-term color stability
- Safety, environmental and regulatory considerations
- Pro tips, advanced techniques and case studies
- Conclusion
- FAQ
Why streaks happen with mineral pigments and lime
Streaking with mineral pigments on lime happens when pigment particles interact with the lime binder, the particle size and surface charge, and how lime’s alkalinity disperses them. Finer or coarser grits alter light reflectance and color saturation, and the binder can carry or trap pigments differently as the carbonation and set occur. Porosity and capillary moisture transport drive pigment migration and uneven drying, so the timing of pigment incorporation relative to plaster set matters for where streaks appear.
On site, these ideas translate into practical controls: manage plaster porosity, humidity, and vapor status so diffusion is predictable, and plan pigment mixing for even dispersion rather than zones of concentration. A thoughtful workflow—dry pigment versus slurry, pigment-to-binder ratio, and brushing technique with cross-hatching and feathering—helps align pigment deposition with the curing front and reduce streaking, while surface prep and a light dampening step aid even uptake. Testing on a small panel under controlled variables before full application lets you predict streak behavior and adjust the process accordingly, saving time and material later.
Actionable workflow to reduce streaks (condensed):
- Substrate prep sequencing (no new headings): assess and condition the wall before pigment use. Sequence: confirm substrate porosity, test suction, prime if needed, and pre-wet patches to normalize absorption.
- Porosity and suction testing: use shallow damp patches or a simple suction gauge on representative areas to map high- and low-suction zones.
- Priming strategy: apply a compatible primer or compatible surface treatment on highly absorbent areas to equalize uptake and reduce differential drying.
- Pigment mixing: use well-milled oxides, mix thoroughly with binder to a uniform slurry or paste, and avoid pigment-rich bands by mixing in small batches and stirring between applications.
- Application technique: apply in uniform passes with cross-hatching and feathering to blend edges; avoid heavy, isolated patches that can dry differently.
- Moisture management: control ambient humidity and surface dampness during finishing; if possible, use a moisture barrier or controlled environment to slow rapid surface drying.
- Drying monitoring: observe fresh vs. cured areas and adjust technique or mix for subsequent coats if streaks appear during early set.
- Panel testing: always test on a small panel under the same conditions before committing to the full wall; use the results to tweak pigment load, mix, and timing.
- Safety, maintenance, and cost: wear appropriate PPE (gloves, respirator as needed), clean tools promptly with water, and plan material usage to minimize waste and cleanup costs.
Pigment chemistry and particle size
Not all mineral pigments behave the same on lime. Oxide pigments are dense and opaque; earth pigments are softer and more variable. That difference changes how well they cover and how easily you can get streaks.
Particle size matters more than most DIYs expect. Fine particles disperse evenly and give better hiding. Coarser particles settle faster and can clump in the mix, leaving visible lines when you trowel or brush.
Practical takeaway: use well-milled oxides for high hiding and mix thoroughly to avoid pigment-rich or pigment-poor bands that show up as streaks.
Lime chemistry (putty, hydrated lime, carbonation)
Lime type changes the workability and the way pigments sit in the film. Putty gives a creamier binder and holds pigment more evenly. Hydrated powder can be drier and more prone to uneven distribution if not properly mixed.
Carbonation—the lime turning back to calcium carbonate—alters the surface over time. As the binder cures and changes pH, pigment can migrate or lock in differently, creating contrast between fresh and cured areas.
Practical takeaway: control your lime consistency and finishing schedule so pigment and binder cure uniformly. That cuts down on streaks caused by variable carbonation and binder behavior.
Substrate porosity and moisture movement
Walls don’t absorb water evenly. Patches of high suction pull the lime-pigment mix in faster. Low-suction areas leave more material on the surface. That difference shows up as light and dark streaks.
Rising damp, salt, or recent repairs introduce moisture movement that shifts pigments during drying. Even your application technique interacts with suction — too much material on a thirsty patch makes a dark line.
Practical takeaway: pre-wet or prime variable substrates and match suction before you apply the finish. That evens out absorption and stops streaks from starting in the wall, not later on the surface.

Choosing the right mineral pigments for lime mixes
Choosing the right mineral pigments for lime mixes means prioritizing natural earths, mineral oxides, and carbon blacks that show stable performance with lime systems, while flagging pigments that react with lime, promote over-decarbonation, or shift color over time. Look for high-purity inorganic pigments—practical thresholds like >95% purity—along with documented colorfastness under lime exposure, including lightfastness and alkali resistance, and follow general ASTM/ISO colorfastness and lime-compatibility benchmarks when evaluating options. A simple, repeatable compatibility test plan should be employed, using a small plaster patch, a defined pigment-to-lime ratio, consistent grinding size, and curing observations to detect streaking, fading, or efflorescence early, so you can filter choices before committing to a full job.
In practice this matters on the jobsite because it translates to more predictable color, less streaking and fading, and longer-lasting finishes on lime plasters and lime washes, with clearer guidance on mixing ratios, grinding and dispersion practices, and brand considerations tailored to lime systems. By documenting a straightforward test protocol and aligning pigment selection with practical standards and sourcing tips, DIYers and tradespeople can verify performance before purchase, reduce trial-and-error at scale, and achieve stable color that remains true through exposure to sunlight and high-alkali environments without sacrificing compatibility with lime binders.
Oxides vs. natural earths: pros and cons
Pick your pigment knowing the trade-offs. Oxides, ultramarines and natural earths behave differently in lime mixes — some give stronger color, others give a softer, more natural look.
Pros
- Iron oxides: very stable and lightfast. Color lasts on exterior work.
- Ultramarine blues: bright, clean blues not found in earths. Good tinting strength.
- Natural earths: subtle, warm tones that blend well with lime’s natural look.
- Oxides and pre-treated pigments: predictable batch-to-batch color and low risk of staining.
Cons
- Some ultramarines can leach or fade if not alkali-stable—check specs.
- Natural earths vary by source; shades can shift between batches.
- Coarse, untreated pigments can streak or give patchy coverage in lime.
- Lower-grade pigments may contain fines or contaminants that affect setting or color.
When to use which: choose iron oxides or quality pre-dispersed pigments for exterior durability and strong color. Use natural earths for interiors or where a historic, muted finish is wanted — but buy consistent batches and test a sample.
Particle size, grind, and surface treatment
Finer pigments mix more evenly into lime and give a smoother, more uniform finish. Coarser grains can settle out or show as speckling when the render dries.
Look for pigments labeled as finely ground or micronized. Pre-dispersed liquid or paste pigments save you time on the job and reduce dust. They cut straight into the lime putty and keep the wet-edge consistent.
Surface-treated pigments resist clumping and improve wetting in the alkali environment of lime. That matters on large walls where uniform color across panels is critical.
Always do a small mock-up with the exact pigment and mix ratio before committing to a full facade.
Lightfastness, alkali resistance and testing info
Check manufacturer specs for ASTM or ISO lightfastness ratings and an indication of alkali stability. For lime work you want pigments that list high lightfastness and explicit alkali resistance.
Simple tests on the job: make a small sample panel, expose it to sun and water spray cycles, and inspect after 2–4 weeks for fading or bleeding. For alkali checks, mix a tiny mortar sample and leave it in a damp, warm spot for a few weeks — look for color change or surface bloom.
Lab reports are best when available: look for pigment certificates showing % iron oxide for reds/browns, rutile/anatase form for titanium whites, and sodium/calcium stability for ultramarines. If in doubt, choose pigments with published test data or buy from suppliers experienced with lime systems.
Tools, materials and prep checklist to prevent streaks
To prevent streaks, assemble a core kit of tools and materials that promote a smooth lime pigment application: brushes of varying widths, micro-fiber rollers, flat and hake brushes, and a controlled‑mix drill or slow‑speed mixer to create a consistent pigment-lime slurry for even coverage across tricky surfaces. Also include fine-mesh strainers or pantyhose‑style strainers, pour‑spout buckets, stirring paddles, and a paint mixer attachment to eliminate clumps that cause uneven coverage, plus surface prep items such as thorough cleaning tools, breathable lime plaster primers or sealers, and dampening methods, and maintain clean cups and lids to prevent contamination for repeat use every time.
Wetting agents approved for lime work, anti-dusting aids, and small color stabilizers help achieve uniform spread without streaks, while drop cloths, eye protection, and good lighting create a safe, controlled environment for repeatable results that stay consistent across batches. A tidy, staged mixing area with dedicated buckets, a tool bench, and frequent tool cleaning between coats minimizes re-wetting and catches any lumps early and easily accessible from the worktable. Test patches on scrap areas, maintain a consistent slurry viscosity, and follow a planned sequence to keep finishes even and durable, so you finish faster with fewer reruns per coat.
Brushes, rollers and spray tools that work best
Pick tools that match the material and texture. The right brush or sprayer controls film thickness and reduces lap lines.
- Synthetic sash brushes Good for water‑based coatings and thin, controlled lays. Choose 2–3″ widths for trim and edges; rinse clean after each bucket to avoid dried bristles.
- Natural bristle brushes Best for oil‑based products and heavy coatings. Hold more material for fewer strokes; test on scrap because they can leave brush marks if overloaded.
- High‑density rollers Use 3/8″–1/2″ nap for smooth to semi‑rough surfaces. They lay product evenly and reduce stipple; change when nap mats to avoid streaks.
- Microfiber rollers Ideal for thin, smoothing coats on flat surfaces. They give a uniform finish with less splatter; expect to pay $6–$15 each.
- Wide masonry brushes 4″–8″ brushes move large volumes on textured walls. Use for leveling thin cementitious coatings; keep strokes consistent to avoid ridges.
- Low‑pressure sprayers HVLP or turbine systems for even atomization on panels. Set 10–30 PSI for most paints; rentable units run $50–$150/day and cut lap marks when technique is steady.
- Airless sprayers For thick coatings and big areas. Tip size and pressure matter—start low and increase until coverage is even; rentals $75–$200/day but watch for overspray.
- Extension poles Secure threaded poles for rollers to keep stroke angle consistent. A steady hand and full pole reduce uneven application on ceilings and high walls.
Mixing and measuring tools
Consistent batches cut streaks. Measure, test and match every bucket so color and viscosity stay constant across the job.
- Digital scale Weigh pigments, additives and water to the gram. Use a 0.1–1 g resolution for small amounts; label each batch to avoid cross‑mixing.
- Graduated buckets Built‑in marks make repeat mixing fast and accurate. Use the same bucket for each batch to keep ratios consistent; expect $10–$30 per bucket.
- Paddle mixer 6″–8″ drills with mixing paddles ensure uniform viscosity. Run at low speed to avoid air entrainment; rentable heavy‑duty mixers are $20–$60/day.
- Viscometer or flow cup Measures flow/viscosity to match batches. A Zahn or Ford cup gives quick, repeatable readings; low‑cost cups run $30–$120.
- pH strips Check alkalinity when using primers or cementitious mixes. Keep pH consistent to avoid cure differences; packs are $5–$15.
- Fine mesh sieve 60–100 mesh removes lumps and foreign bits. Strain every bucket for a smooth lay; inexpensive strainers cost $10–$40.
- Test panels Small boards or panels to trial each mixed batch. Always spray or roll a test strip and let it dry before contractor‑scale application.
- Slow‑release wetting Measured wetting agents help flow without over‑thinning. Follow manufacturer dosage; a little goes a long way.
Surface preparation essentials
Good application starts with a clean, stable surface. Remove dust, dirt, chalk and loose material so the coating contacts the substrate evenly.
Repair cracks and holes with appropriate fillers and allow full cure. Feather edges of repairs so new material blends with the existing substrate—sharp ridges show through and create streaks.
Pre‑wetting porous surfaces to a uniform dampness helps absorption match across the wall. Don’t soak—surface should be damp but not shiny. Prime areas where absorption differs, and let primers dry to the recommended tack‑free time before topcoating to prevent lap and visual variation.
Preparing pigment-lime blends: recipes and ratios
Prepare starter recipes for three lime matrices—limewash, lime putty paints, and lime plasters—with clear pigment loading ranges and the rationale behind each percentage. Note how pigment type (oxide, carbonate, natural earth) and grind size affect opacity and streak potential, and adjust grind to a fine slurry for even dispersion. Describe how slaked lime, hydraulic lime, or lime putty interact with pigments and whether pre-mixing with a small amount of lime slurry improves dispersion, then provide concrete mixing steps, wet-to-dry ratios, rest periods, and agitation methods to minimize settling and brush streaks.
With these starter recipes, you gain practical guidance for on-site testing, swatch shade development, rub tests, opacity observations on different substrates and climates, and a simple progression from small swatches to larger batches. The approach helps you scale from junior-to-full mixes while anticipating issues such as streaking, efflorescence, or chalking, and it includes safety, labeling, pigment stability, storage, and cleanup tips to preserve color integrity. Following the recommended rest periods and gradual batch reconstitution keeps color consistent across days and projects, while troubleshooting quick references keep you moving when conditions change or materials vary, and it supports documentation for quality control.
Wet-sifted lime putty + pigment recipe (interior)
Start with fully ripened, wet-sifted lime putty. For a smooth interior paint that resists streaks, a good starting mix is 1 part pigment paste to 8–12 parts lime putty by volume. That gives solid tinting without overloading the putty.
Make the pigment into a lump-free paste first (see next subsection). Slowly fold the paste into the putty with a drill mixer on low speed until uniform. Strain through a fine sieve into your final container to catch any grit.
Adjust by small amounts: more pigment tightens color but raises streak risk; add a little extra putty or a touch of water to loosen if application feels heavy. Test a small panel before doing whole rooms.
Limewash slurry (exterior) and pigment load guidance
Exterior limewash needs to breathe and shed water. Typical dilution is 1 part lime putty to 2–4 parts water (by volume) for a standard wash. Use the lower end for more body and coverage, the higher end for a translucent wash.
Pigment load for exterior washes is usually light: aim for about 5–8% pigment by total slurry volume. You can push to ~10% for stronger color, but expect more streaking and slower carbonation. Keep the mix loose enough to brush out smoothly.
Always test on the actual substrate and apply multiple thin coats rather than one heavy coat. Thin coats keep breathability and reduce runs and streaks on rough exteriors.
Pigment paste and pre-dispersion techniques
Mud up your pigment before adding it to lime. Use clean water and make a paste with the pigment until it’s creamy and free of lumps. A stiff paste is fine — you’ll dilute it into the binder — but there should be no dry pockets.
Work the paste with a flat paddle, mortar and pestle, or a small drill mixer. For stubborn pigments, a little repeated rubbing through a fine sieve or a short period in a ball mill/blender breaks down agglomerates. This pre-dispersion is the single best trick to cut streaks and get even color.
Add the paste slowly to your putty or lime slurry while mixing. Let the blended mix rest 15–30 minutes and remix before application. That settles any trapped pigment and makes final brushing easier and more uniform.
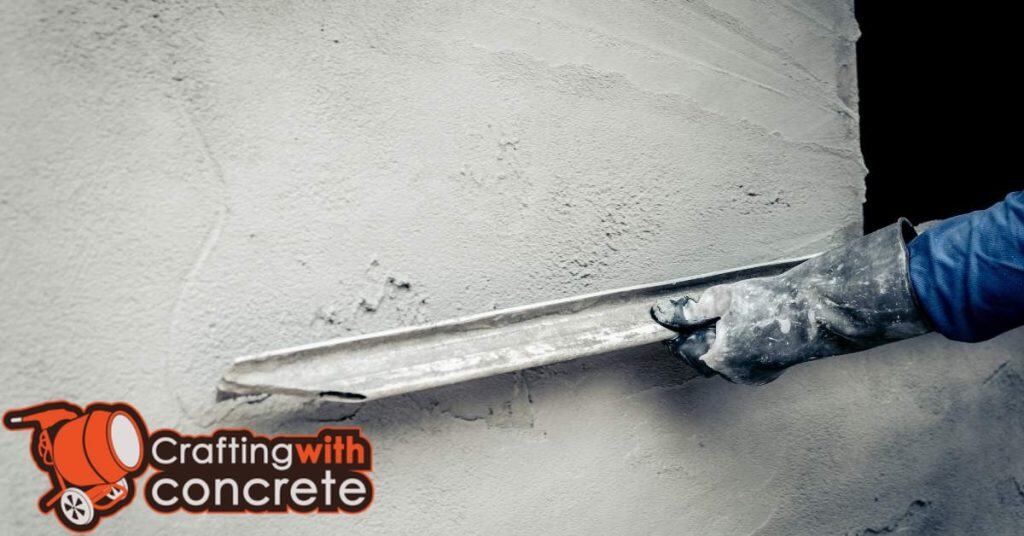
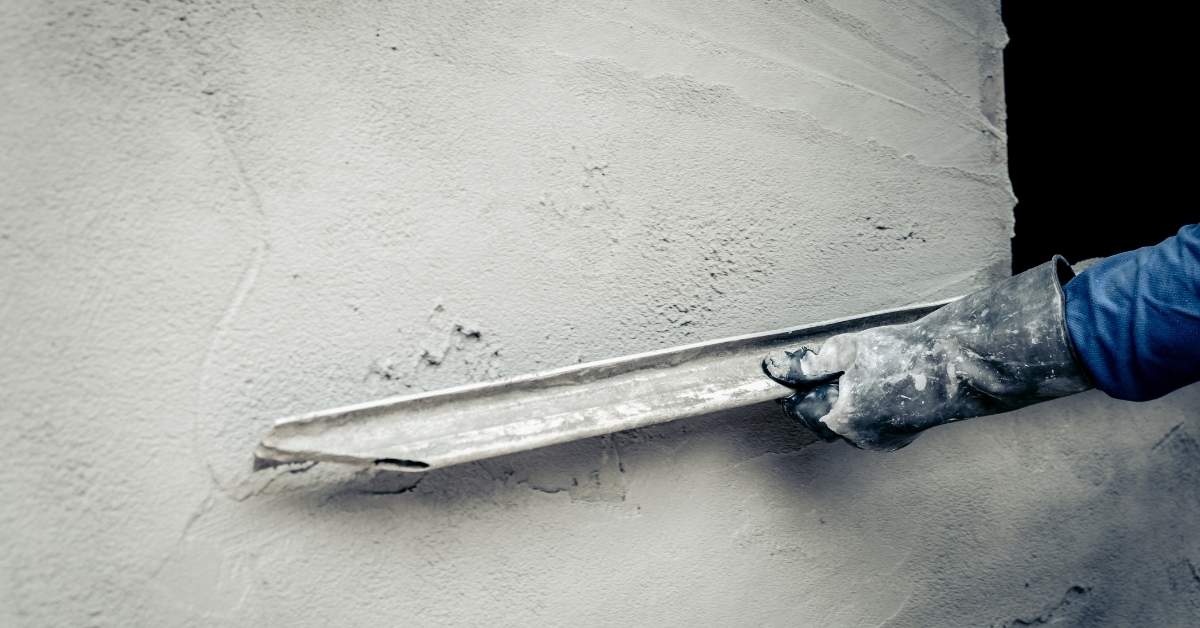
Step-by-step application techniques to avoid streaks
This approach emphasizes preparing the surface and pigments, ensuring uniform dispersion, and planning timing and sequencing for each pass, so brush, roller, and spray applications form a continuous film rather than streaky patches. It highlights exact steps for base, middle, and finish coats, careful drying intervals, and controlled layering to prevent pooling and uneven drying that commonly causes visible streaks. Key actions include testing pigment on a sample board, matching substrate absorbency, maintaining a consistent wet edge, and choosing appropriate tool techniques to even out fibers and avoid lap lines.
From a DIY perspective, following these practices reduces rework, delivers a professional-looking result, and helps you predict drying times and overlap patterns rather than guessing. Using the right nap length, steady speed, and cross-rolling or zigzag patterns helps control film formation, while managing dilution and spray overlap keeps finishes uniform across walls and edges. A thoughtful layering plan and quick swatch checks allow timely touchups without creating new lap lines, making the process smoother, faster, and more forgiving on imperfect substrates.
Step-by-Step Process
This sequence gets you from prep to finish with minimal streaks and lap marks. Follow each step and check the signs listed to know you did it right.
- Prepare the surface and work area. Clean, sand, and patch as needed so paint adheres evenly; a tack cloth removes dust. Check: surface looks uniform and dry before you start.
- Set up lighting and ventilation. Good light shows flaws and ventilation speeds drying to predictable times. Check: no shadowed spots and a light breeze or fan moving air.
- Choose tools and mix paint to a uniform consistency. Match brush, roller nap, or spray tip to the material and stir paint thoroughly. Check: paint flows smoothly and tool picks up an even load.
- Establish your starting point and plan sections. Work top to bottom and pick manageable bays you can finish while wet. Check: you can cover the section edge-to-edge without leaving a dry rim.
- Apply paint with steady, consistent strokes. Maintain a wet edge and overlap wet into wet rather than onto dry. Check: joins feather out with no ridges or thick lines.
- Blend edges immediately with light finishing strokes. Back-brush or re-roll edges while paint is still open to hide lap marks. Check: the sheen and texture match across the join.
- Watch drying times and limit re-coats until the first coat cures enough. Recoat windows in the product datasheet and touch only when tack-free as recommended. Check: no pulling or uneven sheen when you press gently.
- Inspect under good light, touch up thin spots, and let final cure before heavy use. Walk the room and fix any streaks while they’re still tacky to blend. Check: final surface is uniform in color and texture.
- Clean tools and store leftover paint correctly. Proper cleanup keeps brushes and rollers ready and prevents contamination next time. Check: tools come clean and leftover paint seals air-tight.
Working wet-edge and section size strategy
Plan your work so each pass lands next to wet paint you can blend into. The wet edge is your insurance against lap marks — once that edge dries you’ll see a line.
Pick section sizes you can finish in the open time of the paint and the ambient conditions. For slow-drying oil or cool rooms, break areas into smaller bays; for fast water-based paints in warm rooms you can do larger panels.
Use a consistent rhythm and move across the surface before edges dry. Keep a uniform tool load and always finish the furthest edge into the wet area rather than over a dry edge to hide joins.
Back-brushing, cross-hatching and blending methods
Back-brushing forces paint into the substrate and smooths roller texture. After you roll a section, finish with brush strokes that pull paint into the fibers or grain to even out texture and sheen.
Cross-hatching is useful for large flat areas. Lay on paint with one direction, then lightly cross-stroke at a 90-degree angle while still wet to blend roller lines and avoid directional streaks. Work swiftly so the strokes merge rather than drag dried paint.
For final blending, use feathering strokes along joins. Light, overlapping passes reduce ridges and create a seamless transition between sections without reloading heavily.
Spraying vs brushing: when to use each
Spraying covers quickly and lays a very even film if you keep steady speed and overlap. It reduces brush/roller texture but raises the risk of runs and overspray; practice on scrap to nail pressure and distance.
Brushing gives control and is best for edges, trim, and small jobs where touch-up matters. It’s slower but you can work edges into rolls and back-brush to blend, which lowers lap marks on detailed work.
Rolling sits between the two. Use rollers for broad walls and keep a wet edge with a tip-and-pull finish. Choose the method by surface, access, and tolerance for texture — sometimes mixing methods (spray then back-brush) gives the best result.
Testing and sample boards: how to evaluate before committing
Testing and sample boards let you evaluate lime-based finishes before committing by running a practical protocol on small panels that mirror real application conditions. Build test panels with varying substrates—stone, plaster, or lime background—using lime putty or hydraulic lime, measured pigment quantities, binder proportions, and a simple labeling and documentation system, then apply a fixed film thickness and follow a concise curing and accelerated aging plan. Observe color stability, uniformity, streak tendencies, and drying/curing behavior, and compare against baseline controls (no pigment and standard pigment mix) to determine pass or fail and outline necessary adjustments.
Why this matters for a DIY or jobsite reader is that it reveals how pigments actually perform under weathering and use, without risking the entire project. The approach provides practical metrics—before/after aging color shifts, streak formation tendencies, surface gloss if applicable, and any efflorescence or color bleeding—that guide pigment selection, batch planning, and decisions about scaling up or discarding materials. By keeping simple notes, photos, and swatches, you gain actionable guidance on whether a pigment is ready for full application or needs reformulation, iterations, or avoidance.
Building representative test panels
Cut panels from the same substrate you plan to finish—same species, grade, and any veneer or MDF backing. Make at least three panels: one for the manufacturer’s recommended build, one with a thinner coat, and one with an extra coat to compare behavior.
Apply the finish using the same tools and technique you’ll use on the job. Note drying conditions: temperature, humidity, and airflow. Mark each panel with date, product, mix ratios and the number of coats.
Labeling matters. Put the full product name, batch number and application notes on the back. Store panels beside the real work area so they see the same light and environment as the finished job.
Accelerated weathering and moisture-cycle checks
Expose a panel to strong sunlight for several days to reveal color shifts and UV fading. If you don’t have a place in the sun, use a clear window or rotate panels between indoor and outdoor positions daily.
Do wet/dry cycles: mist or wipe panels with water, then let them dry at jobsite conditions. Repeat for several cycles to find streaking, tannin bleed, or adhesion breakdown that shows up under moisture stress.
For high-humidity concerns, place a panel inside a simple humidity box (sealed container with a wet sponge) for 24–72 hours. Check for clouding, milky cures, or edge lifting. Note any changes and compare them to the properly applied control panel.
Visual checkpoints for an acceptable finish
Look for uniform absorption across the panel — no dark or light patches where the grain sucked in finish differently. Inspect from multiple angles under real jobsite light to catch subtle differences.
Check for lap lines, streaks and brush marks. The sheen should be consistent across the surface; compare edges and center. Grain should read evenly, not blotchy or overly raised.
Reject samples that show runs, orange peel, or areas where the topcoat is thinner. Approve the sample only when color, sheen, and texture match your expectations under the same lighting and moisture conditions the finished work will face.
Common problems and troubleshooting streaks
Common streaks like mottling, banding, and color shifts are a telltale sign of lime-based pigments and can appear after the initial cure or mid-application, often signaling uneven pigment load, moisture fluctuations, or improper surface interaction.
Identify them quickly by on-site visual cues, and map root causes into categories such as pigment load and dilution errors, lime plaster porosity and surface prep, moisture conditions, and potential contamination from cleaners or efflorescence, then follow a clear, stepwise fixes sequence.
A practical decision tree helps guide your response: recoat after the recommended cure time, adjust the pigment-to-liquid ratio and application technique, revise surface prep through ablation, sealing, or priming, and consider alternate lime/wash formulations for stubborn streaks.
This matters for DIY because early, accurate diagnosis reduces costly rework, yields a more uniform appearance across walls and batches, and protects the long-term color integrity of lime finishes under variable jobsite conditions.
Using a simple diagnostic workflow—spot test on a small area, document with photos, test a few dilution levels, and check substrate porosity with moisture or absorption checks—lets you control outcomes, track improvements, and prevent future streaking by enforcing consistent mixing, temperature, humidity, and cure practices.
Adopting best practices such as consistent pigment batches, proper mixing order, compatible mineral pigments, controlled application conditions, and careful post-application cure and sealing is your best defense against recurring mottling, banding, or color shifts.
Identifying streak types and root causes
First, look at the streaks while they’re still wet and again after they dry. Wet tool marks usually show directional ridges or glossy lines that follow your brush or roller. Dull, powdery streaks that appear after drying often point to pigment settling or improper binder levels.
Next, check the substrate. High-suction areas pull the finish in and leave darker, banded patches. Smooth, shiny streaks that resist touch suggest surface contamination or not enough surface prep. Match the look to these causes before you start fixing.
Take a sample patch if you’re unsure: fix a small area, let it cure, then compare. That tells you whether it’s a mix, tool, or surface problem.
Fixes for fresh streaks vs cured streaks
If the streaks are still wet, you can usually blend them out. Lightly back-roll or feather the edge with a well-loaded roller or brush to even the film. For solvent or water-based finishes, a short window exists where thinning with the correct reducer and reworking will hide marks.
For cured streaks, you need mechanical or chemical approaches. Light sanding and recoat will often do the trick for small areas; wipe clean and apply a thin, even finish coat. For color or binder issues, scumble or glaze to blend tones, or strip and recoat if adhesion is poor.
Always test a small repair zone before committing to the whole wall so you know the fix matches the surrounding finish.
When to strip and start over
Strip and start over when fixes only paper over the problem. Examples: widespread adhesion failure, severe pigment separation, or deep banding from substrate problems that reappear after patching. If sanding and one recoat don’t deliver uniform results, you’re wasting time with spot repairs.
Also strip when contaminant or moisture issues haven’t been resolved. Removing the finish, addressing the root cause (cleaning, priming, sealing, or correcting moisture), then reapplying gives a durable outcome. For large jobs, stripping once and doing it right is faster than repeating touch-ups.
Make the call early: a clean, prepared surface saves labor and materials down the line.
Additives, binders and modifiers — what helps and what harms
Additives such as starch, casein, acrylic emulsions, and surfactants can improve pigment dispersion in lime-based matrices by enhancing suspension, uptake, and color consistency, but each has limits related to particle size and lime hydration. Starch and casein can aid suspension and reduce settling, while acrylic emulsions strengthen binding and color stability; surfactants help with wetting and pigment distribution. However, compatibility with lime binders and breathability matters, and excessive or film-forming additives can create water-repellent layers that impede vapor diffusion and humidity buffering.
Choosing modifiers requires practical criteria based on project type (plaster, lime wash, or skim coat), lime type (hydraulic vs historical), and environmental exposure, along with cautious testing of concentrations and film thickness. Be mindful of potential harms such as hindered curing, efflorescence, trapped moisture, premature drying, blocked capillary rise, and micro-cracking that may cause streaking or color irregularities. A simple testing plan—small patches, porosity checks, and streak assessment over time—helps verify dispersion, breathability, and uniform appearance before full-scale application.
Safe dispersants and their dosages
Keep it simple: use mild wetting agents, small amounts of lignosulfonates, or traditional natural binders to help pigments spread without wrecking lime’s breathability. Start low and go slow — a little goes a long way.
Typical dosages are tiny: 0.1–0.5% for non-ionic wetting agents or 0.5–1.0% for lignosulfonates by weight of the mix. These levels improve pigment dispersion and workability without turning the mortar into a plastic film.
Practical tip: add dispersants to the mixing water first, mix thoroughly, then introduce lime and pigment. Watch the flow: small additions increase slip and leveling; push past recommended doses and you’ll notice longer set times and reduced breathability.
Additives to avoid with lime
Some common modern additives do more harm than good with lime. They can trap moisture, block carbonation, and cause long-term failures.
- Acrylic emulsions: form impermeable films that stop carbonation; avoid them in external or breathable finishes — use only when a technical specification explicitly allows it.
- Strong plasticizers: overly reduce water demand and slow curing; skip high-dose plasticizers and test at low levels if absolutely needed.
- Silicone water repellents: prevent moisture escape and adhesion; don’t add to fresh lime mixes or finishes meant to breathe.
- High-solids polymers: increase tack but can seal pores and cause blistering; prefer traditional mixes or consult a specialist before use.
- Chloride-based accelerators: can corrode embedded metals and disturb setting chemistry; choose non-chloride alternatives for lime work.
When in doubt, stick to low-dose, reversible, or natural options. Test a small sample and let it fully carbonate before committing to larger areas.
Using natural binders (casein, animal glue) and their effects
Natural binders like casein or animal glue can improve adhesion and open time for decorative lime finishes. They give a silkier rub-up and help pigments stick to the surface during technique work.
Expect longer open time and slightly slower carbonation. That’s useful for stencilling, scumbling, or fake-patina effects, but it can also increase the risk of streaking if over-applied. Use low concentrations — typically 0.5–2% — to balance grip and breathability.
Field tip: dilute the binder and apply as a thin admixture or mist between coats. That keeps adhesion high without turning the finish glossy or creating uneven patches.
Finishing, maintenance and long-term color stability
Finishing lime plaster protects the surface, stabilizes mineral pigments, minimizes streaking, and preserves breathability by using a well-chosen topcoat that is compatible with lime and the climate. Choose among mineral or topcoat sealers, lime-wax, or lime-putty varnish, and implement the exact number of coats recommended for your mix, with curing times that respect the substrate and ambient humidity and timeline expectations. Sacrificial washes smooth pigment distribution, reduce uneven color after weathering, and create a maintenance baseline for reapplication so your finish stays uniform over years of service, even on complex elevations.
For cleaning, use a soft brush, low-pressure water, and pH-neutral cleaners, and avoid strong detergents or acidic/alkaline shocks that can degrade the finish and affect color; perform routine checks and re-wash as needed to preserve color integrity, and schedule seasonal checks to catch alkalinity or crusting early. As pigments carbonate over time, expect gradual shade shifts, and plan light re-washes, selective reapplication, or touch-ups that restore even color without compromising breathability or the wall’s ability to breathe, while documenting changes for future projects for future maintenance decisions.
When to seal or leave breathable
If the job is on a horizontal surface or in a high-traffic area, a sacrificial or breathable mineral sealer can protect pigments and cut down on staining. For vertical lime-based work, I usually leave it breathable so carbonation can proceed—sealers can trap moisture and change how the color settles.
Use a breathable sealer when you need short-term protection but still want the masonry to exchange moisture. Avoid film-forming, nonbreathable sealers on lime surfaces; they often make streaks and differences in sheen more obvious. Pick products labeled vapor-permeable and test a small patch first.
Cleaning and touch-up best practices
Keep cleaning gentle. Start with a soft brush and low-pressure water. Avoid harsh acids or power-washing that strip pigment or damage the surface. For common grime, a diluted non-ionic detergent works well.
When you touch up, feather the edges and work wet-on-wet where possible so the repair blends. Match the original application method and pigment mix. Plan light maintenance annually and deeper touch-ups every 3–5 years depending on exposure.
Monitoring and renewing color over time
Walk the job every season and note areas that darken, fade, or develop uneven patina. Keep a simple photo log from the same vantage points to spot slow changes. That lets you schedule work before patchiness becomes obvious.
For renewal, plan gentle re-washes or a refresh coat timed with the carbonation cycle. Small, regular interventions beat large, obvious repairs. Address weather-exposed spots first and always test your refresh method on a discreet area.
Safety, environmental and regulatory considerations
This section covers safety, environmental responsibility, and regulatory requirements when working with powdered pigments and lime, including the PPE you need, safe handling practices, storage and labeling, disposal guidance, and basic VOC and eco considerations for additives. It also highlights essential touchpoints such as SDS, labeling, disposal bans, and local limits on VOCs and heavy metals, plus practical risk checks and emergency contacts for DIYers.
Following these guidelines reduces inhalation exposure, limits dust and spills during transfer, and helps you set up a workspace that stays clean, compliant, and safer for family and neighbors. Clear storage, labeling, and inventory practices prevent mix-ups, wasted materials, and accidental exposure, while responsible disposal and spill response keep you aligned with local rules and protect water and soil. Handy pre-work risk assessments, PPE checklists, and quick access to waste facilities or poison control give DIYers confidence to handle pigments and lime responsibly.
PPE and safe mixing practices
Wear the right kit before you touch pigments or lime. A fitted respirator (P2/N95 or better) keeps dust out of your lungs. Use chemical-resistant gloves and goggles to protect skin and eyes from irritants.
Control dust at the source. Damp down powders, mix slowly, and use a dust extraction fan or work outdoors when possible. Keep a clean work area and wash exposed skin promptly after handling materials.
Don’t rely on one measure alone. Combine PPE, dust control and good housekeeping for the safest results.
Environmental impact and choosing low-tox options
Pick additives and modifiers that advertise low-VOC or water-based formulas to cut fumes and airborne chemicals. That reduces health risks on site and lowers environmental harm when you clean up.
Choose pigments from suppliers that state responsible sourcing and low heavy-metal content. Natural oxides and modern synthetic pigments often strike a balance between colorfastness and lower toxicity.
Spend a bit more up front for greener products—you’re less likely to face disposal headaches or local restrictions later.
Storage and labeling for longevity
Keep pigments and lime in airtight, clearly labeled containers. Moisture and contamination are the main killers—store cans off the ground in a cool, dry spot to preserve performance.
Separate lime from organic or colored materials to avoid cross-contamination. Note batch numbers, mix ratios and date opened on each container so you know what you have and when to use it.
Rotate stock and use older material first. Proper labeling and storage save you from guesswork and bad batches down the line.
Pro tips, advanced techniques and case studies
This section lays out a pro-level workflow that centers on tempo layering, precise feathering, and two-tone scumbles, with a clear path from session sizing and pigment load adjustments to drying windows, a compact checklist readers can mirror, and a staged photo sequence that tracks progression. It also offers quick, real-world case studies—lime plaster walls, lime-washed exteriors, and interior accent panels—each paired with expected outcomes, constraints, and a concise series of check-in photos. You’ll also find a troubleshooting suite and essential gear and safety practices to keep pigment dispersion even between coats and to avoid common streak-causing mistakes.
Knowing the why matters helps readers translate pro techniques into dependable results on the jobsite, from testing on scrap panels to dialing in edge control and blending ratios before touching the real surface. The plan emphasizes practical benefits: faster diagnosis of moisture gradients and pigment settling, timely adjustments to drying windows, and a clear photo-check plan at 25, 50, 75, and 100 percent coverage with captions that guide you to evenness, feathered edges, and pigment intensity. That clarity helps DIYers reproduce consistent results project after project and provides a repeatable framework for iterative improvement.
Feathering, scumbling and multi-coat glazing
These are finish tricks that hide streaks and build visual depth without sacrificing an even base. Start with a properly leveled undercoat, then work thin translucent layers and feather edges while wet to avoid lap marks.
Feathering blends fresh paint into dry areas with light wrist strokes. Scumbling uses a dry brush or rag to drag a thin, broken layer across the surface. Multi-coat glazing adds subtle color shifts—apply thin glazes, let each cure, then lightly sand and feather before the next coat.
Tip: keep tools damp but not overloaded, and maintain a wet edge when blending. If you’ve read the basic techniques earlier, use those foundations and add these surface treatments only once the base is uniform.
Real project mini-case studies
Interior plaster: old lime plaster had water stains and lap streaks. We cleaned, misted, then applied a light skimming coat followed by a glaze layer feathered into corners. Result: even tone with a soft, hand-finished look and no visible streaks.
Exterior limewash: heavy sun caused patchy absorption on a brick façade. We pre-wetted sections, applied two thin limewash passes and used a soft brush to scumble the second pass. Outcome: uniform color and preserved breathability.
Fresco touch: small touch-ups on a mural required color depth without showing brush lines. We layered translucent tints with tiny breaks between strokes and matched texture with a dry scumble. The repaired area blended and passed photo checkpoints for tonal match.
Quick checklist for job day success
Check the weather: avoid direct sun, high wind, or temperatures outside the paint’s range. Confirm substrates are at recommended moisture levels. These conditions kill good-looking finishes fast.
Mix enough material for a full run and keep a reserve batch for touch-ups. Inspect and organize tools, pads and extension poles. Brief the crew: who starts where, who maintains the wet edge, and who monitors blending and feathering.
Final step: approve a large test panel and photograph it under the same light you’ll be working in. If the sample passes, move forward—if not, tweak mix, tools or method until it does.

Conclusion
Finish that project with confidence by sticking to tested pigment-lime blends, careful prep, and smart testing. Safety and durability go hand in hand with appearance—get it right, and you’ll avoid costly fixes down the line.
Follow this practical flow: start with a small test batch and a sample board, document the recipe and ratios, prep the surface thoroughly, apply in controlled passes and under consistent light, evaluate the result on multiple days and surfaces, adjust only what the test board shows, and then scale up only after the test proves steady color and no streaking. Always prioritize safety gear, proper ventilation, and clean tools as you go.
Common mistakes to avoid are skipping the test phase, rushing the mix or application, and mixing incompatible additives or binders that can promote streaks or color drift. Use only the approved pigments for lime and respect the ratios from your recipes; wear a mask and eye protection, keep your work area ventilated, and clean tools between steps to prevent cross-contamination.
If the project involves large areas, unfamiliar substrates, or stubborn streaks after careful testing, don’t push through alone—calling a professional can save time, material, and headaches. Stay methodical, stay safe, and keep the finish looking even and true; with the right checks, you’ll hit the target color and durability you planned for.
FAQ
What causes streaks when applying mineral pigments on lime?
Streaks usually come from uneven pigment distribution or the mix drying too fast. Poor stirring, old pigment, or applying over a dirty surface makes the problem worse. Keep the surface clean and mix well before any coat goes on.
How should I mix pigments to avoid streaks?
Mix pigment powders with lime putty or lime render thoroughly until it’s uniform. Add water slowly and keep stirring until there are no clumps. Do small test batches first to check color and consistency.
What consistency and tools work best to prevent streaks?
Aim for a smooth, creamy consistency that holds its shape on a trowel. Use a clean plaster mixer and a wide, flat trowel for even spreading. Don’t rush with the first coat or the second coat will show lines.
How can I test my mix before full application?
Apply a small patch to a hidden area and let it set. Check for uniform color and texture. If it looks patchy, regroup: remix, adjust water, and test again.