
Introduction
The perfect gray paint can transform your space, but knowing how long the process takes is crucial for planning. This guide walks you through each step of painting with gray, helping you estimate the time needed to complete your project.
From prep work to final coats, we’ll break down the timeline so you can confidently schedule your DIY paint job and achieve stunning results.
The Step-by-Step Timeline for Painting with Gray
Painting with gray involves several stages, each with its own time commitment. Here’s a detailed breakdown to help you understand the duration of each step:
- Preparation (1-3 days): This includes surface cleaning, patching, sanding, and priming. Allow 24 hours for primer to dry.
- Color Selection & Testing (1-2 days): Choose your gray shade, order samples, and test them on your walls. Let drying time be a factor in your planning.
- Painting (1-3 days): Apply the first coat, let it dry (usually 4 hours), apply the second coat, and allow for final drying before applying touch-ups or sealant.
- Touch-Ups & Finalization (1 day): Make any necessary touch-ups, apply sealant if needed, and clean your tools.
Total estimated time: 4-9 days, depending on room size, paint coverage, and drying conditions.
Key takeaways
The prep work involved in painting with gray can significantly impact the overall timeline. Ensuring surfaces are properly prepared before you start painting will help minimize delays and ensure a smooth, even finish.
- Test color swatches on multiple wall areas at different times of day.
- Consider light quality and room size when selecting gray undertones.
- Use matte or eggshell for high-traffic rooms to reduce glare.
- Prepare surfaces with primer and patch repairs before painting.
- Record paint brand, formula, batch numbers for future touch-ups.
- Compare eco options and odor levels in living spaces and kitchens.
Table of Contents
- Introduction
- Key takeaways
- How to Choose the Right Gray for Your Space
- The 9 Greatest Grays — Quick Picks and Best Uses
- Paint Finishes, Application, and DIY Prep
- Smart Alternatives: Paint Brands, Formulas, and Eco Options
- Color Sampling, Testing, and Visual Checkpoints
- Maintenance, Touch-Ups, and Long-Term Costs
- Alternatives to Full Repaint: Accent Treatments and Quick Upgrades
- Conclusion
- FAQ
How to Choose the Right Gray for Your Space
Choosing the right gray comes down to light, room size, undertones, and what’s already in the space. Map your lighting, scan undertone compatibility with surrounding surfaces, and then narrow to a short list of pre-vetted swatches. Finally, test large samples in key zones to confirm how the color behaves under real lighting, using a simple 1–4 step flow: map lighting, check undertones, compare swatches, and test in place.
This matters because gray is highly sensitive to how light shifts throughout the day and against woodwork, fabric, and cabinetry. Use the flow to steer toward warm, cool, or neutral grays if the space feels airy, cozy, or stark, and note how mixed lighting can drift color. Add practical checks: avoid muddy grays with warm woods, consider ceiling and trim color, and paint large live-room swatches to see true color before committing.
Step-by-Step Process
This sequence helps you pick the right gray paint for your space, from prep to final check.
- Assess lighting and room size. Note: Bright rooms need cooler grays; small spaces benefit from lighter tones.
- Identify undertones in existing finishes. Tip: Warm woods look best with warm grays, cool metals pair well with cool grays.
- Select a short list of gray swatches based on your findings. Check: Ensure the samples match your room’s lighting and size.
- Test small paint samples in key areas. Note: Paint large sections to see true color under real light conditions.
- Finalize your choice after reviewing all tests. Tip: Confirm with a pro if unsure about the final decision.
Understanding Undertones (warm vs cool vs neutral)
Identify undertones by looking for hints of blue, green, purple, or brown. Warm grays have red, orange, or yellow tones; cool grays lean towards blues and greens.
Pair warm grays with hardwood floors and furniture that has a natural warmth. Cool grays work well in spaces with metal accents or cool-toned stone.
Neutral grays are versatile and blend easily with most finishes, making them ideal for mixed decor styles.
How Lighting Changes Gray (natural vs artificial)
Morning light tends to be cooler, while evening light is warmer. Note: Cool LED bulbs enhance cool grays; warm LEDs bring out the warmth in neutral and warm grays.
To test how lighting affects your gray choice at home, paint small samples on a wall and observe them throughout the day under different lights.
Consider using daylight bulbs to mimic natural light when testing colors indoors. This helps ensure you pick a shade that looks good all day long.
Room Function and Mood: Which Gray for Which Room
In bedrooms, opt for calming grays like soft blues or greens to create a restful atmosphere. Tips: Lighter shades can make small spaces feel larger.
Kitchens benefit from brightening grays that complement modern appliances and countertops. Choose cool grays with hints of blue or green for a fresh look.
Living rooms work well with dramatic grays, such as deep charcoal tones, to create an elegant ambiance. Note: Neutral grays offer versatility in living spaces.
Bathrooms can use light and airy grays to enhance the sense of cleanliness and space. Cool or neutral shades are best for this purpose.

The 9 Greatest Grays — Quick Picks and Best Uses
This section lays out nine gray paint picks with brand and shade and a single punchy one-line callout for best gray look and standout quality. Each item uses a consistent format—swatch or bold color cue, shade name, and a quick note on where it shines and where it may fall flat. Quick picks help you eyeball gray living rooms, kitchens, baths, bedrooms, halls, and exteriors at a glance without overthinking it.
Use this as a decision shortcut on a DIY project: test swatches in your lighting, note finish and white ceiling compatibility, and pair with accent colors. It matters because gray paints read differently under daylight and artificial light, and durability choices like washability or stain resistance affect how they perform in high-traffic spaces or gray bathrooms. Always check the product label and local rules, and plan light exposure and room function when choosing grays.
Split by Use Case (neutral, warm, cool)
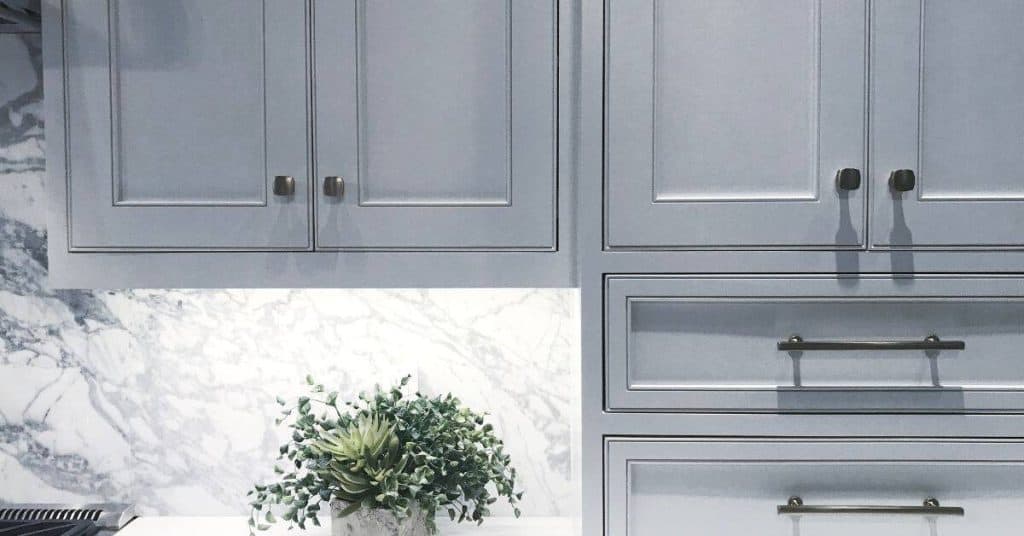
When choosing a gray paint for your home, it’s crucial to understand the undertones and how they affect the overall look. Neutral grays, like Sherwin-Williams’ Agreeable Gray, work well in spaces where you want a calm, balanced feel without leaning too warm or cool.
Warm grays, such as Benjamin Moore’s Metropolitan, add warmth and coziness to rooms. They’re ideal for living areas and bedrooms where you want a welcoming atmosphere but don’t want the room to feel overly dark or cold.
Cool grays, like Behr’s Coastal Gray, are perfect for kitchens and bathrooms where you need a clean, crisp look that doesn’t get too chilly in winter. These shades can make your space feel larger and more open.
Best Gray for Small Spaces vs Large Rooms
In small spaces like hallways or bathrooms, you want a gray that doesn’t close in the room. Lighter grays with cool undertones, such as Sherwin-Williams’ Alabaster, visually expand space and keep rooms feeling airy.
For larger rooms like living areas or master bedrooms, darker shades can add depth and richness without overwhelming the space. A shade like Benjamin Moore’s Revere Pewter works well here because it has a warm undertone that adds warmth but isn’t too dark.
Avoid using very dark grays in small spaces as they can make rooms feel cramped and gloomy. Instead, opt for lighter shades to keep things open and inviting.
Best Gray for Trim and Accent Walls
For trim and accent walls, you want a gray that stands out but still complements the main wall color. A great choice is Sherwin-Williams’ Alabaster, which provides a crisp contrast against darker shades.
Benjamin Moore’s Metropolitan also works well for doors and cabinetry because it has a warm undertone that adds depth without being too dark. This makes it perfect for creating focal points in rooms like dining areas or entryways.
If you’re looking to add an accent wall, Behr’s Coastal Gray is ideal due to its cool undertones and lightness. It pairs beautifully with warmer shades on the main walls, creating a striking yet balanced look.
Paint Finishes, Application, and DIY Prep
Finish choices like matte, eggshell, satin, and semi-gloss change how concrete surfaces look and hold up to foot traffic and cleaning. They also influence moisture tolerance, stain resistance, and maintenance, so pick by room zone and use-case (floors vs walls). Plan careful DIY prep: clean and degrease, remove efflorescence, repair cracks, and profile the surface; make sure moisture is controlled before painting.
This matters because your finish choice drives how often you touch it up and how easy it is to keep clean. Pair finishes with the right primers, bonding agents, or sealers, and follow compatible application steps for brushing, rolling, or spraying; coat sequence and recoat windows depend on the product. Do the work in a well-ventilated area with the right PPE, watch humidity and temperature, and be prepared to troubleshoot issues like orange peel or lap marks rather than sweep them under the rug.
Surface Prep and Tools Checklist
Use this checklist before starting any paint job to ensure a smooth, professional finish.
- Clean surface: Remove dirt, grease. Confirm with damp cloth test; skips can lead to poor adhesion.
- Sand rough spots: Smooth out bumps and cracks. Check by running hand over surface; skipping leaves an uneven look.
- Remove efflorescence: Use acid wash or muriatic acid solution. Confirm with white paper test; residue can cause discoloration.
- Repair cracks: Fill gaps and holes. Test by tapping around area; skipping leaves weak spots prone to cracking.
- Ethylene glycol etching: Clean surface for better paint adhesion. Confirm with visual inspection; skips result in poor bonding.
- Control moisture: Ensure concrete is dry and stable. Check with moisture meter; skipping can lead to peeling or bubbling.
- Apply primer: Use a concrete-specific primer for better adhesion. Confirm by touch test; skips result in poor paint hold.
Quick rule: Always prep the surface thoroughly before applying any finish.
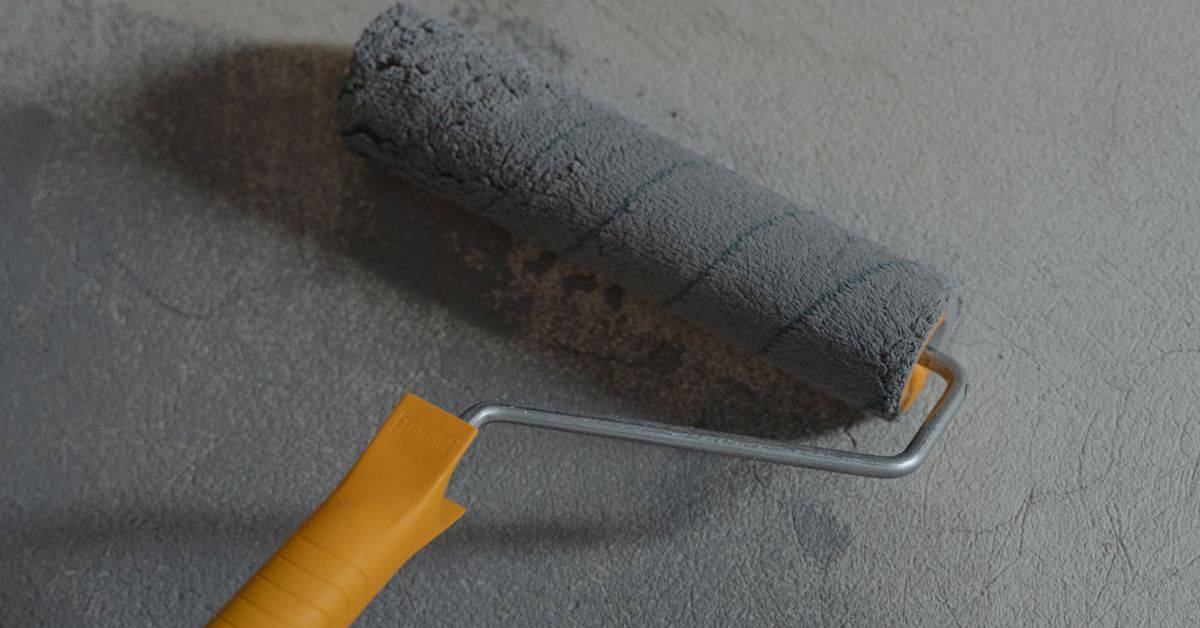
Best Application Techniques (rollers, brushes, cutting in)
Choose your tools wisely to avoid lap marks and streaks. Rollers are best for large areas, while brushes work well for edges and corners.
To prevent visible brush strokes with a roller, use a high-quality nap roller cover that matches the surface texture. Apply paint evenly in W or M patterns to ensure coverage without overlap issues.
When cutting in around trim and edges, use a quality brush designed for your chosen finish type. A steady hand and patience are key; work slowly and methodically to avoid streaks and uneven lines.
Finish Selection by Room (durability vs look)
Select the right finish based on room use. High-traffic areas like floors need a durable, semi-gloss or satin finish to withstand foot traffic and cleaning.
For walls in bathrooms and kitchens, opt for an eggshell or satin finish due to their moisture resistance and easy cleanability. Avoid matte finishes as they can show wear easily.
In low-traffic areas like bedrooms and living rooms, a matte finish provides a smooth, elegant look but requires more care during cleaning. Choose this option if appearance is your top priority over durability.
Smart Alternatives: Paint Brands, Formulas, and Eco Options
Smart Alternatives covers how big paint brands line up for concrete work, from premium to budget, and what you can expect in performance, color range, and durability. It also weighs formulas and finishes—masonry/acrylic, elastomeric, epoxy, limewash—and where each shines, like crack resistance, breathability, washability, and weather or UV stability. Eco-friendly options get attention too, focusing on low-VOC or zero-VOC choices, plus certifications and recycled packaging, with notes on price or availability trade-offs. The goal is to help you pick a practical mix of products that fits your surface and climate without overpaying for features you won’t use.
This matters because DIYers need realistic expectations on prep, odor, dry times, and recoating windows, and because sourcing matters as much as the mix itself. You’ll learn a quick buyer’s checklist for choosing a brand tier, compatible primers, and how to read labels for eco claims. It also helps you navigate stores versus specialty shops and online options, and how to apply and maintain color on concrete without losing your budget or health goals. Practical tips cover roll vs. brush, temperature and humidity windows, and simple maintenance to extend color life while avoiding common eco-paint pitfalls.
Comparing Popular Lines (what to expect by price)
Premium paint lines like Benjamin Moore and Sherwin-Williams offer top-notch coverage, with colors that stay true over time. They’re built for durability, especially in high-wear areas like kitchens or entryways.
Mid-range brands such as Behr and Valspar strike a balance between cost and quality. These paints are great for most residential projects where you want good performance without breaking the bank.
Budget-friendly options from companies like Rust-Oleum and Krylon provide decent coverage but might not hold up as well over time or in harsh conditions. They’re best suited for quick touch-ups or less critical areas.
Low-VOC and Allergy-Friendly Options
For those sensitive to chemicals, low-VOC paints like Benjamin Moore’s Natura line offer a safer alternative. These paints minimize odors and are better for indoor air quality.
Look for certifications from GREENGUARD or Green Seal to ensure the paint meets strict environmental standards. While these options can be more expensive, they provide peace of mind for allergy sufferers.
Recycled-content packaging is another eco-friendly feature worth considering. It reduces waste and supports sustainable practices in manufacturing.
When to Consider Paint-and-Primer Combined
A paint-and-primer combo like Behr’s One Coat is convenient for quick projects where a single coat can do the job. It saves time and effort, especially on smooth surfaces.
However, if you’re dealing with porous or stained concrete, a separate primer might still be necessary to ensure proper adhesion and coverage. This step is crucial in preventing future paint failures.
Check the manufacturer’s guidelines to see if your surface requires a dedicated primer before applying any paint-and-primer combination product.

Color Sampling, Testing, and Visual Checkpoints
This section lays out a clear sampling workflow: swatches, small test patches, and a controlled photography setup to capture true color under consistent lighting. Sample from different surface types and undercoats, using chip cards and printed swatches to keep results representative.
Use lighting and viewing conditions as checkpoints—time of day and neutral light, note gloss or matte reflections, and document results with a color log that includes batch numbers and application notes. Keep a final decision checklist before committing to a full coat, and use a quick re-check process for touch-ups and lighting changes. For any product specifics like color tolerance or application notes, check the label or datasheet and photograph colors with a phone to keep consistency.
How to Make Reliable Test Patches
Before you commit to a full paint job, make test patches on your walls or surfaces.
- Select small areas: Pick corners or edges where touch-ups won’t be noticeable. Avoid large flat spots that hide flaws.
- Vary lighting conditions: Observe the color at different times of day and under various light sources to see how it changes.
- Apply multiple samples: Paint several swatches with slight variations in tint or sheen. This helps you find the best match for your space.
- Note surface type: Test on similar materials as your final project, like drywall, wood, or metal. Different surfaces can alter color perception.
- Check adhesion and durability: After drying, gently rub a corner of the test patch to see if it flakes off easily. Poor adhesion means rework later.
- Evaluate finish sheen: Compare gloss vs matte finishes under natural light. Glossy paints can look too shiny in some settings.
- Document results: Take photos of each test patch and write down your observations for future reference.
- Wait before deciding: Let the paint dry completely, then wait a day or two to see how it looks under different lighting conditions. Rushing can lead to poor choices.
Quick rule: Always test multiple samples in various lighting and on similar surfaces before committing.
Using Photos, Mood Boards, and Virtual Tools Correctly
Photos and virtual tools can help you visualize your paint choices but require careful handling to avoid disappointment.
- Select high-quality images: Use clear photos taken in natural light. Poor quality shots can distort color accuracy.
- Create a mood board: Gather multiple images that represent the look and feel of the space you want to achieve. This helps narrow down choices.
- Use virtual tools wisely: Online visualizers are great for initial ideas but may not accurately reflect real-world conditions like lighting or surface texture.
- Compare in person: Always test colors on your actual walls before relying solely on digital representations. Screen colors can be misleading.
- Note color shifts: Be aware that monitors and printers can display different shades of the same paint. Print out samples for comparison.
- Consider lighting effects: Observe how natural light changes throughout the day to see if your chosen color works well in all conditions.
- Document decisions: Keep a record of your choices and observations, including photos taken under different lighting. This helps track progress and adjustments.
Quick rule: Rely on both digital tools and real-world tests to make informed color selections.
Asking the Right Questions (partners, resale, long-term)
Before finalizing your paint choice, consider practical aspects like compatibility with furnishings and future resale value.
- Partner approval: Get input from all household members. Disagreements later can cause delays or extra costs.
- Furniture coordination: Ensure the color complements existing furniture and decor. Mismatched colors look out of place.
- HOA restrictions: Check if there are any homeowner association rules about paint colors. Violations may lead to fines.
- Resale neutrality: Neutral tones often appeal to a broader range of buyers, making your home more marketable in the future.
- Durability needs: Assess how much wear and tear the space will endure. High traffic areas need tougher finishes.
- Maintenance ease: Consider how easy it is to touch up or repaint later. Some colors may require more frequent maintenance.
- Long-term trends: Think about whether the color will remain appealing over time. Fads can quickly become outdated.
Quick rule: Always consider practical aspects and future implications before finalizing your paint choice.
Maintenance, Touch-Ups, and Long-Term Costs
Maintaining painted concrete means a simple, regular routine and choosing a finish that fits use. Clean surfaces on a schedule, inspect for wear, moisture, and stains, and touch up invisibly by color-matching and feathering edges. Finish choice affects washability, wear resistance, and how often you’ll repaint.
Different rooms demand different looks; matte hides flaws, satin or semi-gloss wash up better, but choose based on room use. A practical touch-up workflow: assess, prep, prime if needed, match the formula, apply with feathered edges, let cure, and recoat the top layer. It matters because finish choice drives wear, washability, and repaint frequency, especially in kitchens, basements, and outdoors; check labels for disposal rules if needed.
Touch-Up Techniques for Seamless Repairs
To ensure your touch-ups blend seamlessly, start by storing leftover paint properly. Keep it sealed tightly and out of direct sunlight to prevent color changes. When you notice wear or damage, assess the area first—check if it’s just a small spot or if repainting an entire wall is needed.
For feathering edges, use a dry brush to soften the touch-up paint around the damaged area. This helps blend the new and old paint together without creating harsh lines. If you’re working with concrete, consider using a glaze-compatible touch-up kit that matches your existing gray finish for invisible repairs.
The application method also matters—spray guns can be great for large areas but brushes are better for tight spots. After applying the touch-up, let it cure according to the paint’s instructions before adding any protective topcoat or sealant.
Cost Breakdown: Paint, Supplies, and Time Estimates
The type of paint you choose impacts both the initial cost and long-term maintenance expenses. High-quality paints often have better coverage rates and durability.
- Coverage rate: Check can size and square footage covered; higher quality usually means fewer cans needed.
Practical tip: Measure your space accurately to avoid overbuying or running short. - Labor costs: Local rates vary widely; consider DIY vs. hiring a pro.
Avoid: Cutting corners on prep work can lead to poor results and wasted time. - Touch-up kits: Essential for minor repairs, look for compatibility with your paint finish.
Mention: Using the wrong touch-up kit can cause patchiness or color mismatch.
Troubleshooting Common Issues (yellowing, streaks, patchiness)
Yellowing often occurs due to exposure to UV light or moisture. To fix this, clean the surface thoroughly and apply a fresh coat of paint with UV protection if needed.
Patchiness can be caused by uneven application or poor adhesion. Start by sanding down rough spots and applying a primer before repainting. If patchiness persists, consider consulting a professional to assess underlying issues like efflorescence.
Streaks usually appear when paint is applied too thickly or dried improperly. Ensure you’re using the right tools for your finish type—brushes for detailed work, rollers for large areas—and follow drying times carefully.
Alternatives to Full Repaint: Accent Treatments and Quick Upgrades
You don’t always need a full repaint to refresh a space. Accent walls, cabinetry painting, removable wallpaper, and decorative panels can introduce contrast using the existing gray palette without a complete overhaul. They’re practical, reversible, and keep renovations manageable.
This approach gives you quick wins and room to scale up later. It helps you coordinate with trims, furniture, and lighting using color blocking and focal points, and you’ll want to plan prep work, finish protections, and timing to avoid rework. Always check product labels, manufacturer instructions, and local rules for disposal.
Painting Cabinets, Doors, and Trim for Big Impact
When you want to make a big impact without repainting an entire room, consider painting cabinets, doors, or trim. This approach can refresh your space with minimal effort and cost.
To ensure the paint adheres well, start by cleaning surfaces thoroughly and sanding any rough spots. Use a primer designed for woodwork to create a smooth base. When choosing paint, opt for a high-quality enamel that’s durable and easy to clean.
For best results, apply thin coats with a brush or small roller. Let each coat dry completely before adding another layer. This method prevents drips and ensures even coverage. Once the final coat is on, seal it with a clear topcoat for added protection against wear and tear.
Temporary and Low-Commitment Solutions
If you’re not ready to commit to permanent changes, removable wallpaper or peel-and-stick panels are great options. These products let you introduce gray tones without the hassle of painting.
Removable wallpaper comes in a variety of patterns and textures. It’s easy to apply and remove, making it perfect for renters or those who want flexibility. Peel-and-stick panels offer a modern look with minimal installation effort.
Another low-commitment option is using accent textiles like throw pillows or curtains in gray tones. These can be swapped out easily if you change your mind later on. This approach allows you to experiment with different shades and styles without permanent alterations.
Professional vs DIY: When to Hire a Painter
Sometimes, hiring a professional painter is the best choice. High ceilings or complex prep work can make DIY projects challenging and time-consuming.
If you’re short on time but need quick results, consider bringing in a pro. They’ll have the tools and expertise to complete the job efficiently. When hiring, check if they carry insurance and ask for references from previous clients.
Before starting any work, request samples of their past projects to ensure quality matches your expectations. A good painter will also provide clear estimates and timelines upfront, helping you plan accordingly.
Conclusion
Choosing the right gray matters for safety, durability, and how the room finally feels, so lock in a plan you can actually follow and test it in small areas before you commit. Use the short list of checks to guide your work: pick a gray from your shortlist that fits the space, verify the lighting and finish fits the room, test samples on a representative wall, prep and protect surfaces, assemble your supplies, mix brands if you’re blending, apply in proper coats with even strokes, and compare the look under different light times before you seal it in with the final coat.
Two or three common mistakes to avoid are skipping thorough prep, underestimating the importance of testing in your own lighting, and neglecting proper ventilation or drop cloths. Don’t rush the dry times or over-thin the paint just to save a step, and always work with fresh, well-maired brushes and rollers. Use a clean, ventilated space and keep a simple plan for cleanup so you don’t undo your work.
If the job starts to feel beyond the basic prep or you’re hearing a lot of scraping, see a pro for prep or repair work, especially for large areas, tricky corners, or significant color changes. Stay steady, follow the checks, protect your investment, and you’ll end with a space that looks right, lasts, and costs less trouble in the long run—your next paint job will be smoother, faster, and worth every careful step.
FAQ
How do I choose a gray for a room?
Check how it looks in the room at different times of day. Test on a big swath of wall and watch it next to trim and furniture. Be wary of undertones that clash with your decor.
Should I use matte or satin for walls in living spaces?
Satin is easier to clean and holds up to traffic. Matte hides flaws but wipes can leave marks. Pick satin if it will get regular use.
Do I need primer with gray paints?
Yes. Primer helps color uniformity and covers the undertone. Skipping primer can give you patchy results and more coats.
How long does a gray paint job take from prep to finish?
Plan a couple of days for prep, cutting in, and rolling, with dry times between coats. Rushing can dull the finish and highlight flaws.