

Introduction
Learn how to paint a front door successfully with a step-by-step approach and practical pitfalls to avoid.
You’ll learn how to prep the door, select the right paint and tools, and apply a smooth, durable finish.
It also highlights common mistakes to avoid and practical tips to keep the result looking fresh for years.
Key takeaways
- Inspect door for peeling paint and rust spots before starting work.
- Remove hardware and mask adjacent areas to protect surfaces.
- Use grit 120–180 sanding for smooth, clean surface without deep scratches.
- Apply primer to bare wood and repaired patches for uniform finish.
- Cut-in edges first, then roll large panels for even color distribution.
- Allow recommended dry time between coats and protect from weather exposure.
Table of Contents
- Introduction
- Key takeaways
- Quick project overview & timing
- Tools and materials checklist
- Safety and special considerations (lead, rust, weatherstripping)
- Prep: removing hardware, cleaning, and sanding
- Priming and patching
- Painting techniques (cutting-in, rolling, spraying)
- Drying, reassembly, and finishing touches
- Common mistakes to avoid and troubleshooting
- Conclusion
- FAQ
Quick project overview & timing
This section contrasts interior versus exterior doors and single‑door projects versus multiple doors, highlighting how prep, priming, and topcoats differ for each scenario. It outlines how your overall timeline can shift based on quantity and location, and points to painting windows that avoid direct sun, rain, or extreme cold. You’ll learn when to paint and how to read drying windows without locking into rigid numbers—check the product label for specific guidance and plan around typical interior and exterior work patterns.
Knowing this helps you schedule tasks, order materials, and avoid rework, since proper timing affects adhesion, finish quality, and handling safety. Use it as a quick decision guide and a practical checklist from prep to finish, with emphasis on ventilation, humidity, and weather windows, plus how to space coats and recoat intervals per the manufacturer’s directions.
Project at a glance (time, coats, difficulty)
This project typically takes 1–2 days for an interior door and 2–3 days for an exterior door. Interior doors usually require one coat of primer followed by two topcoats. Exterior doors often need two coats of primer and three topcoats to ensure durability.
The difficulty level is moderate, with the main challenges being thorough prep work and patience during drying times. Sanding, priming, and applying multiple coats take time but are manageable for a DIY homeowner.
Before you start, make sure you have all necessary tools: sandpaper, primer, paint, brushes or rollers, painter’s tape, and drop cloths. A compact checklist will help keep your project on track from prep to finish.
When to paint (weather and workspace)
The ideal temperature range for painting is between 50°F and 85°F. Avoid direct sunlight, rain, or extreme cold as these conditions can affect the quality of your finish. Humidity should be below 70% to prevent condensation on wet surfaces.
Ensure good ventilation in your workspace to allow paint to dry properly. Open windows and use fans if necessary. For exterior doors, painting when the door is still hanging is best; however, removing it for indoor work can also be effective but requires more handling care.
Avoid painting on rainy or humid days as this can lead to poor adhesion and uneven finishes. Plan your project around clear weather windows to ensure a smooth process from start to finish.

Tools and materials checklist
This section lists the essential tools, consumables, and optional accessories you’ll need to prep, seal, and finish a single door.
Core items include brushes, rollers, a roller tray, extension pole, utility knife, sanding block or sandpaper, primers, and paints; also include basic consumables like tape, drop cloths, and rags. For safety and setup, have a respirator or mask, safety glasses, disposable or washable gloves, and a clean workspace with tarps and painter’s tape; rough quantities for a single door are: 1 primer can, 1–2 cans of paint depending on color and coat count, 1–2 rolls tape, 2–3 sheets drop cloths, and 1 sanding block set with 2–3 grits.
Material specs and paint selection
Use this checklist before you start painting to ensure you have the right materials.
- Select sheen type: Choose gloss for durability, satin for a smooth finish, or matte for a flat look. Check door condition; glossy surfaces may need deglossing.
- Oil-based primer: Use if surface is porous and needs sealing. Confirm by testing with water; if it soaks in, apply primer.
- Water-based paint: Ideal for most doors. Check coverage on a test area; recoat if needed.
- Oil-based paint: For high traffic areas or metal surfaces. Test adhesion and drying time.
- Floetrol additive: Mix with water-based paints to reduce brush marks. Confirm by stirring thoroughly before use.
- Paint cans quantity: Estimate 1 can of primer, 1-2 cans of paint for a single door. Check coverage on the label.
- Tape and drop cloths: Use painter’s tape around edges; lay down drop cloths to protect surfaces. Confirm by measuring area to cover.
- Sanding block set: Include 120, 180, and 220 grits for smoothing surface. Check condition of sandpaper before use.
Quick rule: Always test paint on a small area first to ensure color match and coverage.
Optional equipment: sprayer vs brush + roller
This checklist helps you decide the best painting method for your door.
- Sprayer efficiency: Faster application but requires setup. Confirm by timing a test spray.
- Brush detail work: Ideal for edges and corners. Check brush quality; stiff bristles are better.
- Roller coverage: Quick for large areas. Use 3/8″ nap for textured surfaces, 1/4″ for smooth.
- Overspray risk: Spraying can cause mess and damage nearby items. Confirm by masking off area.
- Sprayer cost: Initial investment higher but saves time on large projects. Check rental or purchase options.
- Brush control: Better for intricate details like door edges. Test with a small brush first.
- Roller texture: Choose nap based on surface type; too thick can leave marks, too thin won’t cover well. Confirm by testing on scrap wood.
- Sprayer maintenance: Regular cleaning needed to avoid clogs. Check manufacturer’s instructions for care.
Quick rule: For a single door, brushes and rollers are usually sufficient; sprayers save time but add complexity.
Safety and special considerations (lead, rust, weatherstripping)
Lead paint is a real risk on older doors, so test when you suspect it and follow EPA guidance, noting when DIY handling is restricted and when a pro should step in. Wear the right PPE—respirator or particulate mask, safety glasses, and gloves—and set up a well-ventilated work area before you do anything, and plan how you will dispose of lead-containing debris according to your local rules. For rust on metal doors, identify areas that need treatment, use approved rust converters or primers, and prep the surface carefully to avoid spreading contamination; protect glass and hardware by masking or removing panes and by bagging or shielding hardware so finishes and cleaners don’t mar or contaminate them; safely remove old weatherstripping and set it aside for proper disposal.
Why this matters: following testing, PPE, and disposal steps helps keep family and neighbors safe while you work, and it reduces the chance of hidden hazards compromising the door’s performance later. Always check product labels and manufacturer instructions for how to use cleaners, what constitutes acceptable ventilation, and how to dispose of waste; also check local household hazardous waste rules for old paint, weatherstripping, and hardware. If you’re unsure about lead testing, rust treatment, or disposing tricky debris, err on the side of caution and hire a professional to test, remove, and dispose of materials properly.
Lead paint and older doors
If your front door is from before 1978, there’s a chance it has lead-based paint. Testing for lead is crucial to know if you need to follow EPA guidelines. Always test first.
Interpret the results carefully: If lead is detected, DIY work can be risky and restricted. You might need to hire a certified professional for safe abatement and disposal. Don’t take chances with your health or home’s value.
Remember, dealing with lead paint isn’t just about safety—it’s also about compliance. Follow the EPA rules strictly to avoid legal issues and ensure proper cleanup.
Protecting surrounding areas and hardware
Making sure your door’s surroundings stay clean is key for a professional look. Cover frames, hinges, and other hardware with painter’s tape or plastic sheeting to avoid accidental paint splatters.
To shield glass panes, use masking tape and paper carefully around edges. This prevents any drips from ruining the clear view through your door. Don’t forget about mail slots and locks—these need extra protection too.
When dealing with hardware like handles or hinges, consider removing them entirely before painting for a flawless finish. If removal isn’t feasible, wrap each piece securely in plastic bags to keep paint out of crevices.
Prep: removing hardware, cleaning, and sanding
Prep boils down to a simple order: decide whether to remove hardware or mask it off, then degrease and clean thoroughly, and finally sand to give the new finish something to bite into. Remove knobs, hinges, and mail slots when feasible; if you can’t, mask weatherstripping and nearby finishes so you don’t chase dust all over the house. Use the right cleaner for the door material—wood, metal, or fiberglass—and make sure all oils, fingerprints, and chalky residues are gone before you touch sandpaper.
Sanding approach matters: start with a coarser grit for adhesion, then move to a finer one, and decide between spot-sanding and full-surface sanding depending on condition. Keep dust under control with vacuum and a tack cloth, and avoid cross-grain scratches by keeping the sander flat and moving with the grain when possible. This prep sets up good adhesion, seals edges, and lets you verify readiness with a quick test and a safety check before priming or painting.
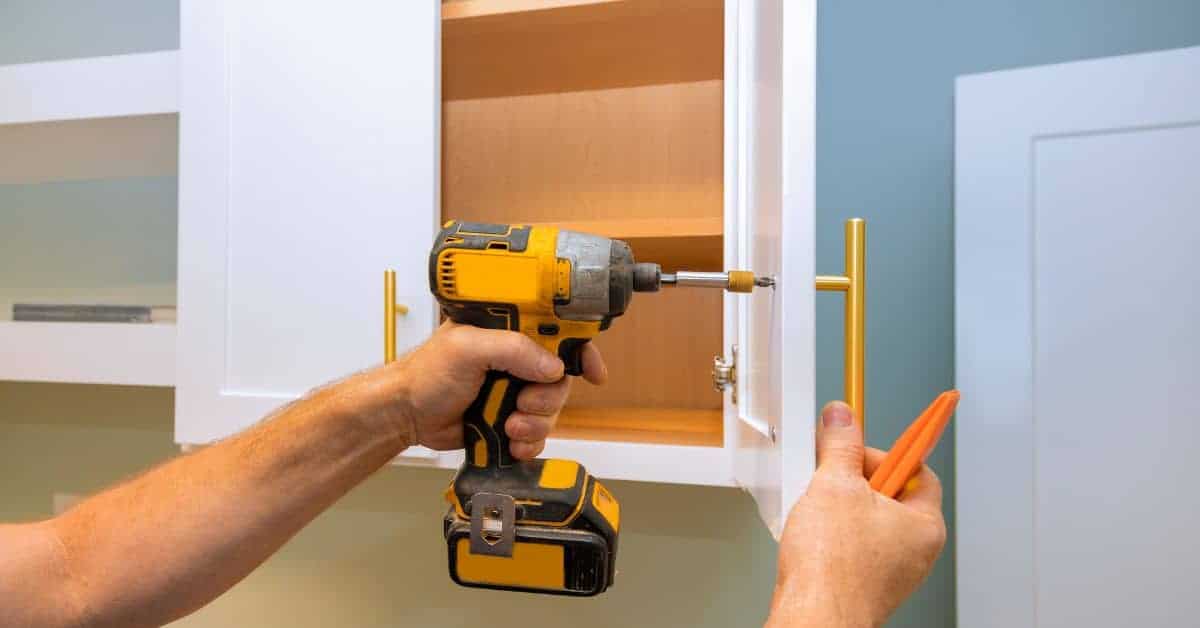
Removing and labeling hardware
Start by removing all hardware from your door, including doorknobs, hinges, and kick plates. Use a screwdriver to carefully unscrew each piece and place the screws in a labeled container or bag for easy reassembly later.
If you’re unsure whether to remove the door completely or leave it hanging on its hinges, consider the weight of the door and your physical strength. For heavier doors, leaving them attached is safer but harder to work around. Lighter doors can be removed easily by lifting off the hinge pins.
Label each screw with a number corresponding to where it came from on the door. This helps you reassemble everything correctly without confusion or missing pieces. If you’re masking instead of removing, cover hardware and surrounding areas thoroughly to prevent paint splatters.
Cleaning and degreasing
Before sanding, clean your door thoroughly with a degreaser or cleaner suitable for the material. For wood doors, use a mild soap solution; metal and fiberglass require stronger solvents like acetone or mineral spirits.
Rinse off any residue with water and let it dry completely before proceeding to sand. This ensures no oils or grime interfere with paint adhesion. If your door has old paint that’s chalking, use a stiff brush to remove loose flakes.
For doors exposed to smoke or mold, apply a specialized cleaner designed for these issues. Follow the manufacturer’s instructions and ensure everything dries before sanding. Skipping this step can lead to poor paint adhesion and premature failure of your new finish.
Sanding and visual checkpoints
Before you start painting, run through a quick checklist to ensure the door is ready. Here’s what to look for:
- Flat surface: Check that all areas are smooth without bumps or ridges.
- Sandpaper progression: Use coarse grit first then fine grit to avoid scratches.
- Rust removal: Sand rust spots until bare metal is revealed and primed.
- Loose paint: Scrape off any flaking or peeling old paint before sanding.
- Dust control: Use a vacuum with brush attachment to remove dust after sanding.
- Tack cloth use: Wipe down the door with a tack cloth for final cleaning.
- Edge sealing: Ensure all edges are sealed and smooth, no sharp corners left.
- Masking adequacy: Confirm that masking tape is securely applied without gaps.
Quick rule: Always sand until the surface feels smooth to touch and free of debris before moving on to priming or painting.
Priming and patching
Priming is about sealing the surface and ensuring the topcoat sticks, and you’ll need it when you’ve got bare wood, metal with rust spots, or a drastic color change that could bleed through. Choose primers by door material: stain-blocking or bonding primers for wood, rust-inhibitive or epoxy-based options for metal, and specialty primers that improve adhesion on fiberglass, all checked against the intended topcoat (latex or oil-based) for exterior use. For patching, address small gouges and holes with appropriate filler, using epoxy for larger flaws and lightweight spackling for smaller imperfections, then sand smooth before priming.
Surface prep matters: clean the door, remove loose paint, and roughen glossy areas so the primer can grab; scuff-sanding bare wood helps adhesion, and vacuum or tack cloth helps prevent pitting under primer. Primer application should be done in a couple of thin, even coats if the surface needs it, with proper thinning and curing times per product instructions, and a light sand between coats to keep the surface uniform. Watch for signs you need a second coat, like patchy coverage or different sheen, and avoid heavy builds that can cause lap marks or cracking; plan primers to work in concert with your chosen topcoat and outdoor conditions.
Choosing the Right Primer
For bare wood doors, go with a tung oil or shellac-based primer to block stains and promote adhesion. If your door is metal and has rust spots, use a rust-inhibitive primer that seals out moisture and prevents further corrosion.
Fiberglass doors need specialty primers designed for smooth surfaces and better paint adhesion. These primers are usually water-based and dry faster than oil-based options, which is ideal for exterior work where drying time matters.
When dealing with drastic color changes or covering up rust spots, a stain-blocking primer is your best bet. It ensures the new coat of paint adheres well and covers evenly. Remember to choose a primer that’s compatible with your topcoat—latex over latex, oil-based over oil-based—to avoid issues later on.
How to Patch and Sand Repairs
To fix small gouges or cracks on the door surface, start by cleaning out any debris. Use a lightweight spackling compound for minor imperfections and epoxy filler for larger flaws that need more support.
Once you’ve filled in the gaps, let it dry completely before sanding down to create a smooth finish. Sand lightly between coats if needed until the surface is even with the rest of the door. A light scuff-sand after filling helps the primer and paint adhere better.
After patching and sanding, make sure to prime these areas separately from the rest of the door. This ensures a consistent finish once you apply your topcoat. Don’t forget to clean off any dust or debris before priming for best results.
Painting techniques (cutting-in, rolling, spraying)
For panels and flat areas, start with cut-in along edges and details using a brush, then finish with rolling or spraying to even out color and texture. Keep brush marks to a minimum by proper technique and avoid drips by keeping a wet edge and not overloading the brush.
Choosing method depends on door style, paint type, and weather; cut-in gives precision, roller speeds coverage on flat areas, and spray smooths large areas. Mask edges, glass, and hardware, and follow product instructions on thinning and flow modifiers; check the label for drying times and coat order, then tailor to interior vs exterior doors.
Painting order and wet-edge strategy
When painting a surface, start with the small details like inset boxes or trim first. Then move on to rails, mullions, or any vertical elements that separate larger panels. Finally, tackle the flat panels last. This way, you avoid getting paint where it shouldn’t be and can focus on neat lines.
Maintain a wet edge while painting to prevent lap marks—those noticeable stripes when one coat dries before another is applied. Keep your roller or brush moving so that fresh paint meets the still-wet area. This technique requires you to work in sections, about as wide as your roller’s coverage, and move quickly but steadily.
How to avoid brush marks and drips
Avoid these common mistakes when painting to ensure a smooth, professional finish.
- Use wrong paint consistency: Thin your paint with Floetrol for latex or follow the manufacturer’s instructions. The right consistency prevents brush marks and dripping.
- Apply heavy coats: Use light, thin coats of paint to avoid drips and uneven coverage. Build up layers gradually instead of trying to cover everything in one go.
- Select poor quality brushes: Invest in high-quality brushes designed for the type of paint you’re using. Cheap brushes can leave marks and streaks that are hard to fix later.
Double-check your techniques before starting to avoid these common pitfalls and ensure a flawless finish.
Sprayer setup and overspray prevention
When setting up your paint sprayer, start by testing the nozzle on a scrap piece of material to find the right spray pattern. Adjust the pressure until you get even coverage without excessive mist. Check the manufacturer’s instructions for specific settings.
To prevent overspray and protect surrounding areas, use painter’s tape and plastic sheeting around edges and fixtures. Mask off windows, doors, and other surfaces that don’t need paint. Also, wear a mask to avoid inhaling paint particles.
Drying, reassembly, and finishing touches
Drying times between coats should be respected, with color coats needing a longer dry tack before light handling and the topcoat waiting until the surface is consistently tack-free. Keep an eye on humidity and temperature in plain terms, and check the label for a general range it suggests; if in doubt, use a conservative, moderate environment and plan for slower drying in cooler or damper conditions. Test for tack with a light finger touch and look for a fully cured feel—no smearing and no chemical smell—and avoid recoat or tape removal until those signs show up. When to remove painter’s tape varies, but do it after the surface reaches full tack yet before the topcoat cures to minimize edge raggedness and potential peeling.
Reattach hardware in a deliberate sequence to avoid marring the finish, using minimal pressure and, if needed, a touch of lubrication on metal contacts only where the manufacturer or label allows. Finishing touches mean a gentle final inspection for drips, dust, or texture inconsistencies, and light sanding between coats if you see a dull or rough edge, followed by a careful cleaning of dust prior to reassembly. If paint lifts when you reattach hardware, stop and reassess, then touch up carefully and reseal the area to prevent further damage; store or handle the door in a protected manner once fully cured to avoid fingerprints and new marks.
When to close the door and re-hang
Before closing your freshly painted front door, you need to wait until it’s fully cured. This usually takes around 24 hours for color coats but can stretch up to a week for topcoats depending on humidity and temperature.
To check if your paint is ready, use the finger test: gently press your fingertip into the paint without applying too much pressure. If there’s no smearing or sticking, it’s tack-free. However, wait another day before considering full cure to avoid any risk of damage.
Once you’re sure the door is fully cured and ready for reassembly, remove painter’s tape carefully after 12 hours but before the topcoat cures completely. This prevents peeling and ragged edges along the taped areas.
Before reattaching hinges, handles, and knockers, make sure to snap them back gently without applying too much pressure. Use a small amount of lubricant if necessary to ease installation and avoid marring the paint job.
Final visual checkpoints and maintenance tips
After your door is fully cured, it’s time for one last inspection before you open it up. Use this checklist to ensure everything looks perfect:
- Coverage check: Look for even paint coverage across the surface; any missed spots can be touched up.
- Edge quality: Inspect edges for smoothness and no ragged lines from tape removal. Any rough or uneven areas should be lightly sanded.
- Hardware fit: Make sure all hardware fits snugly without scuffing the paint; adjust if necessary to avoid future wear.
- Dust and debris: Clean any dust or debris from the door surface before reassembly. Leaving it can cause scratches over time.
- No fingerprints: Wipe down hardware with a lint-free cloth to prevent oily marks that dull the finish.
Quick rule: Regular cleaning and touch-ups keep your painted front door looking fresh for years.
Common mistakes to avoid and troubleshooting
Common mistakes to avoid start with skipping prep, skipping proper surface cleaning, and rushing through sanding. Using the wrong sheen or skipping primer when it’s needed leads to poor adhesion and early failure, and coats that are too thick usually cause runs and uneven coverage. If you see runs, drips, or dull patches, use feather-sanding, re-priming when required, and plan quick touch-ups with careful edge work and controlled application.
This matters because prep and right technique set up durable results, especially on doors exposed to sun and weather. Practical tips: window the painting session to manage humidity and temperature, shield dust, and pace coats to avoid heavy builds; use back-brushing or a steady rolling cadence to even out coverage; address weather sealing and compatibility for door materials, plus a sensible re-coat schedule to keep exterior doors protected.
Problem Fixes (Runs, Orange Peel, Peeling)
If you encounter runs during painting, immediately back-brush to smooth out the area. For orange peel, feather-sand lightly and re-apply a thin coat of paint. If peeling occurs due to poor adhesion or improper prep, strip down to bare wood and start over with thorough cleaning, sanding, and priming.
To fix runs without damaging the surface, use a dry brush to gently pull excess paint into surrounding areas until it blends in. For severe cases of orange peel, consider using a spray gun for an even finish or sanding down to smooth out imperfections before repainting.
If peeling happens after curing, identify the cause—whether it’s moisture, poor prep, or incompatible materials—and address accordingly. Re-prime and repaint with compatible products to ensure durability and longevity of your front door’s new look.
Cost Breakdown and Planning Tips
Budget for quality supplies like primer, paint, brushes, rollers, and protective gear. Factor in time blocks for prep work, painting, drying, and reassembly. Plan around weather conditions to avoid issues with humidity or temperature affecting your project.
If you’re short on time or unsure about tackling the job yourself, consider hiring a professional painter who can complete the task efficiently within budget constraints. Ensure all materials are sourced ahead of time to minimize delays during the painting process.
Keep in mind that proper planning and preparation will save money by preventing costly mistakes like peeling paint or uneven coverage. Allocate extra funds for touch-ups if needed, ensuring your front door looks great long-term without frequent maintenance.

Conclusion
Finish with a door that looks right and holds up to weather by prioritizing safety and proper technique—your paint job matters more than you think, and right now is where durability starts.
First, plan to test materials and methods in a small, invisible spot, then clean, sand, prime, and patch as you did in the guide, followed by cutting in, rolling, and a careful spray if you’re set up for it, letting each coat dry fully before reassembling and checking the weathered seams and hardware fit. Keep the workflow tight: prep first, then paint, then dry and reassemble, with clean hardware kept ready to reinstall exactly where it came from. Be mindful of the forecast and work in dry, moderate conditions so you don’t waste time or damage coatings.
Common mistakes to avoid are rushing the dry time, skipping patching or priming, and ignoring rust or lead safety concerns. A simple rule of safety: never skip eye protection and respirator use when sanding or spraying, and always test a small area before committing to the full door. If you don’t have a stable outdoor setup, or if the door has heavy lead paint, rust, or structural damage, call in a pro to prevent costly missteps. Stay disciplined, stay patient, and you’ll end with a door that looks sharp and performs for years to come.
FAQ
Do I need to remove the old paint or can I just repaint?
If the old paint is peeling or bubbling, you must remove it. A fresh coat won’t hide damage. Sand, scrape, and clean before you start.
What kind of paint should I use for a front door?
Use exterior door paint designed for fiberglass, wood, or metal doors. Satin or semi-gloss finishes stand up to weather and wipes clean. Don’t use flat paint on a door.
How important is surface prep?
Prep makes or breaks the finish. Clean the door thoroughly, sand rough spots, and fix any cracks. Skipping prep is a waste of time and money.
How long will it take and how many coats?
Plan for two coats of paint and a dry time between coats. Sand lightly between coats for a smooth finish. Don’t rush the dry times or you’ll peel or brush marks.