

Introduction
The sun’s heat and shifting light can make painting a challenge, but with the right timing and planning, you can achieve professional results. This guide focuses on creating a clear timeline for your project, helping you understand how long each step takes and when to schedule tasks based on sunlight exposure.
Whether you’re tackling a small touch-up or a large-scale exterior painting job, following this step-by-step timeline will ensure consistent coverage, minimal lap marks, and even sheen, all while making the most of your time in the sun.
For the full guide, see Painting in Direct Sunlight: Timing Windows, Lap-Mark Prevention, and Sheen Control.
Creating a Painting Timeline: Step-by-Step Duration Guide
To create an effective painting timeline when working in direct sunlight, follow this step-by-step guide that focuses on duration and sequencing. By breaking down your project into manageable tasks and allocating appropriate time for each, you’ll ensure a smooth workflow and consistent results.
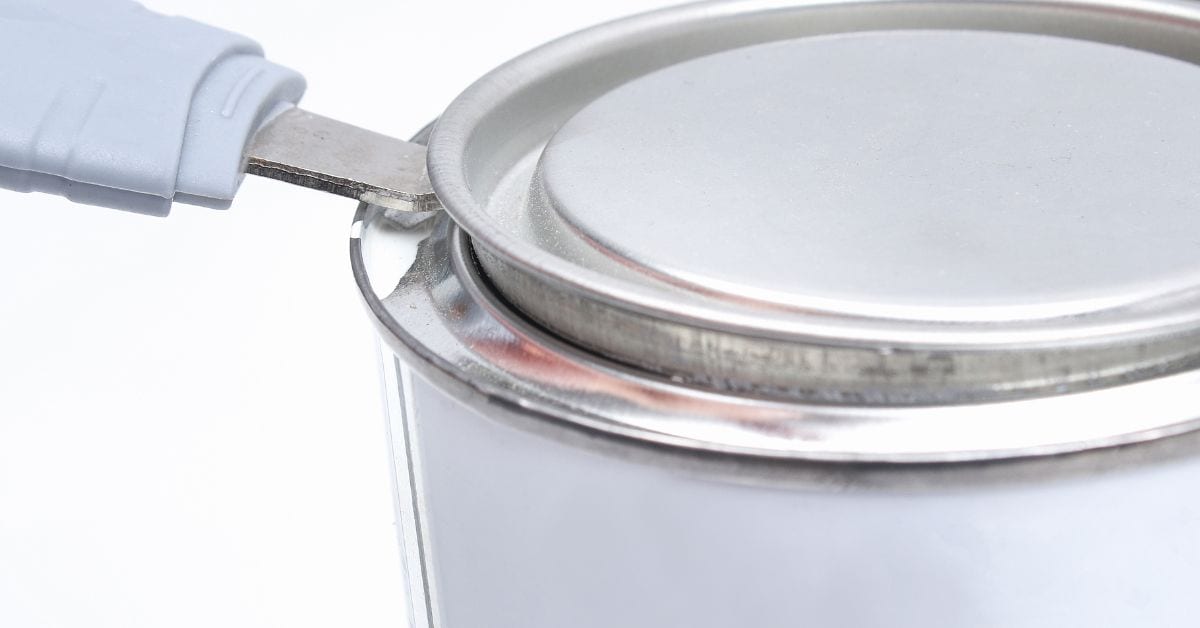
- Surface Preparation (1-2 hours): Clean the surface, remove any loose paint or debris, and apply primer if necessary. Allow the primer to dry according to the manufacturer’s instructions (usually 30 minutes to 1 hour).
- Painting Schedule (4-6 hours per coat, depending on size):
- Apply the first coat of paint, working in manageable sections that you can complete before the paint starts to skin over. Allow for a 20-30 minute drying time between coats.
- Inspect your work and touch up any missed spots or lap marks.
- Apply subsequent coats, following the same process as the first coat. Most paints require at least two coats for optimal coverage and durability.
- Cleanup (30 minutes – 1 hour): Clean your tools, dispose of any leftover paint or materials responsibly, and store your equipment properly to maintain its longevity.
By following this timeline and adjusting your schedule based on the sun’s position and heat, you can ensure a successful painting project that minimizes the effects of direct sunlight.
Key takeaways
The duration of surface preparation directly impacts your overall painting timeline. To maximize efficiency, prepare your surfaces in advance to minimize downtime during the actual painting process.
- Plan around cooler temperatures and shade to minimize sun-driven drying and laps
- Apply water-thin coats during steady conditions; work lanes to avoid lap marks
- Use compatible primers and surface prep to reduce uneven absorption and sheen shifts
- Inspect edges and flutes frequently; maintain wet edge and back-roll for consistency
- Choose sheens and additives carefully; test on small area before full coat
- Safety: wear eye/skin protection; avoid mixing indoors or near heat sources
Table of Contents
- Introduction
- Key takeaways
- Why Direct Sunlight Changes Paint Behavior
- Timing Windows: Best Times of Day and Job Sequencing
- Surface Prep and Primers to Prevent Uneven Absorption
- Tools, Materials, and Visual Checkpoints Checklist
- Technique-Focused Lap-Mark and Flashing Prevention
- Sheen Control: Product Choice, Additives, and Finishing Tactics
- Troubleshooting and Repair After Uneven Sheen or Lap Marks
- Safety, Materials Standards, and When to Call a Pro
- Conclusion
- FAQ
Why Direct Sunlight Changes Paint Behavior
Direct sunlight alters drying dynamics because sun angle and surface temperature change how quickly water or solvents leave the film, which affects how the coating forms and its final sheen compared with shaded areas. When the surface heats unevenly the top skin can form faster than the body of the film, increasing the risk of skinning, lap marks, and visible sheen shifts.
Rapid evaporation under sun causes edge clustering and uneven curing where adjacent areas cure at different rates, so visible flashing or distinct gloss differences can appear. Watch surface heat with an infrared thermometer, check the paint feel and appearance, and test sunlit versus shaded patches to plan your application and use shading, back-rolling, and consistent film thickness to manage those risks—verify specific limits on the product label or technical data sheet before changing technique or timing.
Heat and Evaporation Effects
Direct sunlight heats up surfaces, speeding up paint drying. This rapid evaporation can cause problems:
Incomplete coalescence: Quick solvent loss prevents proper film formation, leading to inconsistent sheen.
Flashy appearance: Paint may look glossy at first but lose shine over time due to incomplete curing.
Keep an eye on surface heat and feel. If it’s too hot, wait for a cooler time to paint.
Light Reflections and Viewing Angle
Sunlight reflects off surfaces differently than artificial light. This can exaggerate:
Texture: Every bump, dip, or brush mark becomes more visible.
Sheen variations: Different areas may appear shinier or duller depending on the sun’s angle.
Check your work from different angles. What you see in the sun might not be what you get indoors.
When Direct Sun is Actually OK
There are times when painting in direct sunlight works:
Fast-drying paints: Some paints, like latex, dry quickly and can handle sun. Follow manufacturer guidelines.
Controlled technique: Use back-rolling or brushing techniques to maintain consistent thickness and minimize lap marks.
Shading: If you must paint in the sun, use a tarp or other shade to control heat and evaporation.
Timing Windows: Best Times of Day and Job Sequencing
Choose time-of-day windows that let you apply and maintain a wet edge while avoiding the hottest, most rapidly drying periods; the right window depends on local sun trajectory, ambient conditions, and the product’s stated limits. Sequence work so prep, priming, and first coats happen during milder conditions and reserve riskier touch-ups for cooler, more stable times of day.
Always check the paint and primer technical data sheets for allowable temperature, humidity, surface-temperature guidance, and recoat windows rather than guessing. Build buffer time into your schedule, plan work from shaded to sunlit sections when possible, and have shade cloths or temporary covers ready to pause or reschedule if field measurements or weather exceed the product’s documented limits.
Daily scheduling strategies
Timing is key when painting in direct sunlight. Aim for lower sun angles to minimize heat and rapid drying.
Start early morning or late afternoon, avoiding peak sun hours. This way, each section dries uniformly without immediate full sun exposure.
Tip: Paint the north-facing walls first, then east, south, and west as the day progresses. This keeps each section out of direct sunlight long enough to dry properly.
Job-phase timing (prep → prime → topcoat)
Sequencing your work and allowing proper flash/dry times between coats is crucial to prevent lap marks and sheen variation.
First, prep your surfaces. Then apply primer, letting it dry according to the manufacturer’s instructions. This usually takes 1-2 hours.
Next, apply your first topcoat. Let it dry for at least 4 hours before applying a second coat. This gives the paint time to level out and prevents lap marks from uneven drying.
Weather and multi-day planning
Monitor weather forecasts to avoid high-heat or rapidly changing conditions that can interfere with consistent drying.
Plan your workdays around stable weather patterns. If a heatwave is forecasted, consider rescheduling for cooler days.
Tip: Use the dewpoint to plan your painting schedule. The dewpoint is the temperature below which water vapor in air begins to condense. Painting when the dewpoint is too high can lead to poor drying and sheen issues.
Surface Prep and Primers to Prevent Uneven Absorption
Proper prep equalizes porosity and adhesion: thoroughly clean concrete of oils, curing compounds, sealers, and loose material, then repair cracks and feather edges to a consistent profile before priming. Inconsistent porosity or leftover contaminants will read as sheen variation after topcoats, so a quick water or solvent test and visual inspection help decide whether deeper cleaning or etching is needed.
Select a primer formulated to bond to concrete and to even out absorption—confirm primer compatibility, recommended coverage, and dry times on the product data sheet. Lightly sand where specified, remove dust with a vacuum or tack cloth, apply the primer per manufacturer instructions to uniform thickness, and inspect under both diffuse and direct light before proceeding with finish coats.
Cleaning and decontamination
Start by removing any loose material, chalk, or dust from the concrete surface. This ensures better paint adhesion and absorption.
Use a degreasing detergent to clean the surface thoroughly. Oils, sealers, and contaminants can cause uneven absorption and sheen variance.
If you spot any mildew, treat it with a suitable cleaner to prevent it from affecting your paint job.
Scuffing, sanding, and feathering repairs
Inspect the surface for any defects like cracks, spalls, or pop-outs. Repair these using a concrete patching compound.
Once repaired, lightly sand the joints and patches. This opens up the pores and creates a uniform texture that prevents shiny or dull spots after painting.
Feather the edges of your repairs to create a consistent profile. This helps in achieving an even sheen across the entire surface.
Primer choice and application tips
Choose a bonding or high-build primer. These primers can normalize porosity and reduce flashing, helping you achieve an even sheen.
Always read the technical data sheet (TDS) to confirm compatibility with your chosen paint. The TDS will also provide recommended coverage and dry times.
Apply the primer as directed, ensuring each coat is applied evenly. This helps in achieving uniform adhesion and sheen before painting under appropriate lighting conditions.
Tools, Materials, and Visual Checkpoints Checklist
Gather rollers, naps, and brushes matched to concrete porosity—foam or microfiber for smooth faces, rougher naps for broomed finishes—and use stiff or angled brushes for trim; have extension poles, mixing paddles, and squeegees or trowels available as needed. Use mixing tools that minimize air entrainment and follow can instructions for stirring and tinting to avoid color or sheen inconsistencies across batches.
Use a short visual checklist on-site: inspect under diffuse light for coverage and under direct sun for sheen shifts, look for lap marks, high- or low-sheen patches, and color depth differences across test panels. Keep a compact field checklist of nap length, brush type, mix batch ID, surface prep status, and inspection results so you can correct technique or materials immediately if uneven sheen or lap marks appear.
Tool selection and maintenance
Before you start painting, make sure your tools are in top shape to avoid drag or fiber loss.
- Roller naps: Choose foam for smooth surfaces and microfiber for textured ones. Check for any holes or tears.
- Brushes: Use angled sash brushes for edges, nylon for smooth areas. Inspect bristles for stiffness and evenness.
- Extension poles: Ensure they’re secure and wobble-free to avoid drips.
- Mixing tools: Use a mixing paddle or trowel/squeegee for concrete. Check for cleanliness.
- Sealant/primer: If using, ensure it’s compatible with your paint and surface.
Quick rule: Clean tools between uses to maintain quality and prevent cross-contamination.
Mixing, thinning, and batch control
Proper mixing and batch management ensure consistent sheen and color.
- In-can mixing: Stir paint thoroughly before use. Check for any settled pigment.
- Batch size: Mix only what you need to avoid waste and maintain consistency.
- Thinning: Follow TDS guidelines. Too much thinning can cause sheen inconsistency.
- Contiguous areas: Keep batches separate for different sections to maintain color match.
Quick rule: Mix and thin paint per manufacturer’s instructions to avoid sheen and color inconsistencies.
Visual checkpoints for even sheen
Regularly inspect your work under different lighting conditions to catch issues early.
- Diffuse light: Check for gaps or missed spots. View at an angle to see shadows.
- Direct sun: Inspect for hotspots and uneven sheen. Move around to check different angles.
- Texture: Feel the surface for any rough patches or raised grain.
- Color depth: Compare test patches under both lighting conditions.
Quick rule: Inspect your work frequently to catch and fix issues before they become problems.
Technique-Focused Lap-Mark and Flashing Prevention
Maintain a true wet edge by working consistent section sizes and overlapping slightly so each pass blends into the next before it skins, which is critical on sun-exposed walls where drying is accelerated. Work in manageable bands, control load on the tool, and use uniform pressure so film thickness stays even and edges do not cure faster than the middle of the pass.
Sequence cuts and rolls around windows and trim so you feather into frames and avoid hard stops where flashing or lap lines form; prime and cut in tight areas first, then roll the adjacent field while the cut-in edge is still open. Keep environmental cues in mind—if the edge starts drying too quickly, pause, add temporary shade, or slow down and make smaller sections rather than forcing a full-area pass that will produce visible seams.
Maintaining a wet edge in sun
Painting in direct sunlight can be tricky due to rapid drying. To maintain a true wet edge:
Paint in smaller sections. Break down your work into 2-4 ft bands. This way, you’re always overlapping onto still-wet paint.
Before starting, pre-wet the substrate in shaded areas. This gives you more time to work before the paint starts drying too quickly.
If allowed by the product’s technical data sheet (TDS), consider using a slower-drying additive. This can buy you some extra time, but remember to mix it thoroughly and follow TDS guidelines.
Consistent roller and brush habits
Using the right tools consistently is key to preventing lap marks:
Choose a roller with the right nap length for your surface. Generally, 1/2″ or 3/4″ naps are good for most exterior walls.
Use the same type of brush for all trim work to ensure consistency.
Apply paint with even pressure using long, overlapping strokes. This helps create an even film and prevents roller marks. Remember, consistency is key. Keep your strokes uniform in length and pressure throughout the job.
Section size and order of operations
Painting in manageable panels helps prevent lap marks:
Size your sections based on how fast the paint is drying. For most paints, 2-4 ft bands are a good starting point.
Work from top to bottom or around windows to avoid cold seams and flashing. If you’re painting walls with windows:
Prime cuts first. Then, roll adjacent walls before feathering into the frames. This helps prevent distinct lap lines and flashing at edges.
Sheen Control: Product Choice, Additives, and Finishing Tactics
Select a sheen appropriate for direct sun exposure and the surface—flatter sheens hide imperfections but reflect less, while higher sheens show texture and flashing more readily; match product selection to the substrate and expected exposure. Check manufacturer specifications for exterior suitability, UV resistance, and recommended substrate to ensure the chosen sheen behaves as expected in sunlit conditions.
Use additives only when the product data sheet lists them as compatible and follow recommended dosages—improper additives can alter film build and final light reflection. Control application technique for uniform film thickness, consider spray versus roller/brush for even laydown, and verify drying and recoat windows on the TDS to reduce the chance of uneven sheen during cure.
Matching sheen to lighting conditions
In direct sunlight, the wrong sheen can make your concrete surface look worse. Here’s how to pick right:
Flat or eggshell finishes hide imperfections in strong light. They’re great for exterior surfaces with visible texture or minor cracks.
Satin, semi-gloss, or gloss sheens make surfaces look shiny and smooth. Use them on even, flawless concrete. But remember, they’ll show every bump and dip in sunlight.
Using high-quality formulations and sheen blending
Premium paints give you the best chance at consistent sheen. Here’s why:
High-quality formulations have better pigments and binders. They hold their sheen longer, even in sunlight.
When touching up, blend new paint with old to match sheen. Mix some of your original paint into your touch-up batch. This helps maintain a uniform look.
When to use a finish coat or flattening glaze
Sometimes, standard fixes don’t cut it. Here are two pro strategies:
Finish coat: Apply a uniform topcoat in the same sheen as your base. This can even out sheen differences and hide minor imperfections.
Flattening glaze: Use this if you want to reduce gloss without repainting. It’s like a clear, matte varnish that dulls down shiny spots. But be careful—it can darken your surface slightly.
Troubleshooting and Repair After Uneven Sheen or Lap Marks
Start with a diagnostic inspection: compare affected areas under direct sun and diffuse light to determine if the issue is flashing, contamination, or texture differences. Note whether the problem is localized or widespread and whether it correlates to a specific pass, batch, or environmental event during application.
For localized sheen differences, clean, lightly sand, spot prime with a compatible product, and repaint with careful feathering to blend edges; for pervasive problems consider full refinishing following surface prep. Verify compatibility and recoat guidance on the product data sheet before repair, and when in doubt run small test patches to confirm the fix will match the surrounding finish.
Quick fixes for fresh wet issues
If you spot lap marks or sheen variation while the paint is still wet, don’t worry. You can fix them right away.
Re-rolling: Use your roller to gently smooth out the lap marks by rolling back and forth over them. Work quickly but carefully to avoid spreading the issue further.
Feathering: If re-rolling doesn’t work, try feathering. Load your brush with a small amount of paint and lightly stroke along the edges of the lap mark, blending it into the surrounding area.
Fixes for cured flashing or sheen variation
If your paint has already dried and you’re left with flashing or uneven sheen, don’t despair. Here’s how to fix it.
Light sanding: Gently sand the affected areas using fine-grit sandpaper. This will help smooth out the sheen and prepare the surface for priming.
Spot priming: Apply a coat of primer to the sanded areas. This will seal the surface and provide a consistent base for repainting.
Full-panel recoat: Once the primer is dry, apply a full panel’s worth of paint over the affected area, feathering the edges to blend it with the surrounding wall. This ensures an even sheen throughout.
Visual diagnostic checklist
Before you start fixing, you need to figure out what caused the issue. Use this visual checklist to help diagnose the problem.
- Dust or contamination: Look for visible specks or streaks on the surface. These could be from dust, dirt, or other contaminants.
- Texture issues: Check if the sheen variation follows the texture of the wall. This could indicate absorption issues or improper application technique.
- Flashing: See if the issue is concentrated in small areas or lines. This is often a sign of flashing due to quick drying conditions.
- Improper tool use: Inspect for visible brush or roller marks. These could indicate improper technique or equipment.
- Environmental factors: Consider if the paint was exposed to extreme temperatures, humidity, or direct sunlight during application. Any of these can cause drying issues.
- Poor product choice: Check if the sheen variation is consistent throughout the entire surface. This could indicate that the chosen paint isn’t suitable for your substrate or lighting conditions.
- Incompatible primers/paints: See if the issue is more pronounced in certain areas. This might be due to using incompatible primers or paints.
- Quick drying conditions: Look for signs of paint drying too quickly, like a ‘skin’ forming on the surface before you could smooth it out.
Quick rule: If in doubt, start with the simplest causes first. Work your way down the list until you find the culprit.
Safety, Materials Standards, and When to Call a Pro
Prioritize heat management, hydration, sun protection, ventilation, gloves, eye protection, and respirators when VOCs or dust are present; use fall protection for ladders or elevated work in sun-exposed conditions. Review the paint and primer safety data sheets and product documentation for VOC limits, flashpoint warnings, and any special handling instructions before starting work.
Check the technical data sheets and local regulations for outdoor temperature, humidity, and recoat limitations; confirm permits or local restrictions if required. If you encounter hazardous substrates, active moisture problems, complex height or access issues, or inconsistent cure behavior that you cannot reliably control, get a professional quote—ask the pro to show documentation of their planned materials and methods that address sun-related curing and sheen control.
Health and Safety Basics
Safety’s your top priority. Here’s what you need:
Exterior: Wear a hat, long sleeves, and sunscreen. Drink plenty of water to stay hydrated in the heat. Use ladders with care – secure them properly and don’t overreach.
Interior: Open windows for ventilation when possible. Use fans if needed. Wear a respirator when dealing with VOCs or dust. Protect your eyes and skin from splashes.
Testing: Check for lead paint on older homes before you start. If there’s mold, get it tested professionally.
Material Specs and Compliance
Choosing the right materials ensures a lasting job. Check these:
- VOC Limits: Look for low or zero VOC paints to minimize emissions.
- Fire Safety: Ensure your paint has the right fire safety classification.
- Exterior Readiness: Confirm it’s suitable for outdoor use and sun exposure.
- Substrate Compatibility: Make sure it bonds well to your surface. Wrong materials can crack, stain, or peel.
- Drying/Curing Times: Follow manufacturer guidelines for drying and recoating in direct sunlight.
- Warranty Requirements: Check what’s covered and for how long.
- Local Guidelines: Follow any local emission or environmental rules.
Cost/Benefit of DIY vs Professional Help
DIY can save money, but it’s not always the best choice. Weigh these factors:
Complexity: If your job’s complex – like working at heights or on hazardous surfaces – a pro might be worth it.
Risk of Rework: A botched DIY job can cost more to fix than hiring a pro in the first place. Consider the potential for mistakes.
Warranty Needs: Pro work often comes with warranties. If you need that peace of mind, go pro.
Common scenarios where pros are worth it include: hazardous surfaces, complex substrates, heights, structural concerns, unexpected moisture or mold, and conflicting cure times in direct sun.
Conclusion
Direct sun changes how paint behaves, so stick to the plan, protect the surface, and work in a way that keeps color even and edges clean. When you respect timing, prep, and safety, you prevent drift, lap marks, and costly rework.
You can finish strong by treating this into one clear workflow: confirm the best sun window and set up shade or cooling as needed, prep the surface and apply the right primer, mix and test a small patch first, apply thin coats with a wet edge and consistent tool technique, monitor sheen and edge quality as you work, and keep tools clean and hands protected throughout. Do a quick visual check at every stage, and if something looks off, pause and adjust before you continue.
Common mistakes to avoid are painting in peak sun or on a hot surface, skipping a test patch or proper surface prep, and piling on thick coats or rushing the stroke. Also wear safety gear, keep ladders stable, and never overlook ventilation and splatter protection. If you feel unsure about moisture, old finishes, or flashing issues, don’t force it—step back and reassess before committing to a full coat.
If the project is large, the surface is tricky, or you’re stabilizing an uneven sheen after the fact, it makes sense to call a pro. You want durable results, not a glossy failure that reappears season after season. Stay careful, stay patient, and you’ll get a solid, long-lasting finish.
FAQ
What are the timing window clues that tell me it’s right to paint in direct sun?
Look for calm, dry conditions with no forecast of rain. If the surface is hot to the touch and the air isn’t humid, you may gain faster drying. Check the paint can label for your product’s recommended conditions and follow local guidance if available.
How can I prevent lap marks when applying paint in direct sun?
Work in small sections and maintain a wet edge as you go. Use consistent, even strokes and avoid stopping mid–surface. Keep tools clean and use appropriate techniques to minimize overlap lines.
What can I do to keep sheen uniform across a sun-exposed area?
Prepare the surface well and use the same product and batch when possible. Apply thin, even coats and follow the manufacturer’s guidance on recoat times. Inspect as you go and blend edges gently if you see dry spots.
What environmental factors should I monitor to protect paint quality outdoors?
Watch for temperature swings, wind carrying debris, and direct sun on the fresh film. If conditions change, pause or adjust your plan to avoid rapid drying or uneven absorption. Always read the product label for outdoor-use cautions.