
Introduction
Painting trim can transform the look of your home, but it’s crucial to understand how long each step takes to plan your project effectively. This guide walks you through a detailed timeline for painting trim, ensuring you allocate enough time for prep work, application, and drying.
Whether you’re refreshing your interior or exterior trim, follow this step-by-step duration guide to achieve professional results without rushing through crucial stages.
The Complete Trim Painting Timeline
From start to finish, here’s a detailed breakdown of the time required for each stage of painting trim:
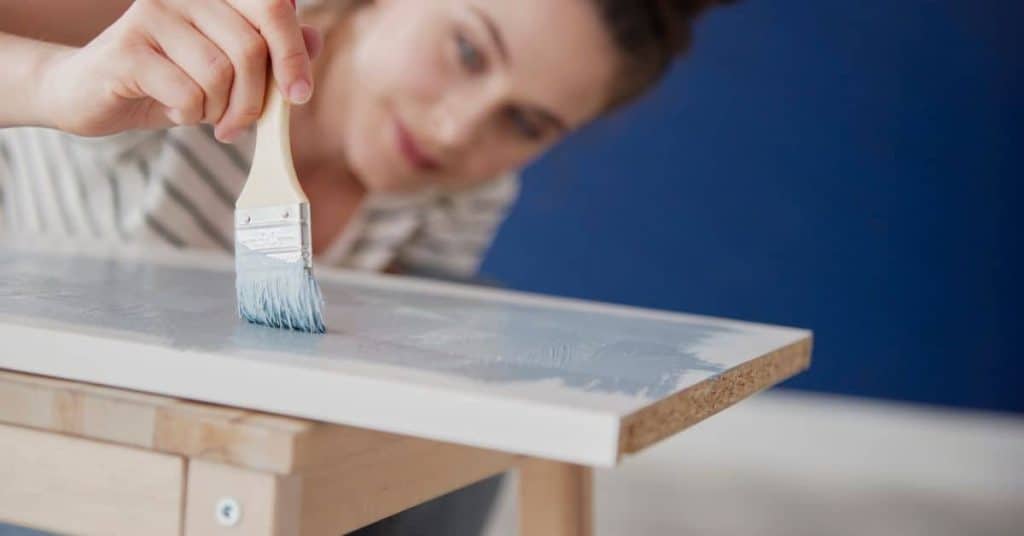
- Preparation (1-3 days): Cleaning, sanding, and priming take around 1-3 days, depending on the size of your project and the condition of your surfaces.
- Painting (2-4 hours per coat): Each coat of paint takes approximately 2-4 hours to apply, including taping off edges and allowing for drying time between coats. Most projects require at least two coats.
- Drying Time (16-24 hours): Allow at least 16-24 hours of drying time between coats and after the final coat before removing tape and touching up any imperfections.
- Cleanup (30 minutes – 1 hour): Washing brushes, rollers, and trays, as well as removing painter’s tape, typically takes around 30 minutes to an hour.
Total project duration can range from 4 to 7 days, depending on the size of your project, the condition of your surfaces, and whether you’re painting interior or exterior trim. Keep in mind that these are rough estimates, and actual time required may vary based on your specific situation.
Key takeaways
Proper preparation is key to a successful trim painting project and can significantly impact the overall timeline. Taking the time to clean, sand, and prime your surfaces ensures better paint adhesion and a smoother final result, making the entire process more efficient in the long run.
- Choose low-odor, low-VOC paints and ensure ventilation to minimize fumes.
- Prepare surfaces properly to improve smoothness and achieve consistent, flawless trim finish.
- Test adhesion and finish by small area before full trim repaint.
- Consider cleanup options that minimize mess and protect adjacent surfaces.
- Wear eye and skin protection during sanding, cleanup, and removal of drips.
- Inspect for smooth finish after each coat, compare value and address runs.
Table of Contents
- Introduction
- Key takeaways
- Why Trim Paint Performance Matters
- Types of Trim Paint and Selecting the Right One
- Cost Vs Value: What to Check Before Buying
- Prep and Tools Checklist for a Professional Result
- Tests to Run Before and After Painting
- Application Techniques for Flawless Trim
- Troubleshooting Common Problems and Fixes
- Maintenance, Cleanup, Safety and Project Planning
- Conclusion
- FAQ
Why Trim Paint Performance Matters
Trim finish sets the tone of a room and helps define its style. The level of sheen changes how light plays along mouldings, corners, and casings, influencing perceived height and contrast. A mismatch between sheen and room usage can make accents look either dull or garish. The choice of finish also signals durability in daily use, from door brushing to chair scuffs, and different trim materials respond differently to wear. Poor selections often reveal themselves as yellowing, dull sheen, or transfer from hands, signaling the need to reevaluate the plan before you buy.
Maintenance needs and recoat cycles hinge on finish choice, ease of cleaning, and stain resistance. Higher traffic areas benefit from finishes that resist scuffs without showing every mark, while easier-clean surfaces save time during upkeep. The wrong finish can drive up maintenance with frequent touch-ups or early recovery work. Quick, practical tests—odor, cleanability, smoothness, and compatibility with primers or water- versus oil-based systems—help you decide without committing to a guess. Use a simple, staged checklist to survey surfaces, select a sheen, test on scrap, confirm drying and curing expectations, and plan a refresh cadence as you finalize a trim-paint plan.
Causes of trim paint failures
Trim paint failures often start with poor preparation. Skipping sanding, not cleaning surfaces, or using incompatible primers can lead to trouble.
Moisture is another culprit. It can cause peeling and bubbling. Make sure your trim’s dry before painting.
Substrate movement—like wood expanding and contracting with humidity changes—can also wreck a paint job. Use flexible paints for high-movement areas.
Contaminated surfaces, like greasy kitchen cabinets, can cause poor adhesion and peeling. Always clean and de-grease first.
Common failure modes to recognize
Peeling paint usually means poor prep or moisture. Check for both before repainting.
Cracking often signals substrate movement. Flexible paints might help next time.
Yellowing usually points to incompatible primers or paints, or exposure to heat and sunlight. Switch products or add a UV-blocking primer.
Brush marks and scuffs are signs of high-traffic areas. Use durable, easy-to-clean sheens here, like semi-gloss or gloss.
Types of Trim Paint and Selecting the Right One
Trim paint comes in several broad families, and knowing the core differences helps you avoid regret after the first coat. Waterborne acrylics are common for interior trim due to easy cleanup and lower odor, while acrylic-alkyd hybrids aim to blend durability with smoother brushability. Oil-based paints offer durability and a hard finish on high-wear spots, though they carry stronger odor and longer cleanup. Urethane-modified options seek to combine the best of resin chemistry for resistance and gloss. Each category has its own strengths and tradeoffs in adhesion, stain blocking, and maintenance needs.
When choosing, look at practical realities like where the trim lives, how much traffic it sees, and what surfaces you’re dealing with. Consider adhesion and how well the product blocks stains, plus the available sheens and cure behavior. Match options to interior doors, casing, moisture-prone bathrooms, or exterior trim, and align with any historical or antique considerations. Use a simple decision framework that weighs primer compatibility, recommended sheen, and expected cure times to guide your selection, then run a quick test on site to confirm performance before committing to full coverage.
Pros and cons of major formulas
The four main trim paint types each have their own strengths and weaknesses. Here’s a quick rundown.
Pros
- Waterborne acrylic: Quick drying, low odor, easy cleanup with water.
- Acrylic-alkyd hybrids: Good durability, stain resistance, can be touched up quickly.
- Oil-based: Excellent adhesion, leveling, and stain-blocking. Long open time for better application.
- Urethane-modified: High durability, excellent mar and scuff resistance, ideal for high-traffic areas.
Cons
- Waterborne acrylic: May not be as durable or stain-resistant as other types. Can raise grain on wood surfaces.
- Acrylic-alkyd hybrids: Some may still have noticeable odor and longer drying times compared to waterborne options.
- Oil-based: Slow drying time, strong odor, difficult cleanup with harsh chemicals.
- Urethane-modified: Can be more expensive, may require professional application due to high VOCs.
Choose based on your project’s specific needs – durability, finish quality, and how much time/odors you can handle.
Sheen and finish choices
The sheen level of trim paint affects both its appearance and practicality. Here’s what to consider:
Flat or matte (sheen < 10%) – Good for hiding imperfections, but harder to clean. Ideal for low-traffic areas like bedrooms.
Satin (20-30% sheen) – Offers a balance between hide and cleanability. Great for most interior trim, especially high-traffic zones like hallways.
Semi-gloss (30-50% sheen) – Highly durable and easy to clean. Perfect for kitchens, bathrooms, and exterior trim that needs frequent washing.
High-gloss (>50% sheen) – Provides the most durability and easiest cleaning but highlights imperfections. Best suited for doors, cabinets, and other high-impact areas.
Environmental and VOC considerations
Trim paint’s environmental impact and odor are crucial factors, especially in enclosed spaces. Here’s what you need to know:
Low-VOC options (under 50g/L) emit fewer harmful fumes but may trade off with performance and cleanup ease. They’re ideal for indoor projects where ventilation is limited.
Waterborne acrylic and some acrylic-alkyd hybrids offer low-VOC formulations, making them eco-friendlier choices.
Oil-based and urethane-modified paints typically have higher VOCs, requiring better ventilation during application. They may also need specialized disposal methods due to their chemical makeup.
Always check local regulations regarding VOC limits and proper disposal procedures before starting your project.
Cost Vs Value: What to Check Before Buying
Define cost versus value for trim paint by looking beyond the sticker price to what you’ll actually use. Upfront cost matters, but so does coverage per quart, the number of coats needed, and how long the finish will last under daily wear. Long-term value often favors products with proven durability, lower maintenance needs, and easier cleanup. By framing the decision around practical project requirements, you avoid chasing discount hype that doesn’t deliver on performance. Use a simple, side-by-side comparison to visualize overall project cost and future refresh needs.
Label information and independent test indicators help you separate truth from marketing fluff. Read about drying behavior, hide per coat, stain resistance, scrubability, and fade resistance, and compare how different claims translate to real-world results. Decode common labels like alkyd vs latex, indoor vs outdoor, and VOC levels, then consider how prep, odor, and cleanup impact your workflow. For a quick, rational choice, calculate expected coverage, coats, and total material cost, and use a concise rubric to weigh odor, application ease, smoothness, and trim-material compatibility. Avoid hype by prioritizing third-party results and practical in-store checks.
Label checklist: what matters
Before you buy, check these label details to ensure the trim paint suits your project.
- Resin type: Check if it’s latex or alkyd. Latex is water-based, easier to clean up, and has lower VOCs. Alkyd dries faster but has stronger odors.
- Solids content: Higher solids mean better coverage and durability. Look for 30% or more.
- Recommended substrate: Make sure it’s suitable for your trim material – wood, PVC, metal, etc.
- Recoat/cure times: Faster drying means you can apply multiple coats in a day. But slower curing could lead to adhesion issues if not allowed to dry properly.
- Recommended primer systems: Some paints require specific primers for optimal performance and adhesion.
- Drying time: Faster drying means you can use the space sooner, but slower drying might mean better leveling.
- Hide/coverage: Better hide means fewer coats needed. Check ASTM D607 or EN 13300 test results.
- Stain resistance: Important for high-traffic areas and hard-to-clean spots. Look for AATCC RM-01 ratings.
- UV resistance: Essential for outdoor trims to prevent fading. Check ASTM G154 or EN 106 test results.
- Scrubability: High scrub resistance is crucial for high-traffic areas. Look for ASTM D2486 or EN 13300 test results.
- Fade resistance: Similar to UV resistance, but focuses on color retention over time. Check ASTM G154 or EN 106 test results.
Quick rule: The more you understand the label, the better you can match the paint to your job and expectations.
When it pays to splurge
Spending a bit extra on high-end trim enamels can be worth it in certain situations.
- High-traffic areas: Premium paints offer better durability and scrub resistance, making them ideal for heavily used trims like doors and cabinets.
- Complex profiles: High-end paints often have superior leveling properties, helping to achieve a smooth finish on intricate trim work.
- Spray-like leveling: Some premium paints are designed to mimic the smoothness of spray finishes, providing a professional look with brush or roller application.
- Long-term performance: Better quality paints often outlast cheaper alternatives, saving you money in the long run despite the higher upfront cost.
- Color vibrancy: Premium paints may offer richer, more vibrant colors that last longer than their budget counterparts.
- Ease of application: High-end paints often have better flow and self-leveling properties, making them easier to apply and reducing the risk of streaks or brush marks.
Quick rule: Don’t overspend on every room. Prioritize high-traffic areas and complex trim work for your premium paint purchases.
Prep and Tools Checklist for a Professional Result
Foundational surface readiness sets the stage for a flawless finish. Clean thoroughly to remove dust and grease, repair cracks, and remove loose paint so the new coat sticks well. Test for moisture or rot and seal knots or stains to prevent bleed-through. A solid prep baseline reduces rework and helps the topcoat perform as intended. Skipping steps here is a common source of delamination and uneven color, so treat prep as the project backbone rather than a chore.
Surface preparation specifics guide your next moves. Lightly feather edges, mask surrounding walls, and identify high-gloss areas that need abrasion for primer adhesion. Use a compatible caulk to seal joints and work the bead smoothly so it cures cleanly before painting. Pick primers that suit the trim material and paint type, and apply a thin, uniform coat in one direction to boost adhesion and stain-blocking. Have edgers, angled sash brushes, short nap rollers, and quality brushes ready, plus tape, scrapers, sanding blocks, and a dust mask for a smooth workflow.
Surface prep and priming best practices
Before you start painting, follow this checklist to ensure a smooth, even finish.
- Clean thoroughly: Remove dust, grease, and mold. A clean surface ensures paint adhesion.
- Repair cracks: Fill gaps with wood filler or caulk. Ignoring this can lead to visible imperfections in your finish.
- Remove loose paint: Scrape off any flaking or peeling paint. Leaving it on can cause bubbling and chipping.
- Test for moisture/rot: Use a moisture meter to check for dampness. Painting over rotten trim leads to quick failure.
- Seal knots and stains: Apply a knot sealer or primer to prevent bleed-through. Skipping this can result in unsightly marks on your paint job.
- Sand softly: Use fine-grit sandpaper (120-220) to smooth edges without gouging the surface.
- Abrade high-gloss areas: Lightly sand glossy spots with fine-grit sandpaper. This improves primer adhesion.
- Mask off surrounding areas: Protect walls and floors from paint drips using painter’s tape.
- Choose the right primer: Select a compatible primer for your trim material (wood, metal) and paint type (latex, oil).
- Apply primer evenly: Use a short nap roller or micro-porous roller to apply a thin, uniform coat in one direction.
Quick rule: Always prime before painting. It improves adhesion and seals the surface.
Tools that improve smoothness and workability
Selecting the right tools can make your trim painting job easier and more professional-looking.
- Edgers: Use for corners. They help create clean, sharp lines without overspray.
- Angled sash brushes: Ideal for cutting-in edges. Their angle allows for better control and less drips.
- Short nap rollers: Great for smooth surfaces. They provide even coverage with minimal texture.
- Micro-porous rollers: Perfect for semi-gloss or high-gloss paints. They leave no roller marks behind.
- High-quality brushes: Use for cut-in work. Synthetic bristles provide better paint flow and less streaking.
- Scraper: Helps remove loose paint or old caulk before priming.
- Sanding blocks: Ensure even pressure when sanding. This prevents gouging or over-sanding.
- Dust mask: Protect your lungs from sanding dust. It’s a simple safety precaution that shouldn’t be overlooked.
Quick rule: Match the tool to the task. Using the right tool makes painting trim easier and more efficient.
Tests to Run Before and After Painting
The goal of pre- and post-paint tests is to confirm adhesion, flow, leveling, and durability without guessing. A quick adhesion check helps identify problem areas early, reducing rework and wasted material. Document the results so you can compare products and methods across the job. This approach keeps you in control of quality from first coat to final finish. Use simple, repeatable tests to build confidence in your product choices and technique.
Adhesion tests involve a crosshatch or tape pull to reveal if the film holds or lifts. For flow and leveling, perform small dot-and-star tests and observe brush marks under different lighting. Toughness checks can be a light scrub or fingernail test on a cured area to gauge wear resistance. Plan your timing so surface prep, priming, and topcoats have appropriate cure windows, and keep a log of results for future projects. Use post-paint checks for adhesion re-checks, water exposure tests, and routine wear assessments to confirm long-term performance.
Adhesion and Tape Test
Before painting, check adhesion with a simple crosshatch test. Use a utility knife to score the surface into small squares, about 1/4″ each way.
Apply painter’s tape over the scored area and pull it off quickly at a 90-degree angle. If paint comes off, adhesion is poor. This could mean your primer isn’t right or you need better surface prep.
Repeat this test after full cure, usually 24-72 hours later, to ensure paint has properly bonded with the substrate.
Flow and Leveling Test
Before committing to a full coat, do a small brush-out. Dip your brush in paint, then stroke it onto the surface. Observe how the paint flows out.
Good flow means the paint spreads evenly without leaving streaks or gaps. It should self-level, evening out any brush marks as it dries. If not, consider a different product or adjust application conditions.
Check for proper drying behavior too. Paint should dry smooth and even, not sticky or tacky.
Durability Test
After paint has fully cured, perform a gentle scuff test to gauge real-world resistance. Lightly rub the surface with a soft cloth or your fingernail. Be careful not to scratch too hard.
If the paint scratches easily, it may not hold up well to daily wear and tear. Consider a more durable product or add a topcoat for extra protection.
You can also perform a thin-film peel test. Apply a piece of plastic sheeting, let it sit briefly, then pull it off. If the paint peels off easily, it’s not tough enough.
Application Techniques for Flawless Trim
Cutting in establishes the crisp edge that anchors a professional trim job. Choose the right tool for the profile—an angled sash brush or a small precision roller—and use steady, short strokes to lock in sharp lines. Maintaining a controlled angle helps you keep a straight edge along casing and corners without overloading the brush. Practice leads to consistent results, and a clean edge reduces touch-ups later in the process.
Tackling tight profiles requires patience and the right approach. Use tiny brushes for corners and joints, and rely on painter’s tape guidance only where it helps, not where it creates ridges. Manage laps by planning a wet edge and working from the outside in, alternating sides to minimize overlapping lines. Prevent drips and brush marks by loading the brush correctly, keeping it stiff, and lightly back-brushing for a smooth, uniform finish. Choose primers and coats with your surface in mind, and alternate between oil and water-based systems only when you’re comfortable with their behaviors across substrates.
Cutting in and handling corners/tight areas
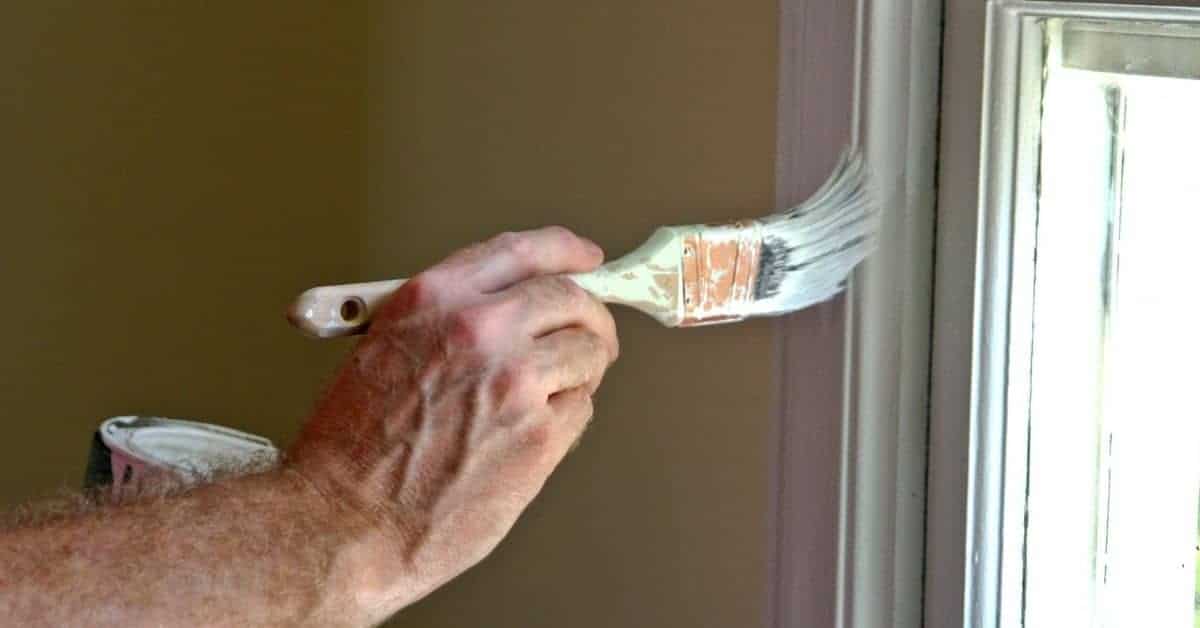
Start by choosing the right tool. An angled sash brush lets you cut in along trim edges with ease.
For tight spots, use a small precision roller or a tiny paintbrush. Work in short strokes, following the edge to maintain sharp lines.
When cutting in corners,
– Load your brush lightly.
– Hold it at a 45-degree angle.
– Use steady, short strokes, working from one corner to another.
To keep edges seamless,
– Work in sections, maintaining a ‘wet edge’.
– Don’t let paint dry before blending into the next section.
Brush and roller technique for a smooth finish
Load your brush about halfway. Too much paint causes drips, too little leaves streaks.
For a smooth stroke, use consistent pressure. Don’t press too hard or you’ll leave ridges.
When rolling,
– Use a high-quality roller cover.
– Work in ‘W’ or ‘M’ patterns to avoid lap marks.
– Apply light pressure, letting the roller do the work.
To minimize stipple,
– Tip off excess paint before rolling.
– Lightly back-roll to smooth out any texture.
Spraying and touch-up strategy
Spraying gives a factory-like finish. Use it for large areas or when a smooth, even coat is crucial.
To blend spray and brush/roller work,
– Spray first, then use a brush or roller to back-roll.
– Work in sections, maintaining a wet edge.
– Lightly touch up any visible edges with a small brush.
For touch-ups,
– Match the paint type and color exactly.
– Use a small, stiff brush for precise application.
– Work quickly to blend the touch-up into the surrounding area.
Troubleshooting Common Problems and Fixes
Diagnose like a pro by mapping symptoms to likely causes and deciding whether spot fixes or a full recoat is needed. Start with a quick surface inspection for moisture, contamination, or substrate issues that compromise the film. Prioritize fixes that restore adhesion and uniform appearance before applying new topcoats. A methodical approach minimizes wasted effort and keeps the project on track. Use a calm, systematic process to determine if you are dealing with cosmetic flaws or underlying material problems that require heavier remediation.
Surface assessment includes checking for moisture, weathered coatings, and compatibility with existing substrates. Look for rot, swelling, or dry areas that signal broader repairs. Cleaning steps should remove contaminants and re-introduce a clean surface for priming. Adhesion tests and primer compatibility checks guide you to the correct products. When in doubt, plan for patching, replacing damaged trim, or scaling back to a spot fix rather than a full recoat. Weather and application guardrails help you avoid mis-timed coats and poor results during DIY painting.
Fixing brush marks, drips and orange peel
Brush marks, drips, and orange peel are common painting issues that can be fixed with the right techniques. Start by letting the paint dry completely to avoid further damage.
For brush marks: Lightly sand the area using fine-grit sandpaper (220 or 320 grit) in the direction of the grain. Wipe off dust and apply a thin coat of glazing solvent, then recoat with paint, feathering the edges.
For drips: Scrape off excess paint while wet. Once dry, sand lightly, wipe clean, and touch up with paint.
For orange peel: Lightly sand using fine-grit sandpaper, wipe off dust, apply glazing solvent or a thin coat of primer, then recoat with paint.
Repairing adhesion failures and peeling
Adhesion failures and peeling can be caused by poor prep, incompatible materials, or moisture. Remove all failing paint using a scraper or heat gun.
Assess substrate/primer compatibility: Ensure the new primer is compatible with your trim material (wood, concrete) and any existing coatings. Perform an adhesion test on a small area before proceeding.
Prep for repainting: Lightly sand, wipe off dust, perform a moisture test (pinning or invasive tests if needed), and prime using the appropriate primer for your substrate.
Addressing yellowing, discoloration and staining
Yellowing, discoloration, and staining can be caused by oil contamination, smoke, or other substances. Identify the cause to choose the right solution.
Oil contamination: Clean the area with a degreasing agent, rinse, and let dry before priming and painting.
Smoke or other stains: Use a stain-blocking primer specifically designed for your stain type. Apply it according to manufacturer’s instructions, then paint as usual. Wait at least 24 hours between coats and allow adequate drying time (as per product guidelines) before repainting.
Maintenance, Cleanup, Safety and Project Planning
Cleanup and maintenance planning reduce the mess and speed up future refreshes. Set up ventilation and protect surrounding areas, ensuring surfaces are clean and patched before painting. A clear plan helps you stay organized and minimizes cross-contamination between rooms or materials. Treat cleanup as part of the workflow to keep everything ready for the next step rather than a postscript. Good planning makes the project feel less chaotic and more predictable.
PPE, ventilation, and safe handling are non-negotiables on a trim job. Use appropriate respiratory protection and eye/hand gear, and manage indoor air quality during the work. Store paints and solvents safely and dispose of waste per local rules. Drying and cure scheduling should reflect realistic timelines that account for humidity, temperature, and airflow. A well-structured plan includes sequencing, containment to minimize dust, contingency options for weather, and a final quality check to ensure tackiness, staining, or odor won’t compromise adhesion or durability.
Cleanup and disposal guidance
Water-based paints are easier to clean up. Use warm water, mild soap, and a sponge for brushes and rollers.
Never pour paint down drains or dispose of in regular trash. Check local regulations for hazardous waste disposal. Leftover paint can be hardened with kitty litter or sawdust before throwing away.
Solvent-based paints require mineral spirits or paint thinner for cleanup. Always use a well-ventilated area and follow safety guidelines on the product label.
Safety, odor control and ventilation
Wear a respirator, gloves, and eye protection when painting. Keep windows open or use fans for cross-ventilation.
Minimize occupants’ exposure to fumes by painting in well-ventilated areas or when they’re out. Consider using low-VOC paints if possible.
Never smoke, eat, or drink while painting due to the risk of solvent ingestion.
Scheduling, cure times and upkeep
Follow manufacturer guidelines for recoat windows. In humid conditions, allow extra drying time between coats. Trim should be touch-dry in 1-2 hours but may take 24-48 hours to fully cure.
Keep trim clean and dry post-painting. Avoid heavy traffic or knocking into wet paint. For long-term care, periodically wipe down with a damp cloth to remove dust and dirt.
Inspect your work regularly for signs of wear or damage. Touch up as needed to maintain the trim’s durability and appearance.
Conclusion
Protecting your investment starts with choosing the right paint and testing it where it matters. Do the prep, apply with steady technique, and check your results before proceeding to the full project to avoid costly mistakes and future damage.
First, verify you have the right trim paint for your surface, then inspect the area for adhesion, cleanliness, and proper drying conditions before you roll or brush a full pass. Check your tools, climate, and ventilation, then follow a simple sequence: wipe, sand or lightly scuff, prime if needed, mask edges, apply thin coats with even strokes, let each coat dry, and perform a quick test patch after each stage to confirm color, gloss, and adhesion are holding. Keep safety gear on hand, and test in a small area before wide use to prevent surprises.
Common mistakes to avoid include skipping surface preparation, overloading brushes or rollers, and rushing coats without adequate drying time. Always mask and protect adjacent surfaces, ventilate well, and avoid painting in extreme heat, cold, or humidity. If a patch test shows failing adhesion, or if the surface is cracked, loose, or damp, stop and reassess before continuing.
If the project scales beyond a simple refresh, or you encounter persistent problems like peeling, bubbling, or unusual material compatibility, it makes sense to call in a pro rather than push on. Stay focused, follow the checks you’ve learned, and you’ll finish with a sturdy, long-lasting result that looks right and performs well. You’ve got this—take it one step at a time and protect your work as you go.
FAQ
What should I expect to pay for trim paint and what affects the cost?
Prices vary by brand, finish, and the type of base. Look at the label for coverage per can and how many coats you’ll likely need. Check local stores for sales, but don’t buy the cheapest option if it means a poor finish or poor durability—read the manufacturer instructions for guidance.
What about paint odor and ventilation during trim painting?
Work in a well-ventilated area and use a mask rated for paint fumes. If odor is a concern, choose low-odor or waterborne options and follow the label for drying times. Leave doors open and use a fan to move air away from your breathing zone.
What cleanup options work best after trimming paint work?
Water-based paints clean up with soap and water, while oil-based ones need mineral spirits or an approved cleaner. Wipe spills promptly and cap cans tightly to prevent skin from forming on the surface. Always follow the product label for safe disposal.
How can I judge smoothness and finish quality, and test durability during the job?
Inspect the edge lines under good light and feel for even texture without grit. Run a light touch with a clean cloth to check for adherence and sheen. For durability, check the label for recommended cure times and perform a simple adhesion test after the paint has dried per instructions. If anything looks inconsistent, investigate with the manufacturer’s instructions or re-coat as advised.