
Introduction
The appearance of orange peel after rolling can be frustrating, but understanding the timeline and duration of fixes can help you plan your project effectively. This guide walks you through each step, from diagnosis to completion, ensuring you allocate enough time for a successful outcome.
Whether you’re tackling this as a DIY or hiring a professional, knowing how long each phase takes is crucial for scheduling and budgeting. Let’s dive into the timeline of fixing orange peel after rolling.
For the full guide, see Orange Peel After Rolling: Causes, Fixes, and When Spraying Is Easier.
The Step-by-Step Timeline to Fix Orange Peel After Rolling
Fixing orange peel involves several stages, each with its own duration. Here’s a detailed breakdown to help you manage your time effectively:
- Inspection and Diagnosis (15-30 minutes): Closely examine the affected area to determine the severity of the orange peel and identify any underlying issues.
- Preparation (30 minutes – 2 hours): Clean the surface, gather necessary tools and materials, and prepare the area for sanding or spraying. The duration depends on the size of the project and the chosen method.
- Sanding or Spraying (1-4 hours): Lightly sanding or spraying a small area can take around an hour, while larger projects may require several hours. Keep in mind that spraying might need additional time for masking and setup.
- Drying Time (2-24 hours): Allow the surface to dry completely before proceeding with touch-ups or recoating. Follow the manufacturer’s recommended drying times to ensure optimal results.
- Touch-up or Recoat (15 minutes – 1 hour): Once the surface is dry, apply a light coat of paint or concrete topping using your chosen method. This step may take longer if you’re addressing multiple troublesome zones.
- Final Inspection and Cleanup (30 minutes – 1 hour): After the touch-up or recoat has dried, inspect the surface for any remaining orange peel or imperfections. Clean up the area, removing any masking tape or protective materials.
The total duration of your project will vary depending on factors such as the size of the affected area, chosen method (rolling vs. spraying), and weather conditions. Allocating sufficient time for each stage will help you achieve a smooth, professional finish without rushing through steps.
Key takeaways
Proper preparation is key to saving time during the sanding or spraying phase. Ensure the surface is clean and dry before starting to avoid adding extra work later in the process.
- Inspect surface closely: orange peel varies by roller type, compound, and humidity.
- Clean and dry the wall before any sanding or re-rolling to avoid dust.
- Start with light sanding or a quick skim coat before full sanding.
- When spraying, test a small area and adjust pattern to match rolling finish.
- Re-roll or spot-prime troublesome zones instead of repainting whole wall.
- Safety: wear respirator, eye protection, and protect floors to prevent slips.
Table of Contents
- Introduction
- Key takeaways
- What Orange Peel Is and the Common Causes After Rolling
- How to Inspect and Accurately Diagnose Orange Peel Severity
- Immediate Fixes You Can Try Without Full Sanding
- Sanding and Smoothing Orange Peel — Safe Step-by-Step
- Re-Rolling Vs Spraying: When Spraying Is Easier and When to Stick with Rolling
- Tools and Materials Checklist for Fixing Orange Peel
- Preventive Best Practices to Avoid Orange Peel When Rolling
- Cost, Time, and When to Hire a Professional
- Conclusion
- FAQ
What Orange Peel Is and the Common Causes After Rolling
Orange peel is a textured surface that resembles the dimpled skin of an orange; it is a finish-level issue, not a structural defect in the substrate. The texture forms when coating flow and leveling are disrupted during application or drying, so the paint cures with small hills and valleys rather than a smooth film.
When rolling, several mechanisms can produce this effect: improper wet film thickness, roller nap or cover that traps texture, or environmental factors that change drying rate. Check your product label and the manufacturer’s instructions for recommended application conditions and compatible tools to narrow down the likely causes.
Surface tension and paint formulation
When you’re rolling on a coat of paint, the way it levels out or stays textured comes down to its chemistry and how it flows. Paint’s made up of pigments, binders, solvents, and additives – all working together to give you that smooth finish.
The key players here are:
- Viscosity: This is like the thickness of your paint. Too thick, it won’t level out; too thin, it’ll drip. Check your paint’s label for the right viscosity range.
- Surface tension: This is what makes paint bead up or spread out. Lower surface tension means better leveling. Some paints need a conditioner to lower this tension.
- Leveling properties: This is how well your paint smooths out after application. It’s affected by viscosity, surface tension, and the paint’s ability to re-wet (flow back together). Check manufacturer instructions for leveling additives if needed.
Now, here’s what you need to do:
- Check your paint’s label or manufacturer instructions for viscosity range and any recommended conditioners or additives.
- Ensure your roller cover is the right nap length for your surface – too long can hold too much paint, too short won’t hold enough.
- Apply paint in even strokes, working from one side of the wall to the other. Don’t over-roll or you’ll break the surface tension and create texture.
Application technique issues
Overworking your concrete can leave it looking like an orange peel. Here’s what to watch out for:
Too much rolling: You might think more is better, but over-rolling can cause the surface to rise and form those little bumps. Check your manufacturer’s instructions for recommended passes.
Not enough concrete in the hopper: If you’re under-loading, the finisher might struggle to spread it evenly. This can lead to thin spots that look like an orange peel when rolled. Keep an eye on your hopper and make sure it’s always at least half full.
Wrong nap or rolling speed/pressure: Using the wrong nap for your roller, or applying too much pressure, can leave marks on the surface. Check your nap size – usually, a 3/8″ to 1/2″ nap is good for concrete. And go easy on the pressure; you don’t want to push the concrete around too much.
Environmental and substrate factors
Orange peel isn’t always your paint’s fault. The weather and what you’re painting can cause it too.
Temperature is a big one. If it’s too hot (over 90°F/32°C) or too cold (under 50°F/10°C), you’ll get orange peel. Check your paint can’s label for its ideal temp range.
Humidity and airflow matter too. High humidity (over 70%) or strong winds can mess with your paint drying. Keep an eye on the forecast before you start painting.
The condition of your substrate (what you’re painting) plays a part as well. If it’s not properly prepared, you’ll get orange peel. So, check base compaction, fill any cracks or holes, and make sure it’s clean and dry before you start rolling.
How to Inspect and Accurately Diagnose Orange Peel Severity
Start with a visual and tactile walkaround under good light to map areas of light, moderate, and heavy texture; run your hand gently across the surface to feel the peaks and note whether the texture is uniform or isolated. Use a small mirror or flashlight at a low angle to reveal shadows that accentuate surface defects and compare affected areas to a known smooth section.
Differentiate orange peel from other problems by checking adhesion, looking for raised brush marks, and testing edges for wrinkling or flaking; if adhesion is questionable, follow the product data sheet for adhesion tests. When in doubt, consult the paint container directions or manufacturer guidance to confirm acceptable appearance tolerances and diagnostic steps.
Step-by-Step Process
Follow this clear, numbered sequence to inspect and accurately diagnose orange peel severity on your DIY project.
- Preparation: Gather a flashlight, magnifying glass, and safety gear. Ensure the surface is dry and clean.
- Safety first: Wear gloves and eye protection when handling paint or inspecting surfaces.
- Main inspection: Start at a distance to see overall texture, then move closer for detailed visual and tactile checks.
- Check angles: Inspect under different light angles and from various distances to assess severity.
- Final check: Document findings with photos, noting any areas of concern or confusion. If unsure, consult a professional.
Visual and Tactile Checks
Assess texture by eye and touch to understand the severity of orange peel.
Start by viewing the surface from a distance. Light orange peel might look like a slight, consistent texture, while heavy orange peel appears bumpy or uneven.
Move closer for detailed inspection. Run your fingers over the surface to feel the texture. Light orange peel feels smooth but textured, while heavy orange peel has pronounced bumps.
Check at different angles and in varying light conditions. Orange peel can appear more or less severe depending on the viewing angle and lighting.
Severity Indicators and When It Matters
Understand when orange peel is cosmetically acceptable or unacceptable for different finishes.
Flat or eggshell finishes: Light texture is usually acceptable, but heavy orange peel may require redoing the job. Even light texture can be noticeable in certain lighting conditions.
Semi-gloss finishes: Orange peel is less forgiving due to higher sheen. Even light texture might be unacceptable and need correction.
Remember, heavy orange peel is rarely acceptable, regardless of finish. It’s usually a sign that the paint or application technique needs improvement.
Cause-Mapping Checklist
Use this checklist to tie observed symptoms to likely causes, guiding your next steps in troubleshooting orange peel.
- Paint issues: Check paint formulation and surface tension. Incorrect formulation or low surface tension can cause orange peel.
- Application technique: Inspect roller cover condition, pressure applied, and rolling pattern. Poor technique can lead to orange peel.
- Environmental factors: Consider temperature, humidity, and air quality. Extreme conditions can affect paint curing and cause texture issues.
- Substrate problems: Check for contaminants, poor adhesion, or brush marks on the surface. These can mimic or exacerbate orange peel.
- Roller type: Ensure the roller cover is suitable for the finish and paint type. Using the wrong roller can cause orange peel.
Quick rule: If multiple factors are present, address them one by one to identify the root cause of your orange peel issue.
Immediate Fixes You Can Try Without Full Sanding
If the paint is still wet or tacky, gently back-roll with a properly loaded roller cover to help level the film—work a small test area first to avoid overworking the coating. For tacky paint, a light mist of appropriate solvent or water (only if the product allows it) can sometimes improve flow; verify this against the product label before trying.
For very mild orange peel, a careful wait for the paint to reach a specific dry feel described on the product data sheet followed by a single light back-roll can be enough to reduce texture. If these quick steps do not improve the finish, prepare for sanding or reapplication following the manufacturer’s surface preparation instructions.
Re-rolling and tipping while paint is workable
If you notice orange peel soon after rolling, don’t panic. You might still be able to save the job.
First, check if the paint film is still workable. Gently touch it with your finger. If it’s not tacky or sticky, it’s too late for reworking.
If it’s still workable, grab a clean roller cover and lightly re-roll the affected area. Use smooth, even strokes to level out any texture. This is called ‘tipping’.
Be gentle. Too much pressure can cause more orange peel or even push paint into the surface.
Flash coat or skim coat technique
For mild orange peel, a flash or skim coat might do the trick. This is a thin layer of paint applied over the textured surface.
Use a good quality paint with strong leveling properties. Thicken it slightly with a paint conditioner to improve flow and leveling.
Apply the coat using a high-quality roller cover, working in small sections. Let it level out on its own without re-rolling or tipping.
Be patient. The key is to apply a thin enough layer that it can level out without causing more texture.
When additives or retarders help — and when to check manufacturer guidance
Leveling additives or retarders can improve paint flow, helping to reduce orange peel. They slow down the drying process, giving the paint more time to level out.
However, not all paints are compatible with these additives. Always check the manufacturer’s recommendations before use.
If you’re unsure, start with a small test area. Apply the additive, let it sit for the recommended time, then roll on a thin coat of paint. Check for improvement before committing to the entire job.
Safety first. Always wear appropriate PPE when handling additives and follow manufacturer guidelines for safe use.
Sanding and Smoothing Orange Peel — Safe Step-by-Step
Begin by confirming the coating is fully cured per manufacturer guidance, then protect floors, trim, and fixtures and set up dust containment like plastic sheeting and a HEPA-filter vacuum attachment. Start with a grit appropriate for the severity listed in product guidance and use either hand sanding or a random-orbit sander; keep pressure light and check frequently to avoid sanding through the film.
Control dust by wet-sanding where allowed by the product instructions or by using a vacuum system hooked to your sander, and finish with progressively finer abrasives until the texture is reduced to the desired smoothness. Always wipe with a recommended cleaner and inspect under low-angle light before reapplying primer or finish coat, following the paint manufacturer’s recoat timeframe.
Step-by-Step Process
Follow these practical steps to safely sand and smooth orange peel.
- Preparation: Gather your tools – sandpaper, sanding block (if needed), tack cloth, vacuum or broom. Put on safety gear – gloves, goggles, dust mask.
- Inspect the surface: Check for any loose paint or debris. Use a flashlight to inspect edges and corners.
- Main work: Start with medium grit sandpaper (60-80) using long, steady strokes. Work in small sections. Switch to finer grit (120-220) for final smoothing.
- Check your progress: Feel the surface with your hands. Look for any missed spots or uneven areas.
- Cleanup: Vacuum or sweep up sanding residue. Use a tack cloth to wipe away any remaining dust. Inspect the surface one last time before priming or recoating.
Grit progression and what to check
Use this checklist when starting your sanding process.
- Paint type: Check if it’s latex, oil-based, or another type. Some require specific grits or sanding techniques.
- Cure time: Ensure the paint has fully cured before sanding to avoid damaging the surface.
- Grit progression: Start with 60-80 grit for heavy orange peel, then progress to 120-220 grit for final smoothing.
- Sandpaper condition: Check if it’s clogged or worn out. Replace as needed.
Quick rule: Always start with the coarsest grit needed, then progress to finer grits. Never skip grits or you’ll risk damaging the surface.
Hand-block vs. power sanding and technique tips
Both hand-block and power sanding have their uses. Choose based on your comfort and the job’s requirements.
Hand-block sanding is great for small areas and detailed work. Use long, steady strokes, following the grain of the paint. Apply even pressure to avoid creating gouges.
Power sanding with an orbital machine is faster but requires more control. Use light pressure and let the machine do the work. Move it in a figure-eight motion to avoid swirl marks.
Clean-up, tack-cloth, and prep for recoat
Proper cleanup ensures a smooth final finish.
Use a vacuum or broom to remove sanding residue. Then, use a tack cloth dampened with water (for latex paint) or mineral spirits (for oil-based) to wipe away any remaining dust. Inspect the surface one last time for any missed spots.
Tip: Before priming or recoating, ensure the surface is completely dry and free of any contaminants.

Re-Rolling Vs Spraying: When Spraying Is Easier and When to Stick with Rolling
Spraying can deliver a more uniform, lower-texture finish faster on large areas, but it requires setup, masking, and matching material thinning and tip sizes—check manufacturer instructions for spray compatibility and thinning recommendations. Rolling remains practical for small areas, touch-ups, and situations where overspray or equipment logistics make spraying impractical.
Choose spraying when a smooth, factory-like finish is the goal and you can control overspray and environmental conditions; choose re-rolling if the area is small, you lack spraying experience, or the product data sheet discourages atomizing the coating. Weigh expected finish quality against prep time, cleanup, and required equipment before changing methods.
Advantages of spraying for leveling and speed
Spraying paint offers a more uniform, level film compared to rolling. It’s especially useful when you want a smooth, even finish.
Speed is another advantage. Spraying can cover large areas faster than rolling, saving you time and effort.
However, keep in mind that spraying requires proper masking and setup to prevent overspray. It’s not as simple as dipping a roller into a tray.
When re-rolling is appropriate and cost-effective
Re-rolling is simpler and more economical in certain situations. For instance, if you’re just touching up small repairs or working in tight spaces.
It’s also a good option when sheen tolerance is higher. Some paints look fine with slight imperfections that would show up under a glossier finish.
Plus, rolling requires less setup than spraying. You don’t need to worry about masking off areas or dealing with overspray.
Decision factors: size, finish, access, and cleanup
Before you decide between rolling and spraying, consider these practical factors:
Size matters. Spraying is generally better for larger areas. If it’s a small room or a specific repair, rolling might be more efficient.
Think about the finish sheen you want. Spraying tends to give a smoother, glossier look. Rolling can leave slight texture, which might be desirable in some cases.
Consider access and cleanup. If you need to move furniture or have ventilation issues, rolling might be easier. But remember, spraying requires thorough masking and cleanup of overspray.
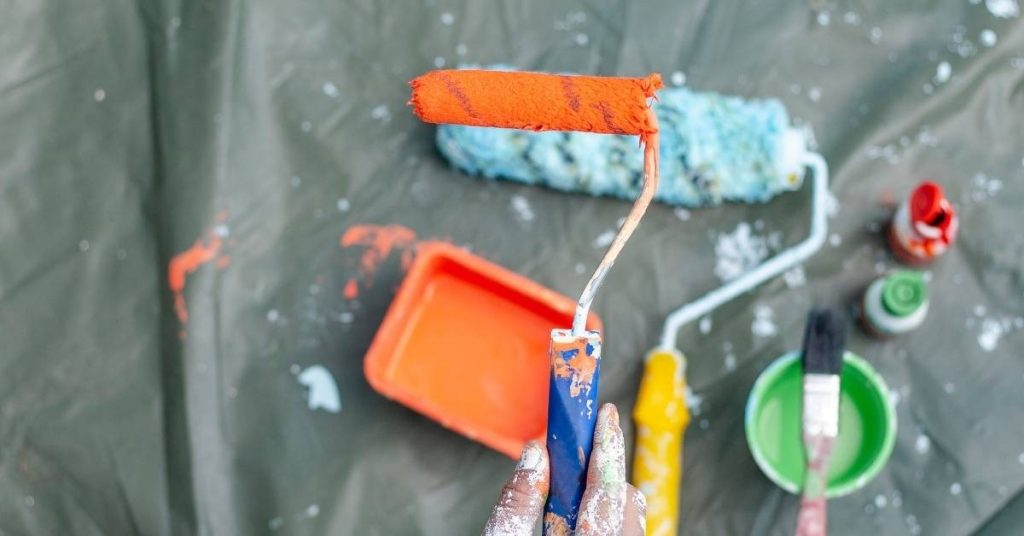
Tools and Materials Checklist for Fixing Orange Peel
Gather compatible roller frames, covers of appropriate nap, sandpaper or abrasive pads in a range of grits, and sanding tools or blocks that suit the area and severity; confirm cover material and grit choices against the paint manufacturer’s recommendations. Include spray tips, sprayer type, or compatible solvents only if the product data sheet allows spraying or thinning.
Also pack protective gear (respirator rated for the materials, eye protection, gloves), drop cloths, masking supplies, a HEPA vacuum or dust containment, and cleaning solvents listed on the product label. If uncertain about tool or material compatibility, consult the product instructions or manufacturer’s technical data sheet before using them.
Rollers, covers, and application tools
Before you start rolling, make sure your tools are up to the task. Here’s a quick checklist.
- Nap length: Choose based on paint type – 1/2″ for latex, 3/4″ for oil-based.
- Cover material: Microfiber or high-density foam for smooth surfaces. Lambswool for textured.
- Frame quality: Good frames reduce hand fatigue and improve control.
- Extension pole: For high ceilings, choose one that’s sturdy yet lightweight.
- Liner tray: For easy paint transfer and reduced mess.
- Roller covers: Buy new ones for each job to avoid texture issues.
- Frame screws: Tighten them before use, loose screws can cause lines.
- Paint condition: Stir paint well and check consistency before rolling.
Quick rule: Invest in quality tools. They’ll save you time and effort in the long run.
Sanding, smoothing, and polishing supplies
When orange peel happens, here’s what you need to smooth things out.
- Sandpaper grit: Start with 120-grit for heavy texture. Progress to 220-grit for final smoothing.
- Sanding block: For even pressure and consistent results.
- Palm sander: For large areas, choose one with variable speed control.
- Power pole sander: For high ceilings, use a lightweight model.
- Polishing compound: For fine sanding and buffing out minor imperfections.
- Steel wool: For light touch-ups and final smoothing.
- Tack cloth: To remove dust before recoating.
- Safety gear: Goggles, gloves, and a respirator for sanding.
Quick rule: Always start with the coarsest grit needed. Sanding too fine initially can cause more texture.
Additives, primers, and paint considerations
Before you pick up your roller or sprayer, consider these factors to ensure a smooth finish.
- Primer: Use one that’s compatible with your paint type – latex or oil-based.
- Leveling additives: Add to paint for better flow and reduced texture. Check manufacturer guidelines.
- Paint sheen: Higher sheens show more imperfections, so use a lower sheen for problem areas.
- Paint brand: Stick with one brand for consistency in results.
- Temperature and humidity: Check the manufacturer’s recommendations for application conditions.
- Surface prep: Ensure surfaces are clean, dry, and free of dust before painting.
- Paint coverage: Estimate needed paint based on surface area and coverage rate.
- Cleaning supplies: Have mineral spirits or paint thinner for cleaning tools.
Quick rule: Always check product labels. Incompatible products can cause more problems than they solve.
Preventive Best Practices to Avoid Orange Peel When Rolling
Start with surface prep that the paint manufacturer specifies—clean, dry, and properly primed surfaces promote good flow and adhesion. Use the recommended roller nap for the paint and substrate, keep a consistent, proper wet edge, and avoid overworking the paint; follow the product label for thinning and application environment limits.
Control temperature, humidity, and airflow to match the product’s advised conditions so the coating has time to level before it skins over. Maintain roller covers clean during the job, reload frequently to keep even film thickness, and check the manufacturer instructions for any special handling tips that reduce texture risk.
Proper roller loading and application technique
Start by dipping your roller into the paint, ensuring it’s evenly coated. Avoid overloading as excess paint can lead to orange peel.
Work in ‘M’ or ‘W’ patterns, overlapping each stroke by about half. This helps ensure even coverage and prevents visible lines.
For touch-ups, use a light touch with the roller’s edge. Too much pressure can cause texture.
Environmental controls: temperature, humidity, and airflow
The ideal painting temperature is between 70-85°F (21-29°C). Too cold or too hot can affect paint leveling.
Keep humidity below 50%. High humidity slows drying time and can cause issues.
Ensure good airflow. Open windows, use fans, or set up ventilation to help the paint dry evenly.
Paint thinning, mixing, and compatibility checks
Thinning paint can help it spread easier. But be cautious – too thin and you’ll lose coverage, too thick and you’ll get texture.
When mixing paints, ensure they’re compatible. Different types don’t always blend well. Always check the manufacturer’s instructions first.
Stir your paint thoroughly. This helps distribute any additives evenly and prevents lumps or streaks.
Cost, Time, and When to Hire a Professional
Decide based on area size, severity of texture, access, and your comfort with sanding, spraying, or extensive prep; DIY repairs can keep costs down for small, localized problems, while large or high-quality finishes may justify hiring a pro. Factor in time for drying, sanding, masking, and cleanup—confirm expected cure and recoat windows on the product data sheet when planning the schedule.
Consider calling a professional if the job requires specialized spraying equipment, extensive dust control, or if the finish needs to match surrounding work at a high standard. When safety or complex logistics are involved, a contractor experienced with the specific coating and local conditions can be the safer, more efficient choice.
What affects time and labor for fixes
The size of the area with orange peel is the first factor affecting time. Larger surfaces mean more rolling, sanding, and polishing.
Severity also plays a role. Light texture may need just one round of fixing, while heavy orange peel could require multiple passes.
Drying and cure times between coats add to the total job time. Plan for these breaks in your schedule.
Preparation work—cleaning, sanding, or priming—also eats into labor hours. The more prep needed, the longer the fix will take.
Clear signs you should call a professional
If extensive texture covers multiple rooms or an entire floor, it’s likely beyond a DIYer’s scope. Pros have the equipment and experience to tackle large areas.
Specialized finishes like metallic or textured paints can be tricky. A pro will know how to handle these without causing more damage.
Lack of necessary tools shouldn’t deter you from fixing orange peel, but it should make you consider hiring a pro. They bring their own gear.
If the orange peel is due to underlying issues like poor surface preparation or incompatible paint, it’s best to call in an expert who can diagnose and fix the root cause.
Questions to ask and what to expect from a contractor
When getting quotes, ask about surface preparation. A pro should include sanding, cleaning, and priming in their estimate.
Inquire about warranties or guarantees. Reputable contractors stand behind their work.
Ask about their experience with leveling finishes. They should be able to provide references or examples of similar jobs they’ve done.
Expect the contractor to inspect your surfaces, take measurements, and discuss any additional prep work needed before starting the job. They should also explain their process and expected timeline.
Conclusion
Fixing orange peel isn’t guesswork if you follow steady steps and protect the surface and you. With the right approach, you can get a durable finish that looks clean and professional.
First, inspect the paint job, clean the area, test your chosen method on a small patch, then decide whether rolling again or spraying makes the most sense. Do the immediate fixes you can safely try, then plan for sanding and smoothing only if you’re confident you can control the material and the dust. Always recoat in proper temperature and humidity, cure fully, and implement the preventive steps you’ll use next time to avoid a repeat problem.
Common mistakes to avoid include over-sanding or digging into Primer, rushing the dry times or skipping ventilation, and applying coats that are too thick or uneven. Safety rules are simple: wear a good respirator and eye protection, cover nearby surfaces, test on a small area first, and never spray or sand in a poorly ventilated space or when temperatures are out of range. If you notice bubbling, moisture behind the film, or the problem is widespread, back off and reassess before continuing.
If the defect covers a large area, you suspect a moisture issue, or you’re unsure about the substrate or sprayed finish, don’t push past safe limits. A pro can save you time and money by identifying root causes and delivering a reliable, long-lasting result. Stay confident, follow the steps, and you’ll finish strong and avoid costly mistakes.
FAQ
How do I tell if the orange peel I’m seeing can be fixed with light touch‑ups or needs a full recoat?
Start by inspecting the depth and uniformity of the texture. If it’s shallow and consistent across the surface, light touch‑ups may help; if it’s deep or uneven, plan for more extensive work. Check the paint label or manufacturer instructions for guidance on recoat windows and sanding requirements.
How do I decide between sticking with rolling or switching to spraying on a project?
Consider how much texture remains after initial fixes and how smooth you need the finish. Spraying can give a uniform coat but requires proper technique and setup. Always follow product instructions and local rules for masking, ventilation, and overspray control.
What spraying mistakes commonly create orange peel and how can I avoid them?
Avoid spraying too close, too far, or with inconsistent passes. Improper spray pressure or unprepared surfaces can cause texture issues. Check the spray equipment manual and use the recommended settings for the product you’re applying.
What should I look for on product labels or datasheets before attempting any fix?
Read the manufacturer’s instructions for application, wait times, and compatibility with primers and coatings. Look for surface prep notes, recommended temperatures, and any safety or ventilation requirements. If in doubt, verify with the supplier or local rules before proceeding.