
Introduction
Embarking on a lightweight concrete project? Understanding the timeline and duration is crucial to ensure your project stays on track. This guide walks you through each step, from planning to curing, so you can complete your project efficiently and achieve excellent results.
The duration of a lightweight concrete project depends on various factors such as project size, weather conditions, and your familiarity with the process. By following this timeline guide, you’ll gain a clear understanding of how long each stage takes, helping you plan your project effectively.
Lightweight Concrete DIY Timeline: Step-by-Step Duration Guide
The duration of a lightweight concrete project can vary greatly depending on the size and complexity of your project. Here’s a step-by-step timeline guide to help you understand how long each stage takes, from planning to completion.
- Planning & Preparation (1-3 days): Research materials, gather tools, and prepare forms. This stage can take longer if you’re new to the process or working on a complex project.
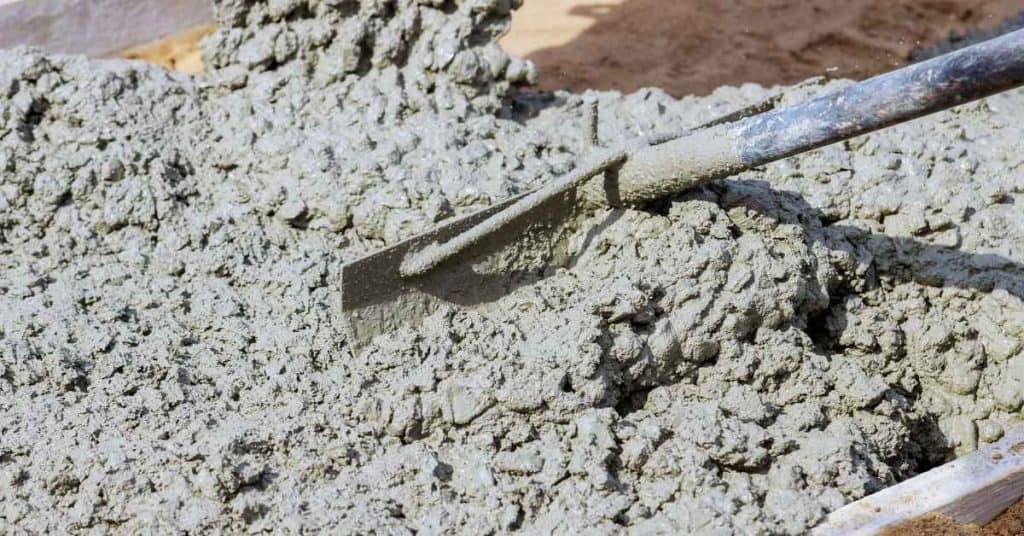
- Mixing Lightweight Concrete (0.5-2 hours per batch): The mixing duration depends on your chosen method (hand mixing or using a mixer) and the size of your batches. Allocate more time if you’re new to mixing concrete.
- Application & Finishing (1-4 days): The application duration varies based on project size, complexity, and weather conditions. Larger projects may take longer, while simple pours can be completed in a day or less.
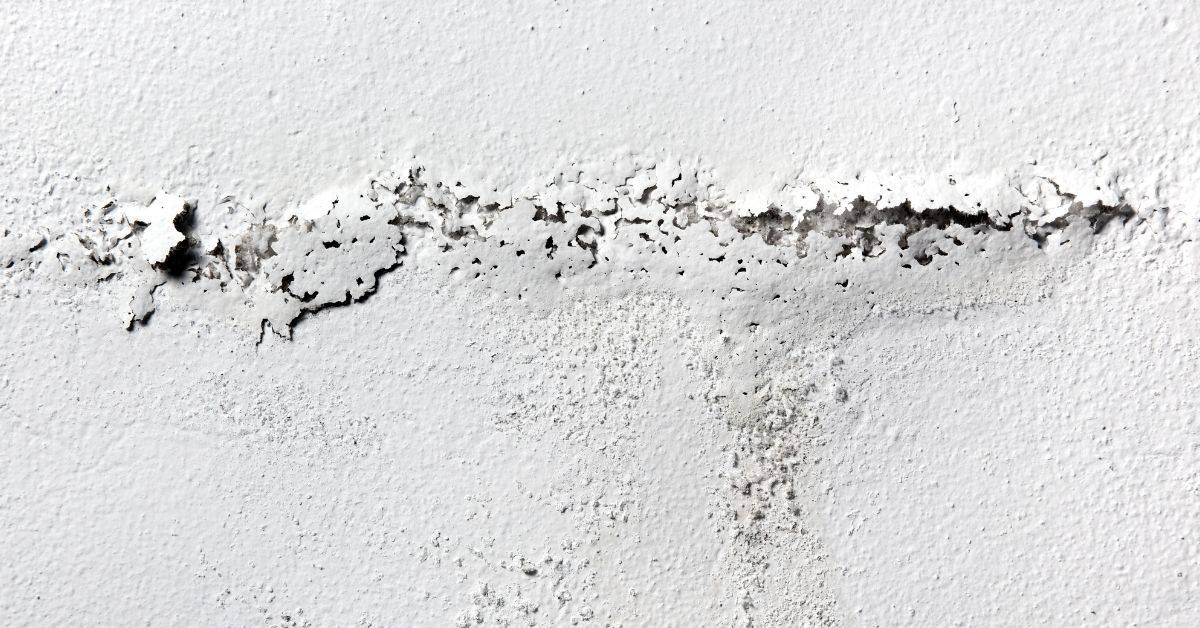
- Curing (7-28 days): Curing is the most time-consuming stage, as it requires consistent moisture and temperature control. The curing duration depends on the concrete mix, weather conditions, and your project’s specific requirements.
By understanding these timeline estimates, you can better plan your lightweight concrete project, allocate resources effectively, and ensure a successful outcome.
Key takeaways
The planning stage significantly impacts the overall project duration. Taking the time to prepare meticulously will help prevent delays during the mixing, application, and curing stages.
- Lightweight concrete reduces structural load but preserves strength with suitable aggregates.
- Choose foam, expanded shale, or perlite mixes for your project size.
- Mix ratios require precise water control to avoid premature drying and cracking.
- Use compatible buckets and mixers to ensure uniform distribution and air content.
- Plan curing with damp covering for at least seven days to prevent cracking.
- Compare costs against standard concrete per cubic meter for accurate budgeting.
- Prepare formwork meticulously and seal joints to avoid leaks and misalignment.
Table of Contents
- Introduction
- Key takeaways
- What is lightweight concrete and common types
- Benefits and limits for DIY projects
- Practical next steps and trusted sources
- Step-by-step DIY mixing and ratios
- Application methods and finishing techniques
- Planning, cost comparison, and job prep
- Common mistakes, troubleshooting, and pro tips
- Safety, curing, and environmental impact
- Conclusion
- FAQ
What is lightweight concrete and common types
Lightweight concrete is a concrete mix that uses lower-density aggregates or foaming to cut weight compared with standard concrete. This keeps handling easier, reduces the load on forms and structures, and changes how it cracks and dries under vibration. Densities vary by type, and the exact numbers come from the product label or datasheet—check there for what you’re buying; in practice you’ll notice it’s noticeably lighter than normal-weight concrete.
The main types you’ll see are expanded clay or expanded shale; expanded perlite or vermiculite; lightweight aggregate concrete; foam concrete; and aerated concrete. Each type is made differently and is best suited to particular tasks: non-structural fills, lightweight structural elements, insulation, or easy-to-handle pours, with regular care on curing and moisture behavior. For DIY projects, plan for lighter tool load, altered slump and finish, and potential cost versus benefit; check the label for mixing ratios, compatibility with formwork, and any limitations for your project.
Materials that make it “lightweight”
The materials you choose for lightweight concrete significantly affect its density, strength, and insulation properties. Here’s a breakdown of the key components:
- Expanded clay/shale: Used in non-structural fills; look for densities around 1000 kg/m3; avoid overwatering to prevent cracking.
- Expanded perlite/vermiculite: Ideal for insulation and lightweight structural elements; check density ranges from 450–700 kg/m3; ensure proper mixing to avoid clumping.
- Aerated concrete: Made with foaming agents; densities around 600 kg/m3; watch for uneven curing due to air pockets.
- Foam concrete: Uses foam as the main lightweighting agent; density ranges from 500–1200 kg/m3; ensure consistent foam distribution to maintain strength.
- Lightweight aggregate concrete: Incorporates expanded aggregates like pumice or scoria; densities typically between 800–1400 kg/m3; avoid using too much water, which can lead to weak bonds and poor performance.
Lightweight vs normal concrete — performance overview
Lightweight concrete offers several advantages over traditional concrete but comes with trade-offs. It typically has lower compressive strength, making it less suitable for high-load applications.
However, its thermal insulation properties are superior, reducing heat transfer and energy costs. This makes it ideal for walls and roofs where weight is a concern or where additional insulation is needed.
The lighter density also means easier handling on site but can lead to higher risk of cracking if not properly mixed or cured. Normal concrete, in contrast, offers greater durability and strength, making it the go-to choice for structural elements like foundations and beams.

Benefits and limits for DIY projects
Lightweight concrete can make DIY projects easier by reducing the amount you lift, simplifying formwork, and often giving better insulation and faster placement for non‑structural work. You’ll notice it carries less weight and can be easier to handle, but it does have real limits: it’s not a drop‑in replacement for concrete in structural elements without proper engineering and approval, and it may require special curing and moisture control to perform well. Expect lower strength for load‑bearing uses and be aware of potential compatibility issues with embeds or rebar you already plan to use.
This matters because choosing lightweight concrete is about matching the job to the material, not chasing convenience at the cost of safety or durability. For DIYers, the benefits show up in easier handling, better thermal or acoustic insulation, and quicker work on decks or interior non‑structural elements, while the limits guide you to avoid risky applications. Use a simple decision checklist—project type, required strength, local permitting, climate and curing capabilities, available tools, and budget—and consider ready‑mix blends for consistency or a carefully planned DIY mix with good curing practices if you proceed.
Best DIY-friendly applications
Lightweight concrete shines for projects where handling and insulation matter more than sheer strength. Think garden planters, non-load-bearing retaining walls or blocks, screeds under flooring, roof insulation layers, and landscaping features like walkways.
The lighter weight means less strain on your back when lifting and placing materials. Plus, it sets faster, making it a great choice for quick turnaround projects where time is tight. For instance, if you’re adding an insulated layer to the attic or a new deck that needs to be up fast, lightweight concrete can save you days.
Another perk: its lower dead load means less stress on existing foundations and structures. This makes it ideal for DIYers working with older homes where structural integrity is already a concern. Just remember, while it’s great for these applications, don’t use it in places that need high compressive strength or resistance to heavy loads.
When NOT to use lightweight concrete
Lightweight concrete isn’t a one-size-fits-all solution. It’s not suitable for structural applications where high compressive strength is critical, such as load-bearing walls or foundations. If your project involves supporting significant weight or carrying heavy loads, stick with conventional concrete.
Also avoid using it in areas exposed to harsh weather conditions or high abrasion, like driveways or patios that see a lot of foot traffic and vehicle use. The lower density makes it less durable under such circumstances. Always check local building codes and get professional advice if you’re unsure about the suitability for your specific project.
Remember, while lightweight concrete offers many benefits in terms of handling and insulation, its limitations are clear when it comes to structural integrity and durability. Use it wisely by choosing projects that align with its strengths and avoiding those where conventional concrete is a must.
Practical next steps and trusted sources
Here’s the practical starter kit and workflow for lightweight concrete DIY batches: you’ll need a mixer, trowels, floats, a wheelbarrow, and molds, plus basic safety gear, plus the right lightweight cement options with compatible dosages. Have a compact batching plan in mind and confirm a small-batch target volume and mixing sequence by checking the product labels and datasheets rather than guessing.
This matters because using the right materials and a sane workflow reduces waste, improves finish, and helps you catch problems early. You’ll learn where to source reliable components locally or online, how to read labels for cement type, aggregate or foam agent, and admixture roles, and why trusted standards and sources matter. A simple QA routine—setup, curing, slump or surface checks, mold release, and a quick troubleshooting guide—keeps a DIY project moving without surprises, and it gives you a clear path to credible, home-safe results.
Recommended tools and substitutes for DIYers
You don’t need a full pro setup to mix lightweight concrete. Here’s what you’ll need:
- Mixer: A small electric drill with a paddle attachment works well. If you can, rent a cement mixer for larger batches.
- Trowels: Get one float trowel and one steel trowel. Floats smooth out the surface while steel trowels give it a hard finish.
- Wheelbarrow: Use this to move materials around your site. A small wheelbarrow is fine for DIY projects.
- Molds: Buy or make wooden forms that fit your project needs. Make sure they’re sturdy and level.
- Safety gear: Always wear gloves, goggles, and a dust mask when mixing concrete. A hard hat isn’t necessary but can be good for protection from falling objects.
Material specs and how to read product labels
The right materials make all the difference in lightweight concrete. Here’s what to look for:
- Density: Check the density on the label, usually given as kg/m³ or lb/ft³. Lower numbers mean lighter concrete.
- Compressive strength: Look for this number, which tells you how strong the mix is under pressure. Higher values are better but not always necessary for DIY projects.
- Mix ratio: The label should give a water-to-cement ratio. Stick to it closely or your concrete won’t set right.
Step-by-step DIY mixing and ratios
This section covers two common DIY mixes: lightweight aggregate concrete (LWA) and foam concrete, with clear, step-by-step instructions for mixing, the order of operations, and what a workable batch should look like. You’ll find guidance on target consistency, sample batch sizes, and how to avoid common problems during mixing. No fluff—just what you need to get a solid, usable mix.
Understanding the right mix for your project helps you decide between blocks, slabs, or decorative pours, and it saves you from costly do-overs. You’ll learn simple field checks, safe mixing practices, and practical tips to keep foam stable and water balanced, so you finish with a durable surface rather than cracked or washout material.
Step-by-Step Process
This sequence guides you through the process of mixing lightweight concrete, ensuring safety and quality from start to finish.
- Check equipment: Ensure your mixer is clean and in good working order. Why: Prevent contamination or mechanical issues.
- Weigh materials: Measure out cement, LWA (or foam components) accurately using a scale. Quick check: Double-check weights against your recipe.
- Mix dry ingredients first: Combine cement and aggregates in the mixer without water for 30 seconds to ensure even distribution. Why: Avoid clumping and segregation.
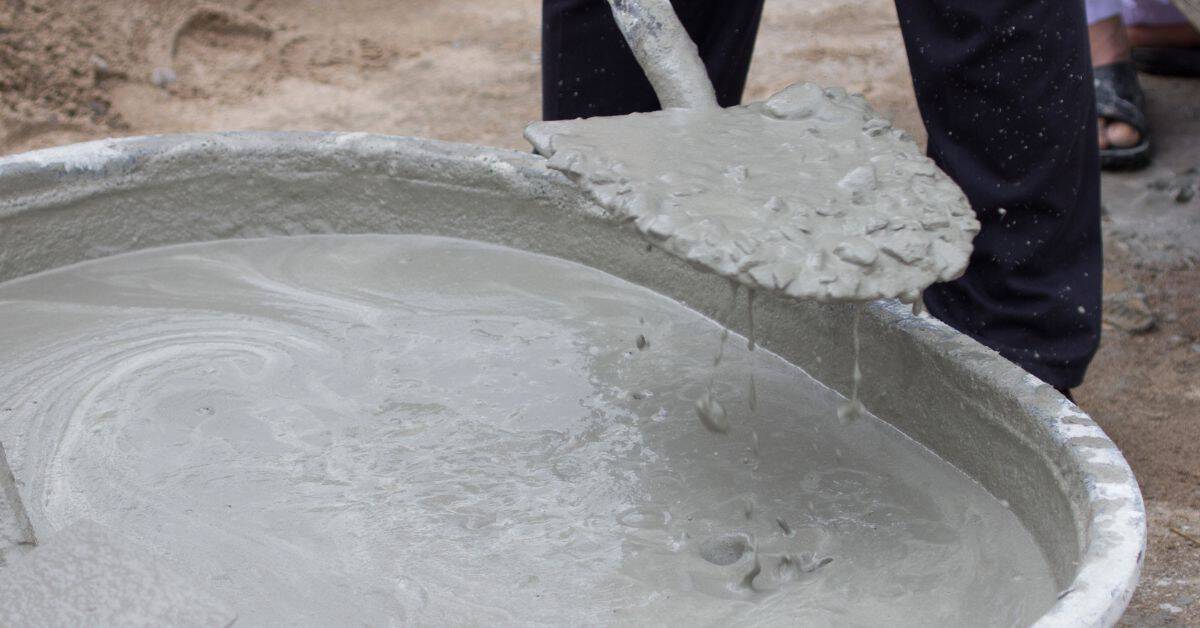
- Add water gradually: Start with half of the recommended amount, mix for another minute, then add more as needed until you reach a workable consistency. Quick check: Test slump or flow to see if it meets your target.
- Mix thoroughly but not excessively: Aim for 3–5 minutes total mixing time to ensure uniformity without over-mixing which can cause air entrapment. Why: Over-mixing weakens the concrete and reduces its strength.
- Pour and finish immediately: Transfer mixed concrete into forms or pour areas quickly, finishing within 15 minutes of mixing for best results. Quick check: Check surface smoothness and level before setting.
Mixing Lightweight Aggregate Concrete (Hand and Mixer)
To mix a small batch of lightweight aggregate concrete, start by measuring out 5 gallons of dry materials. Use a ratio of 1 part cement to 2 parts LWA.
Begin with the mixer on low speed, adding the cement first followed by the LWA. Mix for about 30 seconds to ensure even distribution before gradually adding water. Aim for a consistency that is workable but not too wet.
Mixing should take around 4 minutes total. Check the mix’s workability with a slump test; it should be between 2 and 5 inches. If too stiff, add more water in small increments until you reach the right consistency.
Making Foam Concrete with a Portable Foam Generator or DIY Foam
To make foam concrete, start by preparing your foaming agent. Mix it at a concentration of 1 part agent to 9 parts water for best results.
Use a portable foam generator to create the foam, aiming for a ratio of 0.5 liters of foam per kilogram of cement. If using DIY methods, ensure you have a consistent and stable foam layer before mixing with cement.
Mixing should begin by adding dry materials (cement) first into your mixer, followed by the foam. Mix on low speed for about 30 seconds to distribute evenly, then gradually add water as needed until workable consistency is reached.
Application methods and finishing techniques
This section covers how to cast lightweight concrete into molds, pour for screeds and slabs, and finish it up with troweling, curing, and how to join it to normal concrete. You’ll also learn practical texture checks to gauge proper consolidation and surface texture as you work through each step.
Use this as a practical workflow: plan formwork and release strategies, manage edging and finish texture, and keep an eye on how the material firms up during curing. You’ll see why proper consolidation, consistent moisture, and clean joints matter for durability and a smooth, walkable finish.
Casting small projects (planters, blocks, forms)
When casting lightweight concrete into molds for smaller projects like planters or decorative blocks, start by preparing your formwork. Use a release agent to ensure easy demolding and clean surfaces. Mix the concrete with water until it reaches a slump of 4-6 inches, which is ideal for workability without being too soupy.
Vibration isn’t always practical or necessary for small molds, so focus on thorough compaction by hand tamping or using a vibrator if space allows. Aim to fill the mold in layers no thicker than 3 inches and tamp each layer firmly but gently to avoid segregation of aggregates. Let it set up overnight before demolding.
After removing from the form, keep your castings moist for at least 7 days. This ensures proper curing and strength gain. Inspect surfaces regularly; any air voids or uneven textures can be smoothed out with a trowel while still damp.
Laying lightweight screeds and insulation layers
For laying lightweight concrete as screed or insulation layers, start by preparing the substrate. Ensure it’s clean, level, and free of debris. Use a 1/4-inch plywood sheet to check for any low spots that need filling with mortar.
The recommended thickness varies but typically ranges from 2-3 inches for screeds and up to 6 inches for insulation layers. Reinforce these areas with wire mesh or rebar at the bottom third of your pour depth, especially in larger spans where thermal cracking can occur.
During curing, keep the concrete moist and protected from direct sunlight and wind drafts. Use plastic sheeting or curing compounds to maintain humidity levels. Allow at least 24 hours before walking on it and up to a week for full strength gain depending on conditions.
Planning, cost comparison, and job prep
We’ll cover lightweight concrete options, how to estimate material needs, and a simple weekend-friendly plan for small crews. You’ll learn when foamed, aerated, or lightweight aggregate mixes fit DIY projects and how to account for slab vs. wall thickness, waste factors, and basic mix ideas for lightweight options. Plan includes clear steps for forms, reinforcement, and curing windows so you can batch or premix and stay on schedule.
This matters because lighter mixes can ease handling, reduce form and labor costs, and speed up your timeline without sacrificing durability. You’ll gain practical context for material sourcing, on-site batching vs. premix, and a straightforward prep and safety checklist to avoid cracking and moisture issues. Always check the product label or datasheet for specifics and follow your local rules and weather considerations.
Quick cost-per-project examples
Let’s look at two common DIY projects to understand the costs involved with lightweight concrete. For a small planter box measuring 2 cubic feet, you’ll need around 0.5 bags of lightweight mix and some basic tools like a trowel and mixing bucket. The total cost can range from $15 to $30 depending on where you buy your materials.
For a more substantial project, consider insulating a 20 square foot roof area with a layer of lightweight concrete at 4 inches thick. This will require approximately 6 cubic feet of material and additional supplies like reinforcing mesh and moisture barriers. The total cost for this larger job can range from $75 to $150.
Remember, these estimates include labor savings due to the lighter weight of the materials, making it easier for DIY homeowners to handle without needing heavy machinery or extra hands. Always factor in a waste allowance and any additional additives you might need for your specific application.
Site prep and logistics for a smooth DIY pour
Before pouring lightweight concrete, make sure the site is ready. Clear away any debris or loose material from the subgrade to ensure a solid base. Check that your mixing area has easy access for materials and tools.
The weather plays a crucial role in successful pours. Avoid working on days with extreme temperatures or high winds which can affect curing times and quality. Plan your pour during mild conditions to give the concrete enough time to set properly without drying out too quickly.
Consider your mixing capacity per run based on how much you can comfortably handle at once. For smaller projects, a wheelbarrow might suffice; for larger areas, consider renting a mixer or setting up multiple batches in advance. Ensure you have enough manpower available to move materials efficiently and pour the concrete within its workable time.
Lastly, always wear proper personal protective equipment (PPE) such as gloves, safety glasses, and dust masks when handling lightweight concrete mixes. Follow all manufacturer guidelines for mixing ratios and curing times to achieve optimal results.
Common mistakes, troubleshooting, and pro tips
This section covers the most common DIY concrete slip-ups you’ll see on a casual project: overwatering, poor foam control, inadequate curing, segregation, and cold joints, plus quick signs to spot them early. You’ll get practical fixes you can apply right away, from adjusting water and admixtures to carving out weak spots and reworking joints without wrecking the whole pour. The goal is to help you finish stronger, smoother, and less prone to cracking or surface flaws.
Think of this as a practical workflow you can follow: plan pre-pour checks, monitor during placement, and evaluate after curing with clear, bite-size tasks you can tackle in sequence. These tips pay off in a tougher finish, better edge work, and more durable concrete, while also keeping safety and proper tooling front and center—check the product label or datasheet for any specific guidance on components and follow your local rules when in doubt.
Repairing failures and improving adhesion
To fix mistakes or add strength, use patching techniques and bonding agents. Start by cleaning the surface thoroughly to ensure good adhesion.
Apply a thin layer of bonding agent before pouring new concrete over failed areas. This helps the new mix stick better and prevents delamination.
If you need to top with normal concrete, make sure to roughen the existing lightweight concrete surface first for better grip.
Repairing failures and improving adhesion
If you find cracks or weak spots in your concrete, don’t just ignore them. Patch it up right away to prevent bigger problems down the road. First, clean out any loose material from the crack with a chisel or wire brush.
For better adhesion and durability, use a bonding agent before applying new concrete or mortar. This stuff helps the old and new materials stick together like glue. Make sure to follow the product instructions for mixing and application times.
Before you start any repair work, check that your base is solid and well-compacted. A weak foundation can lead to more cracks and failures later on. Also, always rough up smooth surfaces with a broom or wire brush so new concrete has something to grip onto.
Safety, curing, and environmental impact
This section covers the safety gear you need, proper work practices, how to keep curing conditions steady, and the environmental trade-offs of lightweight concrete. Wear eye protection, gloves, a respirator or dust mask, and sturdy footwear; use fall protection where needed, and keep a simple on-site safety checklist. Control curing temperature and moisture with practical methods to avoid cracking from premature drying.
For DIY folks, the big payoff is lighter weight with better insulation, balanced against the environmental footprint of the chosen aggregates. Dispose concrete washout and packaging properly, reuse or repurpose leftover material when possible, and follow local disposal guidance. Check the product label or datasheet for guidance on curing and washout specifics, and keep dust and waste under control to minimize environmental impact.
Personal protective equipment and handling precautions
Wear the right gear to stay safe on site. Here’s what you need:
- Gloves: Protect your hands from rough edges, chemicals, and concrete burns. Use durable gloves that fit well.
- Eye protection: Safety glasses or goggles shield eyes from dust and debris. Wear them anytime you’re mixing or pouring.
- Dust mask/respirator: Keep dust out of your lungs when handling powders. A simple N95 mask works well for most jobs.
- Footwear: Steel-toed boots protect feet from falling objects and sharp edges. Make sure they’re comfortable for long days on site.
- Fall protection: Use harnesses or guardrails when working at heights over six feet to prevent falls.
Sustainability considerations and greener options
Lightweight concrete offers environmental benefits like reduced material use and better insulation. But it’s important to consider the manufacturing impact of certain aggregates.
Choose recycled lightweight aggregates when possible, such as crushed glass or slag. These materials reduce waste and lower carbon footprints compared to traditional sand and gravel.
Opt for low-carbon cement options like fly ash or ground granulated blast furnace slag (GGBFS). They can significantly cut down CO2 emissions during production.
Using lightweight concrete in your project helps reduce overall building energy use, leading to lower heating and cooling costs over time. This makes it a smart choice for both the environment and your wallet.
Conclusion
Lightweight concrete can cut weight on the job, save material costs, and give you a cleaner finish, but it only pays off when you mix, pour, and cure it right. Safety, good formwork, and proper curing protect durability and appearance.
For your next steps, approach it like a simple workflow: measure the mix correctly and verify your materials match the chosen lightweight type; set up solid, clean forms with no gaps; mix in the right order and keep the slump consistent; apply in thin, workably paced pours, compact as you go, and cure as specified; finish within your planned timeframe and document any issues for future projects. Start small, test a patch, and scale up only after you’re confident in the result and the surface looks right.
Common mistakes to avoid are skipping or misreading the mix ratios, forgetting to cure or rushing curing or masking with the wrong materials, and using improper formwork or air gaps that trap voids. A simple safety rule: wear PPE, keep the area ventilated, and never mix indoors without ventilation or dust control. If you’re unsure about load-bearing elements, large pours, or environmental constraints, call in a pro before you push ahead. Stay deliberate, finish clean, and you’ll have a durable, good‑looking result you can be proud of.
FAQ
What is lightweight concrete, and how is it different from regular concrete?
Lightweight concrete uses lightweight aggregates or air-entraining admixtures to reduce density. It still sets like normal concrete, but it’s easier to handle and saves on weight. Don’t confuse it with foam or punch-filled mixes—these are not the same thing.
Can I use lightweight concrete for a home DIY project?
Yes, you can, but read the mix instructions carefully. It cures differently and may require different moisture control. If in doubt, ask the supplier for a DIY-friendly mix and follow it to the letter.
What are common mistakes when mixing lightweight concrete?
Don’t overwater the mix. Too much water weakens strength and increases shrinkage. Also avoid mixing too long or at high speed, which can trap air and ruin the density.
How do I finish and cure lightweight concrete for best strength?
Keep it moist during the first few days if the mix requires it. Protect from direct sun and wind, which can dry it out too fast. Follow the product’s cure schedule; skipping curing kills strength and longevity.