

Introduction
The durability of your kitchen paint depends not only on the product you choose but also on how much time you invest in preparation and application. Understanding the timeline and steps involved can help ensure a long-lasting, professional-looking finish.
In this guide, we’ll walk you through the process, breaking down each step by time so you can plan your DIY kitchen painting project effectively.
For the full guide, see Kitchen Paint Durability: Scrub Ratings, Sheens, and Grease-Contamination Prep.
The Kitchen Paint Durability Timeline: Step-by-Step
Planning and executing a kitchen painting project involves several stages. Here’s a breakdown of each step, including the estimated time required for completion:
- Preparation (3-5 days): Cleaning, degreasing, sanding, and priming surfaces to ensure optimal paint adhesion.
- Paint Application (1-2 days): Applying coats of paint, allowing for drying time between each coat.
- Touch-ups and Final Inspection (1 day): Addressing any missed spots or imperfections and ensuring the finished product meets your expectations.
Total estimated time: 5-8 days
Key takeaways
The preparation stage is crucial in determining the overall timeline of your kitchen painting project. Proper cleaning and priming can significantly extend the lifespan of your paint, making it a worthwhile investment of your time.
- Understand kitchen scrub ratings to choose durable finishes that withstand cleaning.
- Select sheens based on traffic and wipeability without looking flat.
- Favor paint with grease-resistant properties and appropriate binders for kitchens.
- Clean greasy surfaces thoroughly and prime before painting to maximize adhesion.
- Use proper application technique to reduce touchups and maintain gloss evenly.
- Wear safety gear, ventilate, and follow label guidance for compatible cleaners.
Table of Contents
- Introduction
- Key takeaways
- Understanding Scrub Ratings and What They Mean for Kitchens
- Selecting the Right Sheen for Durability and Appearance
- Paint Formulations, Additives, and Grease-Resistant Properties
- Preparing Grease-Contaminated Surfaces: Cleaning and Priming Workflow
- Application Techniques to Maximize Durability and Minimize Maintenance
- Cleaning and Maintenance After Painting: Preserve the Finish
- Key Specs and Numbers That Matter (Without a Datasheet)
- Cost Versus Longevity: Budgeting, Product Selection, and When to Hire a Pro
- Conclusion
- FAQ
Understanding Scrub Ratings and What They Mean for Kitchens
Scrub resistance is a measure of how well a painted surface withstands repeated cleaning abrasion; manufacturers report it using lab tests that simulate rubbing with specific abrasives and cleaners. Check the product data sheet or label to confirm which test method was used and compare products using the same standard rather than marketing phrases.
Kitchens see heavier, more frequent cleaning and harsher soils than living rooms, so aim for paint specified for high cleanability on the same scrub test. If the datasheet is unclear, ask the manufacturer or retailer for the test standard and performance notes before buying.
Common test standards and how to read them
The most common scrub resistance tests are ASTM D2436 and ISO 11998. ASTM D2436 measures the number of scrub cycles a paint can withstand before it shows signs of wear, using a standardized abrasive pad and cleaning solution. ISO 11998, on the other hand, uses a different abrasive pad and a lower pressure, focusing more on the paint’s ability to resist light scrubbing.
Manufacturers may also use proprietary tests, but it’s best to stick with these standards for fair comparisons. Always check the datasheet to see which test was used.
Higher numbers mean better durability, but keep in mind that kitchens need tougher paint than other rooms due to grease and frequent cleaning.
Translating ratings into real-world performance
A scrub rating of 5,000 cycles or more (ASTM D2436) is ideal for kitchens. This should withstand daily cleaning and occasional heavy-duty scrubbing.
For lighter use, like in a guest bathroom, a rating of 3,000 to 5,000 cycles might be sufficient. But remember, it’s better to have too much durability than not enough for your kitchen.
Also consider the type of stains you’ll encounter. Grease and oil require tougher paint, so prioritize products with higher ratings and grease-resistant claims.
Why lab tests differ from greasy kitchen conditions
Lab tests are great for comparing products, but they don’t fully replicate real-world conditions. Grease and oils can break down paint faster than the test methods account for, while abrasive sponges or scrubbers used at home might be harsher than those in lab tests.
Humidity also plays a role. Kitchens often have higher humidity levels due to cooking and dishwashing, which can affect paint durability over time.
To make the best choice, consider products with high ratings from reliable test standards, but also look for brands known for their kitchen paint performance.
Selecting the Right Sheen for Durability and Appearance
Sheen affects wipeability, how well stains release, and how visible surface flaws are: lower sheens hide imperfections but are generally less washable, while higher sheens clean more easily but highlight texture and brush marks. Match the finish to the kitchen area—higher traffic and splash zones benefit from more washable sheens, while lower-use walls can use lower sheens to conceal minor defects.
Choose the lowest sheen that still meets your cleanability needs to balance appearance and maintenance; verify cleanability guidance on the product label or tech sheet. If in doubt, test a small area to confirm how the sheen looks and cleans in real conditions.
Sheen pros and cons for kitchen walls and trim
The sheen you choose affects both the look and cleanability of your kitchen. Here’s a quick rundown of each.
Pros
- Flat: Hides imperfections, good for walls with visible flaws.
- Eggshell: Balance between durability and appearance, works well on walls.
- Satin: Easy to clean, great for high-traffic areas like trim.
- Semi-gloss: Highly durable, ideal for cabinets and trim.
- Gloss: Reflects light, makes small spaces feel bigger, good for trim.
Cons
- Flat: Hard to clean, shows dirt easily.
- Eggshell: Not as durable as higher sheens, may not withstand frequent cleaning.
- Satin: Shows fingerprints and scuffs on trim.
- Semi-gloss: Can highlight imperfections on walls.
- Gloss: Reveals every bump and dent, requires careful prep.
Choose the lowest sheen that still meets your cleanability needs. For most kitchens, satin or semi-gloss work best on trim, while eggshell is a good choice for walls.
Balancing aesthetics and cleanability
When selecting a sheen, consider both how you want your kitchen to look and how easy it is to maintain. Start by assessing the condition of your walls and trim.
Light levels also play a role. Higher sheens reflect more light, making them suitable for darker kitchens or areas with less natural light.
If you’re dealing with visible imperfections, consider a lower-sheen paint to help hide them. But remember, lower sheens are harder to clean. Weigh the trade-offs and choose the option that best fits your needs and lifestyle.
Paint Formulations, Additives, and Grease-Resistant Properties
Base chemistry (waterborne vs. solventborne/alkyd) and additives like stain-blockers, fungicides, or scuff-resistant resins change how a paint handles grease, adhesion, and scrub wear. Read technical data and ingredient listings to confirm any specific additive claims and whether they’re compatible with your substrate and household needs.
Some formulations resist grease pickup better or tolerate repeated cleaning cycles; manufacturer instructions and the product data sheet are the place to verify those performance claims. Where compatibility or claims are unclear, contact the maker and consider mock-ups to evaluate real-world behavior.
Waterborne vs Solventborne Performance and VOC Considerations
Waterborne paints are water-based, making them low odor and easy to clean up. They’re great for kitchens as they dry quickly and have low VOCs (Volatile Organic Compounds), reducing air pollution.
However, they may not be as durable or stain-resistant as solventborne paints. They can also take longer to cure fully, making them susceptible to scuffing during that time.
Solventborne paints, on the other hand, have strong adhesion and durability. They’re great for high-traffic areas like kitchens but come with high VOCs and strong odors. You’ll need proper ventilation when using these.
Choose waterborne for low odor and quick drying times, or solventborne for superior durability and stain resistance, depending on your needs and the specific product’s VOC levels.
Additives that Help with Grease and Stain Resistance
Paint additives can boost your kitchen paint’s performance. Stain-blockers seal porous surfaces, preventing stains from penetrating. They’re great for new drywall or woodwork.
Fungicides prevent mold and mildew growth, useful in kitchens with high humidity. Always check if they’re safe for food prep areas.
Scuff-resistant resins enhance durability, making surfaces easier to clean. They’re ideal for high-traffic zones like kitchen walls and trim.
Before using any additive, verify its safety and compatibility with your paint and surface type. Always follow manufacturer guidelines.
Preparing Grease-Contaminated Surfaces: Cleaning and Priming Workflow
Begin with an initial degreasing using a cleaner recommended for painted surfaces, follow with rinses, and degloss any shiny residue so coatings can bond; safety gear and ventilation matter during this stage. After cleaning, perform a small adhesion and stain-blocking test patch before committing to full coverage.
Primers are commonly required on previously contaminated or stained areas to lock in residual oils and promote adhesion, so review the primer product data sheet for substrate and stain-blocking guidance. If you’re unsure about a cleaner or primer’s effectiveness, verify instructions on the label or consult the manufacturer before proceeding.
Best cleaners and degreasers (DIY and commercial)
To tackle grease in your kitchen, you’ll need effective cleaners. Here are some options:
Alkaline Degreasers: These are powerful, but use with care. They can damage certain surfaces if left on too long.
TSP Alternatives: Trisodium phosphate is a strong cleaner, but it’s not always eco-friendly. Look for alternatives like borax or washing soda.
Citrus-Based Options: These are gentler and more environmentally friendly. They work well on light grease but may need extra elbow grease (or a scrub brush) for tougher messes.
Choosing primers for stained or oily surfaces
When dealing with residual grease, the right primer makes all the difference. Here’s what to consider:
Stain-Blocking Primers: These seal in stains and prevent them from bleeding through your paint. They’re great for porous surfaces like wood or concrete.
Adhesion-Promoting Primers: These help paint stick better to greasy or oily surfaces. They’re often used on metal or plastic.
Always check the label to ensure the primer is suitable for your surface and the specific grease contamination you’re dealing with.
Visual checkpoints to confirm prep adequacy
Before priming and painting, ensure your surface is ready. Use this checklist:
- No oily sheen: The surface should look dull, not shiny or greasy.
- Consistent dulling: All areas should look equally dull. If some spots still shine, they may need more cleaning.
- Dry surface: Water should bead up and roll off. If it soaks in, the surface isn’t dry enough.
- No flaking or peeling: The old paint or finish should be stable. Any flakes could cause problems later.
- No visible grease: Wipe with a clean cloth. If it comes away dirty, more cleaning is needed.
- No active mold or mildew: These can ruin your paint job. Treat any growth before painting.
- Even surface: Fill and sand any holes or cracks before priming.
- No dust: Wipe down the surface to remove any dust or debris.
Quick rule: If in doubt, wait 24 hours after cleaning. This gives the surface time to dry completely and ensures you’ve caught any missed spots.
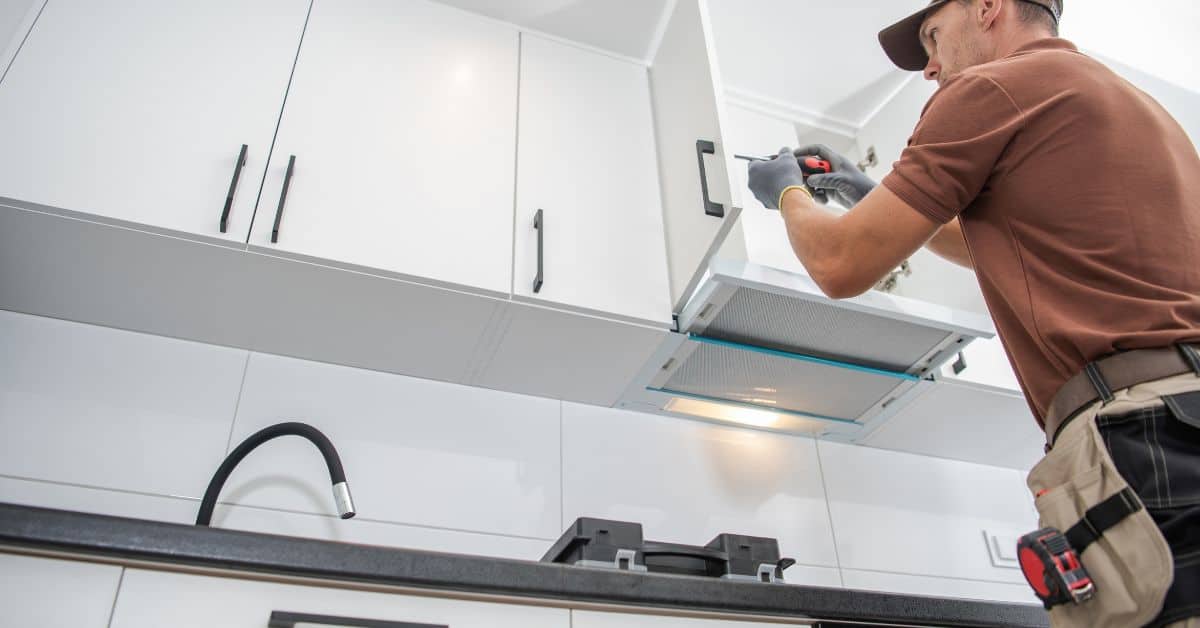
Application Techniques to Maximize Durability and Minimize Maintenance
Tool choice, application conditions, and building proper film thickness from compatible products all influence longevity: use rollers, brushes, or sprayers recommended by the paint maker and work under the environmental ranges they specify. Follow manufacturers’ recoat and handling recommendations rather than arbitrary coat counts to ensure proper cure and adhesion.
Maintain clean tools, avoid lap marks, and control temperature and humidity during drying to reduce defects that increase maintenance. If instructions are unclear for your tool or environment, check the product technical bulletin or contact the manufacturer for guidance.
Tools and materials checklist
Before you start, make sure you have all the right tools. This list will help you achieve a durable, easy-to-clean finish.
- 9-inch roller cover: For large areas; ensures even coverage.
- 3/4-inch nap roller cover (for textured surfaces): Helps fill in texture for better paint adhesion.
- 2-inch angled brush: For cutting-in edges and trim.
- Painter’s tape: Protects non-painted areas; ensures clean lines.
- Drop cloths: Covers floors and furniture; prevents drips.
- Safety glasses: Protects eyes from paint splatter.
- Gloves: Keeps hands clean and protects skin.
- Respirator (for solvent-borne paints): Protects lungs from harmful fumes.
Quick rule: No tool is a substitute for proper technique. Use them right, every time.
Rollers, brushes, and spray: method selection
Choosing the right application method is crucial for a durable finish. Here’s how to decide:
For smooth surfaces, rollers are your best bet. They apply paint evenly and quickly. Use a 9-inch roller cover for walls and a smaller one for cabinets.
For textured surfaces, use a 3/4-inch nap roller cover. It helps fill in the texture, ensuring better paint adhesion.
Brushes are ideal for edges, trim, and small areas. Use a 2-inch angled brush for cutting-in edges and painting trim.
Spraying is great for large, hard-to-reach areas. It applies an even film thickness but requires more setup and cleanup. Always follow manufacturer’s guidelines for spraying.
Cleaning and Maintenance After Painting: Preserve the Finish
Establish a cleaning routine that progresses from mild soaps and soft cloths to stronger cleaners only as needed, testing any cleaner in an out-of-sight area first to confirm it won’t damage the finish. Avoid abrasive pads and harsh solvents unless the manufacturer lists them as safe for that coating.
Document which cleaners and methods work for your surfaces so future maintenance repeats what’s safe and effective; note any limitations shown on the product label or data sheet. When in doubt about a cleaner’s compatibility, refer to the paint maker’s maintenance recommendations or contact their tech support.
Safe cleaning agents and techniques by sheen
Different paint sheens have varying durability and resistance to cleaning agents. Here’s how to clean each safely:
Flat/Matte: Use mild dish soap or a specialized flat paint cleaner with a soft, non-abrasive cloth or sponge. Avoid harsh chemicals and over-scrubbing.
Satin/Eggshell: These are more durable than flat but still need gentle care. Use a mixture of warm water and mild detergent, then rinse with clean water. A soft-bristle brush can help, but avoid steel wool or harsh chemicals.
Semigloss/Gloss: These are easiest to clean due to their durability. Warm water with mild dish soap works well. For tougher grease, use a degreaser designed for painted surfaces, following the manufacturer’s instructions.
Spot repairs, touch-ups, and when to recoat
Over time, kitchens may need spot repairs or touch-ups. Here’s how:
Scuffs/Stains: For small scuffs, use a mild cleaner and a soft cloth. For stains, test a small area with a stronger cleaner first. If the stain persists, consider a full recoat.
Touch-ups: Match the paint color and sheen exactly. Use a small brush or roller to apply a thin coat where needed. Feather out the edges to blend with the existing paint.
When to Recoat: If multiple areas are damaged, it’s often easier and more effective to recoat the entire surface. Consider this when touch-ups become frequent or extensive.
Key Specs and Numbers That Matter (Without a Datasheet)
When you don’t have a full datasheet, focus on the listed scrub method/test, recommended systems (primer plus topcoat), substrate limitations, and any handling or VOC notes available on the label or product page. Those entries indicate whether a product is intended for heavy-cleaning areas like kitchens and what surface prep is required.
Compare products using the same test method and ask the manufacturer for missing details rather than relying on broad marketing claims. If critical specs are absent, request the technical data sheet or consult a pro to avoid surprises in performance.
Key specs to verify for kitchen durability
The datasheet might not always be handy, but knowing what to look for ensures you’re getting a paint that’ll hold up in your kitchen. Here are the key specs:
Scrub Resistance Standard: Kitchens take a beating. Look for paints with high scrub resistance ratings (like AS or BS). This means they can withstand frequent cleaning without losing their finish.
Recommended Application System: Some paints are designed for specific application methods – brush, roller, or spray. Make sure the paint you choose is compatible with your chosen method.
Surface Prep Notes: Check if the paint requires a primer or special surface preparation. Skipping these steps can void warranties and lead to poor performance.
VOCs (Volatile Organic Compounds): Lower VOCs mean better air quality. In kitchens, where you’re likely to be spending time cooking, opt for low or zero-VOC paints.
Understanding warranty language and limitations
Warranties give you peace of mind, but they’re not one-size-fits-all. Here’s what to look out for:
Preparation and Application: Many warranties require proper surface preparation and application methods. If you don’t follow these, your warranty might be void.
Misuse and Abuse: Warranties often exclude damage caused by misuse or abuse – like using harsh chemicals or not cleaning spills promptly. Read the fine print to know what’s covered and what’s not.
Duration and Coverage: Check how long the warranty lasts and what it covers. Some cover only defects, while others include labor costs for touch-ups.
Cost Versus Longevity: Budgeting, Product Selection, and When to Hire a Pro
Assess lifecycle cost by weighing product durability, expected maintenance frequency, and how difficult the prep or application will be for your space rather than using price alone as the deciding factor. For kitchens with heavy grease, poor access, or specialty substrates, higher-performance systems or professional application can reduce long-term upkeep.
Use criteria such as required prep, available time, and the consequences of failure to decide between economy and premium options, and verify product claims via the technical sheet or manufacturer guidance. If adhesion or contamination is extensive, consider hiring a pro for reliable results and peace of mind.
DIY versus professional application: pros and cons
When it comes to painting your kitchen, you’ve got two options: DIY or hiring a pro. Let’s weigh the pros and cons.
Pros of DIY
- Cost-effective
- Flexible schedule
- Sense of accomplishment
- No need to coordinate with others
Cons of DIY
- Time-consuming, especially for large kitchens or complex prep
- Risk of poor application leading to early failure
- Limited access to professional-grade equipment and products
- No warranty on labor
DIY is great for small, simple projects. But for extensive grease contamination, large-scale jobs, or complex prep, consider hiring a pro.
Evaluating product value beyond price
Price isn’t everything when it comes to paint. Here’s what else you should consider:
Scrub rating: Higher ratings mean easier cleaning and longer lifespan.
Sheen suitability: Choose a sheen that matches your kitchen’s needs – gloss for easy cleaning, satin for balance between durability and appearance.
Formulation: Look for 100% acrylic or latex paints. They’re durable, flexible, and easy to clean.
Warranty: Longer warranties indicate better quality and manufacturer confidence in their product.
Conclusion
Paint durability in a kitchen comes down to solid prep, the right sheen, and a clean, grease-free surface, all done safely to prevent costly mistakes and lasting shine. To finish strong, run a quick check: test a small area first, choose a grease-resistant enamel with the right sheen for your space, clean and prime all affected surfaces, apply in clean, dry conditions with proper ventilation, follow manufacturer recoat and cure times, and then maintain the finish with gentle cleaning and occasional touchups.
If you want a simple checklist you can follow in order, here it is in one line: test a small patch; confirm the sheen and grease-resistance fit your kitchen; spotless-clean grease-off and prime; apply with consistent technique in a dust-free window; let each coat cure fully and recoat as directed; and set up a quick, ongoing cleaning routine to keep the finish looking new.
Two or three mistakes to avoid are skipping the test patch and prime on greasy areas, overloading the roller or brush which causes lap marks and poor adhesion, and rushing cure times or using the wrong cleaner that dulled or damaged the finish. Always work in good ventilation, wear eye and skin protection, and keep kids and pets out of the area until the coating is fully cured.
When to call a pro makes sense: if you’re dealing with large grease-contaminated expanses, inconsistent coating, or you’re unsure about the product compatibility with cabinet material or wall noise concerns, it’s wise to bring in a pro. Stay deliberate, follow the steps, and you’ll finish with a durable, easy-to-maintain kitchen surface you can feel good about.
FAQ
How do I interpret scrub ratings for a kitchen project?
Scrub ratings tell you how well paint holds up to cleaning. Look at the label to see the test method and what cleaners were used. If you plan heavy scrubbing, pick a higher rating and follow the manufacturer’s cleaning guidelines.
Match the rating to your kitchen’s use: doors, walls behind the stove, and backsplashes all take more abuse. When in doubt, opt for the tougher option instead of hoping it’s enough.
What sheen should I choose for a kitchen that gets splashes and fingerprints?
Higher sheens resist moisture and are easier to wipe, but they show flaws. Semi-gloss or satin is common for kitchens because they balance washability with appearance. Flat finishes hide imperfections but don’t hold up as well to cleaning.
Consider your lighting and maintenance plan. If you’ll scrub daily, lean toward a tougher sheen and ensure proper surface prep to avoid peel or haze.
Do I need a grease-resistant paint or additives, and what should I check on the label?
Grease-prone areas benefit from paints labeled for grease resistance. Some products advertise additives or primer compatibility—read the label to see if you need a separate primer or specific prep steps. Don’t assume any paint will behave well without proper cleaning and sealing.
Check for surface prep requirements, cure times, and recoat windows on the label or datasheet. If you’re unsure, ask the store or manufacturer for guidance before buying.
What’s the best way to clean and re-prepare a greasy wall before touch-ups?
Start with a mild degreaser or dish soap solution and warm water, then rinse and let it dry completely. Lightly scuff the surface with a non-abrasive pad to improve adhesion. Follow with a suitable primer if the surface is greasy or glossy.
Always test a small spot first and follow the paint label instructions for priming and recoat times. If the area is stubborn, use manufacturer-recommended cleaners or consult a pro before applying new paint.