
Introduction
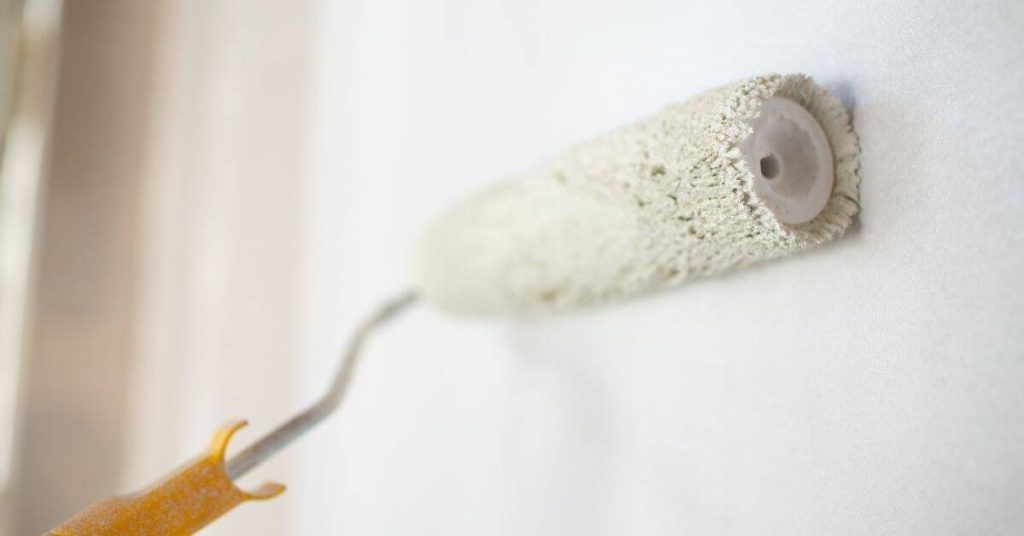
Touching up wall paint means applying a fresh coat to small areas so it blends with the existing finish. Use a light touch and feather the edges so the new paint fades into the old. Work in small patches and inspect under the room’s lighting before it cures.
Match the sheen as closely as possible by using the same type of finish and a compatible color, checking the label for guidance. Use a small brush or roller, apply in thin, even coats, and blend where the old and new meet. Let the paint dry according to the label and compare under different lighting to catch any differences.
Key takeaways
- Identify existing sheen level and finish before planning any touch-up work.
- Prep area, ventilate, and mask edges to reduce dust exposure.
- Test color matches and sheen on a hidden patch before full coverage.
- Use compatible primer or sealer when underlying paint differs significantly.
- Apply touch-ups in thin, feathered passes across edges to blend.
- Inspect under varied lighting after curing and recoat if texture mismatches.
Table of Contents
- Introduction
- Key takeaways
- What Flashing and Sheen Differences Are
- Common Causes Behind Flashing and Sheen Inconsistencies
- Inspecting and Preparing the Area Before Touch-up
- Matching Paint Color and Sheen Accurately
- Application Techniques for Seamless Touch-Ups
- Primers, Sealers, and Undercoats: When and Which to Use
- Tools and Materials Checklist
- Visual Checkpoints and Testing Methods
- Conclusion
- FAQ
What Flashing and Sheen Differences Are
Flashing refers to visible changes in gloss or brightness on a painted surface as light hits it. Sheen differences are how shiny or flat the finish looks up close or from an angle. After touch-ups, these gaps become easier to notice as the newly painted spot contrasts with surrounding areas.
Light direction and viewing angle play a big role in what you see. Even the same color can look different under a lamp versus daylight. Understanding this helps you plan the touch-up so the area blends rather than stands out.
Flashing vs. color mismatch
When you touch up a wall, two common issues can arise: flashing and color mismatch.
Flashing is when light reflects unevenly off the touched-up area, making it look like a shiny streak or patch. This happens due to differences in sheen between the new paint and the existing wall.
On the other hand, color mismatch occurs when the touch-up color doesn’t exactly match the surrounding wall. This could be due to using an incorrect paint shade, or it might be a result of color variation caused by different lighting conditions in your home.
Why sheen matters for perceived color
The sheen of your paint – how glossy or matte it is – plays a big role in how the color looks on your wall.
A glossier finish reflects more light, making colors appear brighter and more vibrant. In contrast, a matte finish absorbs light, causing colors to look duller.
So, if you’re touching up a wall with a semi-gloss paint but use a flat sheen for the touch-up, the new area will look noticeably different – even if the color is technically the same. Lighting and viewing angle can exacerbate this effect, making the difference more apparent from certain angles or in different light.
Common Causes Behind Flashing and Sheen Inconsistencies
Surface contamination like dust, oils, or wax can ruin a seamless match. Different paint batches or brands can also behave differently even when they look the same in the can. Underlying substrate variations show up as flashes if the new coat doesn’t level with the old.
Improper application, such as overloading a brush or roller, can cause painters ridge lines or uneven coat thickness. Variations in porosity, sheen level, or previous finishes can contribute to mismatches. Check each factor when diagnosing why the touch-up looks off.
Surface and Substrate Factors
When touching up paint, the surface you’re working with can cause flashings and sheen inconsistencies. Patching compound or drywall mud might not absorb paint the same way as untouched surfaces.
Stains from previous marks, water damage, or smoke can also affect how new paint adheres and reflects light. If your wall has been previously sealed or painted with a glossy finish, it’ll reflect more light than a flat surface, causing sheen differences.
Tip: Always test your touch-up color on a small, hidden area first to see how it interacts with the existing surface.
Paint and Batch-Related Causes
Even if you’re using the same brand and type of paint, variations between cans can lead to flashings. This is because pigments aren’t always evenly dispersed during manufacturing or mixing.
If your paint was store-tinted, there might be slight differences in color due to variations in the tinting process. Different paint bases (like latex vs. oil) also reflect light differently, causing sheen inconsistencies.
Solution: If possible, buy all your paint at once and mix it together before starting. If you’re buying more later, ask for a ‘kick’ from the original batch to ensure consistency.
Application and Environmental Contributors
The way you apply paint can affect its final appearance. Using a brush might leave visible strokes, while a roller or sprayer could give a more uniform finish.
Applying paint too wet or too dry can cause variations in coverage and sheen. Also, lighting conditions and humidity during application can impact how the paint dries and looks.
Advice: Always apply touch-ups in the same way as the original painting, under similar lighting and humidity conditions.
Inspecting and Preparing the Area Before Touch-up
Start with a quick visual scan from multiple angles and lighting. Identify spots that look flashed or mismatched and note any contamination. This helps you plan the prep steps before a single stroke is applied.
Clean the surface as needed and remove loose material. Lightly abrade glossy areas to improve adhesion. Prioritize repairs on areas that will affect the final blend, and keep the rest pristine for a true test patch.
Visual inspection and testing patches
Before you start touching up, use this checklist to ensure your paint job will blend seamlessly. Do this under the room’s normal lighting.
- Check color match: Compare new paint with existing wall in different lights. Swatch on a small area first.
- Inspect sheen: Ensure new paint matches old sheen. Matte and gloss don’t mix well.
- Feel for texture: Run your hand over the wall. Smooth surfaces need smooth paint, textured need matching texture.
- Look for stains: Check for water marks, grease, or other stains that might show through new paint.
- Examine glossy areas: High-gloss spots can cause sheen differences. Lightly sand and feather edges before painting.
- Check for damage: Look for cracks, holes, or other defects that need repair.
- Test patch curing: Let test patches cure fully (at least 24 hours) to see true color and sheen.
- Observe environmental factors: Note temperature, humidity, and air quality. These can affect paint application.
Quick rule: If in doubt, do more test patches. Better safe than sorry.
Cleaning, sanding, and feathering edges
Prep your surface for a smooth touch-up job. Start by cleaning to remove any contaminants.
Lightly sand: Use fine-grit sandpaper (220 or 320) on glossy areas to help new paint adhere better and reduce sheen differences.
Next, feather the edges of your touch-up area. This creates a smooth transition between old and new paint. Use a damp sponge or sand lightly with a fine-grit sanding block, working from the edge towards the center.
Wipe clean: Remove dust and any residue with a tack cloth or damp rag before painting.
Repair and prime problematic spots
Before touching up, address any issues that might affect adhesion or cause flashing. Use joint compound to repair cracks, holes, or other damage.
Prime stains: If there are water marks, grease stains, or other discolorations, apply a stain-blocking primer first. This prevents these issues from bleeding through your new paint layer.
Glossy areas: If you’ve sanded glossy spots, prime them before painting to ensure good adhesion and prevent sheen differences.
Let it dry: Always let repairs and primers dry fully (as per manufacturer’s instructions) before touching up with paint.
Matching Paint Color and Sheen Accurately
Keep the original can or label handy to verify color name, finish, and batch if possible. Use retailer tinting or manufacturer-matters to reproduce the same base color. Test the match on a small, inconspicuous spot and let it dry in ambient lighting before committing.
Remember to verify sheen, not just color. Compare the new patch to nearby surfaces under the same light and viewing angle. If in doubt, consult the supplier instructions or product data sheet for guidance on sheen compatibility.
Using leftover paint and documented labels
Start with what you’ve got. Check your original paint cans for any formula or batch codes. These are like a fingerprint for your paint, helping ensure an exact match.
Store leftover paint properly: Keep it in the can, tightly sealed, and away from extreme temperatures. Shake well before using to mix any settled pigments.
Test your leftover paint on a small patch behind furniture or in a less visible spot. Let it dry completely – at least 24 hours – before deciding if it’s a perfect match.
Store matching and spectrophotometer options
If you’re out of paint, head to your local hardware store. Bring a sample of the wall color with you. The store’s paint expert can use a spectrophotometer – a fancy color-measuring tool – to match your hue.
Pros: It’s quick and convenient. You’ll likely get a close match.
Cons: It might not be perfect. Sheen, undertones, and other variables can affect the result. Always test the matched paint at home before committing to it.
Apply the matched paint on a small area at home. Let it dry completely. Check it in different lights throughout the day to ensure it’s an exact match.
Choosing the correct sheen
The sheen of your paint – how shiny or flat it is – matters just as much as the color. It affects how light reflects off the wall, changing the perceived color and overall look.
Identify your existing sheen: Look at the label on your original paint can. If you don’t have that, test a small area with different sheens until you find the right match. You can also ask a paint store expert for help.
Match the sheen when touching up. A slight difference in sheen will make the touched-up area stand out like a sore thumb. It’s worth taking the time to get this right.
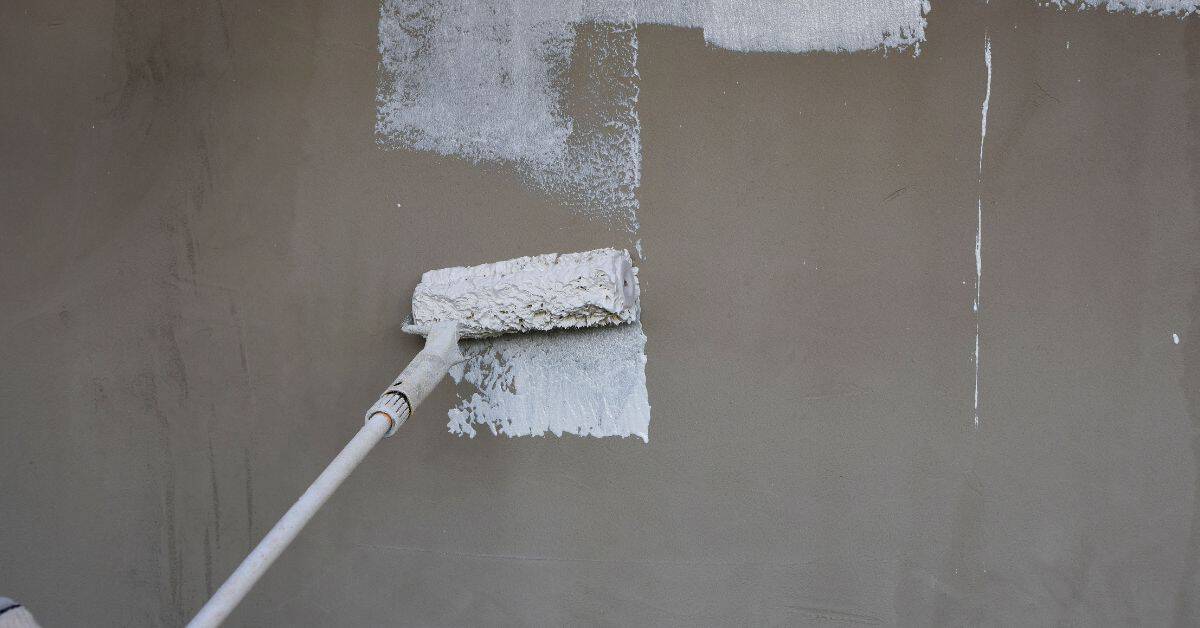
Application Techniques for Seamless Touch-Ups
Use a spot touch with a narrow brush or fingertip to lay down paint only where needed. Feather edges softly to blend the new paint into the old with a gradual transition. Avoid overworking the patch to prevent build-up that catches light differently.
If the patch still looks off, consider repainting a larger area to achieve a single, uniform appearance. Work in thin, even coats and follow drying cues from the product instructions. Consistency is key to minimizing flashing.
Brush, roller, and sprayer best practices
Each tool leaves a unique texture. Match the original finish to avoid sheen differences.
Brush: Use the same type and size as before. Work in ‘W’ or ‘M’ patterns for even coverage.
Roller: Choose the right nap length for your surface. Maintain consistent pressure for uniform results.
Sprayer: Keep a steady distance from the wall. Overlap each pass by about 50% to ensure full coverage.
Feathering and blending edges
Taper paint at touch-up borders to blend into surrounding areas seamlessly.
Use a smaller brush or roller for better control. Start from the edge, working towards the center in a ‘V’ pattern.
Feather: Lightly drag the brush or roller across the border, barely touching the wall. This softens the edge and helps it blend.
Overlap previously painted areas slightly to ensure full coverage and minimize lap marks.
When to repaint the whole wall or section
A full repaint ensures uniform sheen, but it’s more time-consuming. Here when it’s worth it:
1. Large areas: Touching up small spots can look patchy on large walls.
2. Color changes: If you’re changing colors, repainting ensures a consistent finish.
3. Sheen inconsistencies: When touch-ups don’t match the original sheen, it’s best to start over.
4. Worn-out paint: If the existing paint is peeling or fading, repainting gives a fresh, uniform look.
Primers, Sealers, and Undercoats: When and Which to Use
Primers and sealers help stabilize the substrate and block stains that can show through a touch-up. They create a more uniform absorbency so the topcoat lays down evenly. Choosing the right type depends on the surface and the paint you plan to use.
If you’re unsure, check the product label or the manufacturer instructions for compatibility with your topcoat. Local rules or a professional’s guidance can also help you pick the right primer for your project. Testing on a small patch is a safe step before full application.
Blocking stains and tannins
Stains, especially from water damage or wood tannins, can bleed through your topcoat causing unsightly discoloration. This is called flashing. To prevent this, use a stain-blocking primer.
Apply it to the affected areas before painting. It seals in stains and creates a uniform surface for your topcoat. No more surprises!
Remember, not all primers are created equal. Make sure you choose one specifically designed to block stains.
Bonding and high-build primers for repaired areas
Repaired spots, like patched holes or cracks, often have different textures and absorbency than the surrounding wall. This can cause your topcoat to look uneven.
Enter bonding and high-build primers. They do two things: bond with the repaired area and the existing paint, creating a strong bond; and they build up the surface, evening out any differences in texture or absorbency.
Apply these primers to patched areas before painting. They’ll help your touch-up look seamless.
Tools and Materials Checklist
Prepare a basic kit with a small brush, a fine roller, a clean cloth, and a paint tray. Include a couple of sample cans or tester jars to compare under your lighting. Have masking tape and a solvent or cleaner on hand for quick cleanup.
Also gather testing supplies like a scrap board or spare drywall patch to try the match first. Keep brushes and rollers dedicated to the touch-up to avoid cross-contamination. If you’re unsure about durability, verify with the label or manufacturer instructions.
Brushes, rollers, and applicator specifics
Before you start touching up your walls, make sure you have the right tools for the job. Here’s a quick checklist to ensure you’re using the correct brushes and rollers.
- Angled sash brush: Use this for cutting in along edges where precision is needed. It helps prevent drips and keeps your lines sharp.
- 2-3″ straight edge brush: This is great for touching up small areas or painting trim. It’s easy to control and covers a decent amount of area.
- 9-12″ roller with 3/8″ nap cover: For most walls, a medium nap roller will do the trick. It provides good coverage without leaving marks.
- 18″ roller for large areas: If you’re touching up a big wall or section, an 18″ roller can speed up the process significantly.
- High-nap roller (3/4″ – 1″) for textured surfaces: For walls with heavy texture, use a high-nap roller to ensure proper coverage and adhesion.
- Sprayer for large areas or complex shapes: If you’re touching up a lot of wall area or dealing with intricate shapes, consider using a paint sprayer. It can save time and provide even coverage.
Quick rule: Match your applicator texture to the original finish. For example, if your walls have a smooth eggshell finish, use a smooth roller cover. If they’re textured, opt for a high-nap roller.
Test sample materials and lighting aids
Before you start painting, it’s crucial to test your touch-up paint to ensure it matches the existing wall color and sheen. Here’s a checklist of items to help you with this process.
- Small disposable trays: Use these to mix your touch-up paint and apply it to sample areas. They’re cheap, easy to clean up, and perfect for small jobs.
- Paint stirrers: Don’t forget to stir your paint thoroughly before using it. This ensures the color is evenly distributed.
- Portable raking light or flashlight: Inspect your touch-up samples under different lighting conditions to ensure they match the existing wall color and sheen. Raking lights can help you see sheen differences more clearly.
- Small paintbrushes (1-2″): Use these to apply your test patches. They’re easy to control and won’t leave behind brush marks.
- Touch-up samples: Apply your touch-up paint to a small, inconspicuous area of the wall. Let it dry completely before inspecting it.
Quick rule: Always test your touch-up paint in multiple locations and under different lighting conditions. This will help you catch any discrepancies between your touch-up paint and the existing wall color or sheen.
Visual Checkpoints and Testing Methods
Check the patched area from various angles and lighting to spot any flash or sheen difference. Compare against nearby surfaces under the same lighting conditions. Allow time for the finish to cure before a final evaluation.
Use a simple light source to cast a steady beam and observe how the patch looks as it dries. If you see inconsistency, you may need a touch-up refresh or a broader repaint to level the sheen. Rely on product instructions and your own eyes to judge success.
Raking Light and Different Viewing Angles
Use this checklist after applying touch-ups to check for sheen differences that might not be obvious at normal viewing.
- Check from left: Stand to the left of your touch-up, look across it. Sheen should match.
- Check from right: Repeat on the right side.
- Check from above: Look down at a 45-degree angle. No harsh lines or sheen differences.
- Check from below: Look up at a 45-degree angle. Same as above.
- Use raking light: Shine a flashlight across the touch-up at a low angle. Sheen should blend evenly.
- Check in natural light: Morning and afternoon. Sheen should stay consistent.
- Check under artificial light: Evening, with lights on. Same as above.
- Check from a distance: Step back 10 feet. Touch-up should blend seamlessly.
Quick rule: If sheen differences show up under any of these checks, redo the touch-up or consider repainting the whole wall.
Waiting and Re-evaluating After Cure
Follow this checklist to ensure your touch-up is fully dried and cured before making a final judgment.
- Check manufacturer’s drying time: Wait the recommended hours before touching or rechecking.
- Feel for tackiness: Gently press with a clean cloth. No stickiness means it’s dry to touch.
- Wait for full cure: Allow at least 24-48 hours before final inspection, per manufacturer guidance.
- Recheck sheen match: After cure time, re-evaluate under different lighting and viewing angles.
- Check for leveling: Ensure touch-up has leveled out evenly with the surrounding wall.
- Test for durability: Gently rub with a clean cloth. No paint should come off.
- Recheck for stains or tannins: Make sure none have bled through after cure.
Quick rule: If touch-up doesn’t pass these checks, consider repainting the whole wall or section to ensure consistency.
Conclusion
Taking the extra steps now protects your walls from future flashing and sheen mismatches, keeps the finish durable, and avoids costly touch-up loops. Focus on safe prep, correct primer and undercoats, and testing in a small area before committing to the whole job.
Before you start, verify the surface, pick the right primer or sealer, and mix or match the sheen carefully. Then clean the area, protect nearby surfaces, and apply in the order you planned: prep, prime, undercoat if needed, then color coat. Check color and sheen in daylight, test a patch, and compare to adjacent areas until it looks right. If you’re unsure, test again and adjust before proceeding.
A few pitfalls to avoid are rushing the edge blends, skipping the test patch, or applying too many coats over a glossy surface. Always work in small sections, read the paint can for drying times, and keep tools clean to prevent muddy edges. Safety first means ventilate, wear a mask if needed, and never skim over a glossy area without proper abrasion and primer.
If the sheen or texture still won’t align after careful prep and testing, or you’re dealing with large surfaces or stubborn corners, call a professional. Otherwise, stay deliberate, follow your checklist, and you’ll finish with a seamless look and confidence in the result.
FAQ
Why can touch-ups still flash or show sheen differences after you painted?
Flashing and sheen differences happen when the new paint meets a different surface condition, sheen level, or drying environment. Check that you’re using the same base, the same sheen, and that the surface was properly prepared. If needed, follow manufacturer instructions for compatible primers or sealers on glossy or stained areas.
How should I handle a patch that dries darker or lighter than the surrounding wall?
Feather the edges and avoid hard lines. Use the same paint and sheen, and prime the patch if the surface is glossy or very different in porosity. If the color still reads off, you may need a light glaze coat or another thin pass after the first layer cures, per product instructions.
What’s the best way to test the finish before repainting the whole wall?
Pick a small, inconspicuous area or a drywall corner for a test patch. Let it cure fully and compare under the same light as the rest of the wall. If it blends poorly, adjust technique, sheen, or primer before moving to larger sections.
When should I use a glaze or clear coat over touch-ups, and how do I know it’s safe?
Use a glaze or clear topcoat only if the manufacturer approves it for the paint system and your surface. Check the label or datasheet for compatibility and application steps. If in doubt, test on a scrap or hidden spot first and follow local guidance.