
Introduction
Etching on concrete countertops is the process of lightly abrading the surface to restore or adjust the sheen in dull spots.
It’s a hands-on fix you can do with basic tools. Start by identifying dull spots, then prep the area by cleaning and protecting surrounding surfaces, and check any product or finish labels for guidance before you begin.
Key takeaways
- Inspect dull spots vs etching by moisture test and light reflection comparison.
- Common causes include wax buildup, improper sealing, or high pH cleaners.
- Prepare surface with gentle cleaning and a breathable rinse before any etching.
- Use minimal etching pressure and test on a hidden area first.
- Store safety: wear gloves, eye protection, and ventilate when chemicals are used.
- Document results with a small test spot to track sheen changes.
- Develop a long-term plan to reseal periodically and preserve consistent sheen.
Table of Contents
- Introduction
- Key takeaways
- How to Identify Dull Spots Vs Etching, Stains, or Sealer Wear
- Common Causes of Dull Spots on Concrete Countertops
- Safe Cleaning and Preparation to Reveal the True Surface Condition
- Gentle Etching and Restoration Techniques That Preserve Overall Sheen
- Tools and Materials Checklist
- Safety Precautions and Test-Spot Protocol
- Preventive Maintenance and Long-Term Planning for Sheen Consistency
- DIY Vs Professional Repair and Cost, Plus Common Mistakes to Avoid
- Conclusion
- FAQ
How to Identify Dull Spots Vs Etching, Stains, or Sealer Wear
Dull spots on concrete countertops usually look like uniform matte patches that don’t reflect light. They feel similar to the surrounding surface but lack the shine you expect. Visual abruptness or edge halos can hint at more than simple dullness.
Acid etching presents as a chalky or milky haze with uneven edges near the affected area. Stains tend to be color-toned patches that don’t wipe away with standard cleaners. Worn sealer often shows a loss of gloss with possible residue or a sticky feel when touched.
Step-by-Step Process
Follow these steps to accurately identify dull spots, etching, stains, or sealer wear on your concrete countertops.
- Preparation: Gather a flashlight, mirror, neutral cleaner, water, paper towel, and a fingernail. Ensure the area is well-lit but not direct sunlight.
- Visual Inspection: Scan the countertop for any sheen inconsistencies or texture differences using your eyes and the mirror to check angles.
- Light Test: Hold the flashlight at a low angle to see if there are halos around dull spots, indicating etching. Check for darkening patches that could be stains.
- Water Beading Test: Drip water onto suspected areas. If it beads up and doesn’t darken, the sealer is intact. If it spreads and darkens, the sealer may be worn or damaged.
- Fingernail Scratch Test: Gently scratch a suspected etched area with your fingernail to check surface hardness. Etched areas should feel chalky or milky.
- Cleaning Test: Wipe the area with a neutral cleaner on a paper towel. If the gloss returns, it was likely just dirt or residue. If not, proceed to the next steps.
- Document Findings: Take high-resolution photos and note locations, suspected causes, and observations for future reference.
- Final Check: Based on your findings, decide if cleaning only is needed, or if refinishing (polish/compound), resealing, or professional remediation is required.
Visual checkpoints and light tests
Use these visual checks and lighting tests to identify sheen inconsistencies and surface texture differences on your concrete countertops.
- Check for Matte Areas: Look for uniform matte areas that lack the usual gloss or sheen of the countertop.
- Observe Halos Around Dull Spots: Use a flashlight at a low angle to check if there are halos around dull spots, indicating acid etching.
- Dark Patches: Look for dark patches that could indicate stains or worn sealer.
- Loss of Gloss: Check areas where the gloss seems to have faded, which could indicate worn sealer.
- Edge Checks: Inspect edges and corners for any signs of dulling, etching, or staining that might not be visible from above.
- Color-Toned Patches: Look for patches with a different color tone than the rest of the countertop, which could indicate stains.
- Residue or Sticky Feeling: Gently touch areas where the sealer might be worn to check if there’s any residue or sticky feeling.
- Check Under Cabinets: Use a mirror to check for dull spots, etching, or stains under cabinets where you can’t see directly.
- Light Reflection: Check how light reflects off the surface. Etched areas may have a chalky, milky haze.
Quick rule: Always check from different angles and in various lighting conditions to ensure you catch all issues.
Touch, smell, and simple at-home spot tests
Perform these noninvasive tactile checks and safe spot tests to help determine the cause of dull spots on your concrete countertops.
Tactile Checks: Gently touch suspected areas. Etched areas should feel chalky or milky, while stained areas might have a different texture due to the stain itself. Worn sealer may feel sticky or residue-y.
Smell Test: Give the area a gentle sniff. Concrete countertops shouldn’t have much smell, so any unusual odors could indicate mold (from water damage) or other issues that might require professional attention.
Water Beading and Blot Tests: Drip water onto suspected areas to check if it beads up and doesn’t darken. If it does, the sealer may be worn or damaged. Blot with a paper towel to see if any color transfers, which could indicate staining.
When the problem is deeper than a dull spot
Look for these signs that indicate underlying damage that likely needs more than a surface correction on your concrete countertops.
Porosity Change: If water no longer beads up and instead spreads out, it could indicate increased porosity due to etching or sealer failure. This might require professional remediation.
Color Shift: A change in color that doesn’t wipe off with a neutral cleaner could indicate deep staining or underlying damage that needs more than just refinishing.
Pits and Cracks: Look for pits, cracks, or other signs of structural damage. These issues might require professional repair to prevent further damage or safety hazards.
Exposed Substrate: If you can see the aggregate or base material beneath the surface, it’s a sign that the concrete has been significantly damaged and likely needs professional attention.
Common Causes of Dull Spots on Concrete Countertops
A dull spot can be a sign of sealer breakdown, where the coating loses its clear or filling properties. It can also stem from chemical interaction with cleaners or solvents that compromise the surface film. Abrasion from daily use can wear away the top layer and leave a dull look behind.
Residue buildup from cleaners or efflorescence can obscure the surface and dull the sheen. Usage patterns, like heavy traffic zones or shared work areas, accelerate wear and dulling. Matching the repair to the cause helps prevent recurring problems.
Sealer Degradation and Abrasion
The sealer on your concrete countertop is its first line of defense. Over time, heat, scrubbing, and normal wear can thin or remove it, causing localized dulling.
Age and frequency of use in high-traffic zones accelerate this process. Check the sealer’s age and condition – if it’s old or peeling, replacement might be needed.
Inspect for signs of abrasion too. Scuffs from metal tools or heavy pots can dull spots. Lightly sand these areas to remove any rough patches before reapplying sealer.
Chemical Etching from Acids and Cleaners
Acidic foods, cleaners, or spills can alter the concrete’s surface chemistry. This changes the way light reflects off it, making spots appear dull.
Cleaning habits play a big role here. Harsh chemicals or frequent acid exposure can speed up this process. Test small areas with appropriate cleaner to see if they respond – if not, try a different one.
Be mindful of recent acidic exposures too. Lemon juice, vinegar, or even some cleaning products can cause etching.
Residues, Hard Water, and Oils
Buildup from soaps, mineral deposits (efflorescence), or cooking oils can create the appearance of dull spots without actually changing the sheen underneath.
Hard water and ineffective cleaning can exacerbate this. Look for residues around sinks or high-use zones. If present, a thorough cleaning might be all that’s needed to restore shine.
Oils from food or hands can also build up over time. Use a degreaser to cut through these films and reveal the shiny surface beneath.
Safe Cleaning and Preparation to Reveal the True Surface Condition
True surface condition means the dullness isn’t hiding embedded grime or residue. A simple wipe-and-inspect test helps confirm this before any repair steps. If the surface returns to clarity after cleaning, you’re likely dealing with surface contamination.
Follow a step-by-step cleaning protocol using neutral cleaners and mild agitation. Use soft brushes, microfiber cloths, or non-abrasive pads and rinse thoroughly to remove all cleaner residues. Only proceed when the surface looks and feels clean and uniform.
Recommended cleaners and methods
For concrete countertops, stick to pH-neutral or specifically formulated cleaners. These won’t damage the sealant or alter the sheen.
Why pH-neutral? Concrete is sensitive to acidity and alkalinity. Using harsh chemicals can cause etching, dulling spots, or even damaging the surface.
Apply cleaners sparingly, following the manufacturer’s instructions for concentration and dwell time. Agitate gently with a soft brush or cloth to avoid scratches.
Removing residues without altering sheen
Gentle techniques are key here. You want to lift grime, not the sealant or finish.
Soft pads and microfiber: Use these for scrubbing. They’re gentle yet effective at removing dirt and residue.
Agitate carefully. Too much pressure can damage the surface. If residues are stubborn, let the cleaner sit a bit longer before scrubbing.
Drying, neutralizing, and inspection
After cleaning, it’s crucial to dry, neutralize, and re-evaluate the spot. Here’s a checklist:
- Dry thoroughly: Use a clean cloth or towel. Ensure no moisture remains.
- Neutralize cleaner: If using an acidic cleaner, rinse with water and apply a pH-neutralizing solution to prevent further damage.
- Inspect for residues: Check for any remaining dirt or cleaner. Wipe again if necessary.
- Check moisture level: Too much moisture can affect adhesion of repair materials or sealants.
- Test temperature: Ensure the surface is cool enough for further treatment. Extreme heat can cause issues with adhesion and sheen restoration.
- Evaluate porosity: Check if the spot feels different from surrounding areas. Uneven porosity may indicate deeper issues.
- Perform a simple moisture test: Place a few drops of water on the spot. If it darkens or absorbs quickly, there’s too much moisture.
- Re-evaluate the dull spot: After prep, confirm the issue remains. Some problems may disappear with cleaning, indicating they were surface contaminants.
Quick rule: Always re-evaluate after preparation. It helps ensure you’re addressing the right problem.
Gentle Etching and Restoration Techniques That Preserve Overall Sheen
Gentle restoration means minimizing abrasive work while blending dull spots into the surrounding sheen. The goal is to repair without creating new glossy hotspots. Start with the least aggressive option that achieves a uniform look.
Assess the area to distinguish dull spots from actual etched damage, then choose non-abrasive or lightly abrasive products. Feather the edges toward the surrounding surface and avoid aggressive polishing that could overshoot the glaze. Finish by re-sealing as needed to restore protection.
What controlled etching means for concrete
Controlled etching on concrete countertops is a delicate process that involves carefully altering the surface to blend dull spots with the surrounding sheen. It’s not about increasing gloss or aggressively removing material.
Key: Controlled etching is about precision and subtlety. It’s like fine-tuning an instrument, not smashing it with a hammer.
The goal is to match, not change. You’re working with what you’ve got, not trying to create something new. Use light touch methods and mild chemicals to achieve this.
Low-abrasion mechanical methods (buffing and light abrasion)
For gentle restoration, use fine pads and low-speed tools. This helps level the surface, restoring even reflection without boosting sheen.
Tip: Start slow with a low grit pad, then progress to higher grits for a smoother finish. Keep your tool’s speed steady and low.
Think of it like polishing a diamond – you’re not trying to change its nature, just bringing out its natural shine.
Chemical alternatives and conservative etchants
Mild chemicals can modify surface texture slightly while keeping sheen in check. They’re like a soft brush, gently touching up your countertop.
Caution: Always test on an inconspicuous area first. Some chemicals may react differently depending on the sealer used or the concrete’s composition.
After application, neutralize with an appropriate solution to stop the etching process and rinse thoroughly. Let it dry naturally – no heat guns!
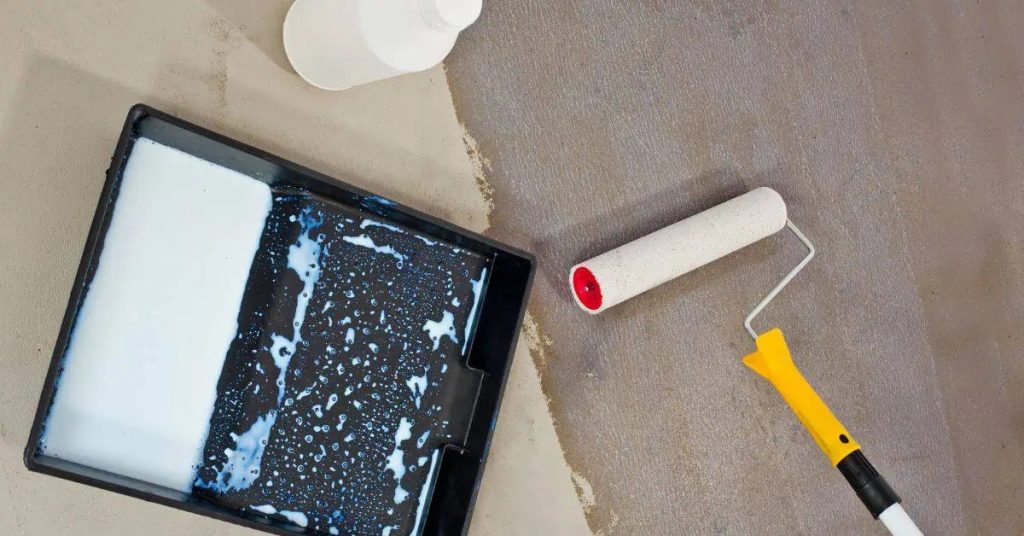
Tools and Materials Checklist
Safety comes first, so wear eye protection, gloves, and appropriate footwear. Ventilate well and protect nearby surfaces during prep and cleaning. Cover drains and remove loose debris before you start.
Test patches help gauge spot severity. Choose pads and tools by category, and pick cleaners that are pH-balanced for routine care. Use residue-removal methods that won’t scratch the surface, and keep a plan for re-sealing after restoration.
Essential hand and power tools
Before you start, make sure you have the right tools for the job. Here’s a checklist of essentials to help you gently restore your concrete countertops.
- Sanding pads or sheets: 120-grit to 400-grit for light abrading and smoothing. Use higher grits for polishing.
- Low-speed buffer: A variable speed orbital sander (6000-8000 RPM) or a dual-action polisher (3000-5000 OPM).
- Scrub brushes: Soft-bristled nylon brushes for cleaning without scratching.
- Applicators: Sponge, microfiber cloths, or lamb’s wool pads for applying sealers and densifiers.
- Safety glasses: To protect your eyes from dust and debris.
- Dust mask: For light sanding tasks. Use a respirator for heavier sanding indoors.
- Shop vacuum: With a HEPA filter to capture fine dust.
- Tack cloth: To remove dust before sealing or polishing.
Quick rule: Always use the lowest grit necessary to avoid over-sanding and maintain your countertops’ sheen.
Cleaners, neutralizers, and sealers to consider
Choose the right cleaners, neutralizers, and sealers to safely remove dull spots without altering your countertops’ sheen.
- pH-neutral cleaner: To maintain the surface’s alkalinity. Avoid acidic or abrasive cleaners that can damage sealers or overlays.
- Etch remover or neutralizer: To remove light etching caused by acids or hard water. Test on a small, inconspicuous area first.
- Penetrating sealer: For natural-looking, matte finish. It soaks into the concrete to protect from within.
- Topical sealer: For glossy or semi-gloss finishes. It sits on top of the surface for added protection and shine.
- Densifier: To enhance the concrete’s strength and durability, especially in high-traffic areas.
- Polishing compound: To restore sheen and smoothness after sanding. Choose one compatible with your sealer.
- Rinse aid: To help water sheet off and dry quickly, preventing streaks or residue.
- pH test strips: To monitor the surface’s alkalinity before and after cleaning.
Quick rule: Always choose cleaners, neutralizers, and sealers that are compatible with your countertops’ finish to avoid damaging or altering the sheen.
Personal protective equipment and containment materials
Protect yourself and your surroundings while working on your concrete countertops with these essential safety items and containment materials.
- Respirator: For heavy sanding or using harsh chemicals indoors. Choose a P100 filter for fine particles.
- Gloves: Disposable gloves to protect your hands from chemicals and dust.
- Eye protection: Safety glasses with side shields to protect against debris and splashes.
- Ear protection: For operating power tools like sanders or buffers.
- Drop cloths: To protect adjacent surfaces from dust, chemicals, or spills.
- Plastic sheeting: To cover drains and prevent clogging with debris or chemicals.
- Trash bags: For easy disposal of used pads, gloves, and other waste materials.
- First aid kit: In case of minor injuries while working.
Quick rule: Always prioritize safety first. Wear appropriate PPE and contain the work area to protect yourself and your surroundings.
Safety Precautions and Test-Spot Protocol
PPE should include chemical-resistant gloves, splash protection, long sleeves, and a respirator suitable for the chemicals used. Work in a well-ventilated area, outdoors if possible, and keep first-aid supplies on hand. Read the product SDS before handling any chemical.
Designate a discrete test area, apply minimal product, and observe the immediate reaction and dwell time. Compare test results to an adjacent untouched area and document changes in color, sheen, and etch depth. If anything looks off, stop and reassess before proceeding farther.
How to set up and document a test spot
Before treating your entire countertop, it’s crucial to perform a test on an inconspicuous area. This helps you understand how the etchant will react with your specific surface.
Mark out a small, discrete area using tape or a marker. Ensure it’s not visible when looking at the countertop from eye level.
Using a fine brush, apply a minimal amount of etchant to this test spot. Follow the manufacturer’s instructions for dwell time, usually around 15-30 minutes. Observe any immediate reactions and compare it with the adjacent untouched area.
Document your findings by taking photos from different angles. Note down the color, sheen, and etch depth. This will help you decide whether to proceed or consult a professional.
Personal and product safety considerations
Safety is paramount when working with chemicals like etchant. Ensure you’re wearing the right PPE: chemical-resistant gloves, splash goggles or face shield, long sleeves, a respirator suitable for acid fumes, and closed-toe footwear.
Always read the product label and Material Safety Data Sheet (MSDS) before use. This will provide you with specific safety instructions and first-aid measures in case of accidents.
Work in a well-ventilated area or outdoors if possible. If indoors, use local exhaust ventilation to remove fumes. Keep a safe distance from heat sources and flames as etchant can be flammable.
Remove any jewelry that could react with the chemicals and tie back long hair to prevent it from getting into your face.
Containment and protecting adjacent surfaces
Protecting nearby surfaces is essential to prevent damage from runoff or abrasives. Use tape and plastic sheeting to cover cabinets, sinks, appliances, and flooring around the work area.
Apply the tape first, then press down the plastic sheeting onto the tape to create a seal. This will help contain any spills or etchant drips.
If your countertop is near a wall, extend the protection up the wall slightly to prevent any splashes from damaging the paint or wallpaper.
Regularly check the protective measures during and after the process. Replace or reinforce them if necessary to maintain a secure barrier.
Preventive Maintenance and Long-Term Planning for Sheen Consistency
The goal is an even sheen through routine maintenance and compatible sealers. Reapply protectants as needed, following product instructions and your existing finish. Build a simple upkeep plan around your workflow and cleaning habits.
Include routine cleaning, signs of wear, and a decision tree for resealing. Compare sealers on penetration, film form, and sheen retention, and note food-safety considerations. Keep a maintenance log for future touch-ups and to track product compatibility.
Routine cleaning habits that protect sheen
To maintain the sheen of your concrete countertops, establish a regular cleaning routine. Cleaning too infrequently allows dirt and grime to build up, while over-cleaning can strip away sealers.
Clean weekly: Use a mild dish soap or pH-neutral cleaner with warm water. Avoid harsh chemicals like bleach or ammonia that can damage the sealer.
Avoid abrasive materials: Don’t use steel wool, scouring pads, or other abrasive materials as they can scratch and dull the surface.
Choosing and maintaining a sealer for consistent sheen
Selecting the right sealer is crucial to maintain your countertop’s sheen. Consider the following factors:
Appearance: Choose a sealer that matches your desired sheen level – matte, satin, or glossy.
Durability: Opt for a sealer with good UV stability and chemical resistance to protect against everyday wear and tear.
Maintenance needs: Ensure the sealer is easy to recoat when needed. Keep track of product batch numbers for future touch-ups.
Environmental and usage adjustments
Adopt these lifestyle changes in your kitchen to minimize dull spots on your concrete countertops:
Use trivets and cutting boards: Protect the surface from direct heat and knife cuts by using trivets for hot pots and cutting boards for food preparation.
Clean spills promptly: Wipe up spills immediately to prevent residue buildup and potential dulling of the sealer.
Avoid acidic or alkaline substances: Keep your countertops away from harsh cleaners, acids (like lemon juice), and alkalis (like baking soda) that can damage the sealer.
DIY Vs Professional Repair and Cost, Plus Common Mistakes to Avoid
Differentiate between small dull spots and deeper etched or chipped areas to judge DIY viability. If the area is shallow and color can be matched, a DIY fix is often reasonable. More complex issues may require a pro for best results.
Common mistakes include using harsh acids, over-etching, skipping patch tests, and sealing too soon. Always verify sealer compatibility and consider warranty implications. When in doubt, request clear quotes and references from a professional.
Pros and cons of DIY repairs
A DIY approach can save you money, but it’s not always the best choice. Here are some pros and cons to consider.
Pros
- Cost-effective: You’ll only pay for materials, no labor.
- Personal satisfaction: There’s pride in a job well done.
- Flexibility: Work at your own pace and schedule.
- Learning opportunity: Gain new skills and knowledge.
Cons
- Skill requirement: DIY etching needs some know-how. Mistakes can be costly.
- Tool investment: You may need to buy or rent tools.
- Time-consuming: It might take longer than a pro.
- Limited warranty: DIY work may void manufacturer warranties.
DIY makes sense for small, shallow fixes and new or light etching. For complex jobs, consider hiring a professional.
When to call a professional and what to ask
Professional help is best for large areas, significant etching, or structural concerns. Here’s when to call:
Color uniformity: Pros can match existing colors better.
Edge/UV-exposed areas: These are tricky and may need pro attention.
Complex countertops: Embedded aggregates or prior improper repairs require a pro’s touch.
When comparing contractors, ask about their experience, references, and process. Request a visit for an estimate if needed.
Typical pitfalls and troubleshooting tips
Avoid these common mistakes to ensure your countertops look their best:
- Wrong chemicals: Using harsh acids or incorrect dilutions can damage surfaces. Always test first.
- Over-etching: Too much etching can remove too much material, leaving counters thin and weak.
- Neglecting prep: Proper surface preparation is key to successful etching.
- Improper PPE: Always wear appropriate safety gear when handling chemicals.
- Sealing too soon: Allow surfaces to dry completely before sealing. Use the right sealer for your counters.
If you make a mistake, act quickly to minimize damage. Consult with a pro if needed.
Conclusion
You can fix dull spots on concrete countertops without wrecking shine, but do it safely and with a plan. The right approach protects durability and keeps the surface looking even and clean.
First verify the surface with a quick wipe, then run a small test spot per safety protocol, then choose gentle cleaning or etching steps in small increments, rinse and inspect, and repeat as needed until the true surface shows through. After you’re satisfied, seal or protect the area to lock in the finish and plan for maintenance.
Common mistakes to avoid include skipping the test spot, over-etching or rubbing too hard, and mixing cleaners or rushing rinsing. Always wear eye and hand protection, work in a well-ventilated area, and keep a clear water rinse on standby. These safeguards save time, money, and recovery risk.
If you see signs of wide damage, deep staining, cracking, or uncertain sealer wear, call a professional to assess and repair. When you keep the steps practical and deliberate, you stay in control and achieve a durable, even sheen. You’ve got this—steady hands, steady plan, solid results.
FAQ
What are the telltale signs that a dull spot is from etching or surface wear rather than a simple finish issue?
Look for a hollow or glassy feel with uneven light reflection. If the area looks milder or darker after cleaning, it’s likely deeper than surface dulling. Check for edges around the spot where sheen changes abruptly.
What should I do to prep the surface before any etching work?
Clean the countertop to remove dirt and residue. Degrease with a mild cleaner and dry completely. Test a small spot first to judge how the surface reacts to etching.
What tools and methods are appropriate for etching without overdoing it?
Use a controlled handheld pad or a soft-bristle brush with a compatible etching agent per manufacturer instructions. Work in small sections with even pressure and stop at the first sign of tide lines or dull halos. Always follow product labels and local guidance.
How do I post-treat the surface so the shine stays without making dull spots reappear?
Rinse thoroughly and allow to dry completely. Apply a compatible sealer or polish as directed by the product label, and avoid over-application. Reassess after curing to ensure even gloss across the countertop.