
Introduction
Oil stains in concrete are marks where oil has penetrated the surface and can ruin color and seal performance. They can trap dirt and may interfere with resealing if not treated. This is why addressing them before applying sealers matters.
For fresh spills, blot up excess oil and clean with a mild degreaser, then rinse and dry before sealing. For set in stains, use a concrete cleaner or degreaser following the manufacturer’s instructions and test a small area first. If stains persist, or you plan to reseal the floor, consider calling a professional to avoid damaging the finish.
Key takeaways
- Oil stains can penetrate and degrade sealers, compromising long-term protection and appearance.
- Fresh spills respond to blotting, mild cleaners, and prompt sealing reinspection advised.
- For set-in stains, avoid harsh solvents that can strip seals; test first.
- Safety: wear gloves, eye protection, proper ventilation; dispose contaminated waste per local rules.
- When in doubt, call professionals for complex staining or delicate sealers.
- Tools and products: choose pH-balanced cleaners, Spot test, avoid chlorine bleach on concrete.
Table of Contents
- Introduction
- Key takeaways
- Quick Overview — Why Oil Stains Are a Problem for Concrete and Sealers
- Assessing Stain Severity and Sealer Condition Before You Start
- Safety, Preparation, and Disposal Considerations
- Deep Cleaning Methods for Fresh Oil Spills (Safe for Most Sealers)
- Deep Cleaning Methods for Set-in and Deep Oil Stains (Minimise Sealer Damage)
- Techniques Specifically Aimed at Protecting Sealers
- Tools, Products, and Material Specs to Choose (and What to Avoid)
- DIY Vs Professional Cleaning — When to Call a Pro and Cost Considerations
- Conclusion
- FAQ
Quick Overview — Why Oil Stains Are a Problem for Concrete and Sealers
Concrete is porous, and oil can travel via capillary action deeper into the substrate. This creates dark, stubborn stains that aren’t always visible on the surface alone. Sealers add a protective layer that can complicate cleaning unless the goal is to remove oil without breaking the coating.
Knowing how different oils behave helps set realistic expectations. Motor oil, diesel, and cooking oil each leave residues that resist water-based cleaners, especially when a sealer is present. The goal is to lift or reduce staining while preserving the sealer’s integrity and avoiding solvent-driven damage.
How oil behaves on bare and sealed concrete
Oil loves concrete’s porous nature. It seeps deep into tiny pores, causing dark stains that won’t budge with just a quick scrub.
Bare Concrete: Oil forms a surface film first, then capillary action draws it down into the substrate. The deeper it goes, the harder it is to remove.
Sealed Concrete: Sealers reduce absorption but don’t stop it entirely. Some sealers, like acrylics or epoxies, can trap oil in pores behind them, making removal tougher. Others, like silane-siloxanes, may allow some penetration but resist staining.
Impact on appearance, safety, and sealer performance
Oil stains mar your concrete’s look. They can also pose slip risks if not cleaned properly.
Appearance: Dark oil marks spoil your concrete’s finish. Repeated cleaning or harsh treatments can dull sealers’ gloss, too.
Safety: Oily surfaces are slippery, especially when wet. Be cautious while cleaning to prevent falls.
Sealer Performance: Harsh cleaners or repeated scrubbing can degrade sealers over time. This leaves your concrete vulnerable to further damage and staining.
Assessing Stain Severity and Sealer Condition Before You Start
Identify stain freshness by visual cues and odor, and note how deeply it seems to sit in the surface. Quick field judgments guide the method you choose. Expect different approaches for fresh, aged, and deep-set stains.
Check sealer condition by looking for peeling, hazing, and uneven moisture movement. Use common inspection tools and safety gear to evaluate the area. Document findings with a simple checklist and photos for reference during treatment decisions.
Visual and simple tests to evaluate stain depth
Before you start scrubbing, understand the oil’s penetration. Here are quick checks:
Blot test: Press a paper towel on the stain. If it lifts color, the stain is fresh or near surface.
Extraction test: Use a small amount of cleaner and a brush to scrub a hidden area. If color comes off easily, the stain’s not deep.
How to identify sealer type and condition
Knowing your sealer helps protect it during cleaning. Here’s how:
Water test: Pour water on the surface. If it beads, you’ve got a film-forming sealer. If it absorbs, it’s a penetrating sealer.
Sheen check: Look at the sheen. High gloss means a film-forming sealer; low or no sheen is a penetrating one.
Patch test: Apply a small amount of cleaner to an inconspicuous area. If it doesn’t damage the sealer, you’re good to go.
Safety, Preparation, and Disposal Considerations
Wear appropriate PPE and ensure good ventilation when working with cleaners and oily residues. Protect nearby surfaces and vegetation from splashes by using drop cloths and barriers. Plan containment to keep rinse water from draining to unintended areas.
Follow local disposal rules for oily waste and contaminated materials. Keep MSDS directions handy and know whether specialized disposal is required. Create a simple log of what you did and what you removed for post-cleanup checks.
Personal protective equipment and ventilation
Safety first, buddy. We’re dealing with chemicals here.
- Gloves: Chemical-resistant, not just rubber gloves. They’ll protect your hands from harsh cleaners and oils.
- Eye protection: Safety goggles or glasses. Not your regular specs, they won’t cut it here.
- Respirator (optional): If you’re using solvents, consider a respirator. It’s not expensive to rent one for a day.
- Long sleeves: Chemical-resistant sleeves or long-sleeved shirt. You don’t want these chemicals on your skin.
- Ventilation: Work outdoors if possible. If indoors, use fans to create cross-ventilation. Don’t let fumes build up.
Waste capture, runoff control, and proper disposal
We need to keep this mess contained. It’s not just about your concrete anymore.
Containment: Use plastic barriers, drop cloths, or even old sheets to catch any run-off. Don’t let it spread onto lawns or drains.
Collection: Have a bucket or container ready for oily rinse water. You’ll need this for disposal later.
Disposal: Check local regulations before you dump anything. Oily water can’t go down storm drains. It’s against the law in most places. Follow MSDS guidance, use hazardous waste codes if needed. Some cities require licensed contractors for disposal. Don’t be that guy who pollutes the neighborhood.
Deep Cleaning Methods for Fresh Oil Spills (Safe for Most Sealers)
Contain the spill quickly and identify the oil type and sealer in use. Wear gloves and eye protection, and mark a small test spot to verify sealer compatibility before full cleaning. A cautious start reduces the chance of sealer damage.
Use absorption-first blotting to lift the oil without scrubbing. Apply dry absorbents and press gently to wick oil into the material. Repeat as needed until most oil is gone.
Immediate absorbent and lift methods
Start by applying a dry absorbent to the fresh oil spill. This could be kitchen cat litter, baking soda, or a commercial absorbent product.
Gently press the absorbent onto the stain with a broom or a flat tool. Don’t scrub; just let it wick up the oil. Repeat this process until no more oil is being absorbed.
Remember: The key here is to act fast and lift that oil off the surface before it seeps in.
Low-impact detergents and agitation
Once you’ve lifted as much oil as possible with absorbents, it’s time for a gentle cleaner. Choose one that’s pH-neutral and safe for your sealer.
Dilute the cleaner according to the instructions, then apply it to the stain using a soft-bristled brush or a mop. Let it sit for a few minutes to break down the remaining oil.
Before you scrub: Test the cleaner on a small, hidden area first to ensure it won’t damage your sealer.
Deep Cleaning Methods for Set-in and Deep Oil Stains (Minimise Sealer Damage)
Begin with an assessment of stain age, sealer type, and compatibility, then test inconspicuously. Develop a progressive plan that starts with mild methods and only moves to stronger options if necessary. This keeps options open for resealing if needed.
For each method, outline surface prep, product use, dwell time, and rinsing steps. Focus on minimizing sealer contact and choosing low-impact techniques first. Document results and adjust as you go.
Poultices and Paste Cleaners for Drawing Out Deep Oil
For set-in, deep oil stains, poultices and paste cleaners can draw out the oil. Start by testing a small area to ensure no adverse reactions with your sealer.
Preparation: Mix a poultice or paste cleaner according to package instructions. It should be thick, like toothpaste.
Application: Apply the mixture liberally over the stain using a trowel or putty knife. Cover with plastic wrap to keep it moist. Let it sit for 24-48 hours.
Removal: Scrape off the poultice. If the stain is still visible, repeat the process until it’s gone. Neutralize with a mild detergent and water solution, then rinse thoroughly and let dry.
Solvent-Based and Enzyme Cleaners — Pros and Precautions
For tough stains, solvent or enzyme cleaners can be effective. But remember, solvents can damage fresh or waxed sealers.
Compatibility: Always test on a small area first to ensure your cleaner won’t harm the sealer. Follow manufacturer’s guidelines for mixing and application.
Application: Apply the cleaner liberally over the stain, let it dwell for 15-30 minutes, then agitate with a soft-bristle brush or cloth. Rinse thoroughly and let dry.
Monitoring: Keep an eye out for any dulling or hazing of the sealer. If you see signs of damage, stop immediately and consider resealing after cleaning.
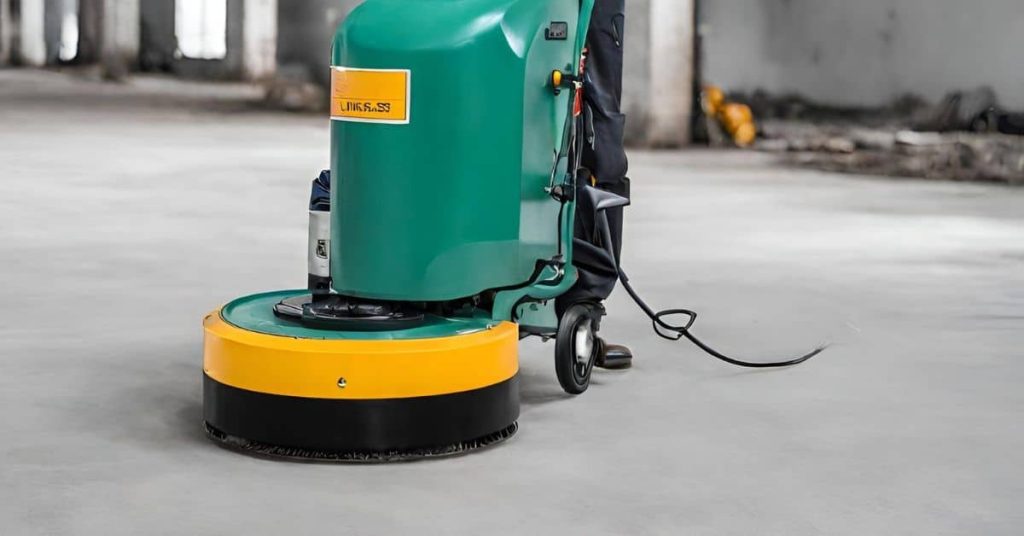
Mechanical and Thermal Aids (Scrubbing, Steam)
For stubborn stains, mechanical and thermal aids can help. But be gentle — aggressive methods can damage sealers.
Scrubbing: Use a soft-bristle nylon brush or cloth with mild detergent and warm water. Scrub gently in circular motions. Avoid wire brushes that can scratch the sealer.
Steam Cleaning: Use a steam cleaner on low pressure. The heat helps break down oils, but be careful not to overheat, which could damage the sealer.
Monitoring: Keep an eye out for any signs of damage to the sealer. If you see any, stop immediately and consider resealing after cleaning.
Techniques Specifically Aimed at Protecting Sealers
Identify the sealer type and how it interacts with cleaners before you start. This informs which methods are appropriate and how aggressively you proceed. Tailor steps to avoid compromising the coating.
Test patches with a dilution plan and follow label directions for dwell time. Use the gentlest effective cleaner and control contact time to protect the sealer while cleaning stains. Plan for resealing if the surface shows signs of degradation after treatment.
Patch testing and escalation protocol
Before diving into deep cleaning, test your cleaner on a small, hidden area. This helps avoid damaging the sealer.
Start with a diluted solution. If it’s safe, gradually increase concentration until you find the lowest effective one. Inspect for any signs of softening or discoloration after the recommended dwell time from the product label.
Only escalate to stronger cleaners if the test area remains unharmed and the stain lifts. Safety first, mate!
What to avoid: common sealer-damaging actions
Some cleaning methods can wreck your sealer faster than a jackhammer on fresh concrete. Here’s what to steer clear of:
- Undiluted harsh solvents: They strip sealers like there’s no tomorrow.
- Abrasive pads or wire brushes: These can scratch and damage the sealer, making it useless.
- Uncontrolled high-pressure washing: Too much pressure can blast right through your sealer.
- Leaving cleaner on too long: Prolonged contact gives cleaners more time to attack the sealer.
- Using cleaners not meant for concrete: Some cleaners are harsh and can damage sealers.
Remember, prevention’s better than cure. Keep these no-nos in mind while cleaning your concrete.
Tools, Products, and Material Specs to Choose (and What to Avoid)
Choose core tool categories such as absorbents, pH-neutral degreasers, poultice materials, soft brushes, and low-pressure washing options. Use them where they fit the stain type and sealer presence. Save harsher methods for when they are clearly needed and permitted.
Verify product specs like pH, sealant compatibility, and application instructions. Check for guidance on dwell times and any required rinsing. Avoid cleaners that can soften or strip sealers and never skip compatibility checks on inconspicuous spots.
How to read product labels and specs for sealer safety
When choosing cleaning products, always check the label. It’s your guide to keeping your sealers safe.
Check the pH: Most sealers don’t like acidic or alkaline cleaners. Stick to neutral ones (pH 7).
Active ingredients: Look for mild degreasers, not harsh chemicals that could damage your sealer.
Dilution instructions: Follow them to the dot. Too strong can harm your sealer.
Manufacturer notes: They often mention ‘safe for sealed surfaces.’ If it’s a no, find another cleaner.
Tools checklist and care
Before you start, gather the right tools. It’ll save you time and protect your sealers.
- Soft-bristled brushes: Nylon or soft bristles won’t scratch your sealer. Use them for scrubbing.
- Squeegees: To remove excess cleaner and oil, keep your sealers intact.
- Containment materials: Tarps, barriers to catch runoff, prevent oils from spreading.
- Low-pressure washer (1200-1500 PSI): Too high can damage sealers. Use the lowest setting that works.
- Absorbents: Cat litter, diatomaceous earth to soak up fresh oil spills.
- Poultice materials: Kaolin clay or baking soda pastes for deep-seated oils.
- pH test strips: To check your cleaners are neutral (pH 7).
- Protective gear: Gloves, goggles, and aprons to keep you safe.
Quick rule: After use, rinse tools thoroughly. Oil residue can damage sealers next time around.
DIY Vs Professional Cleaning — When to Call a Pro and Cost Considerations
Decide based on stain severity, sealer condition, and access to the right tools. If the charge of risk to the sealer feels high, consider professional help. Weigh the effort against the potential outcome for your concrete.
When requesting quotes, share details on stain type and age, sealer status, and access constraints. Compare methods, product brands, warranties, and cleanup practices, not just price. Prepare the site by photographing stains and removing loose debris before a visit.
Signs you should hire a professional
Deep cleaning concrete oil stains can be tricky, even for the most experienced DIYers. Here are signs it’s time to call in the pros:
Very deep or large stains: If your stains are deeply ingrained or cover a big area, they might be beyond your DIY capabilities.
Damaged or unknown sealers: If you’re unsure about the condition of your sealer or what type it is, it’s best to leave the job to professionals. They can assess and protect the sealer during cleaning.
Failure of DIY treatments: If you’ve already tried DIY methods without success, it might be time to bring in the experts.
How to evaluate pro quotes and warranty questions
When comparing professional quotes, don’t just focus on price. Here’s how to make an informed decision:
Request written estimates: Always get a detailed, written estimate outlining the work to be done, products to be used, and the total cost.
Ask about methods and sealer preservation steps: Inquire about their cleaning methods and how they plan to protect your sealer. This shows they understand the job’s complexity and have a plan in place.
Confirm insurance and guarantees: Ensure the company is insured and offers a warranty or guarantee on their work. This protects you if something goes wrong.
Compare treatment scope, not just price: Consider what each quote includes in terms of prep work, cleaning methods, and follow-up care. The cheapest option isn’t always the best value.
Conclusion
Stubborn oil stains threaten both the look and longevity of a sealed concrete floor. Do the work in steps, test first in a small area, and keep safety front and center so you don’t wreck the sealer or weaken the surface.
Start by assessing the stain and sealer condition, then choose a cleaning approach that fits how fresh or set-in the stain is. If you’re moving into deep cleaning, plan for proper ventilation, spill containment, and disposal, and proceed in a conservative, methodical way—apply a cleaner, agitate as recommended, rinse thoroughly, and recheck the results before moving on. Keep the goal in mind: remove oil without lifting or dulling the sealer.
Common mistakes to avoid are using overly harsh chemicals without testing, scrubbing too aggressively and risking surface damage, and skipping a test spot before full application. Always wear appropriate protection, ventilate the area, and follow manufacturer guidance for any cleaners or sealers. If the stain persists after a couple of rounds, or if the sealer shows signs of swelling, discoloration, or loss of film, don’t push it—call a pro and discuss cost and treatment options.
FAQ
Why are oil stains a problem for concrete and sealers?
Oil can penetrate concrete and lift binder around the stain, which can reduce sealer adhesion and create ghosting. Some sealers are more forgiving, but many will dull or discolor if oil remains. Always test a hidden spot before wide cleaning to avoid chasing damage.
What’s the difference between removing fresh oil stains and set-in stains?
Fresh spills are easier to blot up and rinse away, with less chance of soaking in. Set-in stains have penetrated deeper and may require absorbents, cleaners, or agitation without harming the sealer. Start with gentler methods and escalate only as needed and safe for the coating.
What DIY methods work best for home use without wrecking the sealer?
Begin with blotting and mild cleaners recommended for your sealer, then consider poultices or absorbents if needed. Avoid harsh solvents or abrasive scrubbing on sealed surfaces unless the manufacturer approves. Always follow product labels and stop if you notice peeling or dulling.
When should I call a professional for oil stains?
If the stain is deep, widespread, or you’re unsure about the sealer’s tolerance, consult a pro. A contractor can test sealer compatibility and apply stain-removing techniques that minimize damage. Get a clear plan and cost expectations before work begins.