
Introduction
You can know if you pulled a tile correctly by verifying coverage and proper adhesion.
The guide walks through practical steps, common signs of good and bad installs, and simple rules of thumb to help you assess a tile pull on the job.
Key takeaways
- Plan a careful tile pull after curing to prevent damage to surrounding work.
- Use a margin of safety with a tile cutter and protective gloves.
- Inspect backerboard and thinset visibility before reinstallation to gauge adhesion.
- Document substrate type, adhesive brand, trowel size, and coverage findings.
- Choose proper notch trowel and adhesive for your tile size.
- Decide repair vs redo based on depth of coverage gaps and cracks.
Table of Contents
- Introduction
- Key takeaways
- Why pull a tile? Purpose and when to check coverage
- Tools and materials checklist for safely pulling a tile
- Step-by-step method: how to pull a tile without wrecking the surrounding work
- Inspecting coverage: what to look for under the tile
- Interpreting what you find: repair vs redo decisions
- Best adhesives, trowel selection, and application tips to avoid coverage issues
- Documenting findings and creating a coverage checklist for future installs
- Visual signs and examples to look for
- When to call a pro and warranty/legal considerations
- Conclusion
- FAQ
Why pull a tile? Purpose and when to check coverage
Pull a tile to see what’s really under it. You’re checking adhesive coverage, voids, and any waterproofing problems. Do this for new installations, warranty claims, or when you suspect delamination.
This isn’t nitpicking. Seeing the underlayment and thin spots helps you fix issues before they turn into leaks or loose tiles. It saves you time and money in the long run.
Common failure signs that justify inspection
Use this checklist when you notice something amiss with your tile installation. It’s a quick way to spot issues before they become costly repairs.
- Hollow sounds: Tap tiles lightly; hollow sound indicates loose bond. Confirm by comparing to solid-sounding tiles.
- Loose edges: Gently wiggle tile edges; movement means poor adhesion. Check corners too, as they’re often weak points.
- Lippage issues: Measure height difference between adjacent tiles with a straightedge and feeler gauge. Lippage over 1/8 inch is noticeable and problematic.
- Discoloration or staining: Look for dark spots, especially around grout lines; can indicate moisture penetration or poor quality materials.
- Bubbles under tiles: Lift a corner of the tile gently to check for air pockets. Bubbles mean inadequate coverage and potential lifting.
- Cracks in thinset or mortar bed: Inspect areas around tiles; cracks can indicate structural issues beneath the surface.
- Uneven grout lines: Use a straightedge to check for consistent grout thickness. Inconsistent lines suggest uneven tile placement.
- Bulging corners: Check if corners are raised or protruding compared to surrounding tiles; this can indicate improper installation technique.
- Peeling edges of tiles: Look for lifting edges, especially around the perimeter. This is often a sign of inadequate thinset coverage.
- Visible gaps between tiles and walls: Measure these gaps with a ruler or feeler gauge; significant gaps can lead to water damage over time.
- Uneven tile surface: Use a level across the entire installation. Unevenness suggests improper leveling during installation.
- Cracking tiles: Inspect for any cracks, especially near stress points like doorways or corners. Cracks can indicate structural instability.
- Grout cracking or crumbling: Check grout lines for signs of wear; crumbling grout means poor adhesion and potential water damage.
Quick rule: If something looks off, sounds hollow, or feels loose, it’s worth a closer look to avoid bigger problems later on.
Timing: best moments to perform a pull
Check base compaction before laying tiles. If the ground isn’t solid, you’ll regret it later when your tiles start cracking or shifting.
After grout sets but before sealing, do another pull check. This catches any issues without damaging finished work. Look for loose tiles and uneven surfaces.
If you spot cracks or gaps during installation, don’t wait—pull the tile right away to fix the problem underneath. It’s better to redo a small area now than deal with bigger headaches later.
Tools and materials checklist for safely pulling a tile
Start with a tight, prioritized toolkit for pulling tiles safely. Core tools: pry bars, oscillating tool, putty knife, chisels, and proper safety gear like goggles and gloves. Optional items that help when needed: a heat gun to loosen adhesive and a suction cup to lift stubborn tiles.
Having these tools ready keeps the job moving and reduces tile damage. Using the right tool for the job prevents injuries and makes the removal cleaner, saving time on cleanup.
Safety and prep gear
Use this checklist before you start pulling tiles to ensure your safety and the integrity of surrounding finishes.
- Eyewear: Wear safety glasses or goggles. Confirm they fit snugly without fogging up. Skipping eye protection can lead to serious injury from flying debris.
- Work gloves: Put on heavy-duty gloves that cover your wrists. Check for puncture resistance and flexibility. Not wearing gloves can result in cuts, scrapes, or chemical burns.
- Dust mask: Wear a respirator or dust mask rated N95 or higher. Ensure it seals well around the nose and mouth. Breathing tile dust can cause respiratory issues.
- Protective clothing: Cover your arms and legs with long sleeves and pants. Confirm no skin is exposed to potential hazards. Skin exposure leaves you vulnerable to cuts, burns, and chemical irritation.
- Dust control measures: Set up plastic sheeting or drop cloths around the work area. Check that it’s securely taped down. Dust can damage surrounding finishes if not contained properly.
- Tile edge protection: Use foam or rubber strips to shield edges of adjacent tiles and fixtures. Confirm they are snug against the tile edges without causing damage. Leaving unprotected edges can lead to chipped corners or cracked grout lines.
- Grout line masking: Apply painter’s tape along grout lines to prevent damage during removal. Ensure it adheres well but won’t leave residue when removed. Improperly masked areas risk damaging the grout and surrounding tiles.
- Surface protection: Cover nearby surfaces with plastic sheeting or drop cloths. Check that they are securely fastened without gaps. Unprotected surfaces can get stained, scratched, or damaged by falling debris.
- Emergency kit: Have a first aid kit and fire extinguisher within reach. Confirm contents are up-to-date and accessible. Being unprepared for emergencies can lead to delays in treatment or response times.
Quick rule: Always wear safety gear and set up dust control before starting any tile removal work.
Tools for non-destructive vs destructive pulls
This checklist helps you decide on the right tools to use when removing tiles. Use it before starting any tile removal project.
- Tile lifters: For non-destructive pulls, choose soft rubber or plastic tile lifters. Confirm they are flexible and won’t scratch the surface underneath. Skip this and you risk damaging the subfloor.
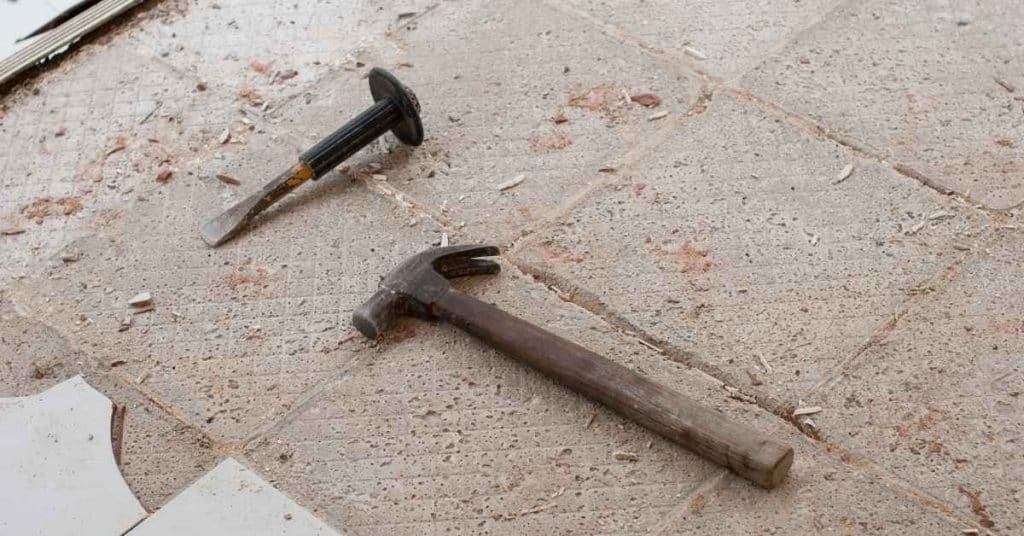
- Hammer and chisel: If expecting to replace tiles entirely, use a hammer and chisel for destructive pulls. Check that your chisel is sharp and your hammer has a flat face. A dull tool can lead to wasted effort and broken tiles.
- Grout saw: Use this for non-destructive removal of grout lines only. Ensure the blade is fine-toothed and suitable for hard surfaces. An incorrect blade choice will damage surrounding tiles.
- Heat gun: For adhesive removal in non-destructive pulls, confirm your heat gun has variable temperature settings. A too-hot setting can warp or burn the subfloor.
- Putty knife: Essential for both types of pulls to scrape away old adhesive and grout. Confirm it’s sharp and flexible enough to fit into small spaces. A blunt tool will leave residue behind.
- Vacuum cleaner: Use a wet/dry vacuum for cleanup during destructive pulls. Ensure it has attachments for tight corners. No vacuum means more manual cleaning, risking injury from sharp edges.
- Circular saw: For cutting through tiles in destructive pulls only. Confirm the blade is diamond-tipped and suitable for hard surfaces. A wrong blade choice can ruin your tool or cause accidents.
- Utility knife: Useful for scoring grout lines during non-destructive pulls. Ensure it has a sharp, replaceable blade. A dull utility knife will tear the surface and waste time.
Quick rule: Use soft tools like rubber lifters for saving tiles; use hard tools like hammers when replacing them entirely.
Step-by-step method: how to pull a tile without wrecking the surrounding work
To pull a tile without wrecking the surrounding work, score the grout first, then expose the edge. Wedge and lift gently, keeping the tile intact and the substrate clean.
This saves you from costly repairs and a bigger job. Work slowly, use thin wedges and steady hands, and plan every cut to protect nearby tiles. You’ll thank yourself when the rest of the floor stays solid and you can reuse the tile if it comes up clean.
Step-by-Step Process
This sequence will guide you through safely removing a single tile without damaging the surrounding area.
- Action: Mark the center of the tile to remove with an X using a pencil. Reason: This helps ensure you’re working on the right tile and provides a clear starting point for your work. Check: The mark should be visible and centered, no need to dig in too deep as it’s just a guide.
- Action: Use a chisel and hammer to gently tap around the edges of the marked tile. Reason: This breaks the grout and loosens the bond between the tile and adhesive underneath. Check: The surrounding tiles should remain undamaged, with only the targeted tile showing signs of loosening.
- Action: Once the edges are loose, carefully insert a flat pry bar under the center X mark to lift the tile out. Reason: This prevents cracking or breaking the tile unnecessarily. Check: The tile should come up cleanly with minimal damage; if it breaks, stop and assess whether you need professional help.
- Action: Clean any remaining adhesive from the surface using a scraper and sandpaper. Reason: This ensures a smooth base for new tile installation or repair work. Check: The surface should feel clean and free of debris, with no raised edges or uneven spots.
- Action: Apply a thin layer of adhesive to the cleaned area according to manufacturer instructions. Reason: This prepares the surface for new tile installation. Check: The adhesive should be evenly spread and not too thick; it should feel tacky but not wet.
Pro tip: Always wear safety goggles when working with tools like hammers and chisels to protect your eyes from flying debris.
Techniques for intact tile removal
To remove a single tile without damaging the surrounding area, start by scoring along the grout lines with an oscillating tool. This weakens the bond between the tile and adhesive. Be careful not to let the blade wander off-target.
Next, use a chisel and hammer to gently pry up one corner of the tile. Work slowly and steadily, applying pressure evenly around the edges. If you encounter resistance, pause and check base compaction before continuing.
To preserve tiles for re-use, avoid using excessive force or breaking them into pieces. Once loose enough, slide a thin spatula under the tile to lift it out cleanly. Clean off any remaining adhesive carefully with a scraper.
Techniques when tile is sacrificial
When you’re dealing with a sacrificial tile, speed up the process by using a chisel and hammer. Hit the center of the tile firmly but not too hard to avoid damaging the substrate or adjacent tiles. Check base compaction before you start to ensure it can handle the impact.
Work your way around the edges gently, prying up small sections at a time. This helps prevent cracks from spreading to nearby tiles. Once the tile is loose enough, lift it out in pieces and clean up any remaining adhesive carefully.
Avoid using power tools unless you’re experienced with them on delicate surfaces. They can cause more damage than they save time. Stick to hand tools for better control over where and how hard you hit.
Inspecting coverage: what to look for under the tile
Inspecting coverage means checking that the tile sits on a solid bed with good contact and minimal voids. Look for a clear percentage of coverage and avoid large gaps; understand whether you are using full-bedding or spot-bonding and if that choice matches the tile and substrate. If the bed is flaky or hollow in spots, fix it before grouting.
Clear, even contact prevents cracks and hollow spots that show up after drying. Red flags include powdery membranes, uncured thinset, and gaps at edges or corners. Addressing these issues on a DIY job saves time, money, and call backs from a failed install.
Coverage standards and quick visual tests
When it comes to coverage under your tiles, you want to aim for at least 80-90% on floors. For large format tiles or walls, go for full bedding. A good rule of thumb is if you can see more than a few spots where the base isn’t covered by mortar, it’s not enough.
To do a quick visual test, stand back and look at your work from different angles. If light reflects off uncovered areas, or if you notice gaps bigger than half an inch, you need to add more mortar. Remember, check base compaction too; loose spots will show up as dips in the tile surface.
Another simple test is to run your hand over the tiles. If it feels bumpy or uneven, there’s likely not enough coverage underneath. Smooth and even means you’ve got a good bed of mortar down there.
Using tools to test adhesion and coverage
Tapping is a quick way to check if your tile adhesive has stuck properly. Just use a hammer or screwdriver handle to tap around the edges of each tile. If it sounds hollow, you know there’s an issue with adhesion. This means the tile isn’t bonded well and could come loose.
Pull tests are another method for checking adhesion strength. Use a specialized tool that can pull out small metal tabs attached to the tiles before installation. If the tab pulls out easily, it shows weak bonding. Remember, these tests should be done on random samples, not every single tile.
Dye or indicator solutions are handy for spotting gaps and voids under your tiles. Apply a thin layer of dye around the edges of each tile after installation but before grouting. If you see the color seeping through, it means there’s an air pocket or gap underneath. This is a clear sign that you need to rework that area.
Interpreting what you find: repair vs redo decisions
When you find gaps in thinset or loose tiles, decide repair vs redo based on overall coverage. Reapply thinset only where it will bond and replace the entire field if the coverage is shot.
Understanding coverage helps you avoid wasted work and future failure. Spot repairs save time but ignore a failing base if the field is compromised; when in doubt, redo the whole area.
Small voids and edge problems: quick fixes
When you spot small voids or issues at the edges of your concrete, don’t panic. These are often fixable without tearing everything down. Start by checking base compaction. If it’s solid, you can usually inject epoxy or polymer-modified thinset to fill in those gaps. Clean the area, remove loose material, and dampen the surface so the adhesive can bond properly. Apply the filler with a syringe or small trowel, then press and back-butter adjacent tiles to ensure contact. Use a stable reference line to maintain even tile height and grout lines. Allow adequate curing time per manufacturer guidelines before grouting.
For edge problems, like cracks or chips, re-bedding the edges is a quick solution. Use a high-quality concrete patching compound and make sure it matches your existing surface closely for a seamless look. If the edge is structurally compromised, remove and replace the affected tile row to prevent future failures.
Avoid the temptation to redo large areas just because of small issues. It’s costly and time-consuming. Focus on fixing what you can with minimal fuss, and move on to enjoy your space again.
Large-area failures and waterproofing breaches
If you spot widespread debonding, cracking, or peeling of the membrane across large areas, it’s a clear sign that there’s a systemic failure. This isn’t just cosmetic; it means water is getting in where it shouldn’t be. Don’t waste time on patch jobs—full removal and re-installation are likely your best bet.
When dealing with waterproofing breaches, check base compaction. If the concrete slab wasn’t properly compacted or if there’s significant settlement, you’re looking at more than just a surface issue. These problems can undermine the entire structure’s integrity and lead to further damage down the line.
In such cases, it’s crucial to assess whether the existing waterproofing system is salvageable or needs replacement entirely. If you find that water has penetrated deep into the substrate or if there are signs of structural weakness beneath the surface, don’t hesitate—call in professionals who can handle a full-scale redo safely and effectively. Add moisture testing (in-situ concrete moisture, or a relative humidity test) and verify substrate readiness before installing a new membrane or setting materials. Plan for proper surface preparation, tanking or waterproofing the substrate, and using compatible products for bonding and adhesion. Budget for potential tile removal, disposal, and disposal of contaminated materials, and verify warranty coverage with product manufacturers.

Best adhesives, trowel selection, and application tips to avoid coverage issues
Use the right thinset for your substrate, pick the correct notch size, and butter or back-butter to hit full coverage. Smaller tiles need different trowel notches and more buttering than large tiles. Without this, you’ll get thin spots, voids, and uneven tile.
Getting coverage right prevents cracks, lippage, and failed bonds when the floor settles or moisture changes. Take the time to test a small area and verify coverage before you set the whole room.
Matching trowel notches to tile size and substrate
Pick the right trowel for your tiles based on their size. For small tiles, go with a narrower notch, like 1/8 inch or 1/4 inch. Larger tiles need wider notches, such as 1/2 inch or bigger. This helps spread the adhesive evenly without leaving gaps.
Before you start laying tile, check base compaction. If your substrate is uneven, use a trowel with deeper notches to fill in low spots and ensure good coverage. But be careful: too much adhesive can cause tiles to sink or crack over time.
Remember, the goal is to have just enough adhesive on the surface so it’s slightly visible when you press down your tile. If there’s too little, your tiles won’t stick well; if there’s too much, they’ll be too thick and might break under pressure.
Techniques to ensure full contact (back-buttering, pressure)
To get your tiles down right and avoid gaps or voids, you need to make sure they stick fully to the surface. Start with back-buttering. This means applying a thin layer of adhesive directly on the back of each tile before placing it. Use a small notched trowel for this; it’s like spreading peanut butter on bread but thinner.
Once you’ve got your tiles back-buttered, use a larger notched trowel to spread an even bed of adhesive on the floor or wall. Press each tile firmly into place with a rubber mallet. This helps ensure full contact and prevents air pockets from forming under the tiles.
Avoid using too much pressure when setting large-format tiles, as this can cause cracking. Instead, use a spreader tool to evenly distribute adhesive across the back of the tile before placing it down gently but firmly. This technique is crucial for achieving a professional look and preventing future problems.
Documenting findings and creating a coverage checklist for future installs
Keep a simple log of pull results, coverage percentage, photos, and corrective actions. This creates a clear record for quality control and warranty work. It helps you spot issues early and show what was done.
This context shows why it matters on a DIY jobsite: you can prove what was done, track improvements, and guide future installs. It keeps everyone honest, saves time, and reduces disputes if a claim comes up.
Photo and note best practices for proof and troubleshooting
Use this checklist every time you pull concrete to document your work accurately.
- Angle shots: Capture from above and eye level. Confirm by checking the pour’s surface texture is clear in photos.
Gotcha: Missing angles can hide defects. - Show scale: Include a measuring tape or known object. Verify by ensuring measurements are visible.
Gotcha: Without scale, it’s hard to gauge size and depth. - Lighting right: Shoot in natural light; avoid shadows. Confirm by checking for even illumination across the photo.
Gotcha: Poor lighting hides flaws. - Note key details: Write down mix ratios, curing times, and weather conditions. Check by reviewing notes against photos.
Gotcha: Missing data leads to confusion later. - Mark reference points: Use stakes or spray paint for orientation. Confirm by verifying all shots include these marks.
Gotcha: Without references, it’s hard to locate issues. - Capture edges and corners: Focus on where pours meet. Check by ensuring no gaps are missed in photos.
Gotcha: Edges often hide problems. - Note pour dates: Write down when each section was poured. Confirm by cross-referencing with your calendar.
Gotcha: Missing dates can mix up curing times. - Capture before and after: Take photos of the area before pouring concrete. Verify by comparing pre- and post-pour shots.
Gotcha: No baseline means you don’t know what changed. - Note any issues
Creating an install-ready checklist
Use this checklist before starting your concrete installation to ensure everything is prepped and ready for a smooth pour.
- Substrate level: Check that the base layer is flat. Use a straight edge or laser level to confirm. Uneven substrate can cause cracking.
- Trowel size: Verify trowels are the right size for your concrete mix. Measure them against specs. Incorrect sizes lead to poor finish quality.
- Membrane compatibility: Confirm membranes adhere properly to base layer. Test with a small patch. Incompatibility leads to leaks and rework.
- Weather conditions: Check temperature, humidity, wind speed. Ideal pour temps are 50-90°F (10-32°C). Extreme weather can affect curing.
- Concrete mix ratio: Ensure correct water-to-cement ratio. Use a slump test to confirm. Incorrect ratios lead to weak concrete.
- Rebar placement: Confirm rebar is correctly spaced and tied off. Measure spacing with tape measure. Improper placement can cause structural issues.
- Drainage systems: Verify all drainage channels are clear and functional. Test by pouring water into gutters. Blockages lead to pooling and cracking.
- Formwork stability: Check that forms are securely braced. Tap with a hammer to ensure no movement. Loose forms can shift, causing uneven pours.
Quick rule: Always double-check substrate prep before pouring concrete to avoid costly rework later on.
Visual signs and examples to look for
Watch for peeling patches, staining, or bubbles in the coating. These signs point to failed coverage and need correction.
These cases show common mistakes, from skipping primer to over-thinning paint. Knowing them helps you fix the job right the first time, save time, and avoid future leaks.
Large-format tile voids: causes and cures
When you see big gaps under large tiles, it’s usually because the base isn’t strong enough to support them. Make sure your base compaction is solid before laying any tile. Also, check if the installer didn’t back-butter the tile properly. If there’s no mortar underneath, that’s a clear sign of poor installation.
To fix voids, you need to remove the loose tiles and reapply mortar correctly. Start by scraping out all old grout and mortar from around the affected area. Then, apply new thinset in a thick layer under each tile, making sure it’s spread evenly across the back of the tile. Press firmly into place and use spacers to keep everything aligned.
Remember, prevention is key. Always check base compaction before laying any large-format tiles. If you’re unsure about your skills or tools, consider hiring a professional for this step to avoid costly mistakes later on.
Wet areas and waterproofing overlaps
When dealing with wet zones, the devil’s in the details. Missed membranes or improper overlap can lead to hidden leaks that only show up when it’s too late. Check your membrane edges, ensuring they’re at least 6 inches over any adjacent surfaces and properly sealed. If you see gaps or wrinkles, you’re setting yourself up for trouble.
During a pull check, focus on the corners where walls meet floors. These spots are notorious for improper overlap and can be easily missed if you’re not careful. Make sure your waterproofing membrane is continuous and doesn’t end abruptly at any transition point. A good rule of thumb: if water could get in, it will.
Remember, a well-sealed wet area starts with a solid base. Before laying down the membrane, check base compaction. If your substrate isn’t level and firm, no amount of waterproofing is going to fix that. Take the time to prep properly; it’s worth every minute.
When to call a pro and warranty/legal considerations
Call a pro when the job involves structural issues, major waterproof failures, or anything outside your DIY scope. Warranties and legally binding guarantees require licensed contractors and documented inspections. Don’t risk your foundation or insurance by guessing.
Evidence matters: keep records of all checks, photos, dates, and what you found. When you call a pro, they will expect this coverage information to verify claims and determine if the warranty applies. Understanding these rules helps you avoid voided warranties and costly disputes.
What data contractors want to see from your inspection
This checklist helps you gather the right info for a contractor’s assessment. Use it when you suspect issues that need professional eyes.
- Crack Widths: Measure cracks with a ruler. Note if they’re hairline or wider than 1/8 inch.
Gotcha: Wider cracks can indicate major structural problems. - Pitting Depth: Use a depth gauge to measure pitted areas.
Gotcha: Ignoring deep pits leads to water penetration and further damage. - Bleeding Water: Pour water on suspect spots. Check if it soaks in or runs off.
Gotcha: Soaking indicates poor concrete mix or improper curing. - Surface Texture: Feel the surface for smoothness or rough patches.
Gotcha: Uneven texture can mean improper finishing techniques. - Rebar Exposure: Look for exposed rebar. Note its location and extent.
Gotcha: Exposed rebar rusts, weakening concrete structure. - Spalling Areas: Identify flaking or chipping of the surface.
Gotcha: Spalling can be a sign of underlying moisture issues. - Concrete Samples: Take small samples from damaged areas for lab testing.
Gotcha: Without samples, contractors may guess at repair methods. - Drainage Issues: Check if water pools or runs away from the concrete.
Gotcha: Poor drainage causes constant wetness and deterioration. - Expansion Joints: Measure gaps between sections of concrete. Ensure they’re consistent.
Gotcha: Inconsistent joints can cause cracking and shifting. - Surface Leveling: Use a level to check if the surface is even.
Gotcha: Uneven surfaces lead to tripping hazards and uneven wear. - Waterproof Membrane: Look for signs of a waterproof layer underneath.
Gotcha: Missing membrane can cause water damage over time. - Concrete Age: Note the age of the concrete. Older surfaces may need different treatments.
Gotcha: Newer concrete might not have cured properly, causing issues later.
Quick rule: Always document and measure before you fix.
Understanding installer warranties and manufacturer requirements
When you’re working on a concrete project, make sure to read the fine print on warranties. If you don’t follow manufacturer trowel specs, your work might not be covered if something goes wrong later. And that’s no joke; I’ve seen homeowners lose out big time because they didn’t do their homework.
Also, keep an eye on the base compaction and any other critical steps listed in the warranty documents. If you skip these or make changes without proper documentation, it’s like waving goodbye to your warranty coverage. Trust me, I’ve seen too many DIYers get burned because they thought shortcuts were okay.
So before you start pouring concrete, take a moment to understand what the installer warranties cover and what manufacturer requirements are non-negotiable. It’s worth spending that extra time upfront to avoid headaches down the road.

Conclusion
Pulling a tile is about safety and lasting results. Do it right and you protect the substrate, prevent costly damage, and keep the look clean and durable.
Start by unplugging or turning off power as needed and put on eye protection. Loosen the tile without hammering, inspect the base and adhesive under the surface in a small reveal, note hollow spots and thickness, set the tile aside, and document what you find so you can decide repair vs redo and choose the correct adhesive and trowel for the next install. Check and record your findings as you go, then apply a practical repair plan and assemble the right materials before continuing.
Two common mistakes to avoid are prying too aggressively and rushing the notes or tests. Don’t force tiles loose or you’ll damage surrounding work, don’t mix or apply adhesives without following the product instructions, and don’t skip a moisture or substrate check. Always test a small area first, work in a controlled sequence, and wear eye and hand protection as a baseline safety rule.
If you uncover serious substrate damage, persistent moisture, or warranty considerations, call a professional rather than press on. Otherwise, use the step-by-step checks and the documented findings to guide your next install. Stay disciplined, stay safe, and you’ll finish with a solid, professional-looking result.
FAQ
How do I know if my tile has good coverage on a wall or floor?
Check the thinset under the tile. Press with a slight twist and look for full contact with no voids. If you hear a hollow sound when you tap the tile, you pulled too soon and need to rework that spot.
How can I test coverage while I install?
Do a light back-butter on one tile and then set it in place. Lift it to see if the thinset sticks to the back evenly. If you see dry spots on the tile back, add more thinset there and re-seat the tile.
What common mistakes ruin coverage?
Using too little thinset, skipping back-buttering, moving tiles too soon, or spreading thinset too thin. Bad substrate or wrong notch size also wrecks coverage fast. Fix those before you go any further.
How do I know the job stays right after it cures?
Check with a straightedge across the grout lines and feel for consistent height. If you find gaps or lippage, fix it before grouting. Once cured, uneven areas won’t magically fix themselves.