
Introduction
Primers for plaster before paint are coatings that seal the surface and even out suction so paint goes on smoothly. In plain words, you dampen any dry areas, fill small flaws, and create a uniform base. Choose a primer labeled for plaster and follow the label for surface prep and drying times.
Prepare the surface by cleaning away dust, repairing cracks, and letting dust settle before applying primer. Use a brush or roller suitable for plaster, work in thin, even coats, and follow the product’s directions for drying and recoat times. After priming, select a compatible topcoat as recommended by the primer, and test a small area to confirm uniform sheen.
Key takeaways
- Choose plaster-friendly primers that seal suction and improve topcoat adhesion.
- Ground the surface by brushing and pre-wetting lightly before primer application.
- Use a stain-blocking or bonding primer depending on plaster condition and paint type.
- Apply primer with roller or brush in even, overlapping strokes for uniform sheen.
- Avoid applying in extreme humidity or heat; allow proper drying and test readiness.
- Follow safety: wear mask for dust, ventilate, and clean spills promptly.
Table of Contents
- Introduction
- Key takeaways
- Why Plaster Needs Primer and What “Suction” Means
- Types of Primers for Plaster: Pros and Cons
- Surface Preparation for Plaster Before Priming
- Application Methods and Best Practices
- Drying Times, Environmental Conditions, and Testing Readiness to Topcoat
- Safety, Lead Precautions, and Cleanup
- Cost, Coverage, and Planning the Project
- Common Mistakes and Troubleshooting After Priming
- Conclusion
- FAQ
Why Plaster Needs Primer and What “Suction” Means
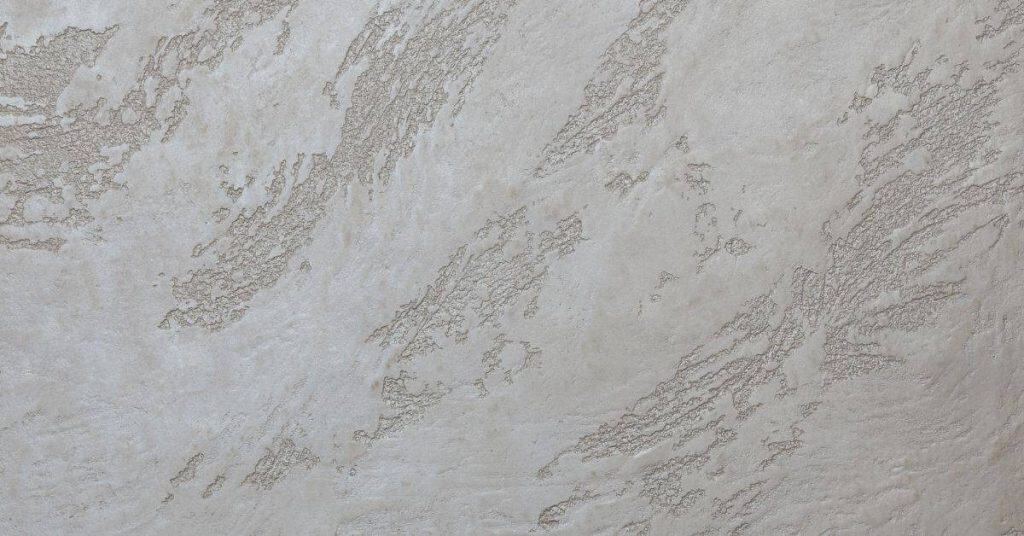
Suction and porosity are the core ideas to understand before painting plaster. Fresh plaster tends to drink in moisture quickly, while older plaster can show more variable absorption. Alkalinity levels also shift how the surface behaves with coatings.
Uneven absorption leads to blotchy finishes and wasted paint as some areas soak up more primer than others. A simple visualization is to compare sanded spots to untouched areas where the paint sits differently. Decide whether sealing is needed now or if skim-coating is a better, more economical fix based on suction and porosity clues.
Porosity and moisture behavior of plaster
Plaster is a porous material, meaning it absorbs water and other liquids. Fresh plaster is more porous than old plaster due to its higher moisture content.
Fresh plaster can absorb up to 12 liters of water per square meter, while old plaster absorbs around 3-5 liters. This difference in absorption drives primer choice. Fresh plaster needs a sealing primer to prevent excessive paint absorption.
Porosity also affects how plaster accepts paint. High porosity means more paint is absorbed, leading to uneven coverage and wasted paint. A primer helps even out this absorption, ensuring uniform paint application.
Alkalinity and efflorescence risks
New plaster has a high pH level due to its lime content. This alkalinity can cause problems with paint adhesion and durability.
Efflorescence is a common issue with new plaster. It’s the white, powdery deposit that appears on walls over time as water evaporates from the plaster, leaving behind salt deposits. Alkali-resistant primers prevent efflorescence by sealing the plaster surface.
High alkalinity can also cause paint to fail prematurely. Alkali-resistant primers are designed to withstand these high pH levels, ensuring better paint adhesion and longevity.
Visual problems caused by suction
Suction in plaster leads to visible issues that can ruin your paint job. Here are a few common problems:
Patchy sheen: Suction causes some areas to absorb more paint than others, resulting in patchy, uneven sheen. Primers help even out this absorption for a uniform finish.
Flashing: When suction is high, it can cause the paint to ‘flash’ or dry too quickly in some areas, leading to an inconsistent finish. A primer slows down the drying process, preventing flashing.
Paint soak-in: In severe cases, suction can cause the paint to soak into the plaster too much, leaving a dull, patchy finish. Primers prevent excessive absorption, ensuring better paint coverage and sheen.

Types of Primers for Plaster: Pros and Cons
Primer chemistries for plaster fall into a few broad categories, each with strengths. Acrylic PVA/latex options help with suction control, while alkali-resistant primers address lime-based surfaces. Oil-based, shellac, and bonding primers offer specific adhesion benefits for tough spots.
Consider plaster characteristics like dustiness, lime residues, and efflorescence when choosing. This affects how well the coating adheres, how the sheen develops, and how easily the system cleans up. Use a simple decision approach to match primer to plaster condition and paint type, then confirm compatibility with the product data sheets and local guidance.
PVA/Latex Sealers and Their Best Uses
Water-based PVA or latex primers are great for most plaster surfaces. They’re easy to clean up, have low odor, and dry quickly.
They excel at controlling suction on standard new or painted plaster. But they might not be the best choice for high-alkali or damaged plaster.
PVA/latex sealers are compatible with both water-based and oil-based paints. They give a uniform sheen, but may not fully block stains or tannins.
Alkali-Resistant and Cementitious Primers
For new plaster or cement-based surfaces, use alkali-resistant or cementitious primers. They’re formulated to neutralize alkalinity, preventing paint peeling.
These primers are ideal for fresh plaster, but they might not be necessary on older painted surfaces. They can extend drying times and have a stronger odor compared to PVA/latex sealers.
They’re compatible with both water-based and oil-based paints, providing good adhesion and stain blocking. But they may not control suction as well as PVA/latex on standard plaster.
Bonding and Shellac Primers for Difficult Substrates
For challenging surfaces like stains, gloss finishes, or contaminated plaster, use bonding or shellac primers. They provide superior adhesion to tough-to-stick substrates.
Bonding primers are water-based and low-odor, but they can extend drying times. Shellac is solvent-based with a strong odor, but it dries quickly and seals tannins effectively.
Both are compatible with most paint types, but shellac should be sealed with a bonding primer or paint before applying water-based paints to prevent tannin bleed. They’re not always necessary on standard plaster surfaces.
Surface Preparation for Plaster Before Priming
Note the curing status of new plaster, since it directly influences primer adhesion and suction. Fully cured or close to it tends to behave differently than freshly laid work. Document the stage you are in before moving to primers.
Clean thoroughly to remove dust and residues, then repair cracks or holes with appropriate patching compounds. Feather the repairs and smooth surrounding edges so the surface reads uniformly to the primer. A quick moisture check and a test area help confirm compatibility before the full prime.
Timing: how long to wait on new plaster
The key to successful priming is patience. Plaster needs time to cure and dry completely before applying primer.
Here’s what to check:
Surface hardness: Gently press the surface with your thumb or a putty knife. If it feels hard and doesn’t leave an indentation, it’s likely cured.
Moisture content: Use a moisture meter to ensure the plaster has less than 18% moisture. High moisture can prevent primer adhesion and cause suction issues.
Repair and smoothing techniques
Before priming, your plaster surface should be smooth and uniform. Here’s how to achieve that:
Fill cracks and holes: Use a suitable patching compound to fill any cracks or holes. Apply with a putty knife, feathering the edges for a smooth transition.
Skim-coat high spots: If there are high spots or ridges, apply a thin layer of joint compound (skim coat) to level them out.
Sand lightly: Once the repairs are dry, use fine-grit sandpaper (120-150 grit) to lightly sand the surface. This helps create a smooth, uniform substrate for priming.
Dust, contamination, and moisture checks
A clean, dry surface is crucial for primer adhesion. Here’s how to ensure your plaster meets these criteria:
Remove dust: Use a vacuum cleaner with a soft brush attachment or a tack cloth to remove all visible dust from the surface.
Check for contamination: Ensure there are no residues, grease, or other contaminants that could impede primer bonding. If necessary, clean the surface with a suitable degreaser.
Test for moisture: Use a moisture meter to check both the surface and ambient relative humidity (RH). Aim for less than 18% surface moisture and 50-60% RH in the room before priming.
Application Methods and Best Practices
Choose your tool based on the area and texture: brush for edges, roller for broad planes, and spray for even coverage on textured surfaces. Each method has its own approach to film build and consistency. Use the right technique to avoid misses and lap marks.
Watch for proper overlap, back-rolling on textured plaster, and avoiding streaks or nibs. Ensure the surface is dry, repaired, and free of defects before applying the primer. Keep the chosen primer compatible with your topcoat and plan for cleanup after the job is done.
Brush and Roller Tips
For plaster walls, use a 3/4″ or 1″ nap roller cover for even coverage. Apply primer in ‘W’ or ‘M’ patterns to avoid lap marks.
At edges: Use a 2-3″ angled brush to cut-in first. Then, roll out from the edge to ensure a smooth transition.
Stroke technique: Work in manageable sections, keeping a ‘wet edge’ to prevent visible lines between strokes.
Spray Application Guide
For spray application, use a HVLP (High Volume, Low Pressure) sprayer set at 60-80 PSI. No thinning is typically needed.
Masking: Protect adjacent areas with painter’s tape and drop cloths to avoid overspray.
Hold the spray gun 10-12″ from the surface, moving in steady side-to-side sweeps for even coverage. Overlap each pass by about half to ensure full coverage.
Maintaining Uniform Sheen and Avoiding Lap Marks
To avoid suction and maintain an even sheen, work quickly but carefully. Here’s how to manage your speed and coats:
- Work speed: Apply primer at a steady pace, not too fast or slow.
- Wet edge management: Keep your roller or brush constantly ‘wet’ by overlapping each stroke slightly.
- Lap marks: Avoid them by maintaining a consistent working angle and applying even pressure.
- Second coat: If suction is still an issue, apply a second coat after the first has fully dried to ensure uniform sheen.
Remember, patience and consistency are key to achieving a smooth, even finish on your plaster walls.

Drying Times, Environmental Conditions, and Testing Readiness to Topcoat
Environmental factors like temperature, humidity, and ventilation shift drying and recoat windows. These conditions determine when the surface feels dry enough for another coat without guessing. Use the product label as your guide for readiness checks.
Look at the plaster porosity and film thickness to gauge suction and adhesion. Practice safe readiness tests such as a touch test or a light film check to verify uniform sheen potential before proceeding with topcoat. Keep notes on conditions for future projects.
Ideal conditions and how to improve them
The ideal temperature for primer drying is between 50°F (10°C) and 85°F (29°C). Relative humidity should be below 70%.
To speed up drying, ventilate the area. Open windows or use fans. But don’t overdo it; too much airflow can cause the primer to dry too quickly, leading to poor adhesion.
If humidity’s high, consider using a dehumidifier. But be careful not to create drafts that could interfere with drying.
Remember, these are ideal conditions. Real-world jobsites might not cooperate. Do your best and keep an eye on the primer’s progress.
How to perform a readiness check
Before topcoating, do a touch test. Gently touch the primed surface. If it’s dry and no longer tacky, you’re good to go.
For a more thorough check, try the tape or clear film peel test. Press a piece of tape or clear film onto the primer. After 30 seconds, pull it off quickly at a 90-degree angle. If paint comes off with it, wait longer before topcoating.
Also, check for uniform sheen. Any patchiness could indicate the primer’s not fully dry or hasn’t been applied evenly.
These tests won’t damage the coating if done correctly. They’re just checking that the primer’s ready to accept your topcoat.
When to wait longer or add another primer coat
If your topcoat absorbs quickly, wait longer before applying it. This could mean the primer’s not fully dry yet.
Look for signs of under-priming: patchiness, rapid absorption, or a non-uniform sheen. If you see these, wait at least 24 hours more, then recheck readiness.
If problems persist, apply another primer coat. Sometimes, one coat just isn’t enough to seal the plaster and provide a uniform base for your topcoat.
Always follow the manufacturer’s guidelines on recoating. If they say wait 24 hours, don’t rush it. Better safe than sorry when it comes to paint jobs.
Safety, Lead Precautions, and Cleanup
Older plaster can carry lead hazards, so identify signs and pause work for testing or containment if risk is present. If lead is suspected, follow local guidelines and consult professionals as needed. Do not assume safety without verification.
Wear appropriate PPE and use proper sanding controls to minimize dust. Set up ventilation, containment, and cleanup routines that reduce spread of dust and ensure thorough post-work cleaning. Review product safety data sheets for primers and disposal rules applicable to your region.
Lead-safe work practices
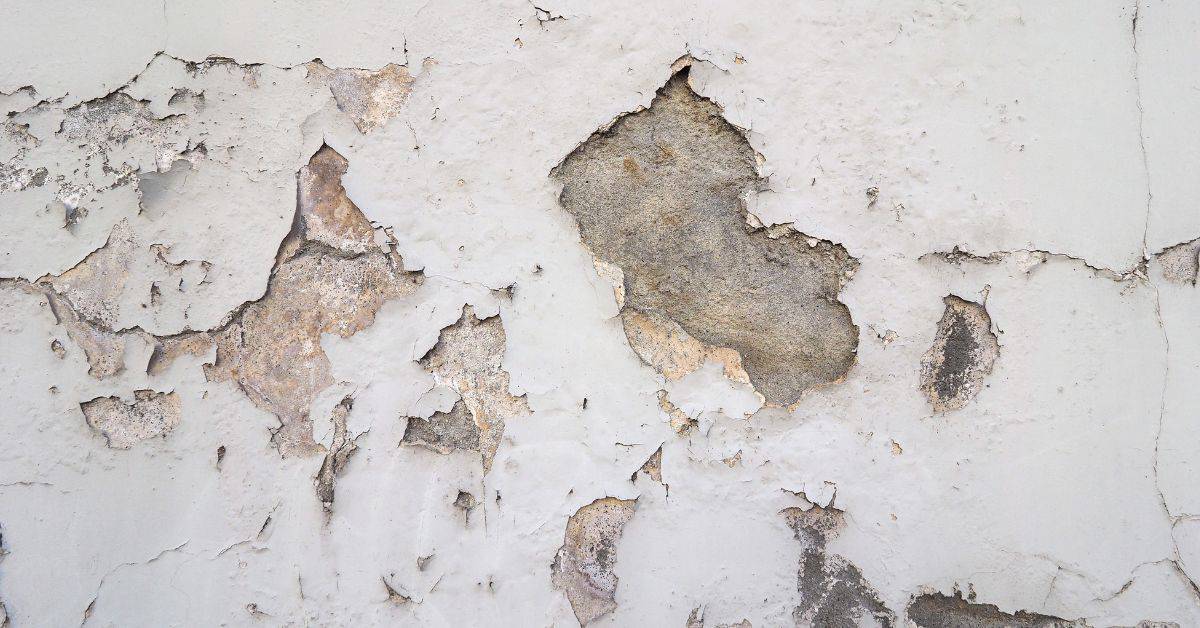
Before you start working on old plaster, assume it may contain lead. Lead was commonly used in paint before the 1970s.
Signs of risk: Flaking or peeling paint, dust, or a date built before 1978. If unsure, halt work and get professional testing.
Safe containment: Isolate the area with plastic sheeting. Use HEPA vacuums for cleanup. Keep tools down when not in use to contain dust.
Personal protective equipment and ventilation
Protect yourself from lead dust with the right gear.
- Respirator: Use a NIOSH-approved respirator or P100 filter. Change filters regularly.
- Gloves: Wear disposable gloves to protect your hands. Change them often.
- Eye/face protection: Goggles or a face shield will keep dust out of your eyes and face.
- Ventilation: Use fans to create negative pressure, drawing dust towards the vacuum.
- Optional: HEPA vacuum rental ($30-$50/day): For thorough cleanup, rent a HEPA-filtered vacuum. Follow manufacturer’s instructions.
Cleanup and disposal best practices
Proper cleanup prevents lead dust from spreading. Always follow local regulations and product labels.
Tools: Clean tools with a damp cloth, then wipe again with a dry cloth. Dispose of rags as hazardous waste.
Rags: Do not wash or reuse rags used for lead cleanup. Seal them in a plastic bag and dispose of according to local regulations.
Disposal: Lead-contaminated debris is hazardous waste. Contact your local waste management department for disposal instructions. Never pour liquids down the drain.
Cost, Coverage, and Planning the Project
Estimate primer needs by considering surface area and the expected level of suction or porosity. Decide how many coats are appropriate for the plaster condition and plan the number of cans accordingly. Use this to inform your budget and inventory.
Plan room by room, including ventilation, tools, and disposal considerations. Build a realistic schedule that accounts for drying and recoat steps, and keep a buffer for adjustments. Review compatibility with the chosen topcoat and check storage and shelf life information.
How to estimate primer needed
The first step is calculating your room’s surface area. Measure walls and ceilings, then multiply by the average height of each wall.
Next, consider substrate porosity. Heavy-absorption plaster needs more primer. Add 10-20% extra to your estimate for such surfaces.
Finally, decide on coats. One coat is standard, but two may be needed for heavy suction or to ensure uniform sheen.
Budgeting versus performance trade-offs
Economy primers are fine for smooth, non-porous surfaces. But for porous plaster, consider high-build primers that cover more and reduce suction.
Specialty primers with adhesion or bonding properties can help with slick areas or repairs. They’re pricier but may save you from rework.
Splurge when dealing with challenging surfaces or to avoid multiple coats.
Work sequencing and time budgeting
Start by prepping your rooms. Fill cracks, sand, clean, and let dry.
Next, apply primer. Use a roller for large areas, brush for edges. Follow the manufacturer’s drying times before recoating or moving on.
Inspect each room after priming to catch any missed spots. Then, topcoat once ready. Plan your schedule so rooms dry sequentially, avoiding contamination and rework.
Common Mistakes and Troubleshooting After Priming
Timing and environmental control are common pitfalls after priming. Priming too soon or in unsuitable conditions can lead to flashing or uneven sheen. Allow adequate drying and follow product guidance for recoat readiness.
Choose the right primer for the plaster type to avoid adhesion issues. Ensure thorough cleaning and feathering of edges, and test adhesion before topcoating. When problems arise, use targeted spot priming or adjust conditions to restore uniform results.
Fixing blotchy sheen or flashing
Blotchy sheen or flashing after priming can be due to suction, primer incompatibility, or application errors. Here’s how to diagnose and fix:
Suction: If the surface is drawing in the primer too quickly, it might cause blotches. Solution: Use a breathable, alkali-resistant primer designed for plaster or new drywall.
Incompatibility: Using the wrong type of primer can lead to flashing. Solution: Re-prime with a compatible primer, ensuring it’s suitable for your surface and conditions.
Application errors: Inadequate feathering or applying in unsuitable conditions can cause issues. Solution: Spot-prime problem areas, ensure edges are well-feathered, and apply in ideal conditions (refer to ‘Drying Times’ section).
Addressing adhesion failures
Poor adhesion can lead to peeling or flaking paint. Here’s how to address it:
Test adhesion: Perform a light scrape test before top-coating. If the primer comes off easily, adhesion is poor.
Sand and re-prime: If adhesion is poor, lightly sand the surface, remove dust, and re-prime with a bonding primer designed for your surface.
Moisture risk: High moisture can cause adhesion failures. Solution: Ensure surfaces are dry (refer to ‘Testing Readiness’ section) and consider using a mold-resistant primer in damp areas.
When to call a pro
While DIY is great, there are times when it’s best to hire a professional:
Extensive moisture damage: Persistent water issues can cause serious structural damage. A pro can assess and address the root cause.
Persistent efflorescence: If white salt deposits keep reappearing, there might be underlying issues that require professional attention.
Lead-abatement needs: If your home was built before 1978, it may contain lead. Always hire a certified professional for lead abatement to ensure safety (refer to ‘Safety’ section).
Conclusion
Keep the plaster ready and the solvent-free primer applied in a way that controls suction, protects the surface, and yields a uniform sheen. Proper priming builds durability and keeps your paint from soaking in unevenly, saving time and money in the long run.
Make your next moves in a simple, repeatable sequence: wipe loose dust, repair cracks, dampen a small test area if allowed, apply the selected primer evenly with the chosen method, let it dry per the product guidelines, check for a uniform finish, and plan the topcoat only after a successful test patch. Do a quick field check of tack, color, and feel in multiple spots before you commit to the whole wall, and always follow the product’s stated drying times and environmental limits.
Common mistakes to avoid are guessing the primer type, skipping surface prep, and rushing drying or topcoat timing. Never skip safety steps or ignore lead precautions if they apply to your plaster. Wear gloves and a mask in dusty areas, protect nearby surfaces, and ventilate the room. Test a small area first, and if you see peeling, flaking, or blotchy sheen, pause and reassess before proceeding.
If the patchwork or suction feels off after a couple of tests, or you run into persistent peeling, damp spots, or unusual odors, it’s wise to call in a pro rather than push ahead. With careful preparation and disciplined steps, you’ll have a solid base for a durable, even topcoat and a finished look you can be proud of.
FAQ
What types of primers work best on plaster, and how do I choose?
Water-based primers are easy to clean and low odor. Oil-based or shellac primers block suction better on very porous plaster. Check the label for compatibility with plaster and if it’s intended for interior use. If in doubt, ask the manufacturer or test a small area first.
How should I prepare the plaster surface before priming?
Clean off dust, dirt, and loose material. Fill cracks or gouges and sand rough areas smooth. Wipe the surface to remove dust and let it dry completely before applying primer.
What tools and technique should I use to apply primer on plaster?
Use a roller with a medium nap for large areas and a brush for edges and corners. Apply primer evenly in thin coats, avoid heavy blobs that slump. Allow the first coat to set according to the label before applying a second coat if needed.
What paint type works best after priming plaster, and what should I expect for drying and cleanup?
Choose a paint compatible with your primer and plaster surface; many DIYers prefer a wall paint with a matte or eggshell finish for even sheen. Follow the primer’s label for drying times and ventilation, and clean tools with water or solvent as directed. Dispose of rags and cans per local guidelines.