
Introduction
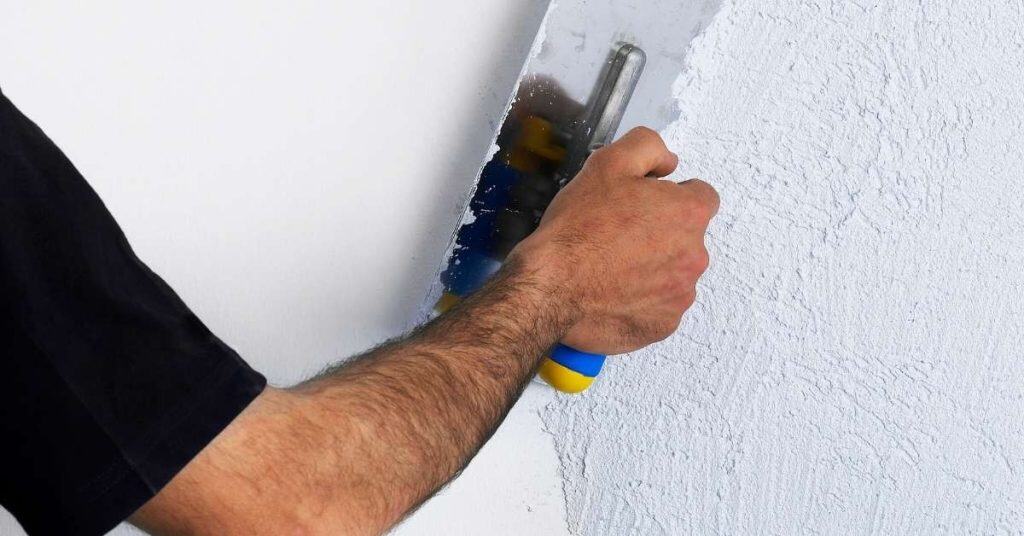
A skim coat over old plaster provides a smooth, ready-for-finish surface.
This article explains how to clean the plaster effectively and prepare it for a skim coat, including practical steps and tips you can apply.
You’ll learn the general approach for assessing the plaster, choosing materials, and applying a lightweight skim coat to hide imperfections.
Key takeaways
- Start by clearing furniture and sealing floors to contain dust and debris.
- Inspect plaster for loose patches and delamination before any cleaning work.
- Use a soft brush and low-pressure water to test cleaning effectiveness.
- Remove wallpaper and adhesive residues in small sections to avoid oversaturation.
- Dress in waterproof gloves and respirator when mold or damp stains appear.
- Rinse and dry between passes to prevent reactivation and staining.
Table of Contents
- Introduction
- Key takeaways
- Why cleaning old plaster matters before skim coating
- Assessing the plaster condition before cleaning
- Tools and materials checklist for cleaning and prep
- Safety and health precautions when cleaning old plaster
- Preparing the room for cleaning
- Removing wallpaper, adhesives, and paint residues
- Cleaning mold, mildew, and organic stains
- Removing loose plaster and sanding strategies
- Cleaning dust, efflorescence, and saline residues
- Priming and bonding: when cleaning ends and priming begins
- Repairing cracks and holes after cleaning
- Bonding agents and additives: boost adhesion on cleaned plaster
- Choosing skim coat materials after cleaning
- Alternatives to skim coating after cleaning
- Cost comparison and time estimates
- Common mistakes during cleaning and how to avoid them
- Planning checklist and project timeline for beginners
- Visual checkpoints and quality inspection before skim coating
- Maintenance tips after skim coating and finishing
- When to call a professional
- Conclusion
- FAQ
Why cleaning old plaster matters before skim coating
Cleaning old plaster is the foundation for skim coat adhesion and long-term performance. Dirt, oils, and dust create a slick surface that the primer and plaster won’t bite into, so the bond can fail and the finish can pop off later. Start with a simple surface assessment: look for moisture signs, efflorescence, loose plaster, and hairline cracks, then decide what needs repair before you rinse or scrub.
This matters because the level of contamination guides your method: dry brushing and vacuuming first, then damp wipe with a mild detergent for tanning grime, and a thorough rinse if needed. Protect adjacent surfaces, lay down drop cloths, wear PPE, and keep dust down to avoid spreading debris to rooms you’re not skim coating. When the surface is dry and lightly abraded if needed for keying, you’re ready for bonding agents or sealers, and you’ll notice the patching and skim coat thickness behave more predictably on a clean, stable base.
Surface contamination and its effects
Before you start skim coating, make sure to clean the old plaster thoroughly. Common contaminants like dust, grease, wallpaper paste, and mold can mess up your work big time. Dust is easy to miss but it stops new plaster from sticking properly. Grease acts like a barrier too, so if there’s any cooking oil or similar stuff on the wall, you need to scrub that out.
Wallpaper paste left behind after stripping old paper will also ruin your skim coat by preventing proper adhesion. And don’t even think about ignoring mold spots; they can grow back under new plaster and cause real problems later down the line. So take a moment to check for these issues and clean them up before you start applying any fresh plaster.
How cleaning reduces cracking risk
Cleaning old plaster thoroughly before skim coating is crucial because it removes loose debris and contaminants that can cause weak spots. These weak spots are nests for future cracks. Make sure to scrub down the surface, removing any flaking paint or loose plaster bits.
Think of your base as a foundation; if it’s not solid, everything on top will suffer. By cleaning, you’re ensuring that your skim coat has something strong and stable to adhere to. This means fewer chances for cracks to form later when the plaster expands and contracts with temperature changes.
A quick check after cleaning is also important. Use a damp sponge or cloth to see if there’s any residue left behind. If water pools in certain areas, it indicates weak spots that need attention before proceeding. Take care of these issues now, or you’ll regret it later when cracks start showing up.
Assessing the plaster condition before cleaning
Start with a careful visual and tactile survey of every plaster surface. Look for cracks, bulges, delamination, water stains, and any movement around doors, windows, or baseboards to tell you if the plaster is still sound enough to clean or if it needs patching first. Mark trouble spots, note whether cracks are structural or cosmetic, and decide if cleaning plus a skim coat is even the right next step. Quick reference: delamination means plaster has begun to separate from the lath behind it, reducing adhesion; hairline cracks are very thin cracks that may or may not require repair depending on location and movement. For beginners, plan for a skim coat thickness around 1/16 to 1/8 inch (about 1.5–3 mm) if adhesion is good and patches are minor.
Check moisture and the environment by scanning for mold, staining, efflorescence, and damp pockets, and grab a moisture meter if you have one. Assess age, prior patches or skim coats, lath type, and plaster thickness to decide what the surface will tolerate and whether stabilization is needed before any cleaning. Screen for lead-based paint or asbestos, plan the right safety measures and containment, and keep a concise inspection log so you can sequence repairs and the skim coat correctly.
Quick tap and visual test
Before you start cleaning, give the plaster a quick once-over. Tap each area lightly with your knuckles—listen for hollow sounds. If it rings like an empty bucket, that section needs attention. Don’t just rely on looks; some hollow spots might still have a thin layer of good plaster covering them. Hollow sounds can indicate delamination or poor adhesion behind the surface, which may require stabilization before any cleaning or skim coating.
Also, keep an eye out for cracks or bulges. These are signs the plaster isn’t sticking properly to the wall. Mark these areas with chalk so you don’t forget about them later. Remember, fixing issues now saves headaches down the line.
Mapping trouble spots
After you’ve done the quick tap and visual test, it’s time to mark the plaster issues. Use a pencil or chalk to outline any hairline cracks, bulges, or areas where the plaster is flaking off. This helps you focus your cleaning efforts on these problem zones.
Avoid over-cleaning healthy sections of plaster. It’s crucial to target only the damaged spots for repair later on. If an area looks fine but feels loose when tapped, mark it anyway—it might need a closer look or some reinforcement.
Remember, proper preparation is key before you start cleaning and repairing. Taking the time now to map out trouble spots will save you headaches down the road and ensure your repairs are effective.
Tools and materials checklist for cleaning and prep
Here’s a clear, DIY friendly checklist to clean old plaster efficiently, covering hand tools, cleaners, personal protective equipment, and prep materials, with the goals of removing dirt, efflorescence, and flaking paint while identifying fragile or loose areas that must be stabilized before any cleaning begins. Prepare with a putty knife, stiff brushes, microfiber cloths, a utility knife, scrapers, a silicone spatula, a chisel, a bucket, and a trowel for any re-pointing prep, plus non-scratch scrapers and basic inspection kits, while choosing pH-neutral cleaners, mild detergents, eco-friendly degreasers, and any necessary solvents—always test a spot first and avoid harsh acids that damage plaster.
This matters on a jobsite because a thorough plan saves time, keeps dust contained, and prevents further cracking by stabilizing loose plaster before cleaning, while masking, plastic sheeting, drop cloths, edge shields, and dust barriers control debris and protect finishes. By listing prep consumables, PPE, and workflow steps up front, you’ll move efficiently, reduce waste, and know what to stock so you don’t stall mid-cleaning or miss a critical repair like cracks that need patching before moisture management.
Tiered options and quick decision rubric:
– Basic: prioritize cost by choosing affordable, readily available tools and cleaners; substitute with generic brands or reused items where safe.
– Mid-range: balance performance and cost with reputable brands and mid-grade equipment.
– Pro-grade: select professional-grade tools and specialized cleaners for tough jobs, longer life, and easier maintenance.
Decision rubric (quick): assess surface condition, presence of efflorescence or mold, access and space, budget, and willingness to re-clean. If in doubt, start with basic tools and a mild cleaner, test a small area, and escalate to mid-range or pro-grade as needed.
Cleaning tools and supplies
This checklist helps you ensure your cleaning equipment is ready before starting any concrete prep work.
- Industrial vacuum: Check it’s fully charged or has enough fuel. Confirm by testing suction power; avoid dust build-up issues. Basic: rental or entry-level vac; Mid-range: higher CFM, better filtration; Pro-grade: HEPA filters, large capacity.
- Bristle brushes: Ensure bristles are not worn out and stiff enough for tough grime. Test on a small area to see if they scrub effectively. Basic: stiff nylon brush; Mid-range: natural/fiber mix; Pro-grade: brass or nylon with extended wear.
- Microfiber sponges: Confirm no lint left behind when cleaning a test surface; avoid residue that hinders adhesion. Basic: inexpensive microfiber; Mid-range: higher-density cloths; Pro-grade: professional lint-free microfiber.
- TSP alternative cleaner: Verify it’s non-toxic and biodegradable. Check the label for safety data; skipping this can lead to environmental damage. Basic: basic biodegradable cleaner; Mid-range: concentrate with dilution options; Pro-grade: professional degreaser with safer reactive profiles.
- Mold remover spray: Ensure it’s EPA-registered and safe for concrete surfaces. Test on a small area first to avoid surface damage. Basic: consumer-grade mold cleaner; Mid-range: EPA-registered formula; Pro-grade: professional mold remediation product.
- Pressure washer: Confirm nozzle is set at 2500 psi or less; higher pressure can erode the concrete. Basic: garden sprayer or low-psi washer; Mid-range: 1800–2500 psi; Pro-grade: adjustable, surface-safe attachments.
- Squeegee: Check it’s straight and free of cracks. A bent squeegee won’t clean properly, leaving water marks. Basic: rubber blade; Mid-range: aluminum frame; Pro-grade: professional-grade with replaceable blades.
- Steel wool pads: Confirm they’re fine grade for light cleaning without scratching the surface; coarser grades can damage concrete. Basic: fine steel wool; Mid-range: non-scratch non-woven pads; Pro-grade: specialized anti-scratch pads.
- Bucket with soap solution: Mix according to cleaner instructions and test on a small area first. Skipping this step may lead to uneven cleaning results. Basic: generic dish soap solution; Mid-range: approved concrete cleaner solution; Pro-grade: pH-balanced, fast-dissolving cleaner.
- Protective gloves: Ensure they fit snugly without restricting movement. Ill-fitting gloves can cause accidents or delays. Basic: nitrile disposable; Mid-range: certified chemical-resistant; Pro-grade: reinforced, cut-resistant with better grip.
- Safety glasses: Confirm lenses are scratch-free and securely fastened. Protecting your eyes is critical; skipping this step can lead to injury. Basic: basic safety glasses; Mid-range: splash-rated; Pro-grade: anti-fog, shatterproof with side shields.
Quick rule: Always test cleaning products on a small area first before full application.
Safety gear and containment
Use this checklist before starting any cleaning or prep work to ensure your safety and the cleanliness of your workspace.
- Respirator: Check that it fits snugly with no gaps. Test by inhaling sharply; mask should collapse slightly around edges.
Skipping this can lead to respiratory issues from dust inhalation. Basic: disposable dust mask; Mid-range: half-face respirator; Pro-grade: full-face respirator with P100 filters. - Gloves: Ensure they fit well and cover hands completely. Try bending fingers to check flexibility without hindrance.
Not wearing gloves may result in skin irritation or cuts. Basic: nitrile disposable gloves; Mid-range: reusable chemical-resistant; Pro-grade: heavy-duty coated gloves. - Eye protection: Glasses should be snug but not too tight, with no gaps around edges. Blink rapidly; glasses should stay put.
Failing to wear eye protection can cause serious injury from debris. Basic: safety glasses; Mid-range: splash-rated goggles; Pro-grade: impact-rated with face shield compatibility. - Drop cloths: Lay them out flat and large enough to cover the entire work area. Check for any holes or tears before use.
Omitting drop cloths means damaging floors or furniture. Basic: inexpensive cloths; Mid-range: reinforced canvas; Pro-grade: heavy-duty poly-viscose with taped seams. - Plastic sheeting: Stretch it tightly over areas needing protection from dust, ensuring no gaps at edges. Test by blowing air under; should not move easily.
Lack of plastic can lead to extensive cleanup and potential damage. Basic: poly sheeting; Mid-range: vented/smaller sheets; Pro-grade: reinforced, taped seams with edge guards.
Quick rule: Always wear protective gear and cover everything that could be damaged or disturbed during prep work.
Safety and health precautions when cleaning old plaster
Identify and assess potential hazards in the plaster now—lead-based paint, asbestos-containing materials, and silica dust from sanding or scraping—and know when to push for formal testing versus simple visual checks. Plan for PPE and engineering controls up front: use NIOSH/OSHA-approved respirators or P100 protection, disposable coveralls, eye protection, gloves, and set up local exhaust or HEPA-filtered air scrubbers with containment to prevent cross‑contamination, plus damp-cleaning methods to minimize dust. Add concrete steps: determine whether your project requires testing before disturbance, and budget for professional testing if any uncertain materials are found or suspected. If testing is needed, hire a licensed laboratory or certified asbestos/lead inspector to perform the assessment and provide a written report with results and recommended actions.
Work in a formal risk-reduction workflow: pre-cleaning area setup, turn off or isolate HVAC if needed, and mark off adjacent spaces to keep dust contained, then follow sequential steps to manage dust generation and disposal of contaminated materials. This matters because proper testing, permits or notifications, and disposal rules protect you legally, keep your crew safe, and prevent costly errors if hazardous waste is mishandled; documented testing results, PPE used, and regulatory communications stay with the job for future work or resale. Keep records of all tests, quotes, and disposal manifests, and check local regulatory requirements for lead and asbestos waste disposal and permits before starting.
When to test for lead or asbestos
If your home was built before the 1980s, especially if it’s from the ’50s through the ’70s, you should test for lead and asbestos. These materials were commonly used back then but are now known to be harmful. Quick test kits can give you a preliminary answer, but they’re not always reliable. Concrete steps you can take:
- Hire a licensed lead-based paint inspector or certified asbestos professional to perform a full assessment if you plan to disturb plaster, install, or remove materials.
- Request a written plan with sampling locations, methods (paint chip testing, XRF screening, or bulk material analysis), turnaround times, and cost estimates.
- Costs to expect: lead paint screening kits are inexpensive (roughly $10–$30 for home-use kits), but professional lab analysis for lead paint can range from about $40–$150 per sample; asbestos testing by a certified professional typically runs around $100–$300 per sample, with a full building assessment often several hundred to a few thousand dollars depending on IOCs and scope. More extensive abatement estimates (including encapsulation or removal) commonly start in the low thousands and rise with material quantity and access issues.
If your tests come up positive or if you’re unsure about the results, don’t mess around—call in a professional for proper remediation. DIY fixes can spread these dangerous materials and make things worse. It’s better to spend a bit more upfront than risk big health issues down the line.
Remember, dealing with lead or asbestos is serious business. Keep kids and pets away from any areas you’re testing until you know it’s safe. And always wear protective gear like gloves, masks, and coveralls when handling these materials.
Dust control and ventilation best practices
When cleaning old plaster, dust control is key. Set up a negative air machine to suck out the dust before it spreads. Don’t forget to seal off doors and windows with plastic sheeting and duct tape. This keeps your home clean and reduces health risks. If testing has indicated lead or asbestos, follow the inspector’s containment and disposal instructions exactly, and maintain the containment until work is complete.
Use a HEPA vacuum for cleanup. Regular vacuums just blow dust around, making more work for you. A HEPA vacuum traps the tiny particles that can cause respiratory issues. Wear a respirator mask while working to protect yourself from breathing in harmful dust.
Minimize dust by wetting down plaster before scraping it off. This makes the job easier and keeps dust levels low. Keep your workspace tidy as you go, so you don’t track dust through other parts of your home.
Preparing the room for cleaning
Covering fixtures and trim
Before you start cleaning, cover your baseboards, windowsills, and light fixtures. Use plastic sheeting and painter’s tape to protect these areas from cleaner splashes and dust. Don’t skip this step; it’ll save you hours of touch-up work later.
Check the corners where walls meet floors or ceilings. These spots are often overlooked but can get messy if not covered properly. Make sure your plastic extends far enough to catch any overspray and is securely taped down.
If you’re cleaning a room with intricate moldings, take extra time to cover them carefully. Use small pieces of tape and plastic to fit around each detail without damaging the wood or paint underneath. It’s worth the effort to keep your trim looking sharp after the job.
Temporary Removal of Trim and Switch Plates
Before you start cleaning, take a moment to remove baseboards, door casings, window sills, and switch plates. This step is crucial for reaching those hard-to-clean spots around the edges. Use a utility knife or a small pry bar to gently separate these items from the wall. Remember, label everything with tape and markers so you know where each piece goes back.
Once removed, give yourself some space by pulling out furniture and moving it to the center of the room. This will make your cleaning job much easier and prevent any accidental damage. Don’t forget to cover floors with plastic sheeting or drop cloths as you go.
After your cleanup is complete, reinstall all trim pieces carefully. Make sure everything lines up straight and use a level if needed. If you notice any gaps or issues during reinstallation, it might be worth checking the base compaction before proceeding further.
Removing wallpaper, adhesives, and paint residues
Start by defining the scope: remove wallpaper, paste, and paint residues without harming plaster or the skim coat. Identify problem areas like peeling paper, embedded paste, or heavy gloss paints, and plan methods accordingly. Use a sequence that tests a small spot first, then selects the safest option for vinyl or fabric wallpaper and the adhesive type—chemical strippers, hot water, or citrus bases—keeping moisture to a minimum. Avoid soaking plaster; dampen only as needed and monitor drying. Gather basic tools and PPE, and be ready to stop if plaster swells or fibers weaken.
Moisture decisions matter: dampening, steaming, or wetting can damage plaster, so explain when to proceed and when to skip. After residue is debonded, wipe with a damp sponge, rinse as needed, and plan for any skim coat prep or light skim to even texture. Proper cleanup and waste disposal prevent mold and future patches. Document what works for future reference and note any problem spots for quick touch-ups. The right approach saves plaster, speeds progress, and reduces rework on future rooms.
Steam, chemical, and mechanical stripping options
When it comes to removing wallpaper, adhesives, and paint residues, you’ve got three main methods: steam, chemicals, and scraping. Steam is great for stubborn wallpapers but can be a pain if your walls aren’t well-compacted—water might seep through. For chemical removers, go with solvent-based products that cut through the toughest glues without damaging the wall surface too much. Just check base compaction before you start spraying to avoid any nasty surprises.
Mechanical stripping is all about brute force—use a scraper or putty knife for quick results, but be ready to patch and sand afterward since it can leave marks on the wall. If you’re dealing with old wallpapers that have multiple layers, steam might save your back from hours of scraping. Remember, each method has its place; pick the one that matches your wallpaper type and your patience level.
Cleaning residual glue safely
After stripping wallpaper, adhesives, and paint residues, you’ll likely have some leftover paste on your walls. This stuff needs to come off before you can skim coat or paint. Use a neutralizing cleaner like TSP (Trisodium Phosphate) diluted in water to break down the glue. Don’t use harsh chemicals unless you know what you’re doing—TSP is gentle enough for most jobs.
Once your walls are clean, give them a good rinse with plain water and let them dry completely. Check that there’s no residue left by running your hand over the wall; it should feel smooth. If you find any spots where glue didn’t come off, hit those areas again with TSP or another recommended cleaner.
Remember, leaving glue behind can cause issues later on. It might prevent new paint from sticking properly and could lead to peeling down the road. So take your time and do it right—your walls will thank you in the long run.
Cleaning mold, mildew, and organic stains
Clean mold, mildew, and organic stains on plaster with safe, non-abrasive methods and plan for moisture control before skim coating. Identify whether the growth is mold or mildew, locate the moisture source, and check plaster condition, then set PPE, ventilation, and containment before you start. Use plaster-friendly cleaners like mild detergent and water or approved mold cleaners, and only use diluted bleach with great caution for stubborn mold, followed by thorough rinsing to avoid damaging the old surface, while treating organic stains with pH-balanced or enzyme cleaners and gentle agitation, then pat dry to prevent spreading spores.
This work matters because proper cleaning sets up the skim coat to bond well and prevent recurrence, plus it keeps you safe and your house’s structure intact. Plan for moisture control by fixing leaks, improving airflow, using dehumidification, and, if needed, installing temporary barriers to limit cross-contamination during cleaning. Gather the right tools—spray bottles, soft brushes, sponges, microfiber cloths, PPE, and moisture meters—and re-check dampness and any residual mold after cleaning before proceeding, ensuring the surface is dry, loose material is removed, and the area is lightly abraded to promote good adhesion for the skim coat.
Choosing mold cleaners for plaster
When dealing with mold on plaster, you need to pick the right cleaner. Bleach is a common choice but it’s not always the best option because it can damage plaster over time and doesn’t kill spores deep down. Instead, go for fungicides made specifically for indoor use or mildewcide products that are less harsh.
For dilution, follow the manufacturer’s instructions closely. Usually, you mix one part cleaner to three parts water. Apply it with a sponge or sprayer and let it sit for about 15 minutes before scrubbing gently. Rinse thoroughly afterward to remove all residue.
Avoid using high-pressure washers on plaster as they can cause damage. After cleaning, make sure the area dries completely to prevent mold from coming back. If you see signs of moisture issues like damp spots or leaks, address those too to stop future growth.
Checking for moisture sources
Before you start cleaning mold and mildew, make sure to find the source of the moisture. If you don’t fix it, the problem will come back. Look around your home for leaks in pipes or walls, especially where water often collects like basements or bathrooms.
Check base compaction too; if the ground isn’t packed tight enough, water can seep through and cause issues. Also, inspect any areas with poor ventilation since high humidity can lead to mold growth. Once you spot a leak or moisture issue, fix it before applying any mold cleaner.
If you’re unsure how to tackle these fixes yourself, consider getting help from a professional contractor who knows the right way to seal and waterproof your home’s surfaces.
Removing loose plaster and sanding strategies
Remove only the loose, flaking plaster and feather the edges to blend with the skim coat, stopping before you hit sound material, lath, or intact backing. Use the right tools with controlled pressure, test moisture, and avoid saturating the wall, so you don’t create new damage or cause cracks that telegraph through the finish.
Understanding the substrate and conditions matters because moisture, old lime-putty versus gypsum, and backing integrity dictate whether you need repairs or lath replacement before skimming. Feathering should plan gradual transitions and be followed by patching deeper voids, plus a careful sanding progression from coarse to fine to create a keyed surface without gouges, while dust control, containment, and proper priming or bonding agent use protect adhesion and long-term durability.
Using scrapers and chisels safely
When you’re scraping off loose plaster, always wear safety glasses and a dust mask. Start with a wide scraper to remove big chunks of material. Go slow and steady; don’t rush or you might damage the good substrate underneath.
If you need to use a chisel, tap it gently with a hammer to avoid breaking through into solid walls behind. Check base compaction before you start so you know what’s okay to scrape off without worrying about hitting something important.
After scraping and chiseling, run your hand over the surface to feel for any rough spots or leftover debris. Sand these areas lightly with a fine-grit sandpaper to smooth everything out before moving on to the next step in your project.
Sanding approach and dust management
When it comes to sanding, start with a lower grit number like 80-grit for rough surfaces. Move up to 120-grit or finer as needed to smooth out the plaster without damaging the base material. Don’t forget, using an orbital sander is faster than hand sanding but can leave swirl marks if you’re not careful.
For dust control, a HEPA vacuum is your best friend. Use it frequently during sanding to suck up loose particles before they settle everywhere. If you skip this step, expect a huge mess and wasted time later on when cleaning up.
Avoid the temptation to blow off dust with compressed air; that just spreads plaster around instead of removing it. Stick to wet-dry vacuums or HEPA filters for real dust management. Remember, proper dust control not only keeps your workspace clean but also protects your lungs from harmful particles.
Cleaning dust, efflorescence, and saline residues
Efflorescence, saline residues, and fine dust ruin bond with skim coats. They create moisture paths and a dusty surface plaster won’t grab. Clean, neutralize, and dry the surface before you skim.
Do a quick check for damp spots and remaining salts. Use mechanical cleaning—dusting, brushing, and a HEPA vacuum—then careful chemical cleaners, rinse, and dry completely. A ready surface prevents cracking and saves you time and money on the job.
Identifying efflorescence
Efflorescence shows up as a white, powdery substance on your concrete surface. It’s caused by salts and minerals moving to the surface when moisture evaporates. Look for it in areas that stay damp or where water has been pooling.
Check base compaction before pouring concrete to prevent efflorescence. If you see white marks after curing, scrub them off with a stiff brush and water. For stubborn spots, use a mild acid solution but rinse thoroughly afterward to avoid damaging the surface.
Avoid using high-pressure washers on affected areas as they can push salts deeper into the concrete. This might seem like it’s cleaning it up, but it’ll just make efflorescence worse in the long run.
Washing and drying protocol
After cleaning dust, efflorescence, and saline residues from your concrete surface, the next step is to rinse it thoroughly with clean water. Make sure you use a hose or pressure washer set on low power to avoid damaging the base. Once rinsed, blot dry immediately. Don’t let standing water sit; it can weaken your bond coat.
After blotting, give the surface ample time to dry completely before applying any bonding agents. This drying period is crucial as moisture left behind can lead to poor adhesion and future problems like peeling or cracking. Check that there’s no dampness by pressing a piece of plastic against the concrete for 15 minutes; if condensation forms under it, keep waiting.
Remember, rushing this step isn’t worth the risk. A properly dried surface ensures your project holds up over time without costly repairs down the line. Take your time and get it right.
Priming and bonding: when cleaning ends and priming begins
Define the transition criteria clearly: once the plaster is clean, dry, and free of dust or laitance, it is ready for primer. Look for a stable, bonding-ready surface with no shiny patches, loose material, or efflorescence to know you have reached the right point. Choose primers or bonding agents based on porosity and absorption, so your skim coat can grip instead of just sitting on a film.
Apply with practical sequencing in mind: use a mist coat or thin sealer to balance porosity, then allow proper drying between coats to avoid film sealing that blocks adhesion. Use compatible options like water-based primers (PVA or mist coats), acrylic bonding primers, or specialty agents for plaster-to-damp or dusty surfaces, and always check they play well with your intended skim coat. Do a small adhesion test on cleaned plaster with the chosen primer and skim coat, and confirm manufacturer guidance for your plaster type and subsequent products.
Choosing a bonding primer
When it comes to priming concrete, you’ve got options: PVA (polyvinyl acetate), acrylic, and specialized plaster primers. Each has its place, so pick wisely.
PVA is your go-to for porous surfaces. It’s cheap and seals the surface well, but it can yellow over time. Use it when you’re prepping concrete that needs a good grip before painting or applying another coat of plaster.
Acrylic primers are more versatile. They stick to almost anything and won’t yellow like PVA. If your base is clean and smooth, an acrylic primer will give you the best bond for your paint or finish layer. But check base compaction; if it’s not right, no primer can save a weak foundation.
Specialized plaster primers are for specific jobs, like patching old walls or sealing new concrete before applying fresh plaster. They’re more expensive but offer better adhesion and durability than general-purpose primers. Use them when you need top performance in tricky conditions.
Application tips for even absorption
When priming old plaster, the goal is to ensure a uniform base that won’t flash dry or suck moisture unevenly from your skim coat. First off, check base compaction. If the plaster feels loose or powdery, you’re not ready for primer yet—clean and prep until it’s firm.
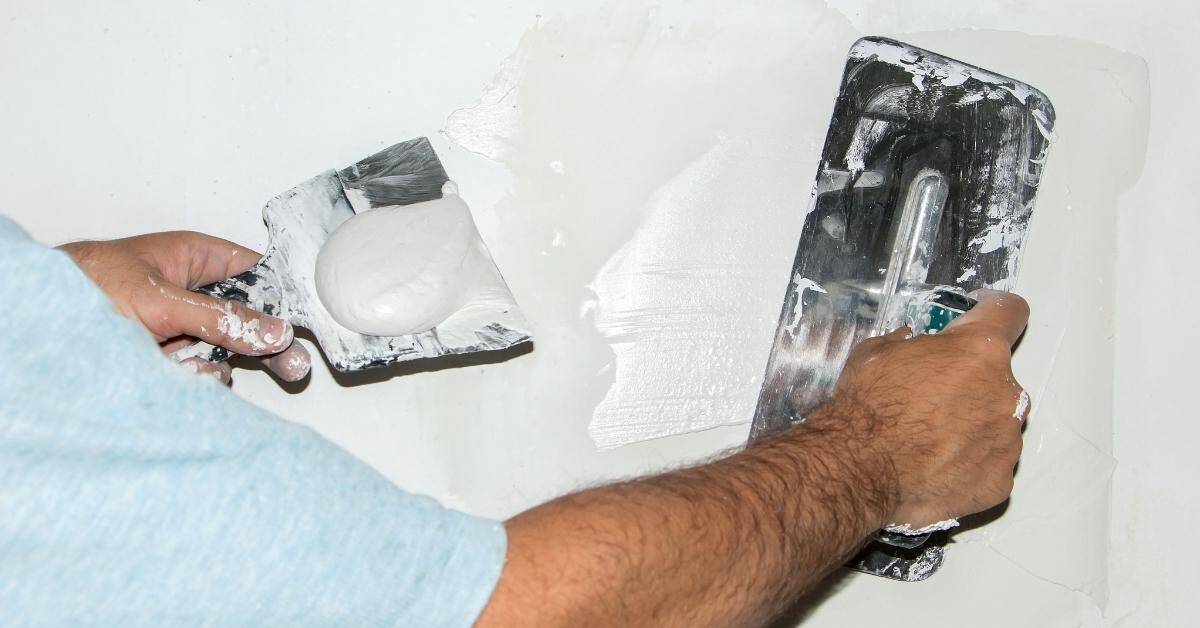
Next, apply your bonding primer in thin, even coats using a high-quality brush or roller designed for this job. Don’t go too thick; aim for coverage that soaks in without pooling. If the primer pools like water on oil, you’ve applied too much—wipe off excess and start over.
Finally, keep an eye out for any areas where the plaster might be more porous or absorbent than others. These spots will drink up primer faster, leading to inconsistent drying times. To fix this, apply a second light coat once the first is dry but still tacky—this helps even things out without overdoing it.

Repairing cracks and holes after cleaning
Repairing cracks and holes after cleaning means classifying the damage, choosing the right patching material, and applying a backing or mesh where needed before you skim coat. Start with hairline cracks and small holes, reinforce with fiberglass mesh or paper tape, then feather edges with a thin patch layer so the repair blends with the wall and won’t telegraph through later coats.
Planning this step matters because proper surface prep, material selection, and curing set the stage for a durable, flat skim coat that doesn’t crack again. You’ll remove dust, loose material, and grime, then seal the repaired areas with a bonding primer after they cure so you get good adhesion and a uniform plane before full skim coat. Skipping backer or using the wrong filler invites backer issues, adhesion failure, and a weak finish that won’t hold up under moisture or daily movement. Take the time to verify moisture, tack-free surfaces, and a true plane; your skim coat will thank you with fewer callbacks and a smoother result.
Crack stitching and flexible fillers
When you’ve got cracks that are more than just surface deep, crack stitching is your go-to. It’s a bit like sewing up a tear in fabric but with concrete. Use mesh or plaster welds to reinforce the area before filling it back in. This stops water from getting in and causing further damage.
Flexible fillers are great for cracks that move, like those caused by temperature changes. They won’t crack again as easily because they can stretch a bit without breaking. Just make sure you check base compaction before applying any filler to ensure the ground is solid and stable.
Avoid using rigid materials in moving cracks; it’s like trying to stop a river with sandbags. It just won’t hold up, and you’ll be back here again sooner than later. Stick to what works, and your concrete will thank you for it.
Patching deep voids
When you’ve got a hole deeper than an inch, don’t just slap on some skim coat. You need to fill it in layers to avoid shrinkage and cracking later. Start by cleaning the area thoroughly as usual. Then mix your patching compound according to the bag instructions.
Check base compaction before you start filling. If the concrete underneath is weak or loose, fix that first with a strong bonding agent and fresh concrete. Pour in a thin layer of about half an inch, spread it out evenly, and let it cure for at least 24 hours. Repeat this process until you’ve filled up to within an inch of the surface.
Once your deep void is almost full, finish with a skim coat as described earlier in Repairing cracks and holes after cleaning. This top layer will smooth everything out nicely and give you that clean look. Remember, rushing through this step can lead to future headaches, so take it slow and steady.
Bonding agents and additives: boost adhesion on cleaned plaster
Bonding agents and additives help the skim coat grab clean plaster and stay put, so you don’t fight sprungs and peeling later. They modify surface tack, add flexibility, and resist wicking, which prevents debond during shrinkage, seasonal movement, or minor damp changes behind the plaster. Do a quick pre-application check: the plaster must be clean, dry, dust-free, and free of waxing, efflorescence, or sealers that could block a bond, and you should assess porosity and moisture to choose the right additive.
Latex admixtures give elasticity and film-forming properties, acrylic fortifiers give stiffness and moisture resistance, and PVA acts as a primer or bonding medium to boost initial grip on porous plaster. Mixing guidance: follow the manufacturer’s ratios, decide whether to premix additives into the skim coat or use a separate bonding primer, and always confirm compatibility with lime-based or gypsum-containing plasters and with your chosen skim coat. Apply a small test patch first, keep the substrate slightly damp to avoid rapid drying, then skim in workable passes and address any poor bond with additional coats or careful abrading if needed.
Mixing ratios and compatibility notes
When it comes to mixing bonding agents, always follow the manufacturer’s instructions. For pre-mixed products, just open and pour; no need for adjustments unless specified otherwise. With powdered additives, you’ll need a clean bucket and water—mix one part powder to two parts water. Stir thoroughly until there are no lumps.
Compatibility is key. Never mix different brands or types of bonding agents without consulting the manufacturer first. Mixing them can lead to unpredictable results like poor adhesion or even a chemical reaction that ruins your work. Stick with what’s recommended for your specific plaster type and application.
Check base compaction before mixing anything. A weak, unprepared surface will not hold any additive well, no matter how good it is. Ensure the plaster is clean, dry, and free of loose particles. This step saves you time and money in the long run by preventing future repairs.
Pros and cons of different bonding systems
When choosing a bonding agent, you need to weigh its benefits against potential drawbacks. Here’s what you should consider:
Pros
- Improves adhesion between plaster and concrete.
- Saves time by reducing the risk of rework due to poor bond.
- Enhances durability, making your project last longer.
- Can be cheaper than redoing a failed job.
Cons
- Mixing ratios must be precise; get it wrong and you waste materials.
- Some systems are tricky to apply without training or experience.
- Poor quality products can lead to weak bonds, causing bigger problems later.
- Costs upfront might seem high but worth it in the long run if done right.
Bonding agents make sense when you’re dealing with challenging surfaces or want extra assurance for a critical project. Just pick one that fits your budget and skill level, and follow mixing instructions closely to avoid issues down the line.
Choosing skim coat materials after cleaning
After cleaning, pick skim coat materials by how they bond to old plaster and how stiff you need the repair to be. Joint compound, finishing plasters, and gypsum-based skim coats each act differently on lime-based, gypsum, or mixed substrates, with distinct effects on shrinkage, weight, and hardness. Your choice should emphasize strong adhesion, minimal cracking, and good performance around hairline cracks, lath exposure, and patches.
This matters because the wrong material can fail once moisture moves through the wall or the substrate ages. Do a quick substrate assessment, test for moisture and any lead paint, and plan bonding with the right primer and bonding agent, plus solid surface prep. Then set clear skim targets for thickness, number of passes, drying times, and how you’ll sand and finish so the final paint coats go on clean and flat.
Fast-setting vs. all-purpose compounds
When you’re dealing with a tight schedule, go for fast-setting skim coat materials. They’ll save you time but come at the cost of shorter working time and less flexibility once set. Check base compaction extra carefully since these compounds don’t tolerate loose substrates well.
All-purpose compounds give you more breathing room during application, making them ideal for beginners or when conditions aren’t perfect. They’re easier to sand down later if you need to make adjustments but take longer to cure fully.
Pick fast-setting materials only if your project demands quick turnaround and everything else lines up perfectly. Otherwise, stick with all-purpose compounds unless you have a specific reason not to.
Single-coat vs. multi-coat systems
When it comes to skim coating, you’ve got two main options: single-coat and multi-coat systems. A single-coat system is quicker but can be riskier if your base isn’t perfectly smooth and compacted. It’s like putting a bandaid on a wound without cleaning it first.
A multi-coat system, on the other hand, involves applying thin layers of material over time. Each layer needs to dry completely before you add another one. This method gives you more control and allows for better correction if there are any imperfections in your base plaster. It’s a bit like laying down a foundation brick by brick.
For most DIY projects, especially on old or uneven surfaces, I recommend going with the multi-coat approach. It might take longer but it’ll give you a much smoother finish and fewer headaches later on when you’re trying to paint or wallpaper over your skim coat.
Alternatives to skim coating after cleaning
After you finish cleaning, your three main paths are drywall over the existing surface, full plaster replaster, or lined gypsum board, and each option has clear cost, time, skill, and long-term durability implications you should weigh before touching a wall. Drywall over is fast and simple, but it adds thickness and can hide underlying cracking; replaster gives durability and a seamless look but costs more and takes longer; lined gypsum board can handle moisture zones and improve sound, yet edge detailing and finish compatibility can bite you. Assess the substrate after cleaning, test moisture, and decide if the current plaster or drywall can support the chosen route; plan fastener patterns, seams, and finish texture early to avoid later surprises.
This matters because wrong choice stacks up costs, leads to recurring cracks, or a finish that peels or fails in high humidity if you misjudge moisture or substrate condition. A quick decision checklist—moisture tolerance, existing texture, desired final look, and how much thickness you’re willing to add—keeps you honest about what you can and cannot do. Know your safety, code implications, and whether you should DIY a small patch or bring in a pro for a durable, warrantable result.
Thin drywall overlay method
If you’re looking for a quick fix after cleaning your plaster walls, consider installing 1/4-inch or 3/8-inch drywall over the cleaned surface. This method is faster than skim coating and can hide minor imperfections. However, check base compaction before starting to ensure the wall studs are strong enough to support the added weight.
Cut your drywall panels to fit snugly around outlets and corners. Use a utility knife for clean cuts and make sure edges align properly. Apply joint compound over seams and screw heads, then sand smooth. This method may not be as aesthetically pleasing as skim coating but it’s practical for those in a hurry.
Remember, this approach works best if your plaster walls are stable and free of major cracks or damage. If you have significant issues, consider consulting with a professional to explore better long-term solutions.
Full replaster vs. skim coat trade-offs
If you’re leaning towards a full replaster instead of a skim coat, check your budget and long-term plans. A full replaster is more expensive upfront but offers better durability and can last decades if done right. Skim coating is quicker and cheaper, but it’s like putting a bandaid on a wound—it might look good for now but won’t hold up over time.
For base compaction, full replastering means you’re starting fresh with solid concrete or drywall. This ensures your new plaster layer adheres well and doesn’t crack easily. With skim coating, any existing issues like cracks or uneven surfaces can show through eventually, leading to more work down the line.
Consider also how much use the area gets. High-traffic areas might need a full replaster for durability, while less used spots could get away with a skim coat if you’re on a tight budget and don’t mind redoing it in a few years.
Cost comparison and time estimates
Costs break into four baskets: cleaning/prep, skim coat, drywall overlay, and full replacement, each with per-square-foot ranges and regional variance. Labor vs materials is different for contractor work vs DIY, and includes disposal, scaffolding access, and dust containment. Expect timelines from a few days for cleaning and skim coat to weeks for full replacement, with drying and cure times.
For a DIY home, a clear breakdown helps you choose when conditions justify higher costs. The numbers matter because wall condition, texture work, and finish quality drive both time and money, and hidden items like permits, primer, and texture matching can swing the total. Use these figures to gauge budget, schedule, and when to call in a pro.
Budgeting for unexpected repairs
When you’re pouring concrete, it’s not just about the cost of materials and labor. You need to set aside money for unexpected repairs. Common hidden costs come up when cleaning out old concrete or dealing with soil issues. Always budget an extra 10-20% for these surprises.
Check base compaction before you start pouring. If the ground isn’t solid, it can lead to cracks and settling later on. This might mean more work upfront but saves big headaches down the road.
Don’t forget about weather delays or material shortages. These aren’t just inconveniences; they add up in costs and time. Have a plan B for when things don’t go as planned, like having extra concrete mix ready to go.
DIY vs. professional hire decision factors
When deciding to tackle concrete cleaning and skim coating yourself, start by checking base compaction. If the ground isn’t stable, any work you do will likely crack or shift over time. Also, consider your tools: if you don’t have a skid steer or similar equipment for mixing and applying large volumes of concrete, hiring pros might save you time.
Budgeting is key—don’t forget to factor in materials and potential repairs that weren’t obvious at first glance. If previous work needs fixing, it could eat into your budget faster than expected. Refer back to the section on unexpected repairs for more details.
Your time is valuable too. Skim coating requires precision and patience; if you’re short on either, a pro can get it done quicker with less hassle. Plus, they come equipped to handle any issues that pop up without breaking your stride or blowing your budget.
Common mistakes during cleaning and how to avoid them
The key point is that cleaning and prep failures show up as over-sanding, inadequate drying, and skipping primer, and each mistake sabotages adhesion and finish; avoid it by sanding only as needed with a light touch, stopping to inspect the surface for hollows or feathered edges, and never rush to skim without a solid, dry base plus a primer or sealer, because skipping these steps invites dull finishes and later failure.
Use mild detergents, tack cloths, and strict dust control to keep the plaster ready for primer, and cut off any source of moisture by ventilating and keeping humidity in check; avoid steam, harsh cleaners, or high-pressure washing that can soften or loosen the plaster and create more work later, especially on old plaster where suction can pull the skim coat right off if the surface isn’t properly prepared.
Why it matters: the right prep saves time and money, because a good primer reduces suction, improves uniform finish on old plaster, and helps the skim coat stick evenly even when the wall has irregularities or dust; this means fewer touch-ups and a stronger final surface that will last longer under normal room conditions.
Finish the job by controlling dust, protecting floors and adjacent surfaces, and vacuuming with a HEPA filter before applying the skim coat, so you don’t trap dust under the new layer and cause bonding failures that show up as ridges or cracks after painting.
Rushing drying times
Avoid rushing the concrete curing process. It’s tempting to walk on new concrete as soon as it looks dry, but this can weaken your slab. Wait at least 7 days before allowing light traffic and a full 28 days for heavy loads or vehicles. Check base compaction and weather conditions too; cold or wet weather slows drying times.
Remember, patience is key. Cutting corners on curing time can lead to cracks, weak spots, and uneven surfaces down the road. Take your time and follow the recommended wait periods for best results.
Leaving contaminants behind
One of the biggest mistakes during concrete prep is not cleaning up thoroughly. Wax residues from old floor coverings, nicotine films from smoking areas, and elevator dust can all stick around and ruin your new slab’s adhesion. Make sure to sweep and scrub every inch before pouring.
Pay extra attention to corners and edges where dirt tends to hide. If you’re unsure about a spot, use a solvent like mineral spirits or acetone to break down stubborn residues. Don’t rush this step; it’s better to spend an hour cleaning than dealing with weak spots later on.
Remember, even small amounts of contamination can cause big problems. So don’t just eyeball the area—get down there and check for yourself. If you see any signs of grime or dust, clean again until it’s spotless.
Planning checklist and project timeline for beginners
This planning checklist breaks the project into a clear path from a thorough inspection to a skim coat that is ready for primer, with realistic timeframes and a finish goal you can defend against dust and rework. Start with scope and goals, decide between skim coat over textured plaster or needed repairs, choose flat or lightly textured finish, and lock in a planning window of about half a day to a full day for setup and contingencies. Then run through a careful inspection of plaster condition, lath, moisture and hidden damage, take initial measurements, and decide whether skim coat or replacement is needed, budgeting 1–2 hours for notes and decisions.
Next, lay out a surface preparation timeline with cleaning, dust removal, crack and hole repairs, priming, and any plaster consolidation, and respect drying or curing windows that may extend the overall timeline to 1–2 days based on room size. Advance your MAP, tools, and safety plan, confirm stock and lead times, and set dust containment and ventilation measures, dedicating 1–2 hours to finalize the list and up to a half day for delivery if needed. Finally, map the skim coat sequence with adhesion tests, first coat timing, second coat, sanding, final wipe down, touch ups, and cure time before priming or painting, totaling roughly 2–4 days in a typical job.
Pre-project decision checklist
Use this checklist to ensure your concrete surface is ready for a skim coat before you start. Quick checks can save big headaches later.
- Surface soundness: Check that the substrate isn’t crumbling or flaking. Tap it with a hammer; no loose pieces should come off.
What goes wrong: Crumbling concrete leads to cracks in your skim coat. - Mold and mildew: Look for any signs of mold or mildew growth on the surface. If present, clean thoroughly before proceeding.
What goes wrong: Mold can cause adhesion issues with new coatings. - Moisture test: Use a moisture meter to check if the concrete is dry enough. It should read below 4 lbs.
What goes wrong: Applying skim coat over wet concrete leads to peeling and bubbling. - No oil or grease: Make sure there’s no residue of oils, greases, or other contaminants on the surface.
What goes wrong: These can prevent proper bonding between old and new surfaces. - No standing water: Ensure that there are no puddles or standing water anywhere on the concrete.
What goes wrong: Water will weaken the bond of your skim coat, causing it to fail. - No cracks wider than 1/8 inch: Measure any cracks; if they’re larger, fill them with a patching compound before proceeding.
What goes wrong: Large cracks can continue to grow and compromise your skim coat. - No loose aggregate: Inspect the surface for any small stones or gravel that might be loose. Remove these before applying your skim coat.
What goes wrong: Loose aggregate will cause bumps in your finished surface. - No sharp edges: Look for any protruding pieces of rebar, wire mesh, or other objects sticking out from the concrete. Smooth them down.
What goes wrong: Sharp edges can create weak points and lead to cracks.
Quick rule: If you see something that looks off, it probably is. Take a moment to fix it before moving on.
Day-by-day suggested schedule
This checklist helps you stay on track with your concrete repair and finishing project. Use it daily to ensure each step is completed before moving forward.
- Day 1: Clean Area Remove all debris from the work area. Confirm by walking around and checking for any leftover materials or dirt. Skip this, and you’ll have a dirty surface that won’t bond well with new concrete.
- Day 2: Repair Cracks Fill cracks with epoxy or polyurethane filler. Check by running your finger over the crack to ensure it’s smooth and level. Skip this, and you risk water penetration causing further damage.
- Day 3: Prime Surface Apply a bonding agent primer evenly across the surface. Confirm by checking for even coverage with no bare spots. Skip priming, and your new concrete may not adhere properly.
- Day 4: Mix Concrete Prepare fresh concrete mix according to instructions. Check consistency by dropping a small amount on the ground; it should hold its shape without cracking. Incorrect mixing can lead to weak spots in your finished surface.
- Day 5: Pour and Level Pour concrete into place, then level with a straight edge. Confirm by running a spirit level across the surface for flatness. Sloppy pouring or leveling will result in an uneven finish that’s hard to fix later.
- Day 6: Trowel Finish Use a trowel to smooth and compact the concrete surface. Check by running your hand over it; it should feel even with no bumps. Inadequate finishing can leave marks or imperfections that are hard to correct.
- Day 7: Skim Coat Apply a thin layer of concrete for smoothing out minor flaws. Confirm by checking the surface is free from small cracks and holes. Skip this step, and your final finish may show too many imperfections.
- Day 8: Cure Concrete Cover with plastic to retain moisture during curing. Check daily for condensation under the cover; it should be present but not dripping. Failing to cure properly can weaken the concrete’s strength and durability.
Quick rule: Each day, double-check your work before moving on to avoid costly mistakes later.
Visual checkpoints and quality inspection before skim coating
Before skim coating, you should confirm the wall is clean and ready, with all dust, grease, wax, old paint, and loose plaster removed and the surface wiped to a near-pristine state; verify there’s no sticky film left by testing visual clarity, feeling the texture with a gloved finger, and doing a quick wipe test across several spots to catch stubborn residues that could pull off with the skim coat. Then evaluate the surface texture for uniform porosity, note any glossy patches or high-porosity areas, and decide if more cleaning or profiling is needed; perform a light scratch test to check adhesion and ensure the plaster won’t flake, and use a moisture meter to confirm acceptable moisture levels before proceeding, since moisture or partial bonding can ruin the skim coat.
Only when the environment is dust controlled, HVAC intakes are covered, containment is set, and a final dust-free wipe and tack cloth pass has been completed do you proceed, because stray dust, oils, or stray fibers will telegraph through the skim and ruin the finish; confirm that high-porosity areas have been leveled and that there are no remaining smooth or glossy spots that could hinder adhesion. This isn’t just busywork—it’s what keeps the skim coat from hairline cracking, peeling, or failing prematurely, saving you hard work and rework down the line, especially in DIY projects where finishes are under visible scrutiny. Keep a simple record-keeping snapshot checklist for quality control so you can verify what was done, note any corrective actions, and establish waiting times if needed, ensuring you have a clear path to a consistent, durable skim coat finish.
Surface readiness signs
Use this checklist to ensure your plaster surface is properly prepared before applying a bonding agent or skim coating.
- Clean and dry: The surface should be free of dust, dirt, and loose material. Confirm by wiping with a damp cloth; it should not leave any residue.
Gotcha: Skipping this step can lead to poor adhesion. - No visible cracks: Inspect the plaster for any hairline or larger cracks that could compromise the skim coat’s integrity.
Gotcha: Cracks will likely reappear and cause future repairs. - Keyed surface texture: The surface should have a slight roughness to provide better grip. Confirm by running your hand over it; it should feel slightly gritty but not overly abrasive.
Gotcha: Smooth surfaces won’t bond well with the skim coat. - No standing water: Ensure no puddles or damp areas remain after cleaning, as moisture can weaken adhesion and cause blistering.
Gotcha: Moisture will delay drying time and affect finish quality. - Consistent color tone: The surface should have a uniform appearance with no patches of darker or lighter plaster.
Gotcha: Inconsistent colors may indicate uneven preparation, leading to poor results. - No loose material: Check for any flaking or peeling plaster that can come off easily when touched.
Gotcha: Loose material will fall out after the skim coat is applied, causing damage and rework. - Proper depth of keying: The surface should have a texture similar to fine sandpaper; too shallow won’t provide enough grip, while too deep can weaken the plaster.
Gotcha: Incorrect keying depth will lead to poor adhesion or surface damage. - No oil stains: Look for any oily residue that could prevent proper bonding of the skim coat.
Gotcha: Oil will create a barrier and cause failure in adhesion.
Quick rule: If you can run your hand over the surface without feeling dust or seeing cracks, it’s ready to go.
Small test patch
Before you skim coat the whole area, run through this checklist on a small test patch to ensure everything works as expected.
- Surface prep complete: Confirm surface is clean and ready. (Refer back to Surface readiness signs)
- Dry time met: Ensure the surface has dried completely before applying skim coat.
- Skim coat thickness: Apply a thin, even layer no more than 1/8 inch thick. Measure with a ruler if unsure.
- No air bubbles: Check for any air pockets or voids in the skim coat immediately after application.
- Smooth finish: The surface should be smooth and free of ridges or bumps. Run your hand over it to feel.
- Color match: Ensure the color matches adjacent areas, especially if patching a small spot.
- No cracking: Look for any cracks forming within 24 hours after application.
- Adhesion test: Gently scrape or scratch the surface to check adhesion. Should not come off easily.
- Water resistance: Lightly spray water over the patch and wait a few minutes; no softening should occur.
- No efflorescence: Check for white powder on the surface after application, indicating excess moisture or salts.
Quick rule: If your test patch looks good and holds up to these checks, you’re ready to skim coat the rest of the area.
Maintenance tips after skim coating and finishing
After skim coating and finishing, you stay on top of curing times, ventilation, and the safe window before you touch the surface again. Confirm full cure per product data, watch for proper temperature and humidity targets, and look out for signs that curing is off. Keep the cleaning plan simple: dust gently, use mild non-ammoniated cleaners, and avoid soaking the plaster or scrubbing hard, because moisture can ruin the skim and seal in flaws.
Getting this right matters because premature cleaning or applying finishes can trap moisture, cause peeling, or reopen tiny cracks. A clear maintenance rhythm—gentle dusting, prompt patching of small flaws, and timely resealing or priming with compatible topcoats—helps your skim stay flat and durable and reduces the chance you’ll need a full re-skim later. If humidity stays high, or you notice persistent mold, address ventilation, dehumidification, and drainage now to keep future work clean and solid.
Preventing moisture and staining
Avoiding moisture is key to keeping your skim-coated concrete looking fresh. Make sure the base compaction under your slab is solid; weak spots can let water seep in, causing stains or even cracking over time. Check for any low areas where puddles might form after rain—fix these ASAP.
Keep an eye on vents and drains to ensure they’re not clogged. Proper ventilation helps prevent moisture buildup that could lead to mold or mildew issues. If you notice any signs of staining, address them quickly before they spread. A little elbow grease now can save a lot of work later.
Consider sealing your concrete every few years depending on wear and tear. This not only protects against water but also helps resist stains from oil or other spills. Regular inspections are cheap insurance for maintaining the look and longevity of your finished surface.
Repairing hairline cracks in finished surfaces
Hairline cracks are a common issue after skim coating and finishing concrete. Don’t panic; they’re usually minor and can be fixed without redoing the whole job. The key is catching them early before water gets in and causes bigger problems.
To fix hairline cracks, start by cleaning out debris. Use a wire brush to remove loose particles and any dirt around the crack. Then apply a concrete patch or epoxy filler that matches your surface color. Press it firmly into place with a trowel, making sure it’s level with the surrounding area.
Avoid using caulk for cracks in concrete—it’s not made for this job and will likely fail over time. If you see more than just hairline cracks or if water is pooling around them, consider calling in a pro to assess whether bigger repairs are needed.
When to call a professional
This is a clear point to call a professional, because the risk and potential cost of DIY mistakes on plaster and framing can quickly spiral beyond a weekend project, especially when safety and durability are on the line. If you see major cracks, bulging plaster, loose lath, or walls that sound hollow, stop and get a pro on site for an accurate assessment and a repair plan that fits the actual damage. Those signs usually mean framing or plaster bond failures that DIY work cannot reliably fix, and delaying professional input can lead to rising moisture, worsening damage, or unsafe conditions.
In addition, assess moisture and mold concerns before any skim coat, because a bad moisture profile will trap dampness behind plaster and ruin the finished job, which is a costly misstep you want to avoid. Persistent dampness, musty odors, or visible mold means remediation should come first and should be done by specialists, not buried under new plaster. If health risks or old materials like asbestos or lead paint are involved, certified testing or abatement is not optional, and you should bring in licensed inspectors and contractors to confirm scope, involve the right trades, and set realistic cure times.
Finding a qualified contractor
When you’re looking for someone to pour your concrete, don’t just pick the first name off the phone book. You need to ask tough questions and check credentials. Start by asking if they have experience with base compaction. If they can’t explain it or dodge the question, move on.
Ask for references from past jobs and call them up. Don’t just take their word for it—verify that they’ve done similar work to what you’re planning. Also, look out for certifications like OSHA 30-hour training; it shows they care about safety and know the rules of the game.
Lastly, trust your gut. If something feels off or too good to be true, it probably is. A pro will give you a solid estimate without pushing you into corners. Remember, hiring the right person can mean the difference between a job well done and a headache for years.
What to expect from a professional quote
When you call in a pro for your concrete job, the first thing they’ll do is come out and take a look at what needs fixing. They’ll check base compaction, see if there’s any water issues, and make sure everything’s solid before giving you an estimate. Don’t just go with someone who gives you a quick price over the phone.
The quote should break down costs clearly. Look for line items like materials, labor, testing fees, and containment measures to protect your property during work. If they mention warranty options, ask what it covers—no sense in paying extra if you’re not clear on the benefits.
Remember, a good contractor will give you a detailed quote that matches their site assessment. If something seems off or too cheap, it might be worth getting another opinion. Don’t rush into anything that feels fishy.

Conclusion
Clean, properly cleaned plaster is the foundation for a durable skim coat and a clean, professional finish. Do the prep right, and you gain long-term durability, better adhesion, and a smoother surface that stays that way.
Begin with a simple, actionable check: assess moisture and damage, seal off the room, remove wallpaper and residue in rough steps, clean mold or stains carefully, remove loose plaster and sand as needed, wipe down to remove dust, then test bond and patch as you go before choosing skim coat materials and priming. Move through each task in order, and verify surfaces look dry, sound, and uniformly dull—not glossy or powdery—before priming.
Common mistakes to avoid are over-wetting the plaster, skipping dust containment, and rushing repairs without testing adhesion. Keep water to a minimum, wear protection, and clean up thoroughly between steps. Don’t skip the small tests, don’t ignore signs of moisture or efflorescence, and don’t apply bonding or skim coat products on damp surfaces.
If you encounter active water intrusion, extensive crumbling plaster, or stubborn mold you can’t treat safely, call a professional. When you stay disciplined with the prep, you’ll finish faster, spend less on repairs, and end with a solid, lasting skim coat. Stay practical, follow the checks, and you’ll be through the cleaning phase with confidence.
FAQ
Do I need to clean plaster dust before skim coating?
Yes. Vacuum the area to remove loose dust, then wipe with a damp cloth. Don’t leave a film of dust or moisture on the surface.
What tools do I need for cleaning and prepping?
Have a shop vac, stiff brush, putty knife, drop cloths, and a damp sponge or cloth. You’ll also want a spray bottle for light dampening and a masking film for nearby areas.
Can I use water to dampen the surface before skim coating?
Lightly mist the plaster to settle dust. Don’t soak it or leave puddles; damp only enough to keep dust down. Let any moisture dry fully before skimming.
How long should I wait after cleaning before applying the skim coat?
Make sure the surface is dry to the touch and free of dust. In normal conditions, wait a day or two; in humid spaces, give it longer until it’s dry and stable.