
Introduction
A primer stack is a layered use of stain-blocking primers to stop nicotine bleed. Think of it as sealing the wall with the right primer before you paint. You’ll typically start with cleaning, choosing primers, and letting them dry per label.
Then you build the finish with a topcoat that suits the surface after the primers. Check the product labels and local rules to pick compatible primers and follow dry times. If in doubt, test on a small area and adjust your plan.
Key takeaways
- Assess odor and staining first, wipe surfaces and note bleed-through patterns.
- Use a stain-blocking primer as the first barrier, followed by stain-killing sealer.
- Sand between coats lightly and remove dust before applying the next layer.
- Test adhesion after primer with a simple tape rub and light scuff check.
- Choose products per layer based on label instructions and local regulations.
- Wear a mask and ensure good ventilation when applying solvents and primers.
Table of Contents
- Introduction
- Key takeaways
- Why Nicotine Staining Bleeds Through Paint
- Assess the Damage: How to Test and Prepare Surfaces
- The Primer Stack Concept — Layers and Their Roles
- Choosing the Right Products for Each Layer
- Paint Selection for Nicotine-Stained Rooms
- Step-by-Step Application Workflow
- Tools and Materials Checklist
- Visual Checkpoints and How to Test Success Before Final Coats
- Conclusion
- FAQ
Why Nicotine Staining Bleeds Through Paint
Nicotine and tobacco tar can migrate from the wall surface into fresh coats of paint. The staining compounds can wick through porous primers and bind with new paint layers. This is why yellowing shows up even after you’ve finished the first coat.
Both chemical residues and the oils in smoke create a persistent mess that can move with humidity and temperature changes. Understanding this helps you pick the right blocking and sealing steps. Always verify product instructions for stain-blocking performance on nicotine substrates.
Chemistry of nicotine and tar on surfaces
Nicotine and tar from smoking leave behind greasy, soluble residues on walls. These residues are made up of thousands of chemicals, many of which are yellow in color.
The problem starts when you try to paint over these stains. Primers and topcoats can’t bond with the oily nicotine and tar. Instead, they sit on top, creating a weak barrier that eventually breaks down.
Over time, the yellow chemicals in the nicotine and tar migrate through this weak barrier, discoloring your new paint. This is why nicotine stains bleed through paint, even after multiple coats.
Common surface types and how they react
Different surfaces react differently to nicotine stains. Here’s what you need to know:
Drywall: The porous nature of drywall allows nicotine stains to penetrate deep, making them harder to cover.
Plaster: Plaster is also porous but tends to absorb less stain than drywall. However, it can still cause issues if not properly primed.
Wood: Wood surfaces are less porous, so stains tend to sit on top. But they’re still tricky to cover due to the oily nature of nicotine and tar.
Previously painted finishes: If the previous paint job was poor or the surface wasn’t properly prepared, old nicotine stains can bleed through new paint.
Assess the Damage: How to Test and Prepare Surfaces
Start by inspecting for visible stains, odors, and any texture where the wall feels different. Note areas with peeling or loose plaster as these will need attention before painting. Odor can indicate deeper residuals that may require more blocking.
Evaluate the substrate underneath—drywall, plaster, or masonry—and check for moisture issues. Decide how aggressive the prep should be based on stain depth and surface condition. Always reference the surface manufacturer guidance when in doubt.
Simple tests to detect active bleed
The first step is to check if the nicotine stains are still active and will bleed through your new paint. Here’s how:
Alcohol/Water Rub Test: Dampen a white cloth with rubbing alcohol or water. Gently rub the stained area. If the stain transfers, it’s active.
Spot-Prime Test: Prime a small, hidden part of the wall using an oil-based primer. Let it dry. If the stain reappears, you’ll need to seal it before painting.
Repair and cleaning steps before priming
Before you prime, you need to clean and repair the walls. Here’s how:
Cleaning: Use a degreasing cleaner or a mixture of water, dish soap, and white vinegar to remove dirt and grime. Rinse thoroughly.
Repair: Sand down any rough spots, cracks, or blisters. Patch with spackling compound if needed. Remove any loose paint or coatings.
Sanding: Lightly sand the entire surface to help the primer adhere better. Wipe off dust with a damp cloth.
The Primer Stack Concept — Layers and Their Roles
Think of a primer stack as a layered defense. The first layer blocks the stain and seals the surface to prevent bleed-through. The next layers improve adhesion and provide a stable base for the finish coats.
Each layer has a job, and the order matters. Use documentation from the product label or data sheet to confirm the intended sequence and dwell times. If unsure, consult the manufacturer instructions or local code guidance for your area.
Stain-blocking primer (contact layer)
The first line of defense against nicotine stains is a stain-blocking primer. Its job? To seal the surface and stop that yellow bleed.
You’ve got options here. Shellac’s the old-school choice, but oil-based or specialty primers work too. They’re designed to tackle tough stains like nicotine.
When to use: If you’ve tested your walls (like we talked about earlier) and found active bleed, don’t skip this step. It’s crucial for a successful paint job.
Sealing/adhesion primer (intermediate layer)
Next up, you’ll want an intermediate primer. This guy’s job is twofold: seal any remaining stains and create a uniform surface for your topcoat.
Think of it as a bridge between the stain-blocker and your finish paint. It ensures compatibility and better adhesion.
When to use: After applying your stain-blocking primer, let it dry (follow the manufacturer’s instructions). Then, apply this intermediate layer for best results.
Topcoat-ready primer or bond coat
A third primer layer might not always be necessary, but it can sure help. This one’s job? To support topcoat appearance and durability.
Think of it as a final prep step before painting. It helps your finish paint go on smoothly and look its best.
When to use: If you’re after that extra-professional look, or if your walls are in rough shape, consider this third layer. But remember, it’s not always needed.
Choosing the Right Products for Each Layer
Stain-blocking primers come in several bases; choose based on your surface and odor control needs. Consider how the product handles nicotine and smoke residues on the material you are painting. Always check the label for compatibility with the topcoat you plan to use.
Besides stain blockers, some universal primers can help with adhesion on challenging surfaces. Compare options by reading the data sheet and asking for a product that suits nicotine staining. When in doubt, verify with the manufacturer’s guidance or your local paint retailer.
Shellac-based primers: strengths and limits
Shellac-based primers are your best bet for stopping nicotine stains dead in their tracks. They’ve got a powerful punch when it comes to blocking stains, sealing surfaces fast.
Pro tip: Shellac dries quick, so you can get on with painting sooner. But remember, ventilation’s crucial here – that smell ain’t no walk in the park. Cleanup’s easy though, denatured alcohol does the trick.
Keep in mind, shellac doesn’t play nice with water-based paints. Stick to oil or latex topcoats for best results.
Oil-based and alkyd primers
Oil-based and alkyd primers are your go-to guys when you’ve got some time to spare. They’ve got good stain resistance, but they take longer to cure compared to shellac.
Bonus: These primers work well with oil topcoats and certain finishes like varnish or polyurethane. Just make sure your surface is dry before applying the topcoat – we don’t want any surprises.
Remember, oil-based primers have a strong odor too. Ventilation’s key here as well. And they’re not the easiest to clean up – mineral spirits are your friend here.
Water-based and bonding primers
Water-based primers are your low-odor, eco-friendly option. They’re great for less severe stains or when you want to minimize that new-paint smell.
Note: These primers might not be as effective against heavy nicotine stains compared to their oil-based cousins. But modern formulas have come a long way in bridging between layers and improving adhesion.
Water-based primers are easy to clean up – just soap and water. And they’re compatible with both water-based and oil-based topcoats, giving you more flexibility.

Paint Selection for Nicotine-Stained Rooms
Pick a topcoat that cleans well and resists staining without sacrificing finish quality. In rooms with lingering odor, look for products designed for washable or scrubbable surfaces. Check sheens to balance durability and appearance in high-traffic areas.
Consider alkyd versus acrylic options based on cleaning needs and long-term appearance. Read the label for dry time, recoat windows, and compatibility with the primer stack. If you are unsure, consult the product instructions or a local paint professional.
Sheen and Washability Choices
Smoke-stained walls need a paint that’s easy to clean. That’s where sheens come in.
Eggshell, satin, or semi-gloss are your best bets. They’re durable, washable, and can handle scrubbing without losing their shine.
Flat paints might seem tempting for hiding imperfections, but they’re a no-no here. They’re hard to clean and show every smudge.
Color and Yellowing Susceptibility
Choosing the right color can help mask that nicotine-stained warmth. Here’s what you need to know.
Cool colors like blues, greens, and purples can reduce visible yellowing. They have a blue undertone that counteracts the warm tones of nicotine stains.
Warm colors like reds, oranges, and browns? They’ll make those stains look worse. Avoid them if you can.
Also, consider using pigments with good hiding power. They’ll cover up those stains better, making your job easier.
Step-by-Step Application Workflow
Begin with cleaning to remove surface grime and nicotine residues using appropriate cleaners. Rinse and let dry before applying the first primer layer. Apply the stain-blocking primer as directed and let it cure according to the label.
Proceed with sealing and adhesion layers as prescribed, followed by the chosen topcoat. Monitor environmental conditions such as temperature and ventilation during each step. If any step’s timing is unclear, refer to the manufacturer instructions or test a small area first.
Step-by-Step Process
The following steps guide you through the application workflow, ensuring a successful job from start to finish.
- Preparation and safety checks: Wear gloves, goggles, and a respirator. Tape off areas not to be painted. Lay down drop cloths.
- Clean walls: Remove any dirt or debris using a damp cloth. Let dry completely.
- Apply stain-blocking primer: Using a brush for edges and a roller for larger areas, apply the primer evenly. Focus on stained areas first.
- Let it dry: Allow the stain-blocker to dry according to manufacturer’s instructions (usually 1-2 hours).
- Sand lightly: Lightly sand any raised grain with fine-grit sandpaper. Wipe off dust.
- Apply sealing/adhesion primer: Using the same technique as before, apply this layer evenly over the stain-blocker.
- Let it dry and cure: Allow 24 hours for drying and curing to ensure proper adhesion of the topcoat.
- Sand lightly again: Lightly sand any raised grain. Wipe off dust.
- Clean up: Remove tape, wash brushes and rollers, and dispose of materials properly.
Layer timing and recoat windows
Proper drying time between coats is crucial for a durable finish. Here’s what to expect:
Stain-blocking primer: Allow 1-2 hours of dry time before applying the sealing/adhesion primer.
Sealing/adhesion primer: Let this layer dry and cure for 24 hours before applying your topcoat. This ensures proper adhesion and prevents lifting or peeling.
Topcoat: Allow at least 24 hours of drying time between coats, depending on the paint type and environmental conditions. Always check the manufacturer’s recommendations for specific products.
Application techniques and coverage tips
Proper application technique helps ensure even coverage and prevents lap marks, especially over stained areas.
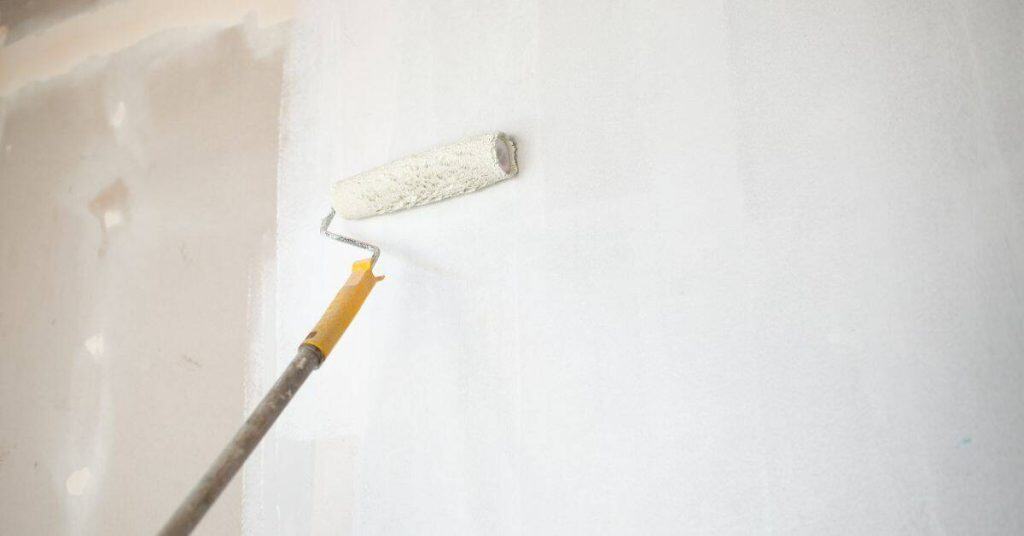
Brush: Use a high-quality brush for edges. Apply paint in 2-3 foot sections, working from top to bottom. Maintain a ‘wet edge’ by blending each new section into the previous one.
Roller: For larger areas, use a roller with a suitable nap length for your surface. Apply paint in 3×3 foot sections, using an ‘M’ or ‘W’ pattern to ensure even coverage and avoid lap marks.
Sprayer: If using a sprayer, maintain a consistent distance from the wall (usually 10-12 inches) and apply paint in steady, smooth strokes. Overlap each pass by about half to ensure full coverage and prevent streaks or missed spots.
Tools and Materials Checklist
Wear the recommended PPE for dust, fumes, and cleaning agents, including gloves and eye protection. Gather cleaners, stain-blocking primers, sealing or adhesion primers, and the final topcoat. Have brushes, rollers, and tapes sized for your project ready.
Keep test cards or small sample boards to verify color and coverage before committing to the full job. Always check the product labels for required tools, cleanup methods, and safety notes, and adjust based on your local guidelines.
Personal protective equipment and ventilation gear
Before you start painting, make sure you’re protected from harmful fumes and chemicals.
- Respirator: Use a half-face respirator with P100 filters for oil-based or shellac primers. For water-based paints, an N95 mask is sufficient.
- Gloves: Wear nitrile gloves to protect your hands from chemicals. Change them if they become contaminated.
- Eye protection: Use safety glasses or goggles to shield your eyes from splashes and dust.
- Ventilation: Open windows, use fans, or set up a ventilation system to keep the air moving and fumes at bay. This helps prevent dizziness and nausea.
- Avoid smoking: Do not smoke near the work area as it can cause dizziness and increase the risk of accidents.
- Long sleeves and pants: Wear long-sleeved shirts, long pants, and closed-toe shoes to protect your skin from chemicals and paint splatters.
- Avoid working alone: If you’re using strong solvents or primers, have someone nearby in case of emergencies.
Quick rule: Always prioritize safety first. Don’t start painting until you’ve got the right gear on and proper ventilation set up.
Recommended applicators and cleanup supplies
Having the right tools makes the job easier and ensures a better finish.
- Roller: For nicotine-stained walls, use a 9-inch roller with a 3/8-inch nap cover for most primers. For oil-based or shellac primers, use a lambswool roller cover for best results.
- Brushes: Use an angled sash brush (1.5 to 2 inches) for cutting in edges and corners with oil-based or shellac primers. For water-based paints, use a synthetic bristle brush.
- Tack cloths: Have tack cloths on hand to remove dust and debris before applying each new layer.
- Solvents for cleanup: Use mineral spirits or paint thinner for oil-based or shellac primers. For water-based paints, use warm soapy water or a dedicated paint cleaner.
- Drop cloths: Protect your floors and furniture with drop cloths to prevent accidental spills from ruining surfaces.
- Painter’s tape: Use blue painter’s tape to mask off edges and protect areas you don’t want to paint. Press down firmly to ensure a good seal.
Quick rule: Invest in quality tools and supplies. They’ll make your job easier, help you achieve better results, and save you time in the long run.
Visual Checkpoints and How to Test Success Before Final Coats
Inspect for any breakthrough staining after the primer layers dry. Look for uniform coverage and absence of wet spots or blotches. Color shifts can indicate incomplete blocking or adhesion issues that need addressing.
Perform a simple adhesion test by gently pressing with a fingernail or a thin object on sampled areas. If you see peeling or lifting, rework the affected area before applying finish coats. Use the manufacturer’s test guidance or product data sheet for acceptable criteria.
Spot testing and masking checks
Before you start applying your final coats, make sure to do these checks. It’s crucial to catch any issues early.
- Test small patches: Apply primer in small, hidden areas first. Let it dry for the recommended time.
- Tape pull test: Stick painter’s tape on the dried patch, let it sit for 15-30 minutes, then pull it off. If paint comes off, adhesion is poor.
- Check for stain bleed: Look for any yellow discoloration seeping through the primer. If present, re-prime.
- Inspect masked areas: Remove masking tape to check if staining has bled under it. If so, touch up and re-mask.
- Feel for texture changes: Run your hand over the primed area. Any rough patches might indicate poor adhesion or incomplete coverage.
- Check for color shifts: Compare primed areas to untouched walls under different lighting. Yellowing indicates nicotine stain breakthrough.
- Look for missed spots: Check corners, edges, and hard-to-reach places for any unprimed areas.
- Inspect around obstacles: Ensure primer has been applied evenly around light switches, outlets, and other fixtures.
Quick rule: If in doubt, re-prime. It’s easier to fix now than after final coats.
Indicators of ongoing bleed and when to re-prime
Even after priming, staining can still seep through. Here’s how to spot it.
- Yellow shadows: Look for faint yellow discoloration appearing on the primed surface. This indicates nicotine is still bleeding through.
- Seep lines: Check for thin, yellow lines along seams, edges, or cracks where staining might be escaping.
- Discoloration through primer: If you see yellow patches appearing on the primed surface, re-priming is necessary.
- Moisture spots: Look for damp or wet areas. These can cause stains to bleed more easily.
- Temperature changes: Warmer temperatures can cause nicotine stains to become more active and seep through.
- Humidity levels: High humidity can also activate staining, causing it to bleed.
- Inadequate priming: If the initial primer wasn’t suitable or applied incorrectly, staining may still come through.
- Unsealed surfaces: If walls weren’t properly sealed before priming, stains can seep through.
Quick rule: If you spot any of these signs, re-prime immediately to prevent further staining and yellowing.
Conclusion
Getting the nicotine bleed under control comes down to a disciplined primer stack and patience. When you do it right, you end up with a durable finish and a safer, better-looking room.
Test a small area, clean and repair as needed, then follow the stack in order: block the stain with the appropriate bottom layer, let it cure, build up with the mid and top layers, and always verify you’re ready for the next coat by checking dryness and surface feel before you proceed. Keep temperatures steady, follow the product times, and don’t rush the steps or skip sanding between coats.
Avoid these mistakes: skip the test area or skip drying times, use the wrong products for any layer, or apply too thick a coat and trap odor or stain. Safety matters—wear a mask when sanding, ventilate well, and avoid mixing products not designed for nicotine-stained walls. If you’re unsure about the surface or a required layer, pause and re-check the manufacturer’s guidelines before proceeding.
If the stain is stubborn, or you’re working in a heavily affected room, call a pro instead of pushing on. Otherwise, stay disciplined, follow the steps, and you’ll finish with a clean, long-lasting result you can be proud of.
FAQ
Do I need to remove all nicotine residue before painting, or can I seal it with primer?
Clean the walls to remove surface grime first. Use a stain-blocking primer as the first coat to seal the stains. If stains still show through after testing, follow the product’s guidance for additional coats.
What order should the primer stack be for nicotine stains?
Start with a stain-blocking primer as the first layer. If needed, apply a second primer layer per the manufacturer’s instructions. Finish with your top coat after the primer has cured as directed.
How do I test if the primer did its job before applying the final coats?
Let the primer dry fully and perform a wipe or light rub to check for bleed. If the stains appear again, apply the next recommended primer layer or retreat per product instructions.
What common mistakes should I avoid during application?
Avoid skipping the cleaning step, skipping or under-applying the stain-blocking primer, and rushing the dry times. Always follow the label directions for coverage, curing, and disposal, and work in good ventilation.