
Introduction
Planning to test paint colors before committing to a full wall? You’re not alone. But how long does it take to create a paint sample wall without damaging your drywall?
In this guide, we’ll break down the process into clear steps and estimate the time required for each task, so you can plan your project timeline effectively.
For the full guide, see How to Create a Paint Sample Wall Without Ruining Drywall: Removable Boards and Film.
The Step-by-Step Timeline to Create a Paint Sample Wall
Creating a paint sample wall involves several stages. Here’s a detailed breakdown of each step and an estimated time frame:
- Preparation (30-60 minutes): Clean the drywall, address any soft spots, and gather your tools and materials.
- Board and Film Preparation (15-30 minutes): Pre-cut boards to size, apply protective film, and label samples.
- Installation (30-60 minutes): Mount the boards and film using removable fasteners or adhesives, following manufacturer instructions.
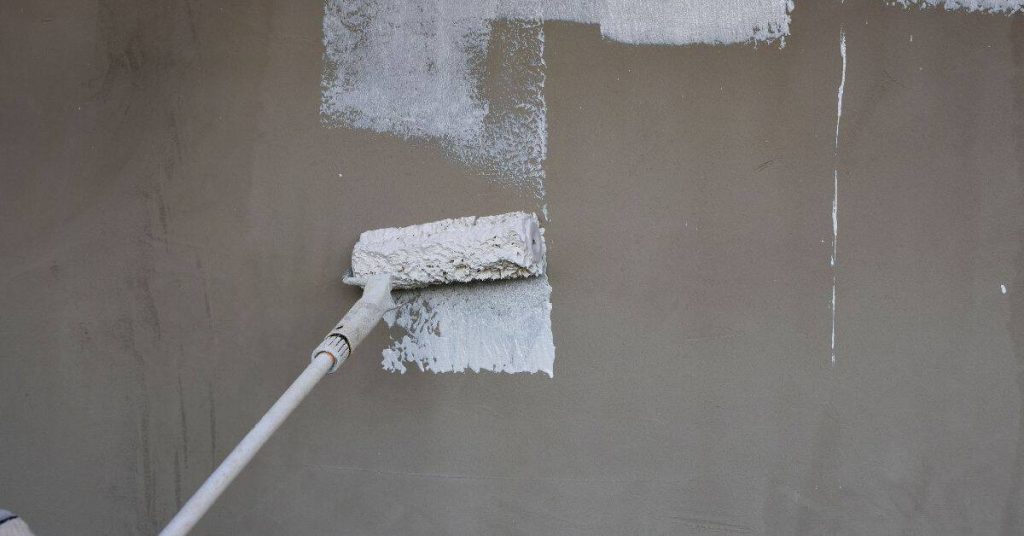
- Painting (1-2 hours): Apply your sample paints, allowing adequate drying time between coats. Remember to cover edges and surrounding surfaces with masking tape or film.
- Viewing and Comparison (30 minutes – 1 hour): Allow paint to dry completely, then compare samples under consistent lighting conditions.
- Removal and Cleanup (15-30 minutes): Peel off the film, remove boards, and inspect the drywall for any damage. Clean up tools and leftover materials.
Total estimated time: 2 to 4 hours, depending on the size of your sample wall and the number of paint samples.
Key takeaways
The preparation stage is crucial as it sets the foundation for a successful and damage-free paint sample wall. Taking the time to clean the drywall and gather all necessary tools and materials will save you time in the long run and ensure a smooth installation process.
- Use removable boards or film to test colors safely without drywall damage.
- Choose material like MDF or plywood that stays flat and sands smoothly.
- Prepare drywall by cleaning, priming edges, and sealing before panel installation.
- Apply protective film to sample surfaces to minimize paint bleed and scratches.
- Test layout with mockups, measure spacings, and verify sightlines from multiple angles.
- Follow manufacturer instructions and local code for boarding removal and reinstallation safety.
Table of Contents
- Introduction
- Key takeaways
- Quick Overview: What a Removable Paint Sample Wall Is and When to Use It
- Tools and Materials Checklist
- Material Specs and Standards Explained
- Step-by-Step Installation for Boards and Film
- Placement, Layout, and Visual Testing Strategies
- Removing, Reinstalling, and Swapping Samples Without Damaging Drywall
- Cleaning, Maintenance, and Long-Term Durability Options
- Cost Comparison, Common Mistakes, and Safety
- Conclusion
- FAQ
Quick Overview: What a Removable Paint Sample Wall Is and When to Use It
A removable paint sample wall is a temporary testing surface made from removable boards and/or clear adhesive film placed over or just off drywall so you can try paint colors without committing to a finish. The idea is to create a non-permanent, clean surface that replicates how paint will look under your room’s real lighting while protecting the drywall beneath.
Typical components include lightweight backing boards or panels, removable adhesive film or paint-safe protective film, low-tack fasteners or clamps, and basic measuring and cutting tools; assembly is a short layout, secure the panels/film, smooth edges, and paint samples. Benefits are no permanent marks on drywall, easy cleanup, reversible testing, and straightforward comparison of multiple colors and sheens—ideal for rentals, staged homes, frequent color trials, temporary displays, or trying samples before priming drywall.
Benefits and limitations
A removable paint sample wall is a game-changer for DIYers. It lets you test colors without leaving permanent marks on your drywall.
You can easily clean up, reverse testing, and compare colors in real lighting. No commitment until you’re sure about your finish.
However, there are trade-offs. Removable boards and film cost more than painting directly onto the wall. Setup time is also longer compared to traditional methods.
But think long-term. Protecting your drywall from permanent damage and allowing flexible testing can save you time, money, and hassle in the end.
When to choose boards vs. film
Choosing between removable boards and protective film depends on your needs.
Boards are ideal for frequent color testing or temporary displays. They’re easy to apply, remove, and reuse. Plus, they provide a larger testing area.
Film, on the other hand, is great for quick, small-scale tests. It’s cheaper and easier to apply than boards. But it doesn’t offer as much real estate for testing.
Consider your budget too. Boards cost more but last longer. Film is cheaper but needs replacing each time you test a new color.
Tools and Materials Checklist
Separate your kit into board-based and film-based setups with essentials clearly labelled. For boards: backing panels, mounting hardware (removable fasteners or clamps), level, drill/driver, screws or toggles as needed, spacers or shims, painter’s tape, straight edge, utility knife, protective gloves and eye protection, and a quick moisture barrier or primer if the board will contact drywall.
For film: removable adhesive or paint-safe film, squeegee or smoothing tool, cutting mat, fresh razor blades or heavy scissors, lint-free rags, scribing tool for edges, painter’s tape, and a method for clean removal; optional items for either approach include magnetic or Velcro fasteners, spare boards for extra samples, a small shop vac, and a labeled storage box. Check product labels or manufacturer instructions for adhesive removability, and ensure you have basic PPE, ventilation, and a clean, dust-free drywall surface before starting.
Tools you’ll need
Before you start, make sure you have all the necessary tools to create your paint sample wall safely and efficiently.
- Tape measure: To accurately measure and cut boards or film.
- Level: Ensures your boards are straight. Crooked boards look unprofessional.
- Utility knife: For cutting boards, film, and tape. Dull blades cause uneven cuts.
- Painter’s tape: To protect edges from paint. Removing dried paint is tough work.
- Adhesive remover: To clean up any residue left behind by removable adhesives.
- Straight edge: Helps guide your utility knife for straight cuts.
- Drill/driver: For securing boards with screws or toggles. Wrong fasteners can damage drywall.
- Safety glasses: Protects eyes from debris during cutting and drilling.
Quick rule: Always prioritize safety first when using tools.
Materials for removable boards
Choose the right materials to create a durable, removable paint sample wall.
- Moisture-resistant boards: Plywood or hardboard work best. Moisture can warp boards.
- Mounting hardware: Use drywall-safe screws or toggles. Wrong fasteners can damage drywall.
- Edge trim: Covers rough edges and adds a finished look.
- Spacers or shims: Maintains even gaps between boards for air circulation.
- Sealant or painter’s caulk: Fills gaps to prevent paint from seeping through.
- Moisture barrier or PVA primer: Prevents moisture from the drywall affecting your boards.
Quick rule: Always use materials designed for removable applications to avoid damage.
Materials for protective film and temporary wall coverings
Select the right films and tapes to protect your walls and create a paint sample wall easily removable.
- Removable adhesive film: Choose one designed for paint-safe removal. Wrong adhesives can peel off paint.
- Squeegee or smoother: Ensures even application of the film with no bubbles or wrinkles.
- Cutting mat: Protects your work surface and provides a stable base for cutting.
- Fresh razor or scissors: For clean, precise cuts. Dull blades cause uneven edges.
- Scribing tool: Helps create precise edges along walls and trim.
- Lint-free rags: To wipe away any residue after removal.
- Non-permanent adhesive tape: For securing film edges. Wrong tapes can leave residue behind.
Quick rule: Always follow manufacturer’s instructions for application and removal to avoid damage.
Material Specs and Standards Explained
Before buying materials, read product labels and spec sheets for key items: adhesive removability (low-residue peel), film thickness and flexibility, and board rigidity and moisture resistance. Look for information on peel strength, recommended substrate, dimensional stability, and any listed testing standards or performance claims on the data sheet.
These specs directly affect drywall safety—high peel strength or solvent-based adhesives can pull paper or leave residue, overly rigid boards can concentrate loads or create edge damage, and non-breathable films can trap moisture. Check for recognized standards or referenced test methods on product literature, use a simple decision checklist before purchase, and flag any strong solvent adhesives, excessively stiff panels, or very thick films as potential risks requiring a different product or additional surface protection.
Film and adhesive specifications
The film’s adhesive is key. Look for low-residue, easy-to-peel types. Some claim ‘no residue’, but test it first on a scrap.
Check the tack level – too high can damage drywall, too low won’t stick. Transparency matters if you want to see through it while painting.
Film thickness (mil) affects light transmission and removal ease. Thicker isn’t always better; it may not peel off cleanly.
Board material properties
Choose boards that won’t crack or stain under paint, and have a smooth edge for neat lines.
- Hardboard: Stiff, heavy. Good for large areas. Look for paint-grade. Avoid if you’re not strong enough to handle it.
- Masonite: Medium weight, rigid. Paintable but may absorb moisture. Not recommended for humid rooms.
- Plywood: Heavy, sturdy. Good for large samples. Check face grain for smooth painting. Avoid if drywall isn’t well-supported.
- Corrugated plastic (coroplast): Lightweight, flexible. Inexpensive but may warp under heat. Great for small samples.
Compatibility and fire/safety considerations
Check if the product has a fire-rating. Some films and adhesives can ignite or spread flames.
Look for low VOCs (volatile organic compounds). High VOCs can off-gas, causing headaches or irritation. Always follow manufacturer’s safety guidelines.
Ensure the product is certified for indoor use. Some films aren’t suitable for enclosed spaces due to off-gassing or other safety reasons.
Step-by-Step Installation for Boards and Film
Start by protecting surrounding drywall and clearing the work area; verify boards and film are clean, flat, and free of debris. Measure and mark reference lines for your layout so panels or film pieces align consistently and avoid covering electrical outlets or vents.
Choose removable mounting methods appropriate to the material—painter’s tape or low-tack adhesive dots for film, clamps, or temporary fasteners for boards—and secure pieces without over-torquing or compressing drywall. Paint samples on the removable surface, manage drying per paint instructions, handle edges and seams with tape or trim to prevent seepage, and when finished, remove carefully, check for residue, and store or reuse panels following the manufacturer’s removal guidance.
Step-by-Step Installation Process
Follow these practical steps to create a paint sample wall without damaging your drywall.
- Protect surrounding drywall with painter’s tape and drop cloths. Safety first!
- Clear the space, remove any obstacles that might hinder installation.
- Verify all materials are clean and ready for use. Double-check your boards or film.
- Install temporary mounting methods (tape, adhesive dots) on the wall, following planned layout lines.
- Mount removable boards or apply protective film, ensuring even pressure and minimal contact with drywall.
- Paint samples on the boards/film, allowing adequate drying time between coats. Keep it neat!
- Check for any tape residue, bubbles, or film marks after removal. Inspect for drywall contact points.
- Store boards/film properly for future use if needed.
Preparing and measuring the wall
Before you start, ensure your wall is ready for installation. Clean it to remove any dirt or debris that could interfere with adhesion.
Measure accurately, use a level to draw layout lines, and mark reference points for uniform placement of boards/film.
Plan your sample spacing and height, considering the size of your boards/film and the overall wall space. A grid or staggered pattern can help maximize usage.
Installing removable boards (multiple safe methods)
Choose from various mounting methods to secure your boards without damaging the drywall:
Hanging cleats: Attach these thin strips of wood to the back of your board, then hang them using nails or screws. Ensure they’re level and evenly spaced.
Removable hook-and-loop strips: Apply these to both the wall and the back of your boards. Press firmly to create a strong bond that won’t damage the drywall upon removal.
For drywall-safe adhesive tapes, follow manufacturer’s instructions for application and removal. Ensure even load distribution to prevent warping or damage.
Applying protective film without damage
Apply seam-free film carefully, following these steps:
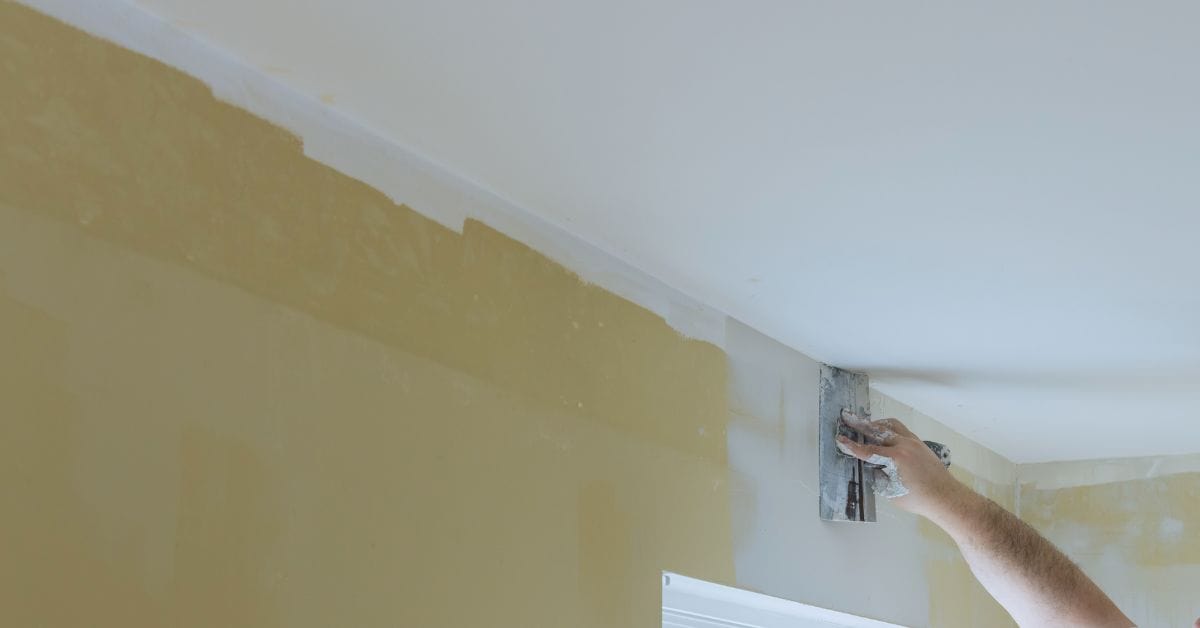
Start from the top of the wall, pressing the film onto the drywall and working your way down. Use a squeegee or smooth edge to remove any bubbles that form.
Ensure the film is securely attached at all edges to prevent peeling or lifting during painting. Allow adequate drying time before applying samples.
When removing the film, pull it off slowly and steadily in a single motion. If any residue remains, use warm water and a mild detergent to clean the area. Inspect for any marks or damage.
Placement, Layout, and Visual Testing Strategies
Decide how many samples and the overall footprint before you cut or mount anything; plan extra boards or film swatches so mistakes don’t force a repeat. Choose a layout—grid, staggered, or clustered—that mirrors how a finished wall will read and keep spacing and margins consistent for accurate comparison.
Group samples by undertone and finish to compare like with like, and create a master swatch map to avoid mix-ups during testing. Test under multiple lighting conditions—natural at different times of day and relevant artificial light—and label positions so you can photograph and document how colors shift, while protecting adjacent drywall with tape and drop cloths during all tests.
Layout ideas by room size and function
When planning your sample wall layout, consider the size of your room and its function. For small rooms or spaces with limited wall space, a 4×4 grid is usually sufficient.
In larger rooms or for focal walls, you might want to go bigger – try a 6×6 grid. This gives you more samples to compare and a better idea of how the color will look in a larger area.
Pro tip: For kitchens or bathrooms with high-gloss surfaces, consider using smaller samples in a 3×3 grid to mimic the reflective nature of these spaces.
Labeling, cataloging, and documenting results
To keep track of your samples, label each one with a unique code or number. Use painter’s tape and a marker for this.
Take photos of your samples under consistent lighting conditions. Natural light is best, but if you’re testing artificial light, use the same type of bulb in all your photos.
Keep a simple log of paint codes, observations, and any notes about how the color looks at different times of day or under different lighting conditions. This will help you make informed decisions later on.
Viewing angles, lighting checks, and time-of-day testing
Colors can look different depending on the angle you’re viewing them from. Make sure to check your samples from various angles – standing up, sitting down, even lying down if necessary!
Test your samples under different lighting conditions. Natural light changes throughout the day, so try to test at different times. Artificial light can also affect color perception, so use a variety of bulbs.
Pro tip: Use a light-diffusing surface like foam board or white paper to simulate wall conditions when testing under artificial light.
Removing, Reinstalling, and Swapping Samples Without Damaging Drywall
Use a gentle, method-appropriate removal technique: peel low-tack adhesives slowly at a low angle, back out screws or toggles carefully, and lift boards from clamps to avoid catching drywall paper. Watch for early warning signs—stuck edges, residue that won’t let go, or paper pull—then stop and follow a different removal approach to minimize damage.
For reinstalling and rotating, keep mounting hardware with each board, label orientation, clean contact surfaces, and reuse only if adhesives remain removable and films aren’t torn. Carry a small removal kit—putty knife, microfiber cloth, mild cleaner, and fresh tape—for immediate cleanup, inspect drywall for nail pops or dust after each swap, and address minor issues before the next installation to keep cycles repeatable without harm.
Safe removal techniques for boards and tapes
When removing boards and tapes, always start by gently pulling from one corner. Never yank or pull hard as it can damage the drywall.
If you’re using removable adhesive films, heat can help loosen the bond. Use a hairdryer on low setting to warm up the area before peeling off. Be careful not to overheat and scorch the paint.
Stop if you feel resistance or hear any cracking sounds. These are signs that you’re applying too much force, which could damage the drywall.
For stubborn adhesive residue, use an adhesive remover like Goo Gone or a mild soap solution with warm water. Apply it to a microfiber cloth and gently rub the area until the residue comes off. Never scrub harshly as it can scratch the paint.
Reinstalling and swapping samples quickly
To speed up your testing process, consider numbering each board or panel. This way, you can easily track which color or finish is on which panel.
Use reusable mounts like magnetic strips or removable adhesive squares to hang boards. These allow for quick and easy installation and removal without damaging the drywall.
Store your panels in a designated area where they won’t get damaged or lost. A numbered storage system can help you keep track of them and make swapping samples faster.
Before reinstalling, clean any residue left behind from previous installations. Use a mild cleaner and a soft cloth to wipe the surface clean. This will ensure that your new sample sticks properly and doesn’t leave behind any marks.
Inspecting and repairing minor drywall marks
After removing boards or films, inspect the area for any signs of damage. Look out for nail pops, screw holes, or drywall dust.
For small nail holes, use a spackling compound to fill them in. Apply it with a putty knife, let it dry, then sand it smooth. Touch up with paint to match the wall color.
If there are any scuffs or marks on the paint, clean the area with a mild cleaner and a soft cloth. If the mark is still visible, use a touch-up marker or paint to cover it up.
For larger holes or damage, you may need to repair the drywall before repainting. Consult a professional if you’re unsure about how to proceed.
Cleaning, Maintenance, and Long-Term Durability Options
After each project, clean and inspect boards and film using mild soap and water, a microfiber cloth, or a soft-bristle brush; avoid solvents or abrasives that degrade adhesives or film surfaces. Different materials need different care—film benefits from gentle squeegeeing and air drying, while plywood or hardboard may need light sanding and sealing before reuse.
Store panels flat or separated with protective spacers in a dry, ventilated area and rotate pieces to prevent warping; note any repeated adhesive buildup, tears, or edge damage as thresholds for replacement. Keep a maintenance log and retire pieces that show warping, cracking, or compromised adhesive properties, then consider upgrading to thicker boards or reinforced film if you plan repeated, long-term use.
Cleaning film and painted samples safely
After each project, clean your removable boards and film to keep them usable for the next one. Here’s how:
Film: Use mild soap and water with a microfiber cloth. Avoid solvents or harsh chemicals that could loosen the adhesive. Wipe gently in one direction.
Painted samples: Gently wipe with a damp, soft-bristle brush. Be careful not to scrub too hard and damage the paint. Let them dry completely before storing.
Maintaining and repairing reusable boards
Regular maintenance keeps your boards in good shape for multiple projects. Here’s how to care for them:
Sanding: Lightly sand any rough edges or nail marks with fine-grit sandpaper. Wipe off dust with a damp cloth.
Repainting: If the board gets scuffed, touch up with the original paint color. Let it dry completely before using again.
Replacing mounting strips: If they wear out, replace them to keep your boards secure and prevent damage to the wall.
Durable upgrades for repeated use
If you’re a frequent user or professional, consider these more robust options:
Sealed panels: These are thicker and have a protective seal that resists moisture and scratches. They’re great for high-traffic areas.
Hardboard: This material is denser than plywood, making it more durable. It’s ideal for heavy use or outdoor applications.
Magnetic systems: These allow you to attach samples directly to the wall without nails or screws. They’re easy to remove and reuse.
Cost Comparison, Common Mistakes, and Safety
Compare relative cost tiers by considering material, adhesive, and hardware needs plus how often you’ll reuse panels or film; film often has lower upfront costs for small areas while reusable boards can amortize over many projects. Factor time and labor for setup and removal, and check product labels and local rules for disposal or recycling guidance that could affect total cost.
Common mistakes include mis-sizing pieces, using the wrong adhesive, failing to protect drywall edges, and not testing removability first—each can lead to damage or extra cleanup. Follow basic safety: PPE, ventilation for paint, dust control when cutting boards, careful handling of tools near finished drywall, and stop if a removal method shows signs of pulling to reassess before continuing.
Cost considerations: boards vs. film
When it comes to creating a paint sample wall, you’ve got two main options: removable boards or film. Each has its own cost structure.
Boards: These typically fall into the medium to high cost range. A pack of 4×8 sheets can run from $20 to $50 each. You’ll also need adhesive, usually around $10 per tube. Hardware like spacers and level might be needed too.
Film: This is generally cheaper, with rolls starting at around $10 and going up to $30 depending on size and quality. Adhesive is often included or runs about $5. But you’ll need a utility knife for cutting, which you might not already have.
Both options scale with wall area – the bigger your wall, the more material you’ll need. Boards can be reused, so if you’re planning multiple projects, they may pay off in the long run. Film is usually one-time use but cheaper upfront.
Common mistakes and how to avoid them
Setting up a paint sample wall might seem simple, but there are some common pitfalls. Here’s how to steer clear of them.
- Mis-sizing or misaligning boards/film: Measure twice, cut once. And don’t forget to account for door and window openings.
- Inadequate edge sealing: Seal edges with painter’s tape or caulk to prevent paint from seeping underneath.
- Using improper adhesives: Always use the adhesive recommended by the manufacturer. Using the wrong one can cause damage or make removal difficult.
- Failing to protect adjacent drywall: Use painter’s tape and drop cloths to shield nearby surfaces from paint drips.
By taking these precautions, you’ll avoid costly mistakes and ensure your sample wall looks its best.
Safety and environmental precautions
Safety should always be a priority when working on any project. Here are some key considerations for setting up your paint sample wall.
Ladder safety: If you’re working high up, use a sturdy ladder and have someone spot you if possible. Always maintain three points of contact.
Ventilation: When painting, ensure the area is well-ventilated to avoid fumes building up. Consider using a fan or opening windows.
Proper disposal: Follow local regulations for disposing of adhesives and solvents. Never pour them down drains. Check product labels for recycling instructions. Also, be mindful of VOCs (volatile organic compounds) and fire safety guidelines.
Conclusion
Keep the removable paint sample wall simple, safe, and repeatable so you can test color and finish without risking drywall damage or big repairs. The key is a clean process you can trust from start to swap.
First verify the wall area is clean and dry, lay out your board and film plan, test a small patch to confirm adhesion and removal behavior, mark the layout clearly, install in the chosen order, and then test removal and reinstallation in a controlled way. Do the work in a well-lit, ventilated space, double-check edge seams, and keep a steady hand through each step to avoid surprises.
Common mistakes to avoid include pressing film or boards too hard, using incompatible adhesives, and rushing removals without a test patch. Stay disciplined: work in short steps, keep tools away from bare drywall, and always wear eye protection and gloves when cutting or handling films. If you notice uneven wall texture, moisture, or stubborn adhesives, pause and reassess the approach before continuing.
If the job calls for unusual wall conditions, wide color ranges, or repeated swaps in a high-traffic area, don’t push past your limits—consult a pro for guidance or hands-on help. With a solid plan and careful execution, you’ll have a reliable, damage-free way to preview color and finish in real conditions and finish with confidence.
FAQ
What’s the best way to build a removable paint sample wall using boards?
Use lightweight boards that won’t damage the drywall when removed. Attach each board with removable fasteners or a framed backing so you can pop panels in and out without tools every time.
How do I choose between MDF and plywood for the removable panels?
MDF is smooth and easy to paint, but it can swell if it gets wet. Plywood is sturdier and more resistant to moisture, but it’s rougher to finish. Check the product label for moisture resistance and choose a thickness that fits your wall space and mounting method.
What prep should I do on the drywall before installing removable panels?
Clean the surface and fix any flaking or damaged areas. Lightly sand glossy patches so adhesives and film can grip, and wipe away dust. If you plan to use film, install a backer board or framing so the drywall isn’t directly exposed behind the panels.
How do I apply film to protect surfaces during the paint test, and how do I remove it later?
Choose a removable protective film with clear instructions. Tape or anchor film edges so it won’t peel, and avoid stretching it tight. When you remove, do it slowly and check for any adhesive residue to clean off with the recommended product per the film’s label.